In this guide, we will show you the steps to replace PowerShell with Command Prompt on your Windows 11 PC. No matter how hard Windows try to make PowerShell the go-to choice for the users, some tech enthusiasts (including myself) are always inclined toward CMD. However, that hasn’t stopped the Silicon Valley giants from giving more weightage to PowerShell.
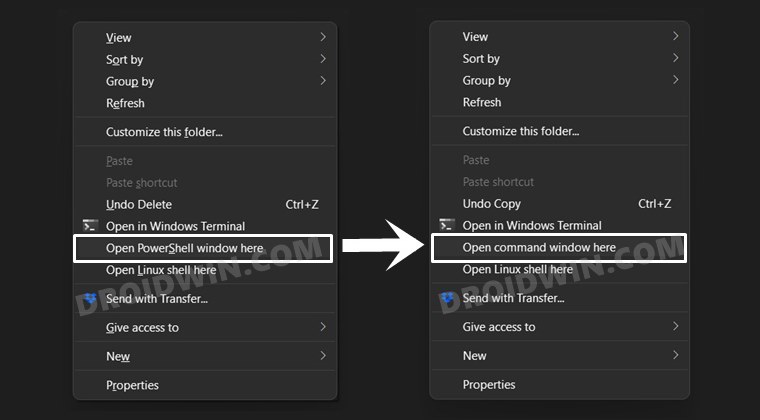
When you bring up the context menu, either by right-clicking on the Windows icon or performing a right-click while holding the Shift key, the Command Prompt is nowhere to be found. Rather, it has now been replaced with PowerShell. Fortunately, there’s still a slight ‘window’ of opportunity left through which you could replace PowerShell with Command Prompt on your Windows 11 PC. And this guide shall make you aware of just that. So without further ado, let’s get started.
- 10 Methods to Open Command Prompt (CMD) in Windows 11
- How to Download and Install Windows 11 Insider Preview Build
- Fix: This PC can’t run Windows 11 | The PC must support TPM 2.0
- How to Install Windows 11 on any PC using Virtual Machine
Table of Contents
How to Replace PowerShell with Command Prompt in Windows 11
In Windows 10, you could easily replace PowerShell with CMD in the Windows+X menu by going to Settings > Personalization > Taskbar. However, at the time of writing, this feature is yet to be added in Windows 11 Insider Preview. But there’s still a Registry Editor tweak through which this process could be carried out. Let’s check it out.
STEP 1: Add CMD to Windows 11 Context Menu
- To begin with, bring up the Run dialog box via Ctrl+R shortcut keys.
- Then type in regedit and hit Enter. This shall open the Registry Editor.
- Now head over to the below location (you may also copy-paste this location in the address bar):
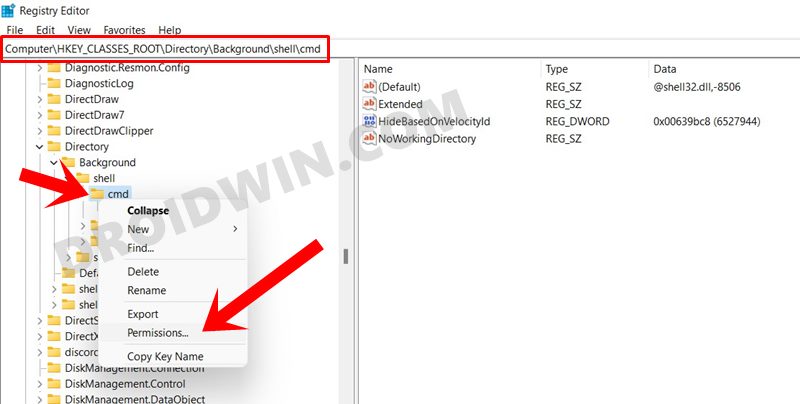
Computer\HKEY_CLASSES_ROOT\Directory\Background\shell\cmd
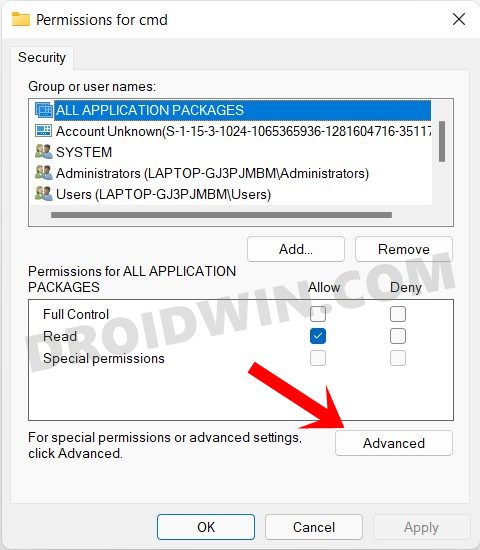
- Now select the cmd folder from the left menu bar, right-click on it, and select Permissions.

- Then click on the Advanced button.
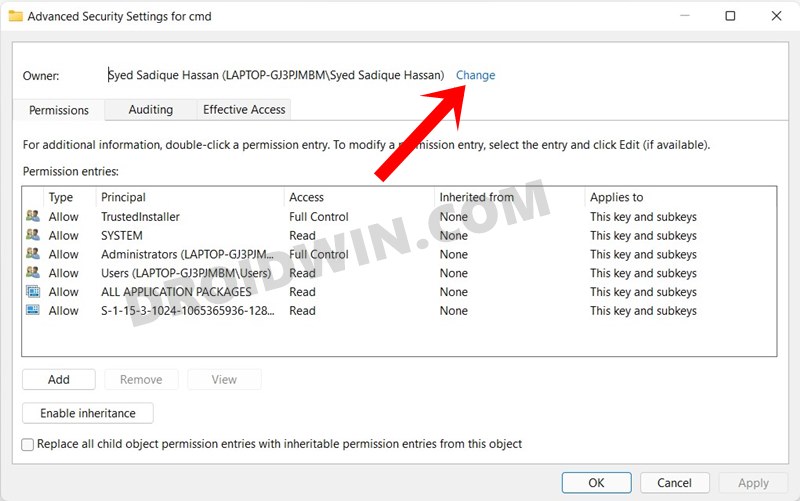
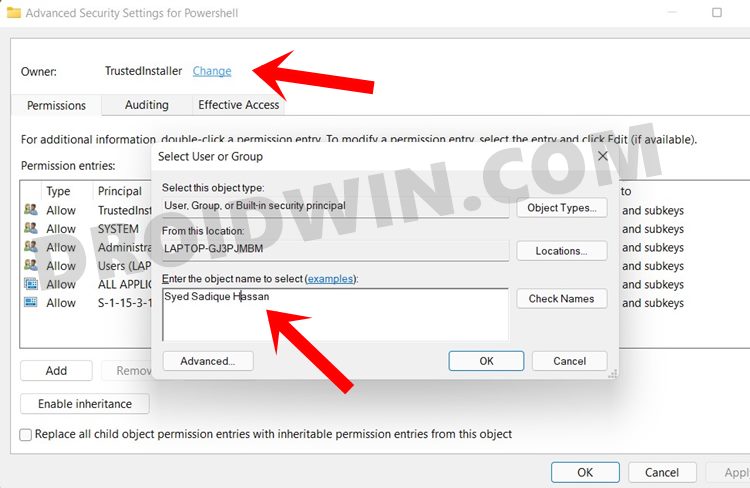
- After this, click on Change.
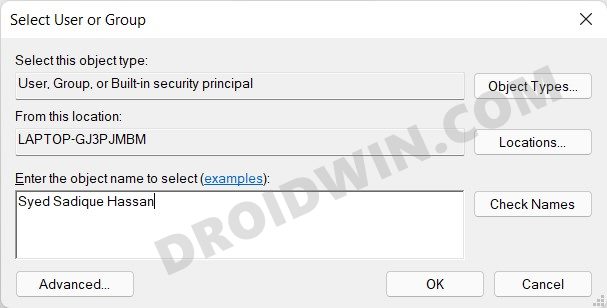
- Under the Enter the object name to change dialog box, type in your username and click OK. [To check your username in Windows 11, launch CMD, type in echo %username% and hit Enter].
- Then double click on Administrator, checkmark the Full Control dialog box, and click OK.
- Now go back to Registry Editor and select the cmd folder from the left menu bar.
- On the right side, select the HideBasedOnVelocityld file, right-click and select Rename. Add _bac at the end of the name and save it.

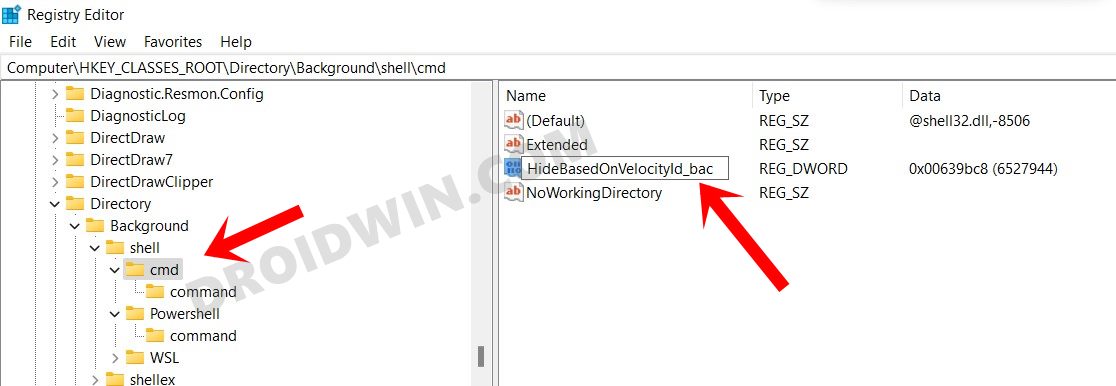
What we did just now: well, we needed to remove the HideBasedOnVelocityld file. However, deleting it is never a good option, hence we added _bac so that Windows wouldn’t be able to recognize the file but at the same time, we still have this file in our hands.
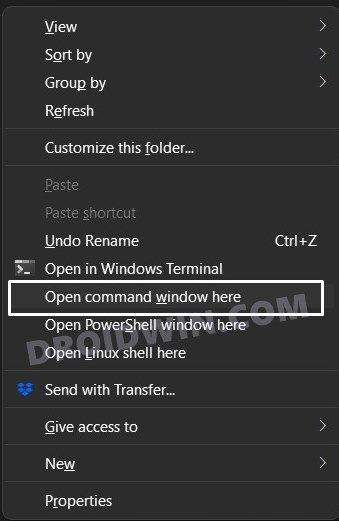
That’s it, the process stands complete. You may now head over to the folder of your choice, press and hold the Shift key and perform a right-click, the Command Prompt option will now be visible.
STEP 2: Remove PowerShell from Windows 11 Context Menu
This guide talks about the steps to replace PowerShell with Command Prompt on Windows 11, however, till now we have only added the CMD option. Let’s now check out the steps to remove the PowerShell from the context menu (this is optional and is only done to make the right-click menu clutter-free).
- Open Registry Editor and head over to the below location:
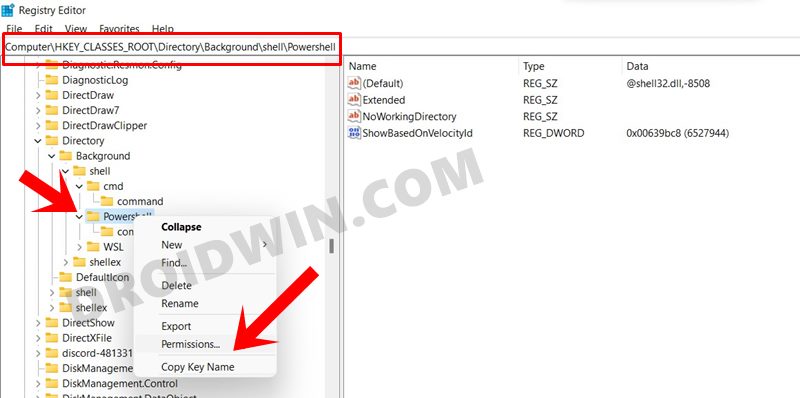
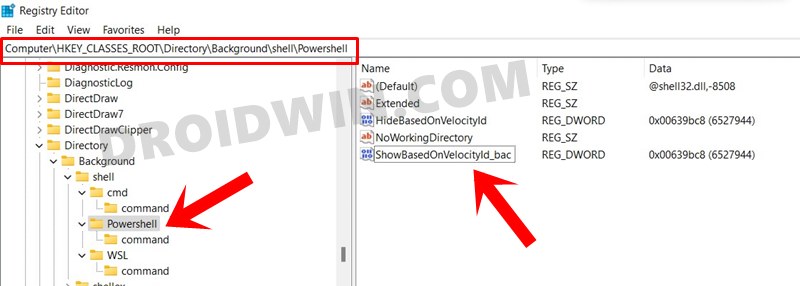
Computer\HKEY_CLASSES_ROOT\Directory\Background\shell\Powershell
- Select the PowerShell folder from the left menu bar, right-click on it, and select Permissions.
- We will be applying the same permissions as before. So click on the Advanced button.
- Then click on Change. Under the Enter the object name to change dialog box, type in your username and click OK.
- Then double click on Administrator, checkmark the Full Control dialog box, and click OK.
- Now go back to Registry Editor and select the PowerShell folder from the left menu bar.
- Select the ShowBasedOnVelocityId file, right-click on it and select Rename. Add _bac at the end.
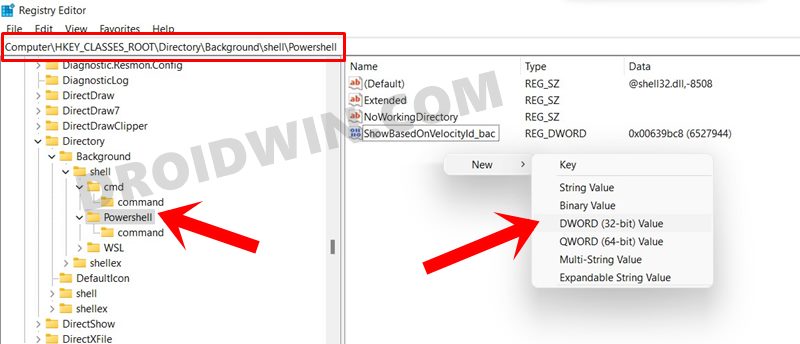
- Now right-click in an empty location, select New > DWord (32-Bit) Value. Name this file as HideBasedOnVelocityId.
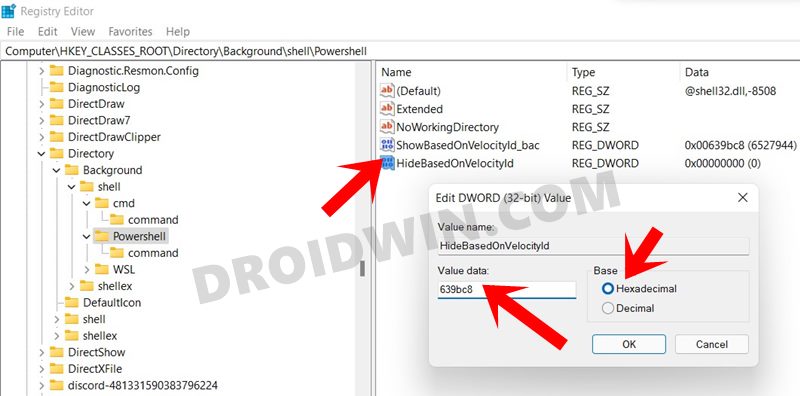
- Double click to open this file and type in 639bc8 under Value Data. Leave the Base as Hexadecimal and click OK.
- That’s it. Head over to the desired location, press and hold the Shift Key, and right-click in an empty location. The PowerShell option will no longer be there.
So these were the instructions to replace PowerShell with Command Prompt in Windows 11.
FAQs: How to Revert Everything to Default
if you wish to revert everything back to their default settings, i.e. bring back the PowerShell and remove the Command Prompt from Windows 11, then here’s what you need to do:
- First off, go to the below location:
Computer\HKEY_CLASSES_ROOT\Directory\Background\shell\cmd
- Rename the HideBasedOnVelocityld_bac file back to HideBasedOnVelocityld. This will remove the CMD option from the context menu.
- After that, go to the below location:
Computer\HKEY_CLASSES_ROOT\Directory\Background\shell\Powershell
- Rename the ShowBasedOnVelocityId_bac file back to ShowBasedOnVelocityId.
- Then delete the HideBasedOnVelocityId file and the PowerShell option will be back. That’s it.
With this, we round off this guide on how to replace PowerShell with Command Prompt on your Windows 11 PC. As of now, there doesn’t seem to be an option to add the CMD option in the Windows context menu (Windows+X menu). As and when I get hold of the same, will update the guide accordingly. With that said, if you have any queries, do let us know in the comments.


Steviant
Wow! Thank goodness Microsoft have improved this since Windows 10, I think I had to click a switch in taskbar settings to change it before… something really challenging like that.
Now I just need to follow the simple 30 step process outlined above on the new computers after I complete the installation wizard and log in to Microsoft’s deanonymization servers.