In this guide, we will show you various methods to fix the issue of Pixel 7/Pro charging slowly. While it’s too early to judge the second-generation Tensor chipset, but the latest addition to the Pixel family has had quite a decent start and definitely had fewer roadblocks in comparison with its predecessor. So in the initial stages, it is putting on a respectable performance, but not without its fair share of issues.
![]()
In this regard, a few users have recently voiced their opinion that their Pixel 7/Pro is charging extremely slowly. The device comes with a 5000mAH battery and as advertised, it should be charged 50% in 30 minutes. However, as of now, it seems to be a far-fetched reality, with some users reporting close to 4 hours for a full charge. If your device is also being charged at a snail’s pace, then this guide will make you aware of a few nifty workarounds to resolve this issue. Follow along.
Table of Contents
Fix Pixel 7 Pro Charging Slowly
![]()
It is recommended that you try out each of the below-mentioned workarounds and then see which one spells out success for you. So with that in mind, let’s get started.
FIX 1: Use Official Charger & USB
While it has already been said many times before, but I would still like to reiterate the fact that you should only use the official charger and not any third-party one. In this regard, use the official USB cable that came out of the box and, if possible, use the 30W charging brick provided by Google.
![]()
FIX 2: Disable Adaptive Charging
When you plug in your device to the charger at night, the Adaptive Charging feature will keep the battery charged to a maximum of 80% throughout the night. Then when it’s time for you to wake up, it will complete the rest of the charging process so that you get a fully charged device. But how does it determine your wake-up time? Well, it primarily uses the alarm that you have set up and your daily usage routine.
And while it does its job quite well, it still has a long way to go. This is because some users have voiced their concern that once they wake up, they still find their device stuck at 80% charging. So they again have to restart the charging process which in turn ends up exhausting a considerable amount of time So you could consider disabling this feature and then charging your device all at one go. Here’s how:
- To begin with, head over to Settings > Battery.
- Then go to the Adaptive preferences section.
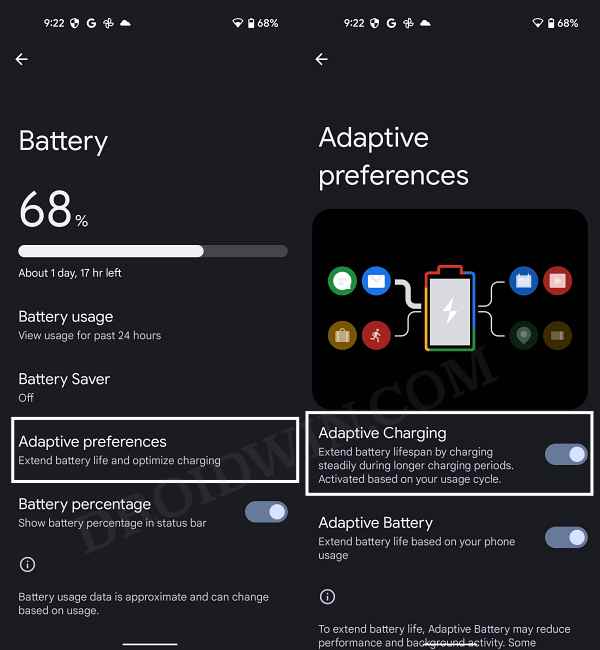
- Now turn off the toggle next to Adaptive Charging.
- Check if it fixes the issue of Pixel 7/Pro charging slowly.
FIX 3: Restrict App’s Battery Usage
In some cases, an app might be aggressively running in the background which would not only lead to excessive battery drainage but could also increase the time duration of the device to get fully charged. Therefore, you should consider putting a cap on the maximum battery usage for such apps. Here’s how it could be done:
- To begin with, head over to the Settings menu on your device.
- Then go to Battery > Battery Usage section.
- Now refer to the apps under the ‘App usage for past 24 hr’.
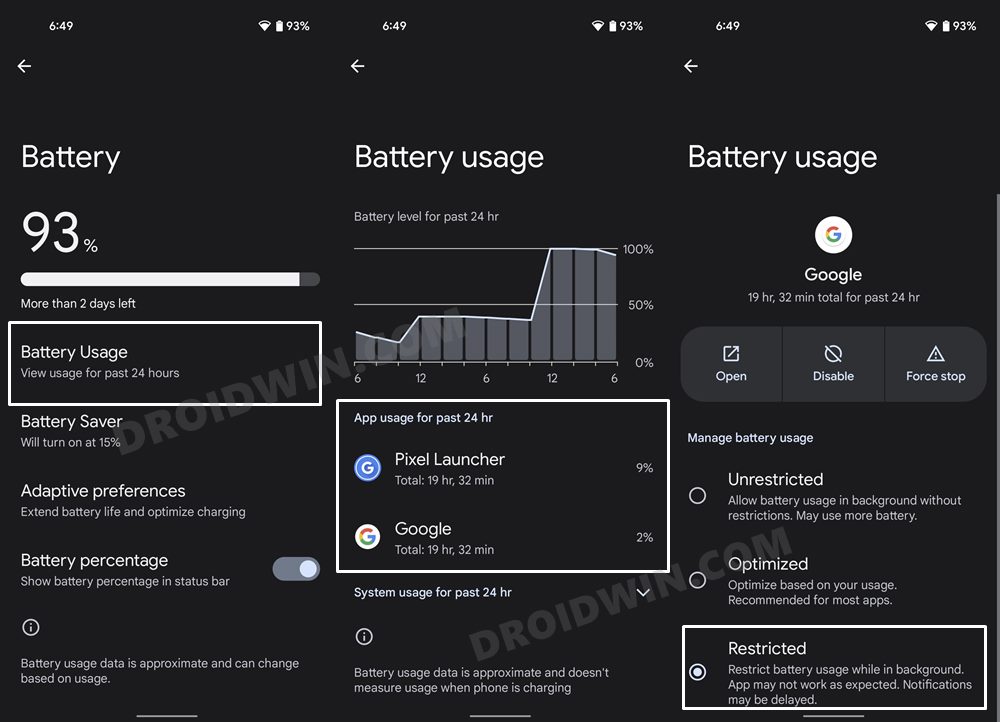
- Tap on the first app in that list and select Restricted from the menu.
- Likewise, do so for all the apps that occupy a higher position in that list.
- Once done, verify if it fixes the issue of Pixel 7/Pro charging slowly.
FIX 4: Charge in Safe Mode
In some instances, a third-party app or service might conflict with the normal process of device charging. Therefore, you should consider charging your device in Safe Mode which would give you an ecosystem free from all third-party apps and services. If your device is charging well and good, then the culprit is indeed a third-party app that needs to be removed from your device right away. Here’s how it could be done:
- Long press the Power menu to bring up the Power menu.
- Then long tap on Restart. This will bring up the Safe Mode pop-up.
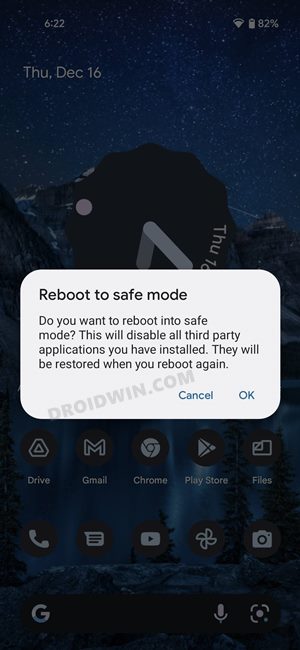
- Tap OK and your device boot to Safe Mode. Check its charging speed in this mode.
- If you notice any improvement in this mode, then the culprit is indeed a third-party app.
- So restart your device back to normal mode and then uninstall all those apps after which the issue first came to light.
- Then check if it fixes the issue of Pixel 7/Pro charging slowly.
FIX 5: Disable Physical Activity Permission
If you have a smartwatch app installed on your device, then it would tend to constantly run in the background and carry out its tasks such as counting your steps. However, not only will it lead to overheating of the device, but might also considerably increase the time frame of the device to get fully charged. Therefore, you should consider disabling the app’s Physical Activity permission and instead refer to all your activity data directly from the watch itself. Here’s how:
- To begin with, head over to Settings > Apps > See All Apps.
- Then select the Samsung Health App and go to its Permission section.
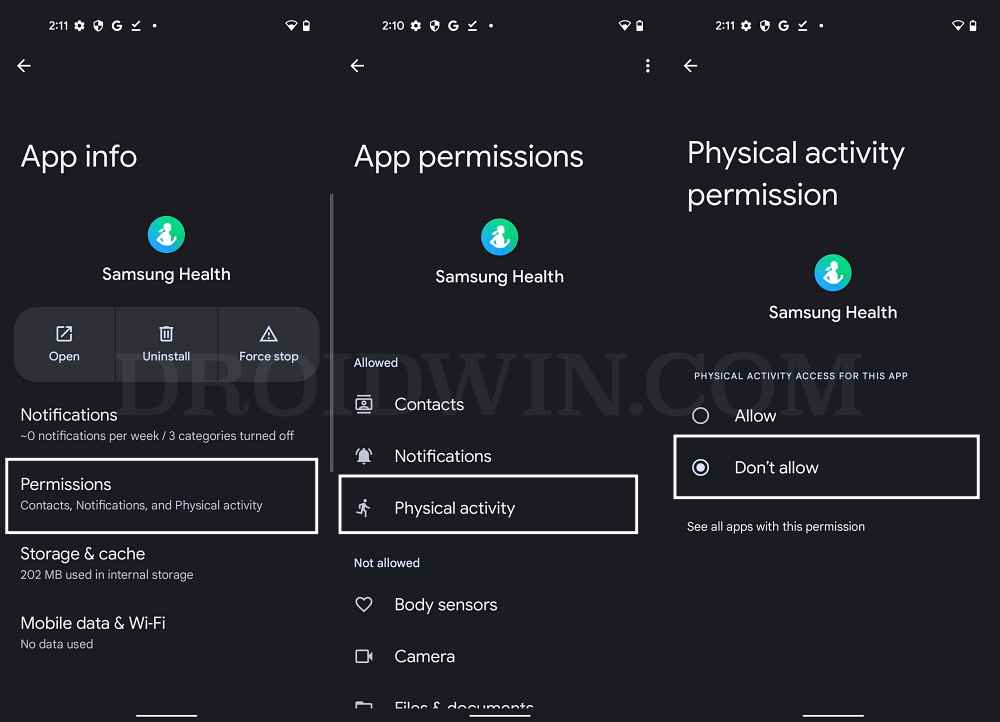
- After that select the Physical Activity permission under Allowed.
- Now change its permission to Don’t Allow. Check if it fixes the Pixel 7/Pro charging slowly.
FIX 6: Delete Data of Pixel Stand App
If you are noticing slow wireless charging speed, then the issue might be attributed to the corrupt data of the Pixel Stand app. So you should delete its data and let the app recreate a fresh instance of the same from scratch. Here’s how it could be done:
- Head over to Settings > Apps > See All Apps and select Pixel Stand.
- Then go to its Storage & Cache section and tap on Clear Storage > Delete.
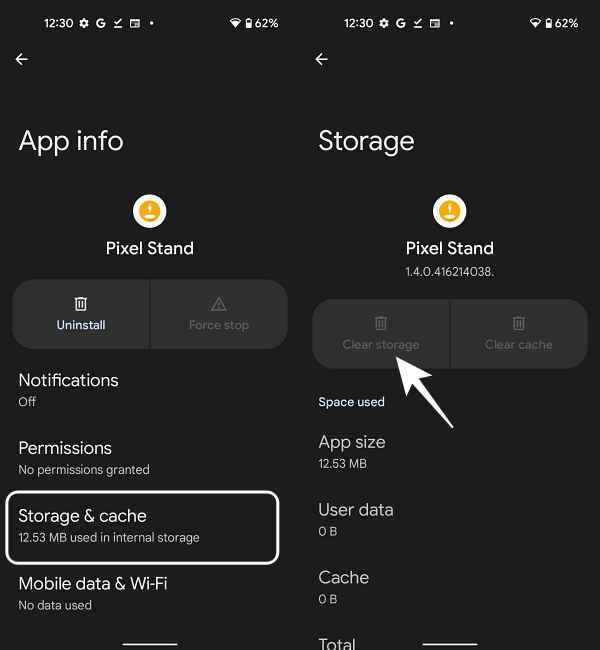
- Once done, it is recommended to restart your device as well.
- This should rectify the underlying charging issue.
That’s it. These were the six different methods to fix the issue of Pixel 7/Pro charging slowly. If you have any queries concerning the aforementioned steps, do let us know in the comments. We will get back to you with a solution at the earliest.