In this guide, we will show you the steps to boot your Windows 11 PC to Safe Mode. Your PC might get bugged with quite a few issues from time to time. As far as the plausible reasons for these issues are concerned, they fall under two categories- hardware and software-related issues. The first one arises mostly due to peripheral devices whereas the second one is linked with third-party/system apps and services.
But no matter the root cause of this issue, most of them follow a similar pattern of troubleshooting steps. In this regard, you might have across two fixes more often than not- performing a Clean Boot or booting your Windows 11 PC to Safe Mode. And in this guide, we will be focusing on the latter one. But before that, let’s check out what exactly is a Safe Safe and how does it differ from a Clean Boot.
Table of Contents
What is Safe Mode in 11?

Safe Mode is a diagnostic mode in Windows that is used to troubleshoot hardware-related issues, especially the ones that have corrupted the system files and in turn prevent the OS from booting properly. When your PC boots to Safe Mode, all the third-party apps, services, and drivers are disabled. Only the essential drivers and services that are crucial for the proper functioning of the OS are allowed to run.
As a result, if the underlying issue is rectified in this mode, then you could surely place your bet that a third-party app was the root cause of this issue. So your next course of action should be to uninstall all such apps (one at a time) that were installed just before the occurrence of that issue. And more often than not, it would fix the underlying issue as well. But how does it differ from a Clean Boot of the OS?
What is the Difference Between Clean Boot and Safe Mode
Safe Mode is used to diagnose and troubleshoot hardware-related issues whereas the Clean Mode is used to troubleshoot software-related issues that might be causing an issue in the proper functioning of the OS. In other words, its eyes are set on the user-installed apps and it always starts its diagnostics with those apps only.
Moreover, Safe Mode automatically disables all the apps and services, and even most of the system apps. On the other hand, Clean Boot only disables the third-party app, and you would have to manually instruct it to disable the Microsoft services. So with this, you would have got a decent idea regarding the differences between both these modes. Let’s now check out the steps to boot your Windows 11 PC to Safe Mode.
How to Boot Windows 11 to Safe Mode
There exist quite a few different methods through which you could boot your Windows 11 PC to the Safe Mode. And in this guide, we will make you aware of the four most common and easy to execute methods. So without any further ado, let’s get started.
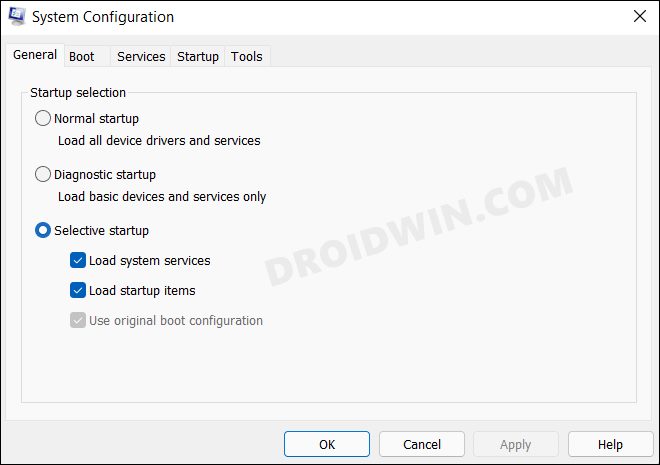
Method 1: Via System Configuration Menu
This is the most straightforward and direct method to boot your Windows 11 PC to the Safe Mode, granted that your PC is up and running normally.
- To begin with, bring up the Run dialog box via Windows+R shortcut keys.
- Then type in the below command and hit Enter to open the System Configuration menu
msconfig

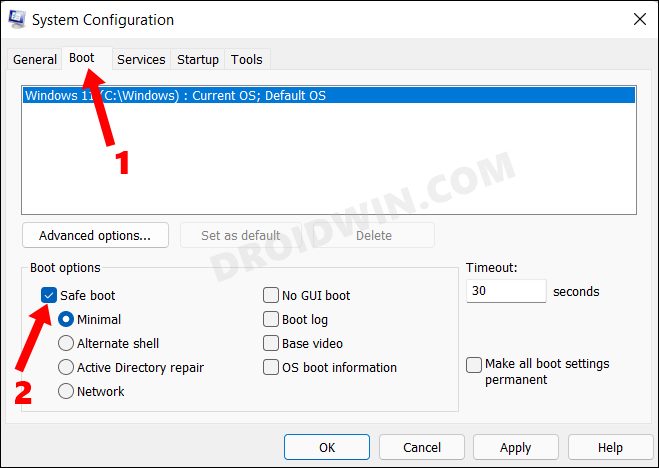
- Now go to the Boot tab and checkmark Safe Mode (and let the mode be Minimal).
- Finally, click Apply > OK and restart your Windows 11 PC. it will now boot to the Safe Mode.
Method 2: Via Windows Recovery Environment
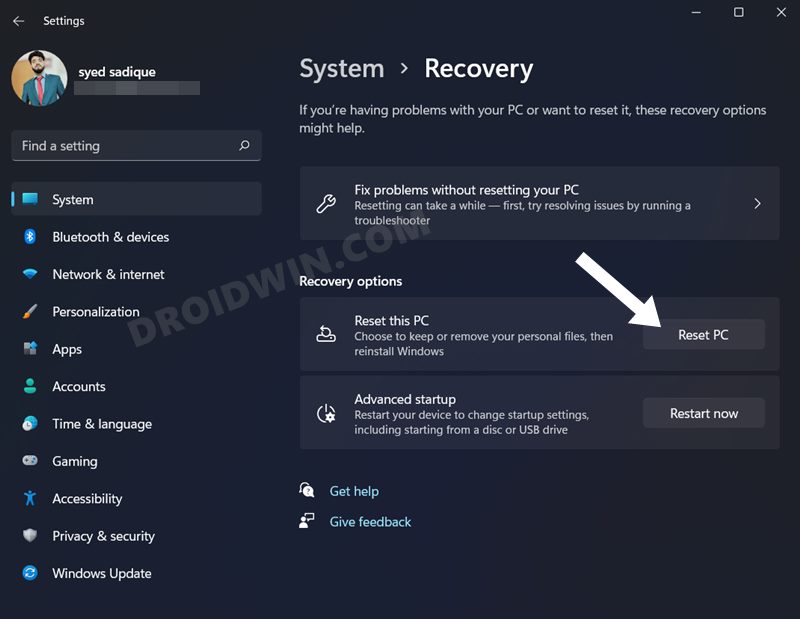
- Bring up the Settings menu via Windows+I shortcut keys.
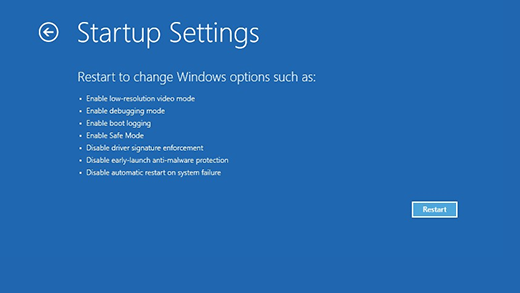
- Then go to Recovery and click on Restart Now under Advanced Startup.
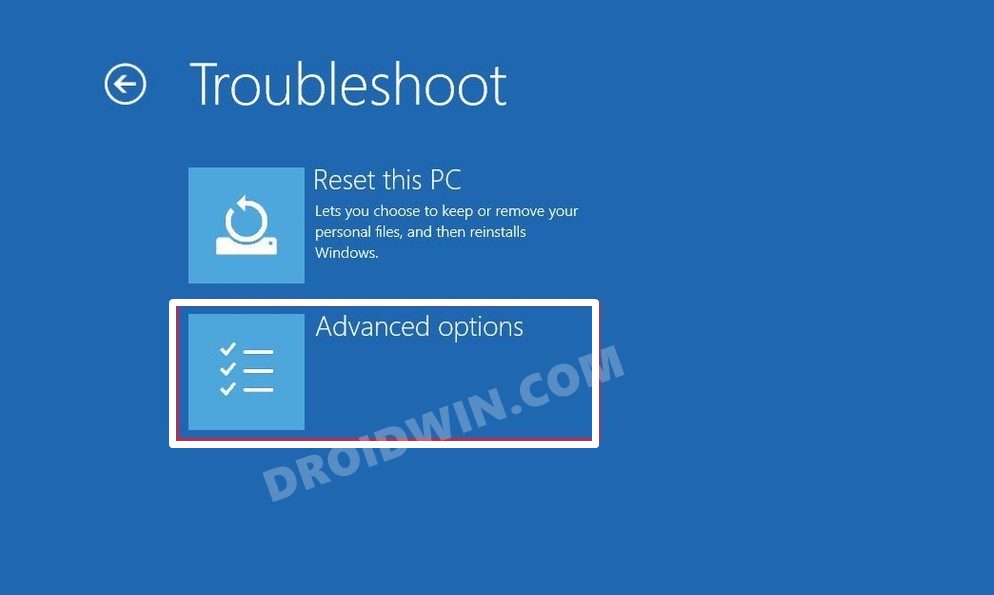
- Now click on Troubleshoot under Choose an Option.
- After that, click on Advanced Options.
- Then click on the Restart button situated at the bottom right.
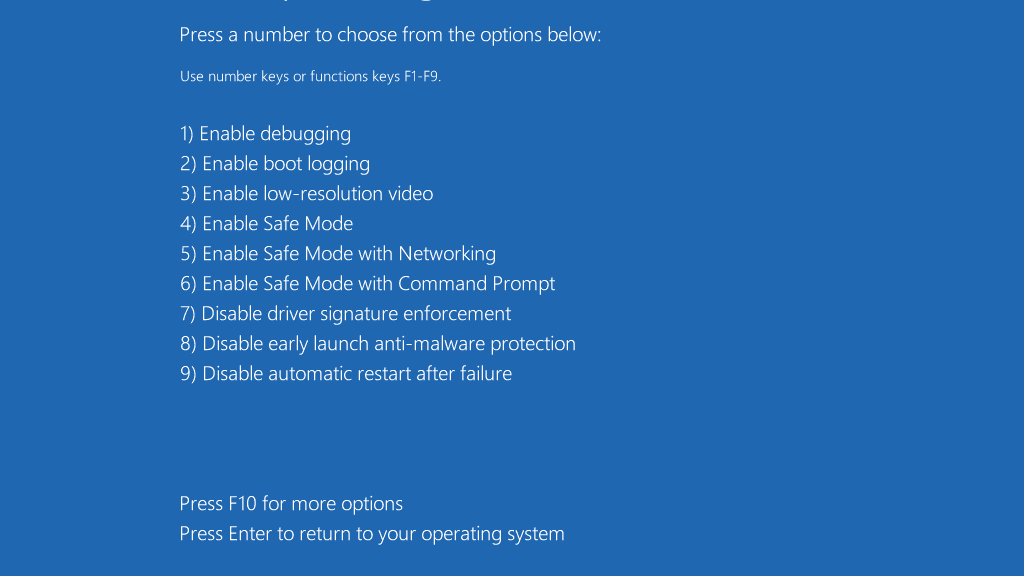
- Now press the F4 key to and your PC will be booted to Safe Mode.

Method 3: Boot to Safe Mode when you cannot Access OS
If you are unable to access the OS, then you wouldn’t be able to reach the Settings page. Well, fret not. You could still reach the Safe Mode by manually invoking the Repair option. Here’s how:
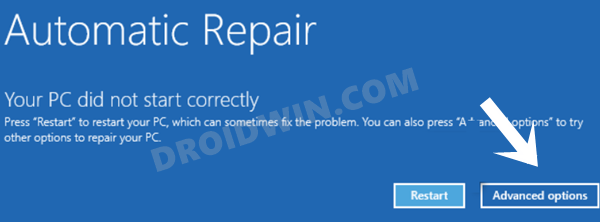
- Power on your PC and as soon as it is about to boot, power it off. Do so three more times.
- The fourth time you will be taken to the Automatic Repair Screen. From there, click on Advanced Options.
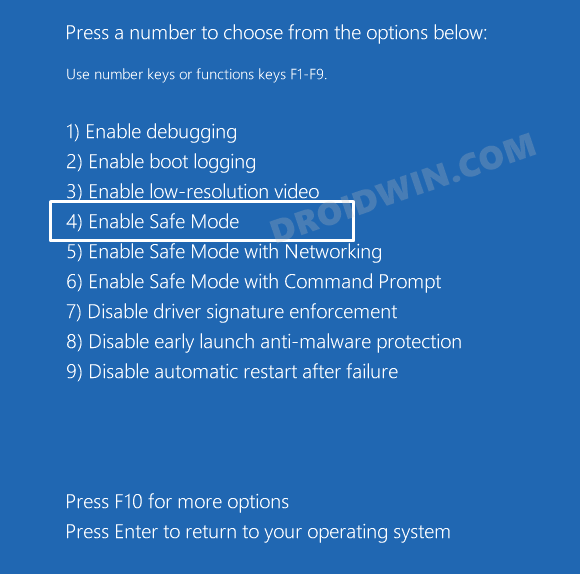
- Then click on Troubleshoot and follow the same route as in STEP 1, i.e. Advanced options -> Startup Settings -> Restart > F4 key.
Method 4: Boot to Safe Mode via USB
If you have a bootable USB with the Windows 11 installation file, then you could also use it to boot your Windows 11 PC to the Safe Mode. If you don’t have one but prefer to use this method, then take a USB with at least 8 GB free storage space and then use the Windows 11 Installation Assistant to create a bootable USB and then mount the Windows 11 setup inside it. You just need to follow the on-screen instructions, the rest will be taken care of by that tool. Once that is done, you may then proceed with the below steps:
- To begin with, connect your USB device to the PC.
- Then power on your PC and select your USB device during the boot-up time.
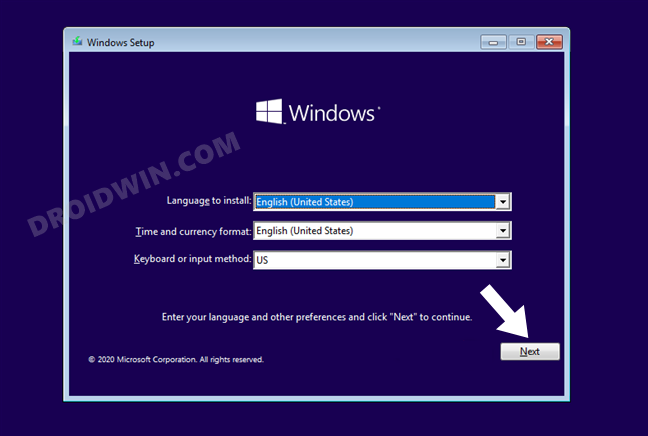
- It shall now load the Windows 11 setup screen, click on Next.
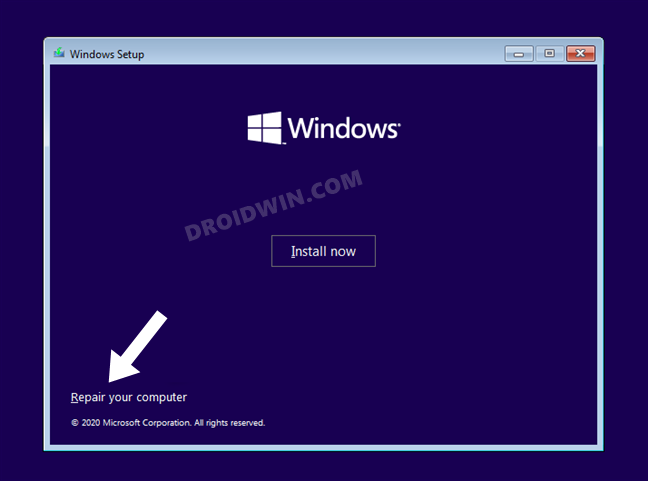
- After that, click on Repair your computer.
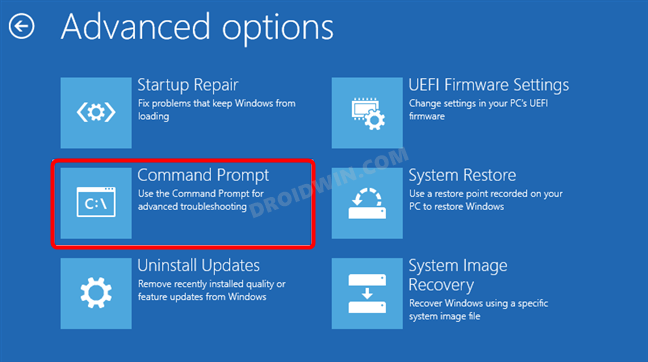
- Next up, select Troubleshooter.
- After that, choose Command Prompt.
- Now copy-paste the below command in the CMD window and hit Enter:
bcdedit /set {default} safeboot minimal - Once you get the “The operation completed successfully.” message, close the CMD window.
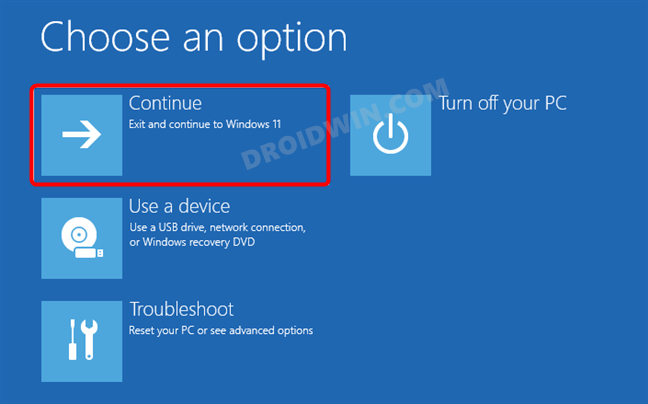
- Then select Continue and your Windows 11 PC will be booted to Safe Mode.
How to Exit Safe Mode in Windows 11
If you have used the first or second method to boot your PC to Safe Mode, then the next restart will automatically boot your PC to the normal mode. However, if you have opted for the third method, then you will have to manually instruct it to leave the Safe Mode, otherwise, your PC will boot to this mode every time. To do so, launch the CMD window either from the Safe Mode or via the Recovery Environment (Troubleshoot > Command Prompt) and then execute the below command in it:
bcdedit /deletevalue {default} safeboot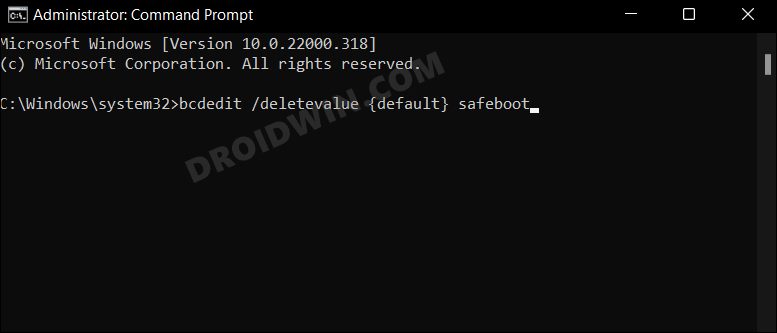
That’s it. These were the steps to boot your Windows 11 PC to Safe Mode. Likewise, we have also listed out the steps to exit this Safe Mode. If you have any queries concerning the aforementioned steps, do let us know in the comments. We will get back to you with a solution at the earliest.


