In this guide, we will show you the steps to unlock the bootloader on your Nokia 6.2 device. Stepping into custom development is probably the first prerequisite for every tech enthusiast. And the first step towards that is unlocking the device’s bootloader. Once you do so, you will be in a position to flash ROMs and custom recovery like TWRP, and even gain access to the system partition by rooting the device via Magisk. This will then allow you to flash a plethora of mods, tweaks, and modules. However, the OEM had some other ideas in mind.
They straightaway decided to block the bootloader unlock process and forced everyone to stay in the stock environment. And this is where the issue arises. Rather than letting the user take their own course of action, they forcefully implemented this rule. While there are a few tweaks to bypass this limitation, they aren’t free and could be risky as well. This is where this guide will come in handy. In this tutorial, we will show you the steps to unlock the bootloader on your Nokia 6.2 device (without spending a dime!).
Table of Contents
How to Unlock the Bootloader on Nokia 6.2
The below instructions are listed under separate sections for ease of understanding. Make sure to follow in the exact same sequence as mentioned. Droidwin and its members wouldn’t be held responsible in case of a thermonuclear war, your alarm doesn’t wake you up, or if anything happens to your device and data by performing the below steps.
STEP 1: Install Android SDK

First and foremost, you will have to install the Android SDK Platform Tools on your PC. This is the official ADB and Fastboot binary provided by Google and is the only recommended one. So download it and then extract it to any convenient location on your PC. Doing so will give you the platform-tools folder, which will be used throughout this guide.
STEP 2: Download Stock Firmware
- Next up, you will have to download the modified stock firmware for your device.
- So download the desired firmware package from the below links [Credits: XDA Senior Member raghu-varma]
SLD_sprout-RVDP.zip
SLDA_sprout-RVDP.zip
SLD-RVDP.zip
- Once you have downloaded the firmware ZIP file, transfer it to the platform-tools folder on your PC.
- Likewise, rename it to update, so that the complete name becomes update.zip (it will be much easier to type in the CMD window).
STEP 3: Enable USB Debugging and OEM Unlocking
You will also have to enable USB Debugging and OEM Unlocking on your device. The former will make your device recognizable by the PC in ADB mode. This will then allow you to boot your device to Fastboot Mode. On the other hand, OEM Unlocking is required to carry out the bootloader unlocking process on your Nokia device.

So head over to Settings > About Phone > Tap on Build Number 7 times > Go back to Settings > System > Advanced > Developer Options > Enable USB Debugging and OEM Unlocking.
STEP 4: Boot to Recovery Mode
- Connect your device to the PC via USB cable. Make sure USB Debugging is enabled.
- Then head over to the platform-tools folder, type in CMD in the address bar, and hit Enter. This will launch the Command Prompt.

- Type in the following command in the CMD window to boot your device to Recovery Mode:
adb reboot recovery
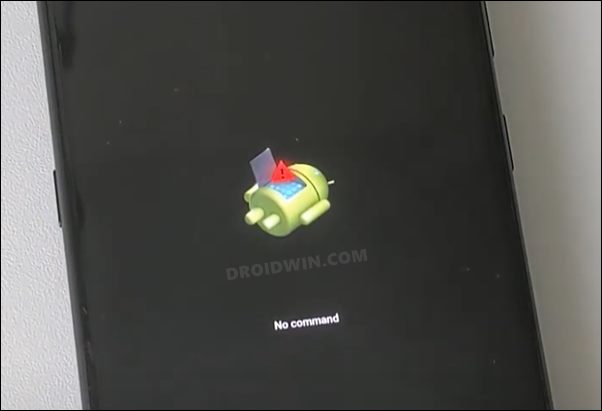
- You will now get the No Command screen, so press and hold the Power and Volume Up key and your device will be booted to Stock Recovery.

STEP 5: Flash Firmware via ADB Sideload
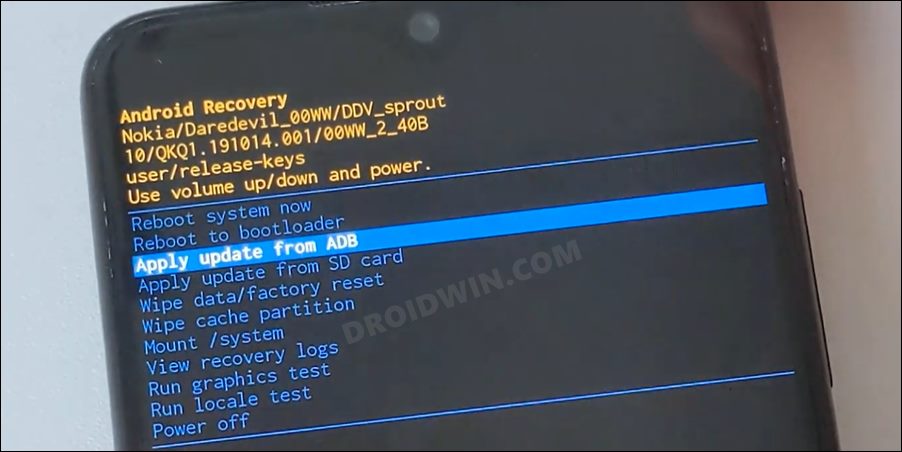
- In the Recovery menu, use the Volume key to highlight the “Apply Update from ADB” option and hit the Power key to confirm it.
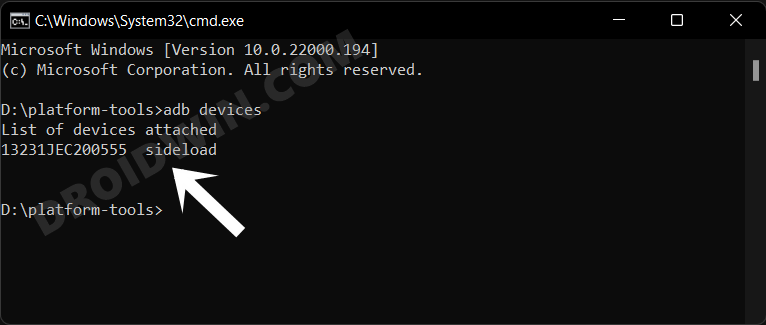
- Now type in the below command to verify the ADB Sideload connection. If you get the Device ID followed by the sideload keyword, then the connection has been successfully established:
adb devices
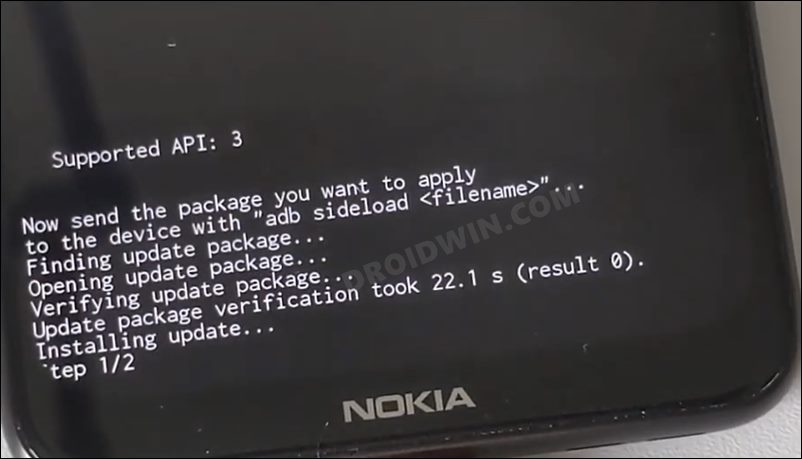
- Now execute the below command to flash the firmware ZIP file (where update.zip is the name of the firmware file)
adb sideload update.zip
- Once the process is complete, your device will boot to the stock recovery.
STEP 6: Unlock Bootloader on Nokia 6.2
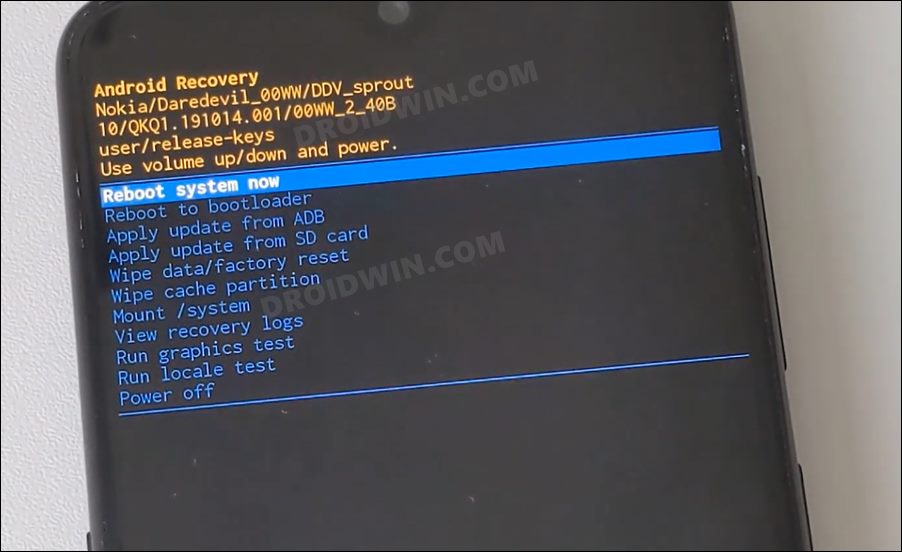
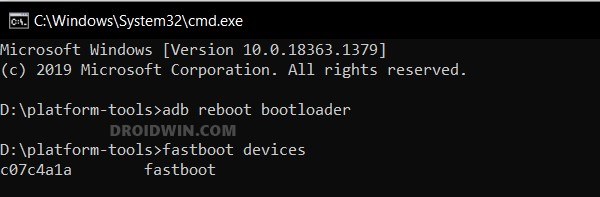
- From the stock recovery, use the Volume Key to highlight the Reboot to Bootloader option and press the Power key to confirm it.
- Your device will now boot to the Fastboot Mode. You may also execute the below command to verify the Fastboot connection:
fastboot devices
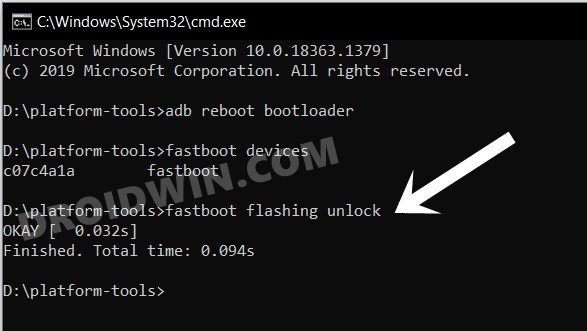
- Now type in the below command to initiate the unlock process:
fastboot flashing unlock_critical
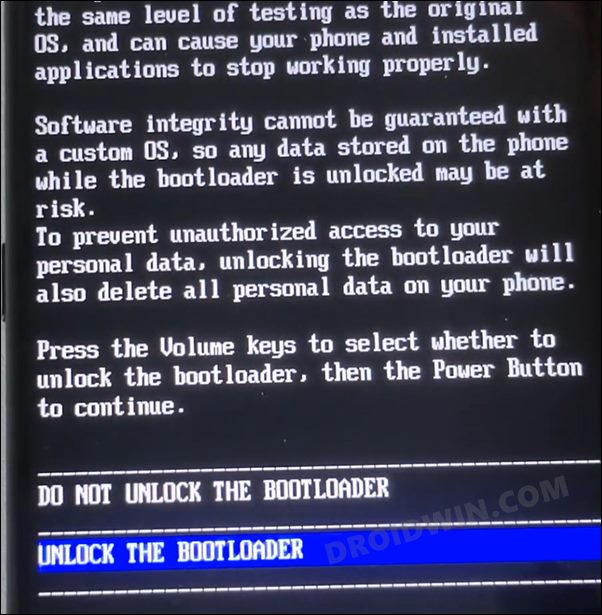
- You will now get a confirmation on your device. Use the Volume Key to highlight the Unlock the Bootloader option and press the Power key to confirm it.
- As soon as you do so, press and hold the Volume Down key so that your device gets rebooted to Fastboot Mode
- Once that happens, execute the below command to unlock the bootloader on your Nokia 7.2 device:
fastboot flashing unlock
- You will again get the confirmation. As before, use the Volume Key to highlight the Unlock the Bootloader option and press the Power key to confirm it.
- Again, press and hold the Volume Down key to boot your device back to Fastboot Mode.
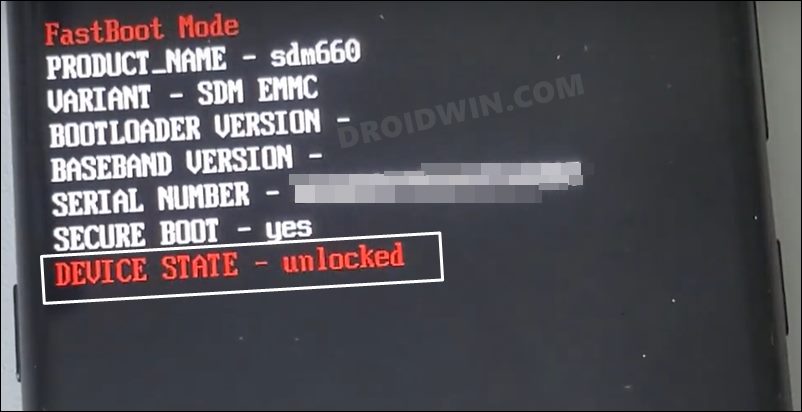
- Once that happens, you should now see the Device State- Unlocked signifying the process has now been successfully completed.
- You may now execute the below command to boot your device to the OS:
fastboot reboot
- That’s it. It is now recommended that you reflash the stock firmware via Nokia Tool or Fastboot Commands before using your device.
So with that, we conclude the guide on how you could unlock the bootloader on Nokia 6.2. If you have any queries concerning the aforementioned steps, do let us know in the comments. We will get back to you with a solution at the earliest.


Alex
Yeah this method didint work on me
Ratan teja
Bro have you found any alternative