In this guide, we will show you the detailed steps to make a switch from Magisk to Kitsune. There have been quite a few rooting solutions for Android since its inception. It all started with the popular SuperSu from Chainfire before the likes of shady one-click rooting solutions made their way. Then a couple of years later we were greeted with Magisk and since then, there’s no looking back.
It has become the one-stop place for everyone who is looking to gain administrative privileges over their device, with the best part being the fact that Magisk carries out the entire process “systemlessly”. This coupled with the ease of flashing modules resulted in the app’s being the tech enthusiast’s de-facto choice. However, over the past few months, we have seen a bunch of new players making their presence felt.
Among them, the KernelSU has made quite a name for itself, all thanks to the fact that it grants root permission to applications directly in the kernel space. Apart from that, we also have the likes of APatch and the Kitsune, with the latter managing to make quite a name for itself among the crowd. So how did it manage to pull it off and more importantly, how does it differ from the official Magisk? Let’s find out.
Table of Contents
What is Magisk Kitsune
Magisk Kitsune is an unofficial fork of Magisk which beholds all the functions that its official counterpart has to offer. For instance, you can easily patch the boot or the init_boot file and then use it to flash via Fastboot Command to obtain the root. Likewise, you could use its Direct Install option to upgrade Magisk or switch from temporary to permanent root. Likewise, the Install to Inactive Slot option will give you the opportunity to install OTA updates while preserving root.
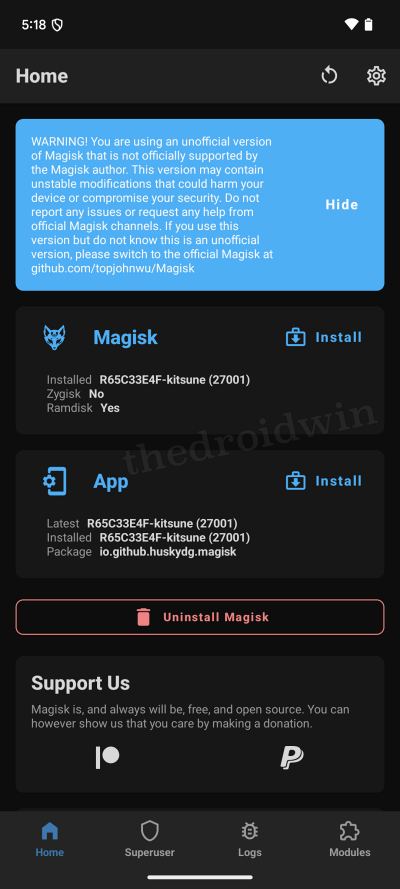
But this is where its similarity ends. There are a few additional tweaks that it beholds that you might not find in the official Magisk app. Some of the noteworthy ones include the likes of MagiskHide, SuList, and the new Zygisk loading mechanism. Apart from that, there are a slew of additional technical differences between both these apps. So without further ado, let’s have a look at them.
How Is Kitsune Different from Magisk
While Kitsune has taken a page or two from Magisk’s book, but the rest of the book is completely different. There exists a plethora of additional goodies in the Kitsune app that you’ll not find in the official Magisk app. Let’s have a look at those features:
- [App] Added a new feature to install Magisk into
/systempartition for emulators that do not have a boot image. - [Zygisk] Changed the method of loading Zygisk to ptrace init implementation (required Android 8+). The implementation comes from ZygiskNext. This method does not need to change any property and is more compatible with some emulators that ignore
ro.dalvik.vm.native.bridgeproperty. - [General] Support for mounting in pre-init for modules.
- [General] Support deleting file by using indicated whiteout character device, similar to
overlayfs - [Zygisk] Added support for GrepheneOS Android 14, a privacy and security focused mobile OS with Android app compatibility. This is because the official Magisk does not support it.
- [General] Restored support for devices with no selinux support, which was removed by the official Magisk. This allows users to use Magisk on devices that do not have selinux enabled in kernel.
- [General] Update resetprop to avoid increasing serial counter for read-only properties
- [Module] Mounting module files to system no longer need mirrors
- [App] Add biometric authentication back
- [General] Grant root to shell by default (for debug build)
- [General] Disable magisk app signature verification
- [Module] Support Magic mount for more partitions
- [General] MagiskSU will not mounted until boot completed
How to Switch from Magisk to Kitsenu
If you have already obtained root via Magisk and are now looking to make a switch over to Kitsenu, then there are two different methods that you can opt for. Go through both these methods once and then try the one that is in sync with your requirements.
Via Direct Install
This is the shorter and the easier of the two methods and is also the one that is recommended by the developers.
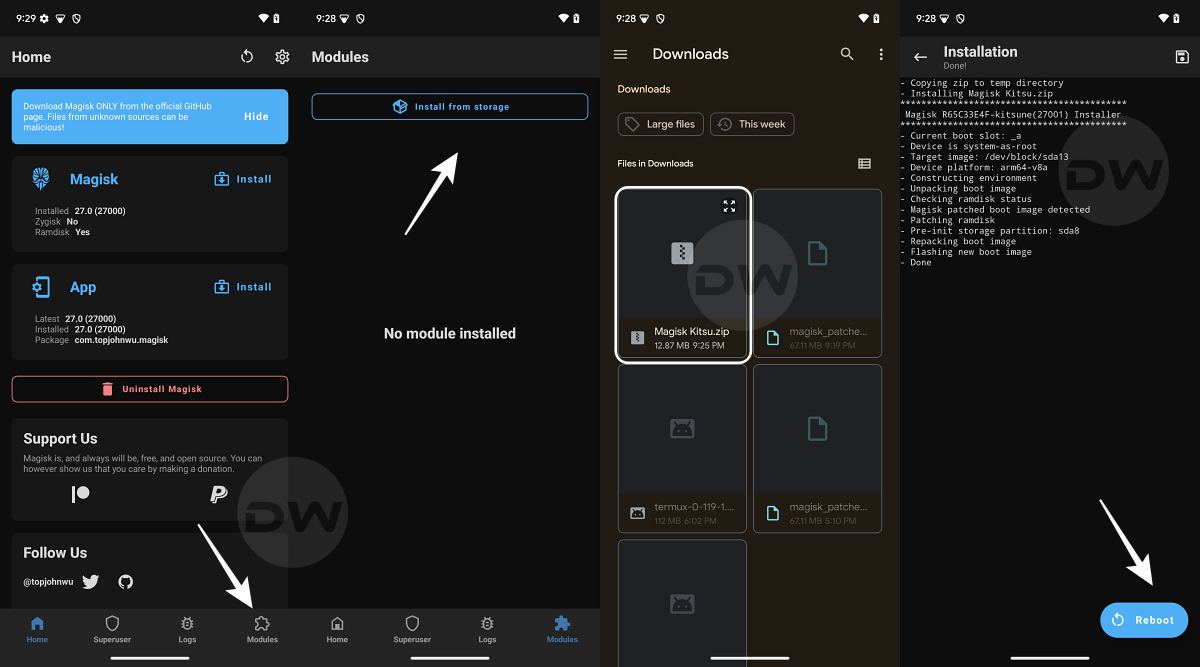
- Make sure that your device is rooted via the official Magisk app.
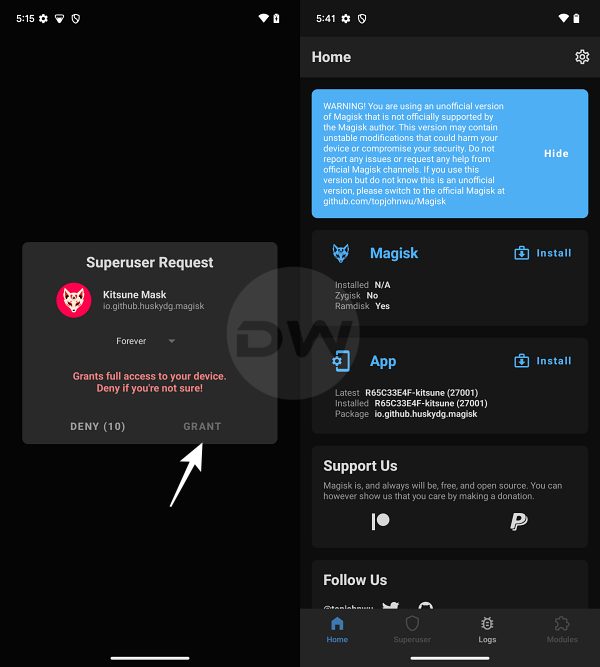
- Now download and install the Magisk Kitsune app on your device.
- Then launch it and you’ll get a SuperUser request, tap on Grant.

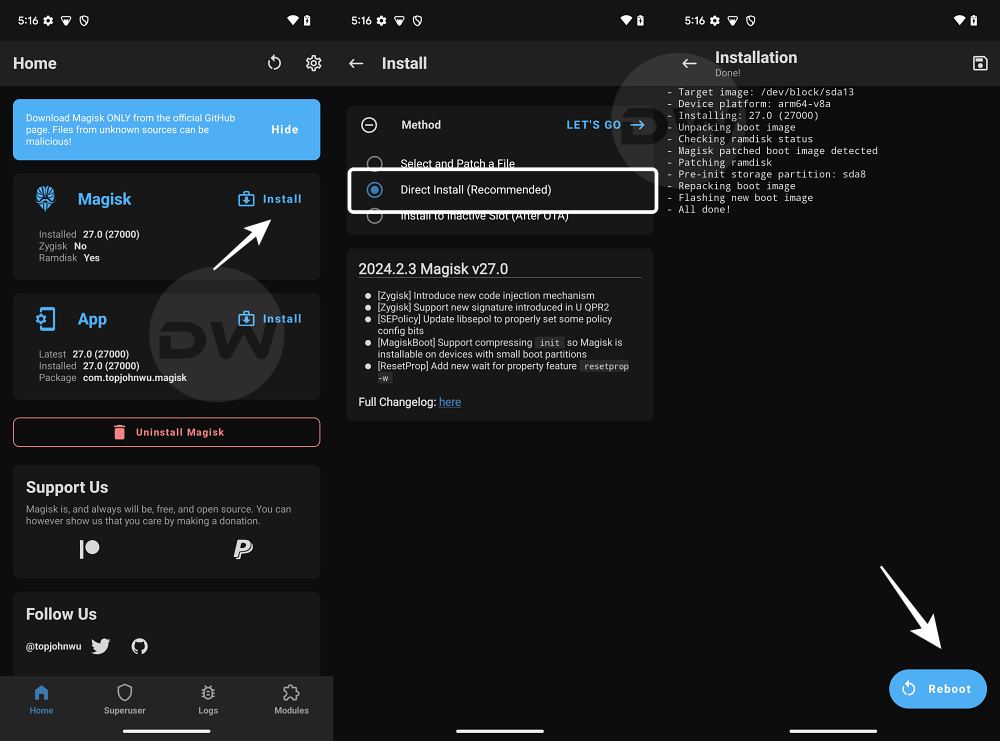
- Now launch Magisk > tap on Install > Direct Install [Recommended].
- Wait for the process to complete. Once done, tap on Reboot. That’s it.
- Your device will now reboot to the rooted OS.
Via Kitsune Module
- Download the Magisk Kitsune APK and change its extension to ZIP.
- Simply do a rename of the file and change the APK at the end to ZIP.
- You’ll get a warning prompt regarding extension change, tap on OK.
- Now launch official Magisk, go to Modules, and select Kitsune ZIP file.
- It will now be flashed on your device. Once done, tap on Reboot.
- The device will now boot to the rooted OS and your take stands complete.
How to Root Via Magisk Kitsune
The steps to root via Kitsune are exactly the same as you do with the official Magisk app, i.e. patch the boot/init_boot via Magisk and then flash it via Fastboot Commands. To know more about this, you may either refer to our detailed guide on How to Root Android Devices Without TWRP Recovery or check out the below shorter instructions:
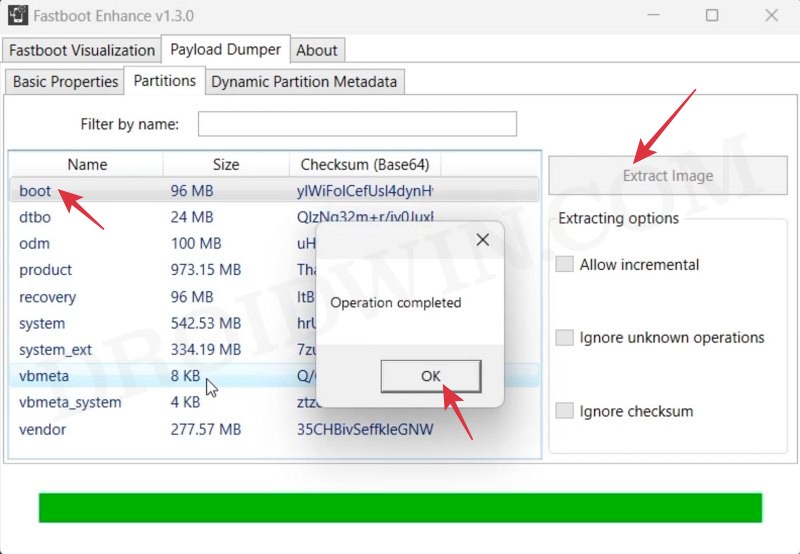
- Download and install Android SDK Platform Tools on your PC.
- then download the same version of stock firmware that is currently installed on your device. You may verify the same from the Build Number.
- Now extract the boot.img/init_boot.img file and then transfer it to your device.
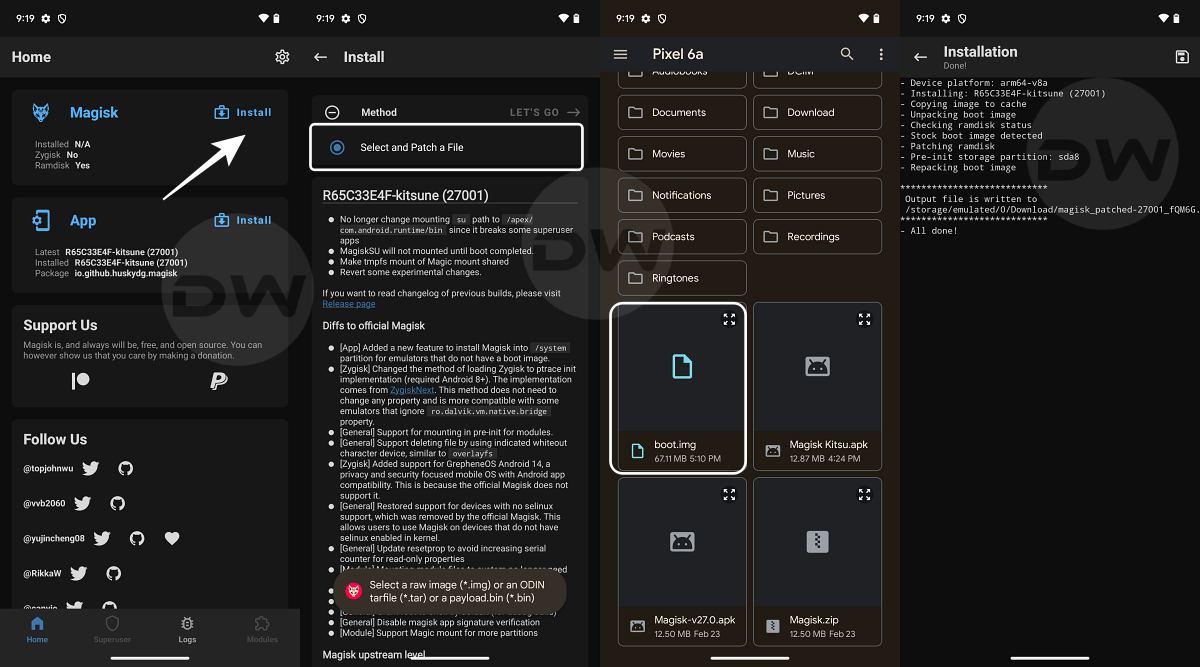
- Then download and install the Magisk Kitsune app on your device and launch it.
- Now tap on Install next to Magisk > Select and patch a file > Select the boot/init_boot.img file.
- It will now be patched and then placed in the Internal Storage > Downloads folder.
- Transfer the file to the platform-tools folder on your PC. Likewise, open the CMD window there as well.
- Now type in the below command to boot your device to the Fastboot Mode:
adb reboot bootloader
- Use the below command to flash the patched boot/init_boot file to its partition
fastboot flash boot patched_boot.img
fastboot flash init_boot patched_init_boot.img
- Then use the below command to boot your device to the OS:
fastboot reboot
- Now launch Kitsune and it will ask for additional setup. Tap OK.
- Your device will then reboot to the OS and it will be rooted now.
How to Flash Modules via Magisk Kitsune
Flashing modules via Kitsune is exactly the same as you do via the official Magisk app. Here’s how:
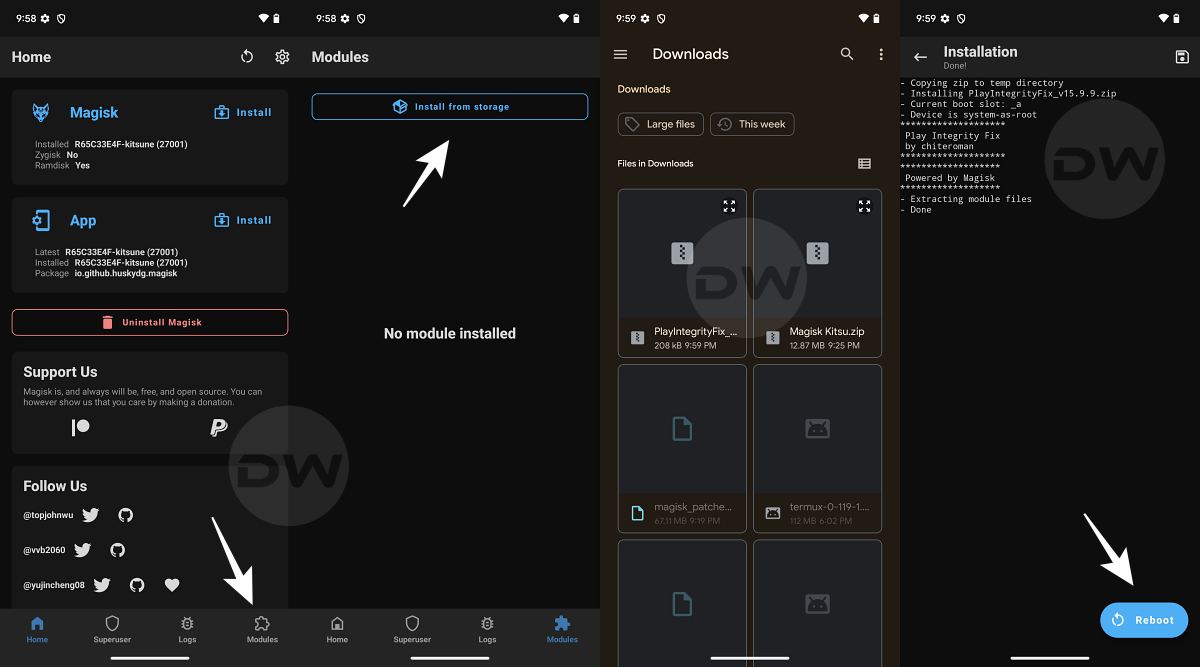
- Download the desired module ZIP and transfer it to your device.
- Then launch Kitsune, go to Modules, and tap on Install from Storage.
- Now select that module and it will be flashed. Once done, hit Reboot.
- Your device will boot to the OS and the module will be up and running.
How to Unroot via Magisk Kitsune
If you wish to return to the stock non-rooted ecosystem then the steps are the same as those with the official Magisk app. Here’s what needs to be done:
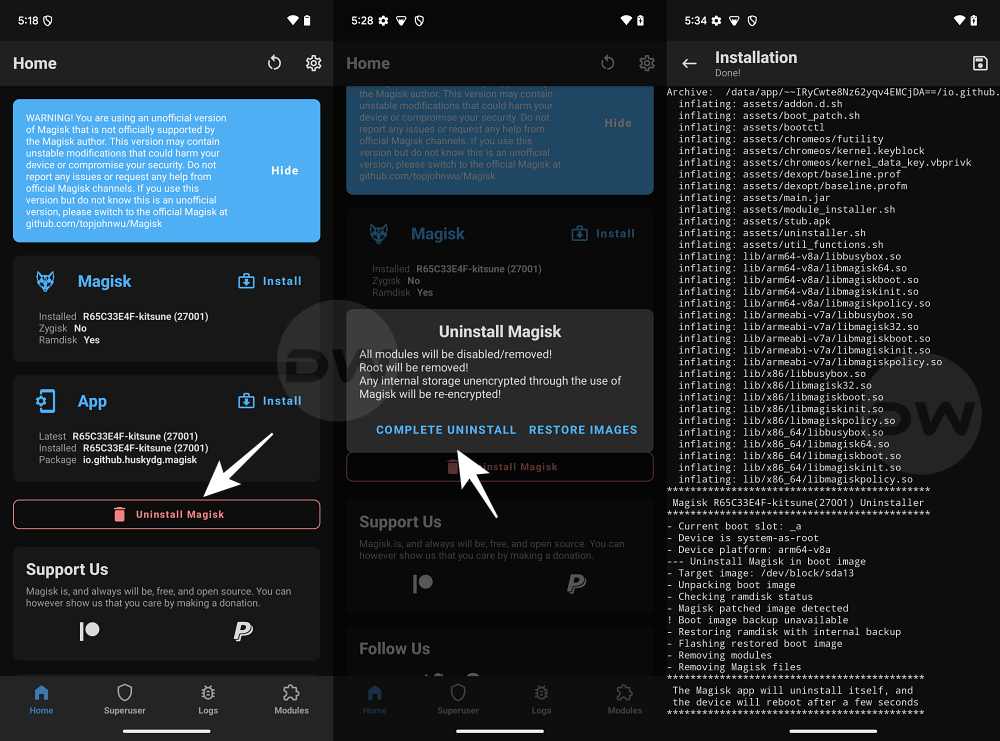
- Launch Magisk Kitsenu and then tap on Uninstall Magisk.
- You’ll get a prompt on your device, tap Complete Uninstall
- The device will now automatically reboot to the non-rooted OS.
- Moreover, as mentioned before, it might remove the Magisk root.
That’s it. These were the steps to root your device via Magisk Kitsune. Likewise, we also listed the steps to make a switch from Magisk to Kitsune. Apart from that, the instructions to flash modules and unroot the device via Ktsune are also given. If you have any queries concerning this app, then do let us know in the comments. We will get back to you with a solution as soon as possible.