In this guide, we will show you the steps to mount/unmount any disk drive using Terminal on your Mac. There exist quite a few days through which you could mount any external/internal SSD or HDD. Among them, it’s the GUI approach using Disk Utility that is the preferred method for many.
However, in some instances, the Disk Utility might not display the drive that you wish to mount/unmount. So in such cases, your best bet is to take the help of the command line to get this job done. And in this guide, we will show you how to do just that. So without further ado, let’s get started with the steps to mount/unmount any disk drive using Terminal on your Mac.
Table of Contents
How to Mount a Drive using Terminal on Mac
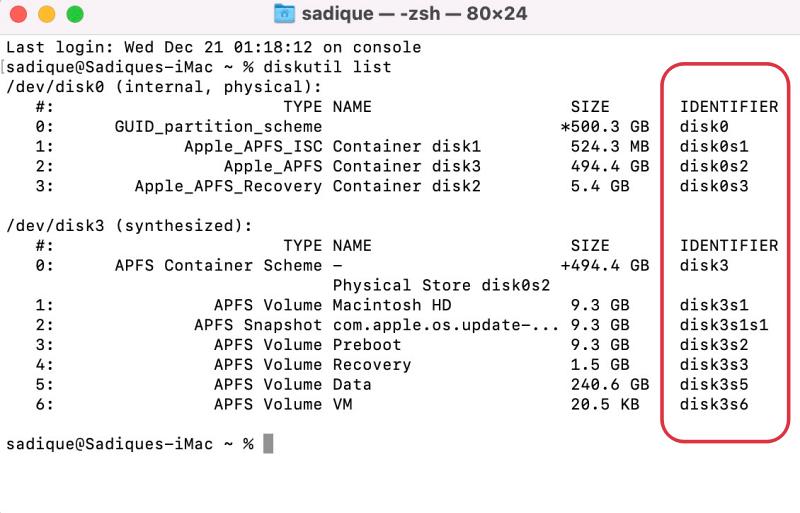
- Open Terminal and execute the below command to bring up a list of all the drives connected to your Mac [both mounted and unmounted]
diskutil list
- Now refer to the output and note down the identifier next to the required disk name.

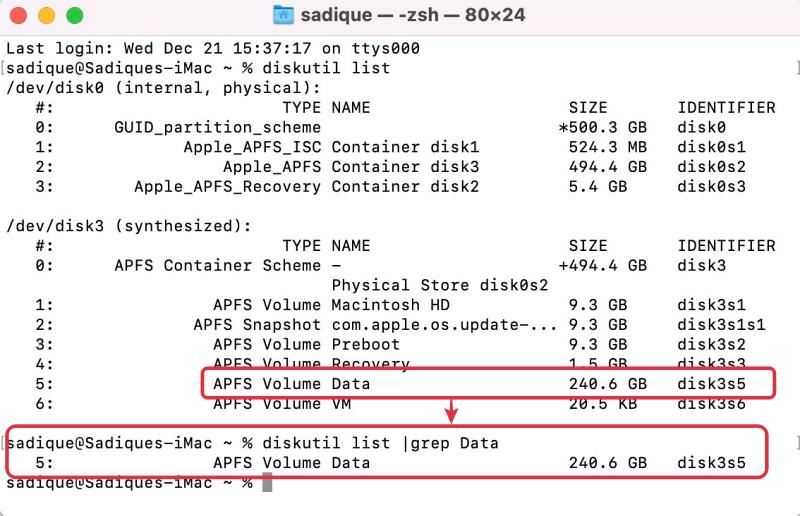
- To reverify, you could execute the below command [replace the diskname] and it will give you the identifier name
diskutil list |grep diskname
- Finally, execute the below command to mount the disk [replace identifier accordingly]
diskutil mount /dev/identifier
- You will now get a mounted message in the Terminal which signifies that the drive has been mounted on your Mac.


How to Unmount a Drive using Terminal on Mac
- Open Terminal and execute the below command to bring up a list of all the drives connected to your Mac [both mounted and unmounted]
diskutil list
- Now refer to the output and note down the identifier next to the required disk name.
- To reverify, you could execute the below command [replace the diskname] and it will give you the identifier name
diskutil list |grep diskname
- Finally, execute the below command to mount the disk [replace identifier accordingly]
diskutil unmount /dev/identifier
- You will now get an unmounted message in the Terminal which signifies that the drive has been unmounted on your Mac
Unmount and Remount Drive on Mac using a Single Command
You could also combine both the mount and unmount commands into a single one, using the below command syntax. Make sure to replace the identifier accordingly
diskutil unmount /dev/identifier;diskutil mount /dev/identifier;echo "Remounted Volume"
That’s it. These were the steps to mount/unmount any disk drive using Terminal on your Mac. If you have any queries concerning the aforementioned steps, do let us know in the comments. We will get back to you with a solution at the earliest.