In this guide, we will show you four different methods to enable the band selection mode on your Samsung device. By default, your Samsung device is automatically assigned the best possible network mode. However, there could still be a few instances wherein you might want to manually make a switch over to another band. For example, if you have found a new 4G LTE / 5G NR band in your area or you know of a well-known uncongested band, then you could manually make a switch over to it.
However, you wouldn’t be able to do so by the conventional method of heading over to the Settings menu. This is because the South Korean giant has hidden this network setting feature under its stock telephone app. So how could one access this functionality? Well, there exist two different methods through which you could enable the band selection mode on your Samsung device. So without any further ado, let’s check them out.
Table of Contents
How to Enable Band Selection Mode in Samsung [4 Methods]

We have listed three different methods below through which you could get this job done. You may refer to the one that is in sync with your requirement.
Using Dialer Code
The easiest of the three methods, you just need to execute a code in the phone dialer and it shall bring up the network selection screen. For a detailed guide on this subject, do check out this guide. The shorter instructions are given below
- Bring up the Dialer and type either of the two below codes.
*#73# OR *#27663368378#
- It should open the ServiceMode > RF TEST screen.
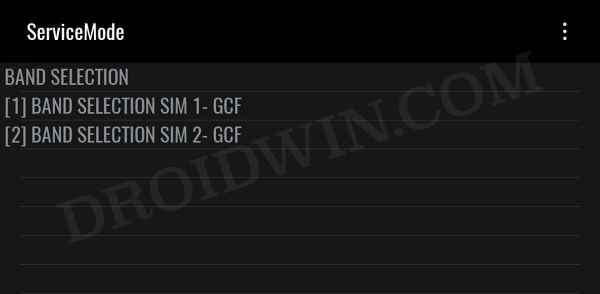
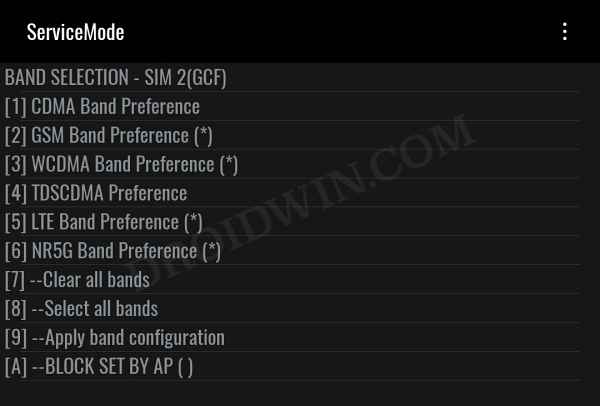
- Select the first option, Band Selection, from the list.

- Now select the appropriate SIM from the list.
- Dual SIM users would see two SIMs, so make the selection carefully.
- That’s it. The Band selection mode is now enabled on your Samsung device.

Via Protocol Simulation Menu
You could also enable all bands on your Galaxy S23 Ultra via Protocol Simulation. In this method, we will be simulating a change in your CSC to GCF (Global Certification Forum). While this won’t actually change your CSC to GCF, but will change the options in the service menu as if you were on GCF CSC, which should give you access to all SA and NSA bands [Credits: XDA Senior Member wr3cckl3ss1].
- Open the Service Mode via the below code
*#27663368378#*
- Then go to Service Mode Main Menu -> PROTOCOL STATE.
- Now go to PROTOCOL SIMULATION -> IMEI PRE CFG SIMULATION.
- In this menu, click [1] AP, then click GCF. Then click [2] NET1 and change it to GCF.
- Do the same for [3] NET2. All GCF and finally Press [4] Write.
- Now restart your device and check out the results.
Via Third-Party App
If you want a much more simplified and easy-to-understand UI, then you could take the help of a third-party app that will do work on your behalf. Here’s how:
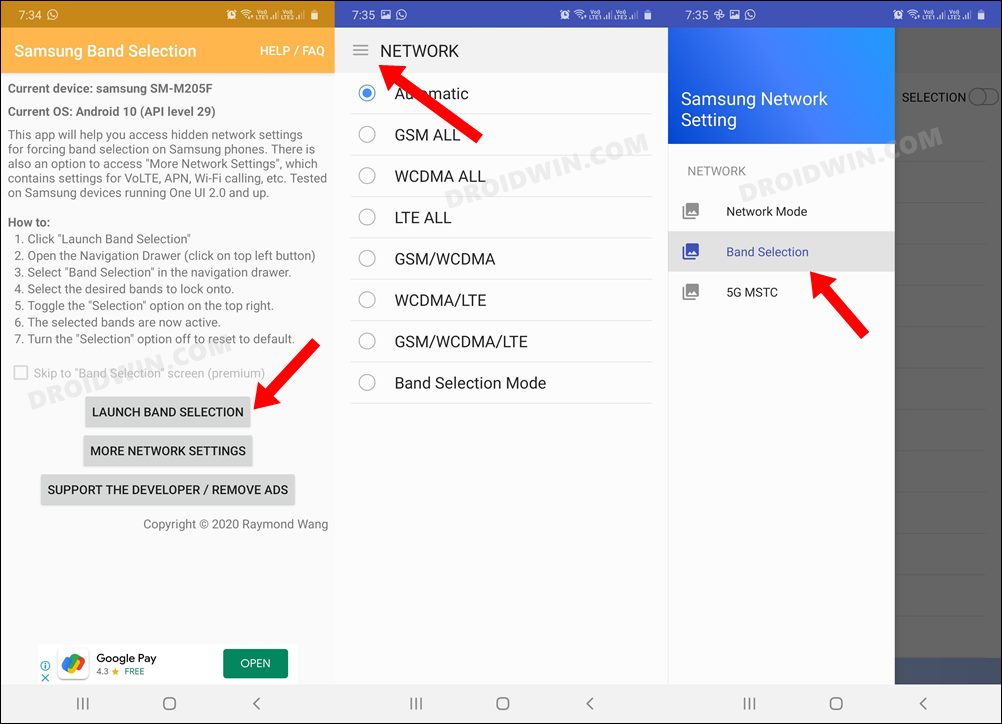
- Download and install the Samsung Band Selection app from the Play Store.
- Then launch the app and tap on the Launch Band Selection button.
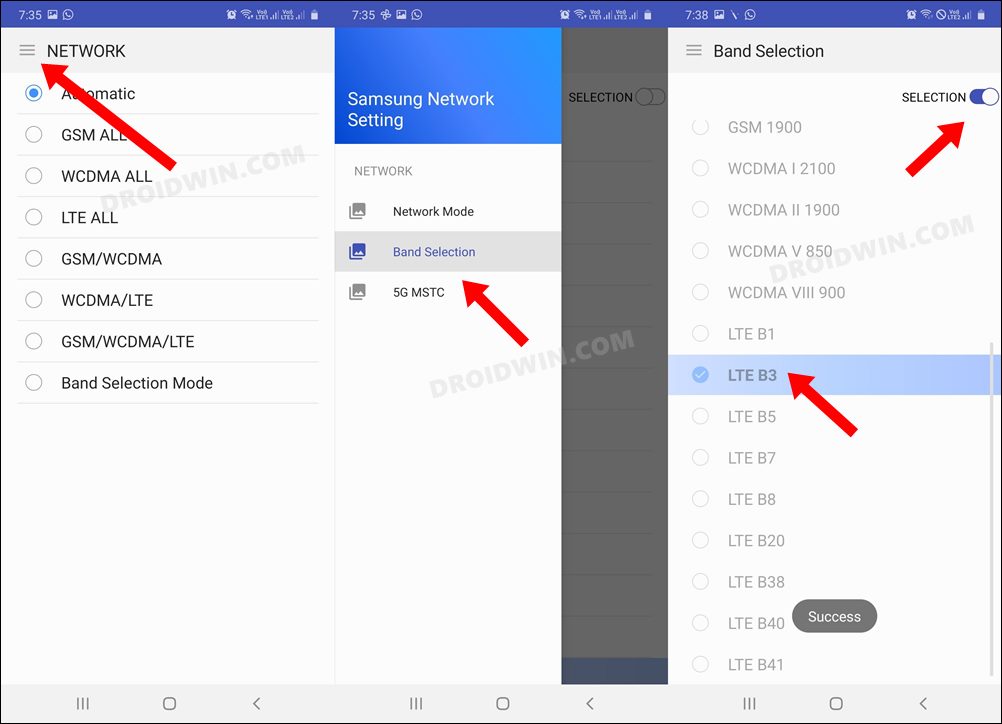
- After that, tap on the hamburger menu situated at the top left and select Band Selection.
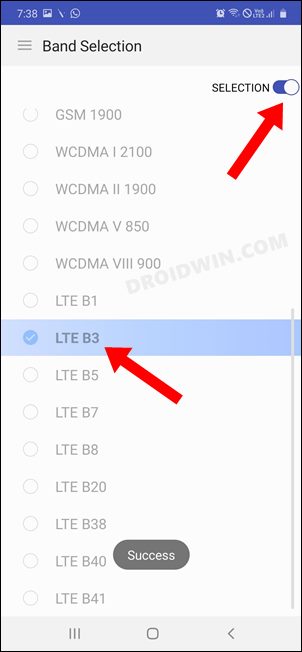
- Now choose the desired band from the list.
- Finally, enable the Selection toggle present at the top right to make it the active band.
That’s it. These were the steps to enable the band selection mode on your Samsung device using a third-party app. now let’s check out how the same tasks could be carried out without any app.
Via ADB Commands
This method is slightly technical and a little bit lengthy, but if you don’t wish to interact with any third-party app, then this should be your go-to method.
- Download and extract the Android SDK Platform Tools on your PC.
- Then enable USB Debugging on your device and connect it to your PC via a USB cable.
- Now head over to the platform-tools folder, type in CMD in its address bar, and hit Enter. This will launch CMD.
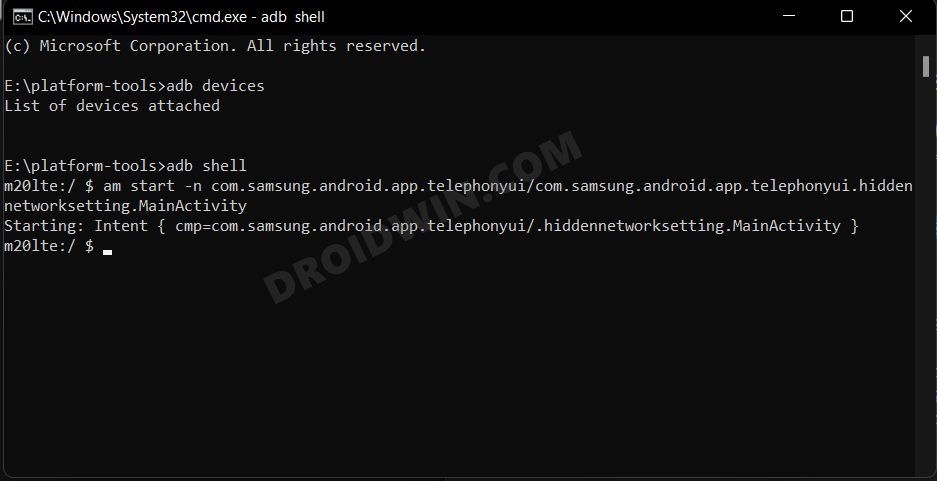
- Type in the below command in this CMD window to open the shell environment
adb shell
- Then execute the below command to unlock the Band Selection Mode
am start -n com.samsung.android.app.telephonyui/com.samsung.android.app.telephonyui.hiddennetworksetting.MainActivity
- You will now be taken to the Network Selection Mode. So tap on the hamburger menu situated at the top left and select Band Selection.
- Then choose the desired band from the list and enable the Selection toggle present at the top right to make it the active band.


That’s it. These were the four different methods to enable the band selection mode on your Samsung device. If you have any queries concerning the aforementioned steps, do let us know in the comments. We will get back to you with a solution at the earliest.


Bradley Smith
Looking for more up to date info as on my flip 3, and the update back earlier this year nothing seems to work. For me,I was looking to force the phone to stay on 5g only
redwattlebird
looks like they have locked this as it won’t work on my sm908e.
CWY
I am using tab s7+5g, so no dialer function is available. Also after latest batch update by Samsung, third party app doesn’t work anymore. And I also tried using ADB command. After typing in am start -n com.samsung.android.app.telephonyui/com.samsung.android.app.telephonyui.hiddennetworksetting.MainActivity, it shows Exception occurred while executing ‘start’. It seems this method is no longer work. Any other methods ? Thanks.
Rami
Hi
when i update my note 20 ultra the band selection app stopped and this message appear
Error: Hidden network settings activity not found on device
plz how can i sole this problem without computer
wait your message
Sadique Hassan
Hi Rami, if you want to take a manual approach, then you could try out the *#73# OR *#27663368378# code in the dialer to bring the band selection screen.
Jo
That didn’t work either. I have a galaxy s22. I’ve tried everything.
Sellamuthu
Dear sadique, while typing, in keypad, both the codes aren’t working and not enter inside th band selection mode in my samsung m31 phone