In this guide, we will show you the steps to enable 120Hz Refresh Rate in Power Saving Mode in Samsung One UI 4/5. In the last couple of years, the number of times your screen refreshes per second has become a major talking point. In this regard, most of the devices now offer 90Hz, and the one that takes it up to 120Hz counts it as their USP. Moreover, the ability of the device to automatically adjust to the required refresh rate based on the work that you are currently doing is also a pretty nifty feature.
For example, if you are chatting with someone, then the rate would drop down to 48hz and while playing a graphics-intensive game, it might shoot all the way up to 120hz. This adaptive mode is quite handy as it negates the need for manually switching to low/high rates and this in turn also ends up saving some battery juice. Talking about which, you might have to bid adieu to most of these functionalities if the Battery Saving Mode is enabled on your device.
Be it opting for the highest refresh rate or selecting the Adaptive mode, both of them might not work until the battery restrictive limitations have been lifted. Well, turns out there does exist a nifty method through which you could easily enable the 120Hz Refresh rate even in the Power Saving Mode on Samsung One UI 4/5 devices. And in this guide, we will show you how to do just that. So without further ado, let’s check it out.
Table of Contents
Enable 120Hz Refresh Rate in Power Saving Mode in Samsung One UI 4/5
There exist two different methods to get this job done. The first one is the lengthier and requires the use of a PC but you don’t have to shell out any bucks. On the other hand, the second approach is extremely easier to execute and is a shorter process but requires a paid app. Anyways, we have listed both these methods below, you may try out the one which is in sync with your requirement.
Method 1: Via Quick Settings Tool and ADB Command
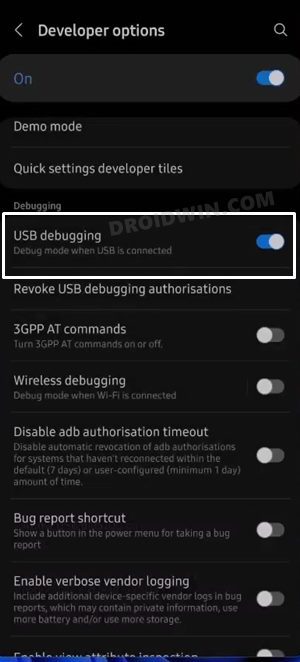
- To begin with, enable USB Debugging on your device. For that, go to Settings > About Phone > Software information > Tap on Build Number 7 Times > Then go back to Settings > Developer Options > Enable USB Debugging.

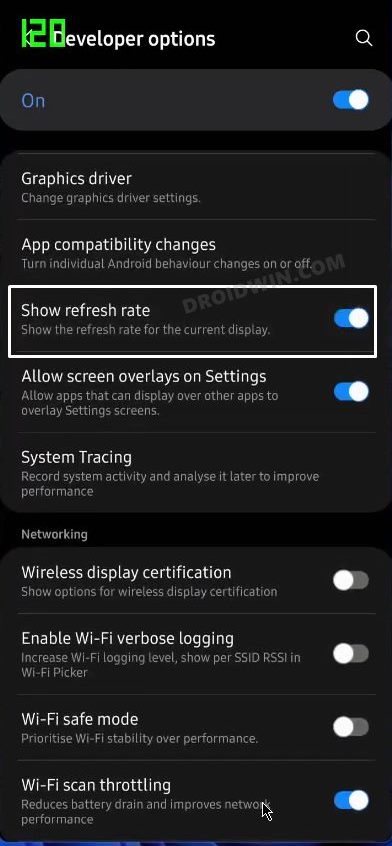
- After that, scroll to Show Refresh Rate (under Developer Options itself) and enable the toggle next to it. It will help us keep a track of the current refresh rate.
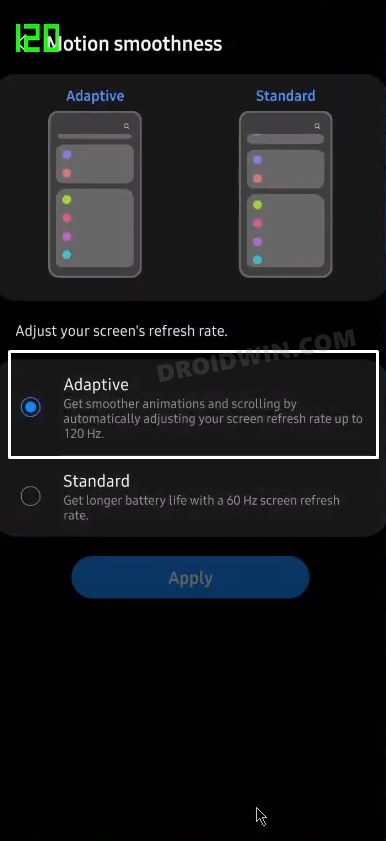
- Then go to Settings > Display > Motion Smoothness > Select Standard and then switch back to Adaptive.
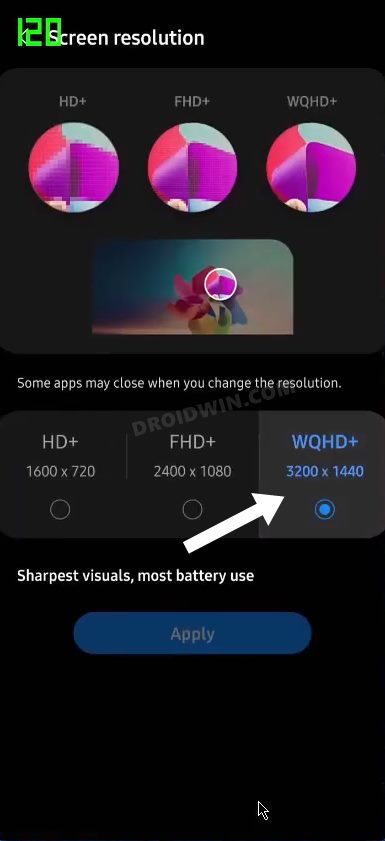
- After that, go to Screen Resolution and reselect WQHD+. This will refresh its settings.
- Now download and install the Quick Settings Tool app from GitHub. [Credits: XDA SeniorMember nishidh].
- Once installed, you wouldn’t see it in the app drawer. Rather it will straightaway go to Quick Settings.
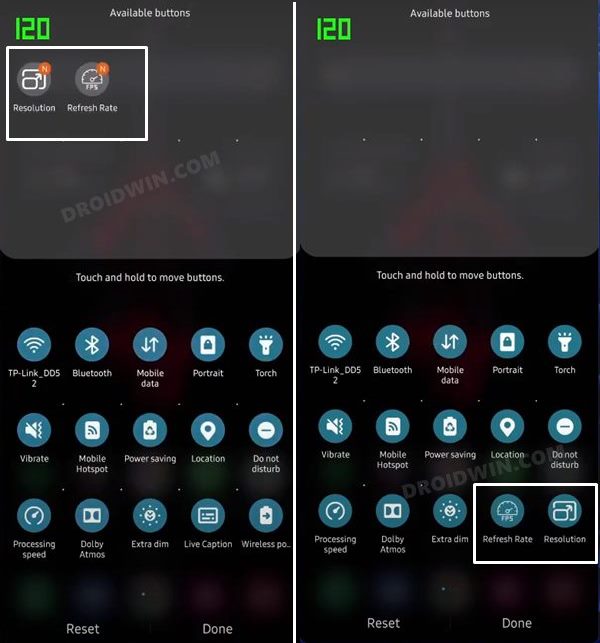
- So pull down the notification shade and tap on the Edit icon situated at the top right. You will see two toggles named Resolution and Quick Settings. Drag them down to the Quick Settings panel.
- You will now have to grant the app the necessary permissions. So download Android SDK Platform Tools and extract it onto your PC.
- After that, connect your device to the PC via USB cable. Make sure USB Debugging is enabled.
- Then head over to the platform-tools folder, type in CMD in the address bar, and hit Enter. This will launch the Command Prompt.
- Now type in the following command in the CMD window to grant the app the required permission
adb shell pm grant com.nss.ssettings android.permission.WRITE_SECURE_SETTINGS
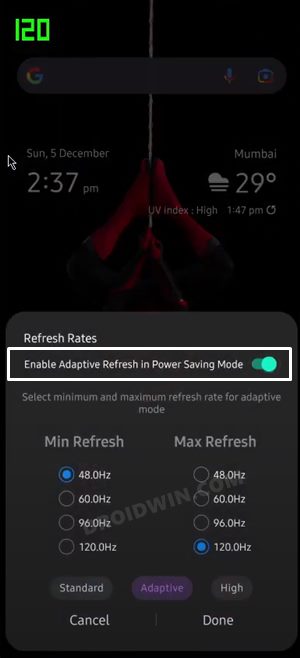
- Once done, tap on the Refresh Rate option from the Quick Settings menu and then enable the toggle next to Enable Adaptive Refresh in Power Saving Mode.
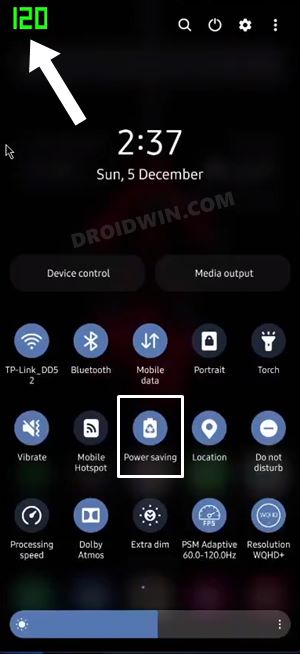
- Now enable the Power Saving Mode and then select 120Hz as the Maximum Refresh Rate.
- That’s it. Your device will now stay at this maximum rate even when the battery saver is enabled.


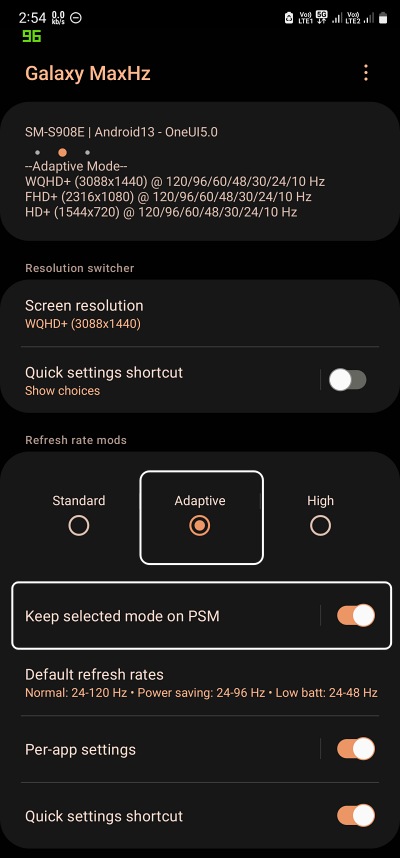
Method 2: Via Galaxy MaxHZ App [Paid]
- To begin with, download and install the Galaxy MaxHz app from GitHub.
- Then launch it and select Adaptive or High under Refresh Rate Mods.
- After that, enable the toggle next to Keep selected mode on PSM.
- Now carry out any “one” of these tweaks to implement this tweak:
- Do a dummy (fake) video call to any number using the native video call app OR
- Connect and disconnect to a WiFi display receiver (e.g. Smart TV, Chromecast) using the Smart View function OR
- Connect and disconnect to Samsung Dex on TV using an HDMI cable or Samsung Dex on PC using a USB data cable. Connect the phone and confirm the “Start now” prompt and disconnect once Samsung Dex has started.
That’s it. These were the two different methods to enable 120Hz Refresh Rate in Power Saving Mode in Samsung One UI 4/5. And as you might have noticed, you will also be able to use the Adaptive Refresh Rate in this Power Saving Mode. On that note, we conclude the tutorial. If you have any queries concerning the aforementioned steps, do let us know in the comments. We will get back to you with a solution at the earliest.


B v
Works amazing on s21 ultra android 12. May Allah bless you
Branislav
Try better cable and plugin into ur pc and set both to 120 hz
IvanPrskalo
It works for me on my S21 Ultra.
You need to know few tid bids about phone connectivity. For example, you need a proper DATA cable, not a charging cable. Preferably USB-c to USC-c cable.
Then when you actually connect your phone, and ALLOW sharing of data… don’t use what is there by default, but scroll down the notification tray and choose USB sharing in there.
Only then the CMD command will work.
Chris
Didn’t work on the s22 ultra
Ethan
How to do on Mac?
Marcus
Hello, I have carried out all the steps but 60 Hz remain in the power-saving mode. They stay even when I set the adaptive setting to 96-120 Hz. Please help me. Thank you very much.
Marcus
vdm
not working
Luke
It doesn’t work…
Amit Sharma
. And as you might have noticed, you will also be able to use the Adaptive Refresh Rate in this Power Saving Mode. On that note, we conclude the tutorial. If you have any queries concerning the aforementioned steps, do let us know in the comments. We will get back to you with a solution at the earliest.
This does not work for s20 plus one ui 4 Exynos India version
Please help.