In this guide, we will show you the steps to enable and use the Android 12’s much-talked-about Camera Switch feature on Android 11. The Google-owned OS comes baked in with a few accessibility features. These include the likes of Magnification, Color Correction, Text to Speech Output, Live Captions, among others. These features are mostly intended for people with disabilities so that it becomes easier for them to use their devices.
In this regard, there is now another pretty useful addition to this domain- Camera Switch. While it has only made its way with the twelfth iteration, you could also enable it in the predecessors. And in this guide, we will show you how to do just that. But first, let’s try and understand this feature and how does it work. After this, we will list out the steps to enable and use the Android 12’s Camera Switch feature on Android 11.
Table of Contents
What is Camera Switch in Android 12?
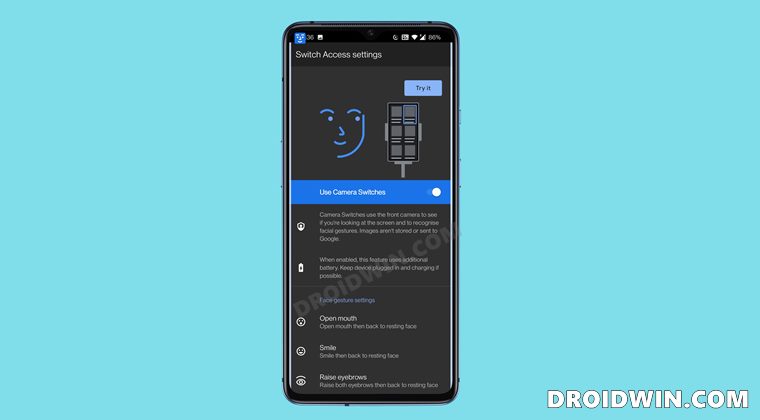
Camera Switch is the latest addition to the Accessibility feature in Android 12 that helps you to control various device elements directly via your face. For example, you could use the gestures to look left, turn right, smile, or open your mouth and in turn perform actions such as previous, next, pause, scroll up and down, etc.
All this is carried out by scanning your face via the device’s front camera. Furthermore, prevent any privacy scare, there will be an indicator as and when your front camera is being used for this purpose. With that said, let’s make you aware of all the facial gestures and the actions that are currently supported:
Facial Gestures
- Open Mouth
- Smile
- Raise Eyebrows
- Look Left
- Look Right
- Look Up
Actions
- Pause Camera Switch
- Toggle auto-scan (disabled)
- Reverse auto-scan
- Select
- Next
- Previous
- Touch & hold
- Scroll forward
- Scroll backward
- Home
- Back
- Notifications
- Quick Settings
- Overview
You could assign any of these actions to any of your preferred gestures. Furthermore, this list is non-comprehensive, we could see options being added in the near future. With this, you would have got a decent idea about this feature. Let’s now check out the instructions to enable and use Android 12’s camera switch feature in Android 11.
How to Enable Android 12’s Camera Switch in Android 11
Since Camera Switch is part of Android’s Accessibility feature, therefore the Android Accessibility Suite app installed on your device should be playing a major role. And indeed it does! This new feature is directly associated with the latest build of the Accessibility Suite app. So if you are on Android 11, all you need to do is just update this app to the latest build.
However, you wouldn’t be able to do this update via the Play Store as your device is still running the unsupported OS for this feature. Hence you will have to download this APK from a third-party site and then install it onto your device. As for this guide, we will be using the APKMirror, however, you are free to use any site of your preference.
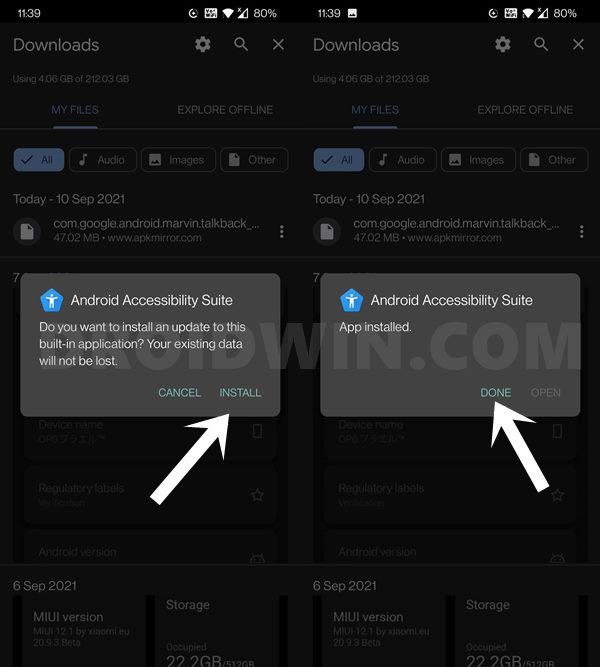
Once you have downloaded and installed the app onto your device, the Camera Switch stands enabled on your Android 11 device. You may proceed with the below instructions steps and start using it. The steps from now on will be the same for both Android 11 and 12. With that in mind, let’s get started.
How to Use Android 12’s Camera Switch in Android 11
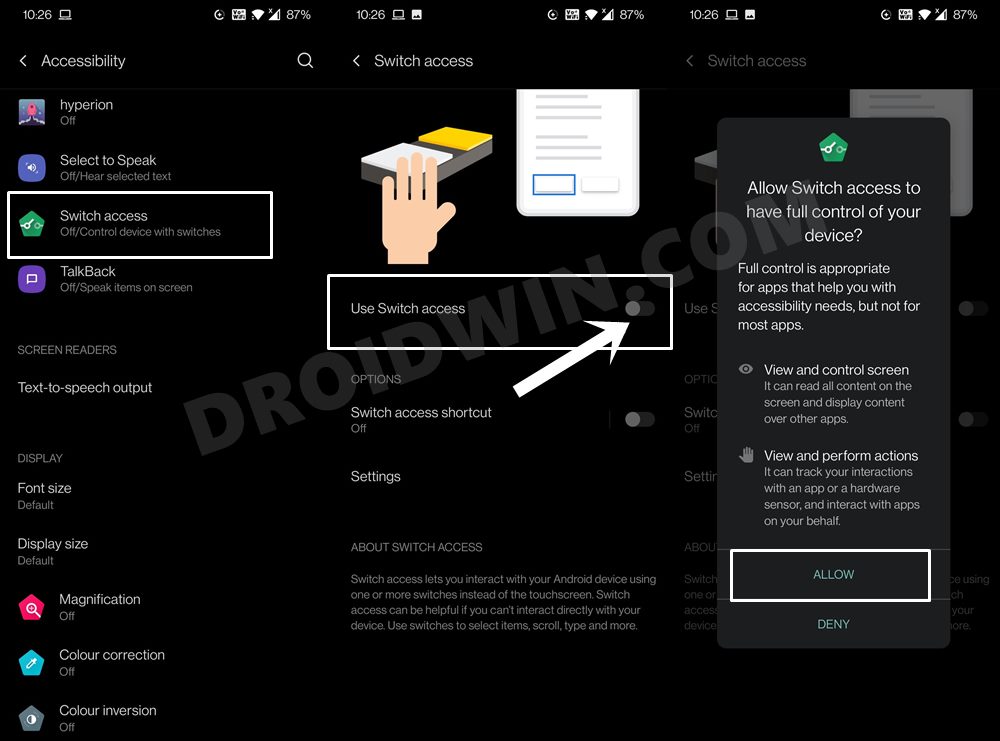
- To begin with, head over to Settings > System > Accessibility.
- Within that, go to Switch Access and enable the toggle next to Use Switch Access.

- Then tap on Allow in the permission dialog box that appears.
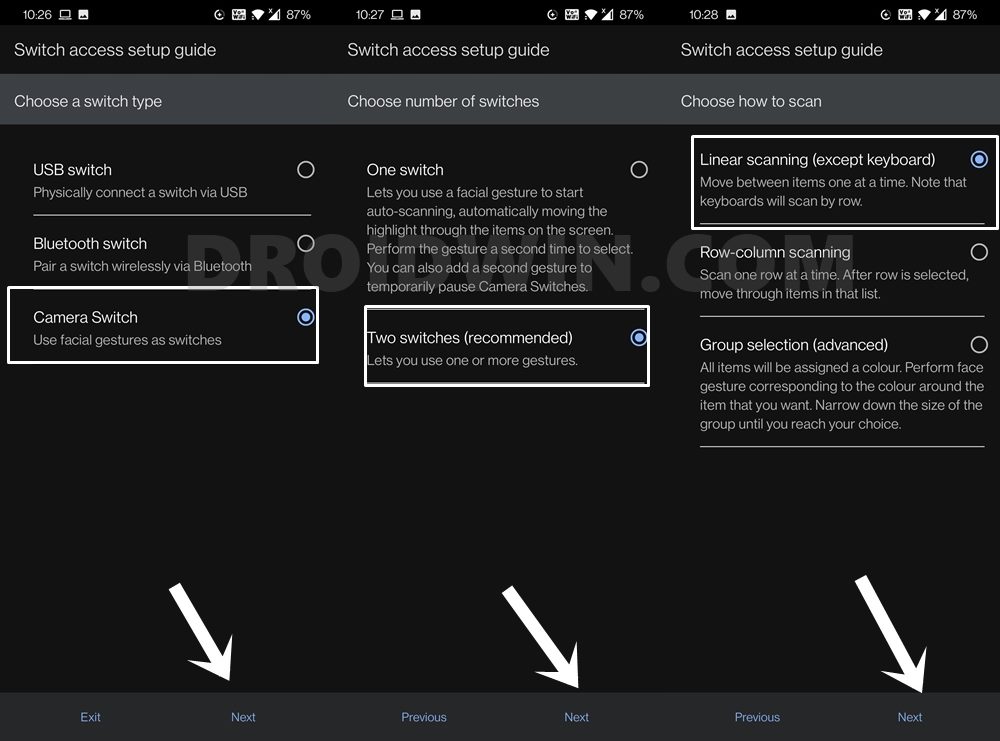
- Now select Camera Switch from the list and hit Next.
- After that, select Two Switches and tap Next.
- You will now have to select the Scanning Method. Go through all three, and then select the one that meets your preferences. As for this guide, we are proceeding with Linear Scanning.
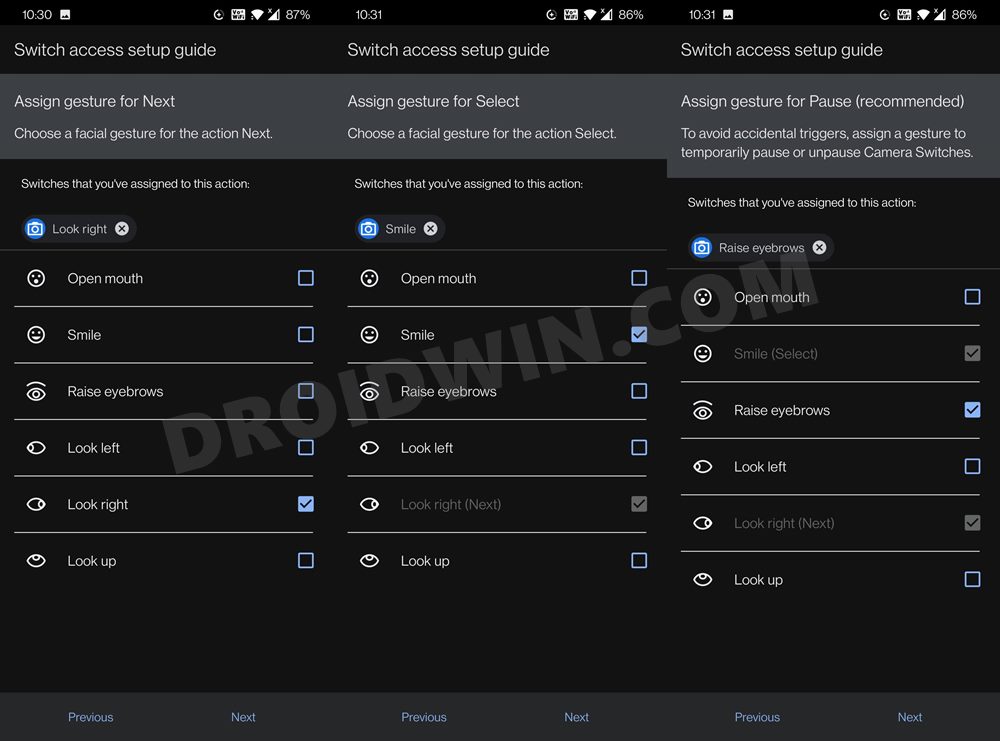
- Next up, you will now have to assign gestures for various tasks, beginning with Next, then Select and then Pause. You cannot assign the same gesture to multiple actions. For example, if you have assigned the Look right gesture to Next, then you cannot apply it for any other actions (Select and Pause).
- However, you could assign multiple gestures to a single action. For example, you could assign Open Mouth and Smile gestures to the Look right action.
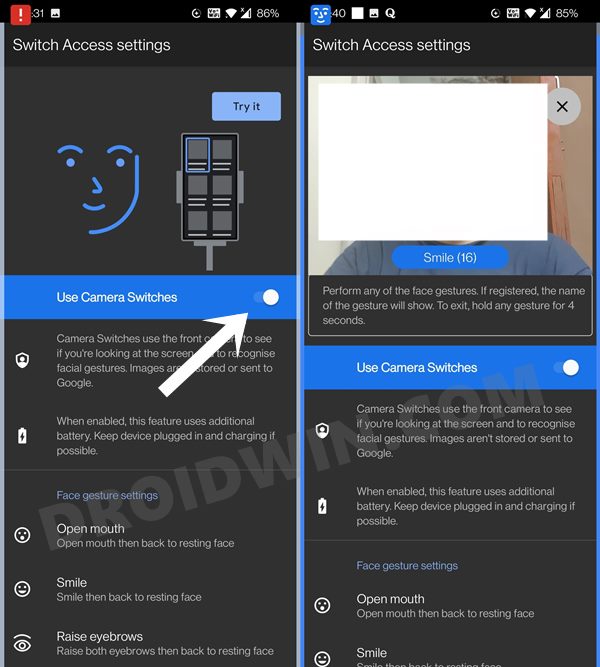
- Moving on, once you have completed the setup, you could put it to test via the Try Now button. So tap on that button and it shall bring up the front camera. Carry out the desired facial gesture by looking into the front camera and you will then be able to execute the associated actions.
That’s it. These were the steps to enable and use Android 12’s camera switch feature in Android 11. Do let us know your views about this feature in the comments section below.
FAQ: The Camera Switch feature is not working
The feature is still in a beta state and on top of that, we are using it on (currently) unsupported OS. So there are bound to be a few issues. In this regard, there might be a few instances when the front camera wouldn’t be activated. In that case, you should also see the red prompt on your device.

To fix this issue, all you need to do is disable the Use Camera Switch toggle, wait for a few seconds, and then re-enable it. The front camera as well as the feature will be up and running again. You should also see the blue logo indicating the same.


