In this guide, we will show you various methods to downgrade or rollback the Nvidia GPU Drivers to an earlier version on your Windows 11 PC. A driver is basically a software component that provides the base for establishing a successful connection between its associated hardware component and the OS. Along with that, it is also responsible for the efficient handling of this connection and to streamline the communication between the hardware and the operating system.
In this regard, the Nvidia drivers are a prerequisite for managing the Graphics drivers on your PC. it creates a bridge for the proper communication between the GPU and the Windows OS. Since these drivers communicate directly with the hardware, it is responsible and also influences whatever you see on the screen. Owing to all these reasons, it is always recommended to be on the latest version of the drivers. However, sometimes you might have to deviate from what is documented in the papers and check out how it fits in the practical aspect.
For example, there have been a few instances when an update to these drivers has broken the normal functionality of an app, software, or game. Along the same lines, the developers might also release a buggy update (though it’s a rarity with Nvidia) and could take a few days before it rolls out a patch for the same. So in all those scenarios, your best bet is to downgrade or rollback the Nvidia GPU Drivers to an earlier version on your Windows 11 PC. And in this guide, we will show you how to do just that. Follow along.
Table of Contents
How to Downgrade/Rollback Nvidia GPU Drivers on Windows 11

There exist two different methods to carry out the said task. While there exist quite a few third-party apps that do this job, we wouldn’t be using them. Rather we will be doing the downgrade on our own, across both these methods. As to which one you should opt for, it is recommended that you go through both these methods once and try out the one that is in sync with your system requirement. So on that note, let’s get started with the instructions to downgrade or rollback the Nvidia GPU Drivers on Windows 11.
Method 1: Using Device’s Manager Roll Back Option
It is the shorter and easier of the two methods and would do the job in just a few clicks. However, not many users might be able to use this feature as the option might be greyed out for them (explained later). Anyways, let’s check if the option is present in your PC and if it is, then let’s make full use of the same.
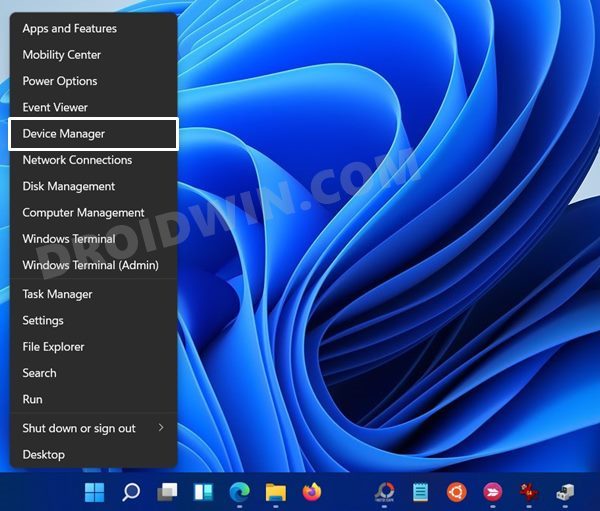
- Right-click on the Windows icon present on the taskbar and select Device Manager.

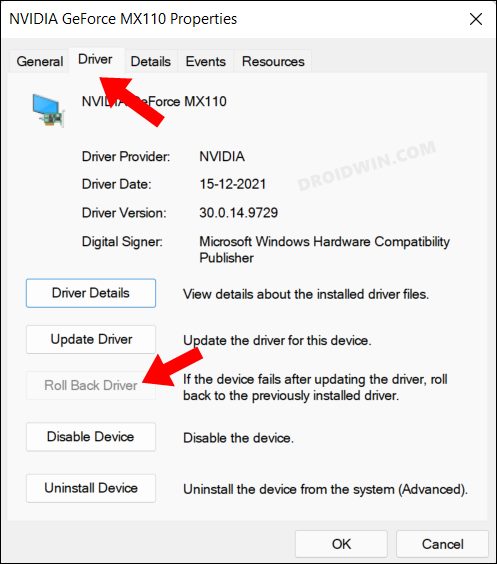
- Then expand the Display Adapter section, right-click on your Nvidia drivers, and select Properties.
- Now go to the Driver tab and click on the Roll Back Driver button.
As evident, this didn’t work out for me - Windows will now install the older build of that driver. Once done, it is highly recommended to restart your PC.

This was the first method to downgrade or rollback the Nvidia GPU Drivers to an earlier version on your Windows 11 PC. If this approach didn’t spell out success for you because the roll back button was greyed out, then do check out the second method given below.
Method 2: When Roll Back Driver Option is Greyed Out
Windows will only be able to rollback to an earlier driver version if your PC has it in the first place. However, if you have uninstalled the currently installed drivers or this is the first time you are performing this downgrade, then there will be no earlier versions of the GPU drivers to which your PC could rollback. As a result of this, the roll back button is greyed out under Device Manager. So to rectify this issue, you will have to manually download and install the older GPU drivers versions on your PC. Here’s how.
STEP 1: Check Driver Name/Version/Type
To begin with, you will have to get hold of some important information pertaining to the drivers installed on your PC. So refer to the below instructions to get started.
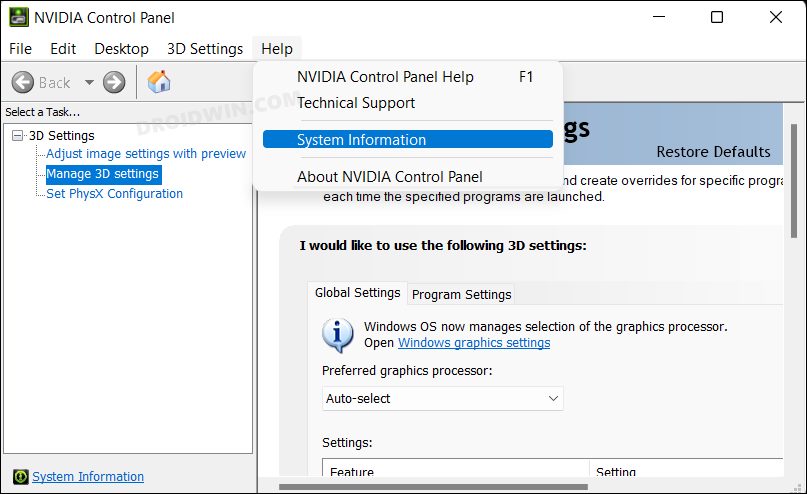
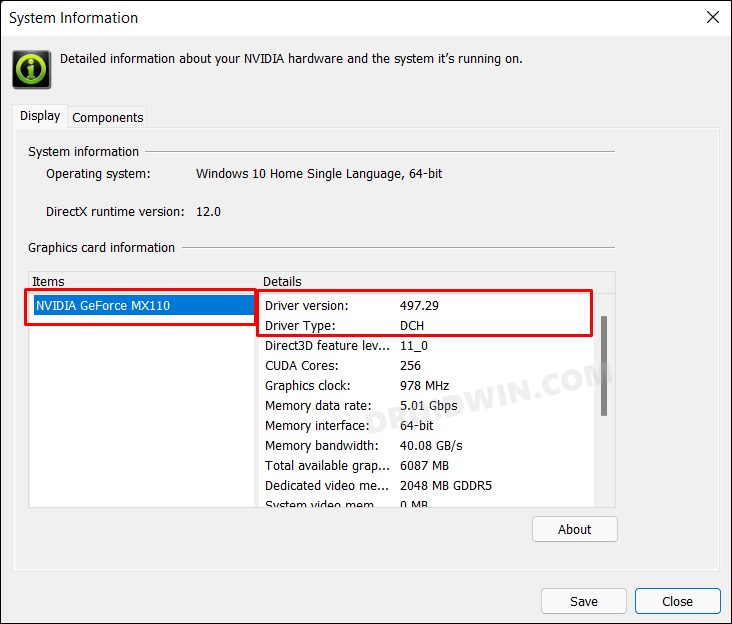
- Head over to the Start Menu, search Nvidia Control Panel, and open it [Cannot Open? Check This Fix].
- After that, click on Help and select System Information from the drop-down menu.
- Now note down your Graphics Card name under the Items section.
- Likewise, take a note of Driver Version and Driver Type as well.
STEP 2: Download Nvidia GPU Drivers Rollback Driver
You will now have to download an earlier version of the Nvidia GPU Drivers. Here’s how it could be done:
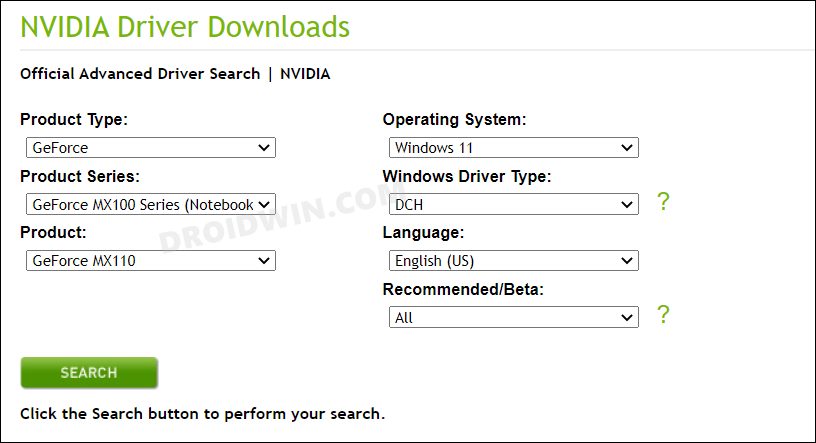
- To begin with, head over to the Nvidia GPU Drivers Rollback Driver page.
- Now select the options from the drop-down exactly how you noted from Nvidia Control Panel.
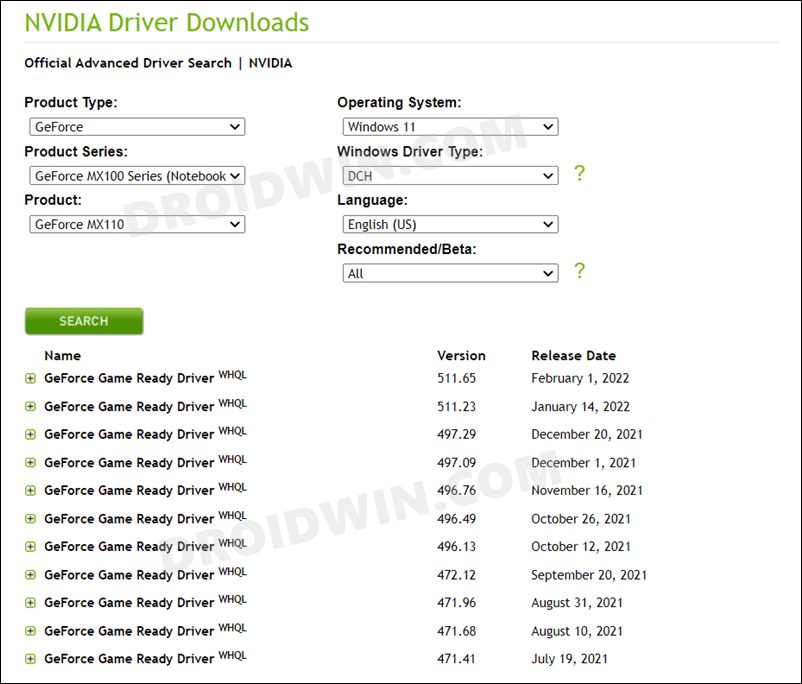
- Then click on the Search button. It will bring up the previous driver files corresponding to the information that you had provided.
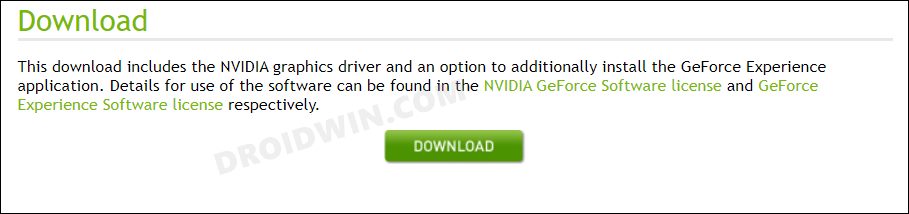
- Select the version of your choice and click Download.
- Again, click on the Download button and wait for the file to get downloaded.

STEP 3: Install Nvidia GPU Rollback Drivers
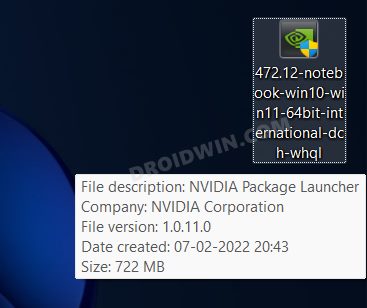
- To begin with, double-click on the downloaded EXE file to launch the setup.
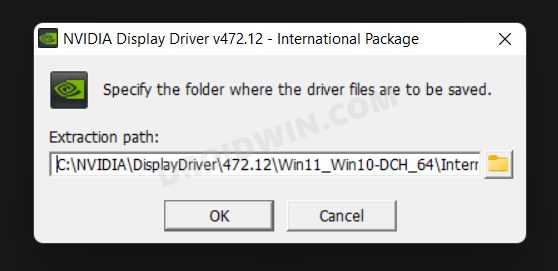
- Then select the directory where you wish to extract the rollback drivers.
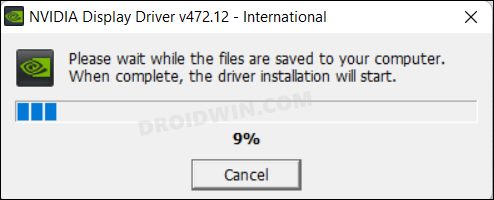
- Wait for the extraction to complete. Once done, it will bring up the installation screen.
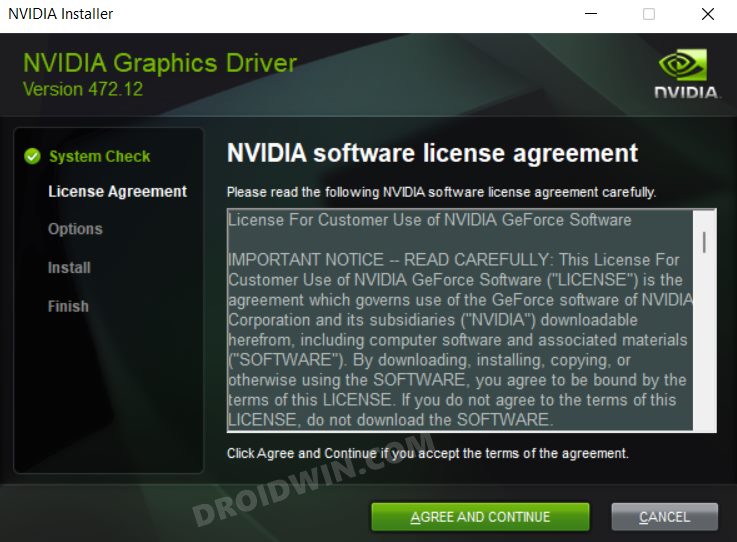
- Agree to the Terms and Conditions by clicking on the Agree and Continue button.
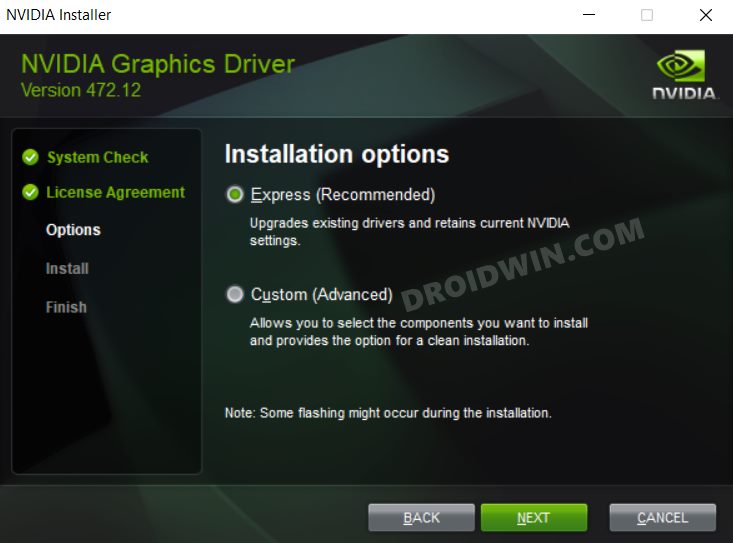
- If you wish to just get the job done without any tweak, then select Express Install and hit Continue.
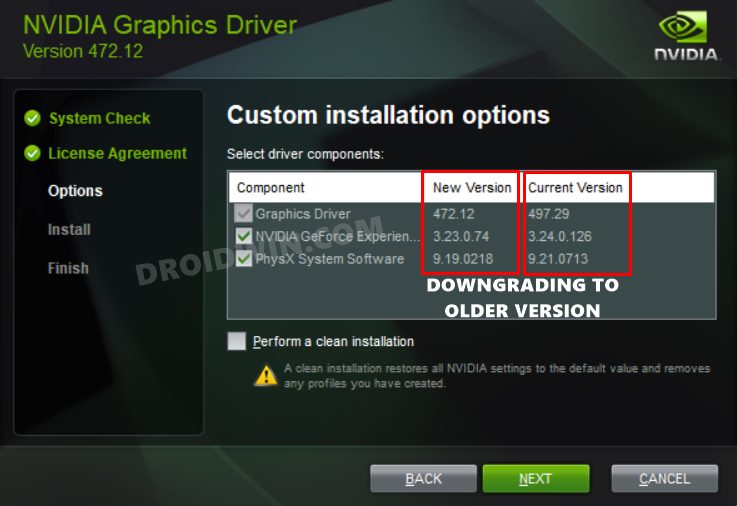
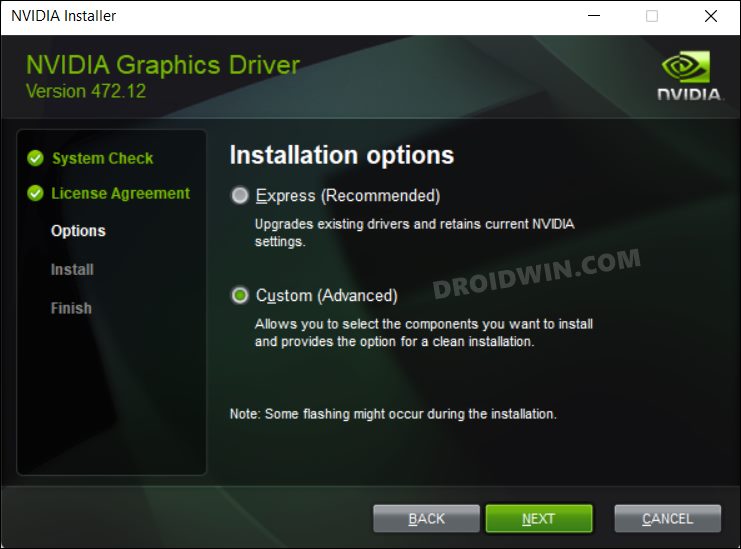
- On the other hand, if you want granular controls over the rollback process, then select Custom Install.
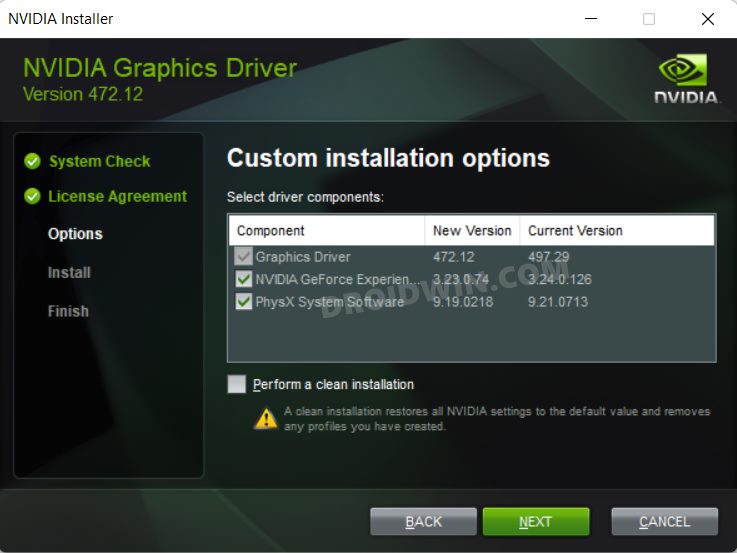
- After that, checkmark all those required driver software that you wish to downgrade. Moreover, if the current drivers were corrupted or you were facing display-related issues, then you could consider choosing the ‘Perform a Clean Install’ option as well.
- The driver downgrade process will now begin and could take a while, depending on the installation type you selected.
- Once the process is completed, you will be notified of the same. When that happens, you should restart the PC for the changes to take place.
That’s it. These were the two different methods to downgrade or rollback the Nvidia GPU Drivers to an earlier version on your Windows 11 PC. If you have any queries concerning any of these two methods, then do let us know in the comments. We will get back to you with a solution at the earliest.


