In this guide, we will show you the shortest way through which you can change your Windows login name. As soon as your PC boots up, the first thing that you notice is the spotlight image but right after that is your login name. In this regard, some users have said that they set up their shorter or even a random name during the initial setup screen thinking that they could customize it later on. However, they are unable to do so.
If they head over to the Control Panel > User Account, then they do see quite a lot of options related to their current account type. However, the ability to change their Windows login name isn’t present there. So what else could be done? Well, you could either head over to your Microsoft account and change your name there and the same will be reflected here. But not only that would require an active internet connection but it is also a slightly longer approach.
So keeping this method out of the way, this guide will show you a nifty workaround using which you could easily get this job done in literally under 10-15 seconds and that too without going online. Here’s how.
How to Change your Windows Login Name?

- Bring up the Run dialog box via Windows+R shortcut keys.
- Then type in control userpasswords2 and hit Enter.
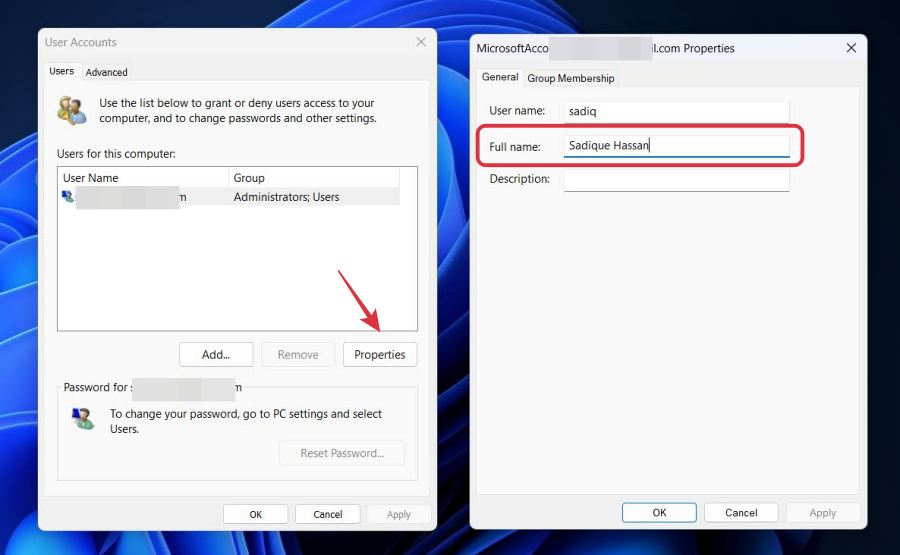
- Now select your account from the list and click Properties.
- Finally, type in the desired new name under Full Name and hit OK.

That’s it. These were the steps to change your Windows login name. If you have any queries concerning the aforementioned steps, do let us know in the comments. We will get back to you with a solution at the earliest.


