In this tutorial, we will show you how to get a temporary blue tick on your Instagram account. It doesn’t matter what type of account you have or the number of followers. Well, the benefits and perks of getting the verified badge are aplenty. We won’t be digging deep into all this, as you might already have this knowledge. Similarly, it is no hidden secret that getting a blue tick is no easy task as well. But fret not.
Today, I will show you how to add a blue tick next to your Instagram account name. Let me make it clear at the beginning itself. It is just a temporary hack and will be gone once you refresh the browser. So once you have added the temporary verified badge, take a screenshot and brag it off on various social media sites! With that said, here are the required instructions. Follow along.
Also Read: How to Send Fake Live Location on WhatsApp
How to Add a Blue Tick in Instagram
You would need a web browser and a PC for this trick. As far as the browser is concerned, anyone will do. We have tried the trick on Google Chrome and Microsoft Edge (Chromium), so it will be better if you attempt on any of these two (not compulsory, but recommended). Now follow the below steps:
- Launch the Google Chrome browser on your PC.
- Open Instagram and log in with your credentials.
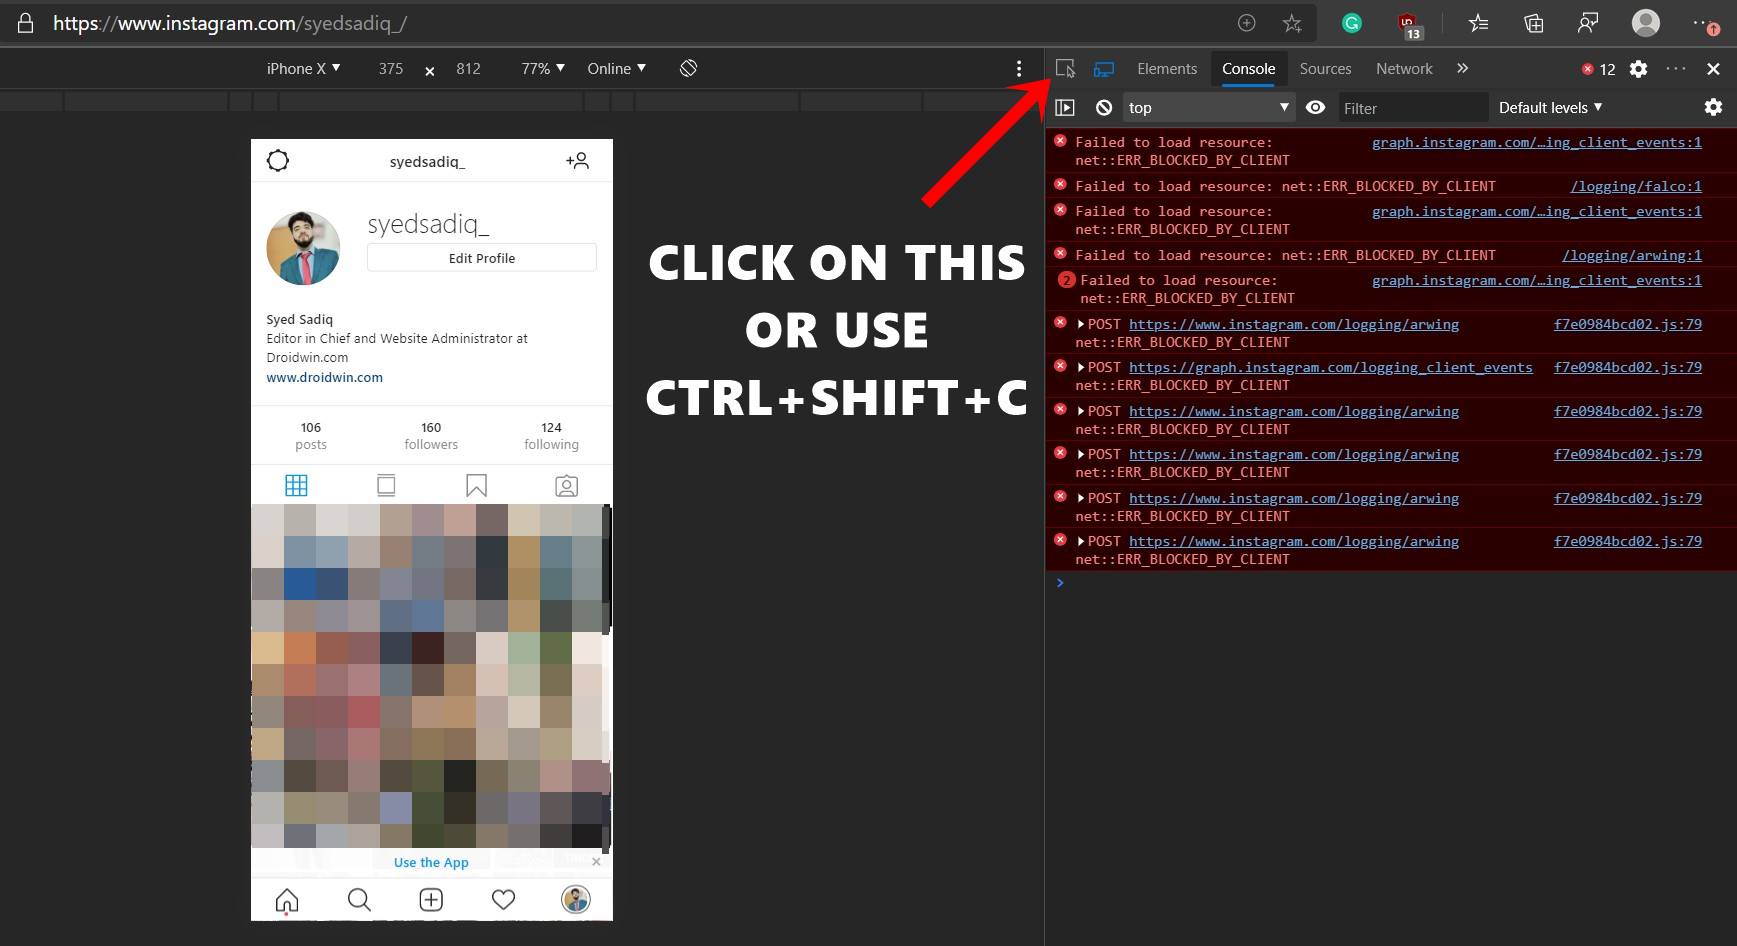
- Now press the Ctrl+Shift+I keyboard shortcut keys to launch the Developer Tools. You could also access the same by clicking on the overflow icon (the three vertical dots) situated at the top right and select More Tools > Developer Tools.

Instagram in Console Window - Once inside the Developer Tools, you now have to click on the element selection tool. It is the left-most icon (see below image). Or you could also use the Ctrl+Shift+C shortcut key combinations.
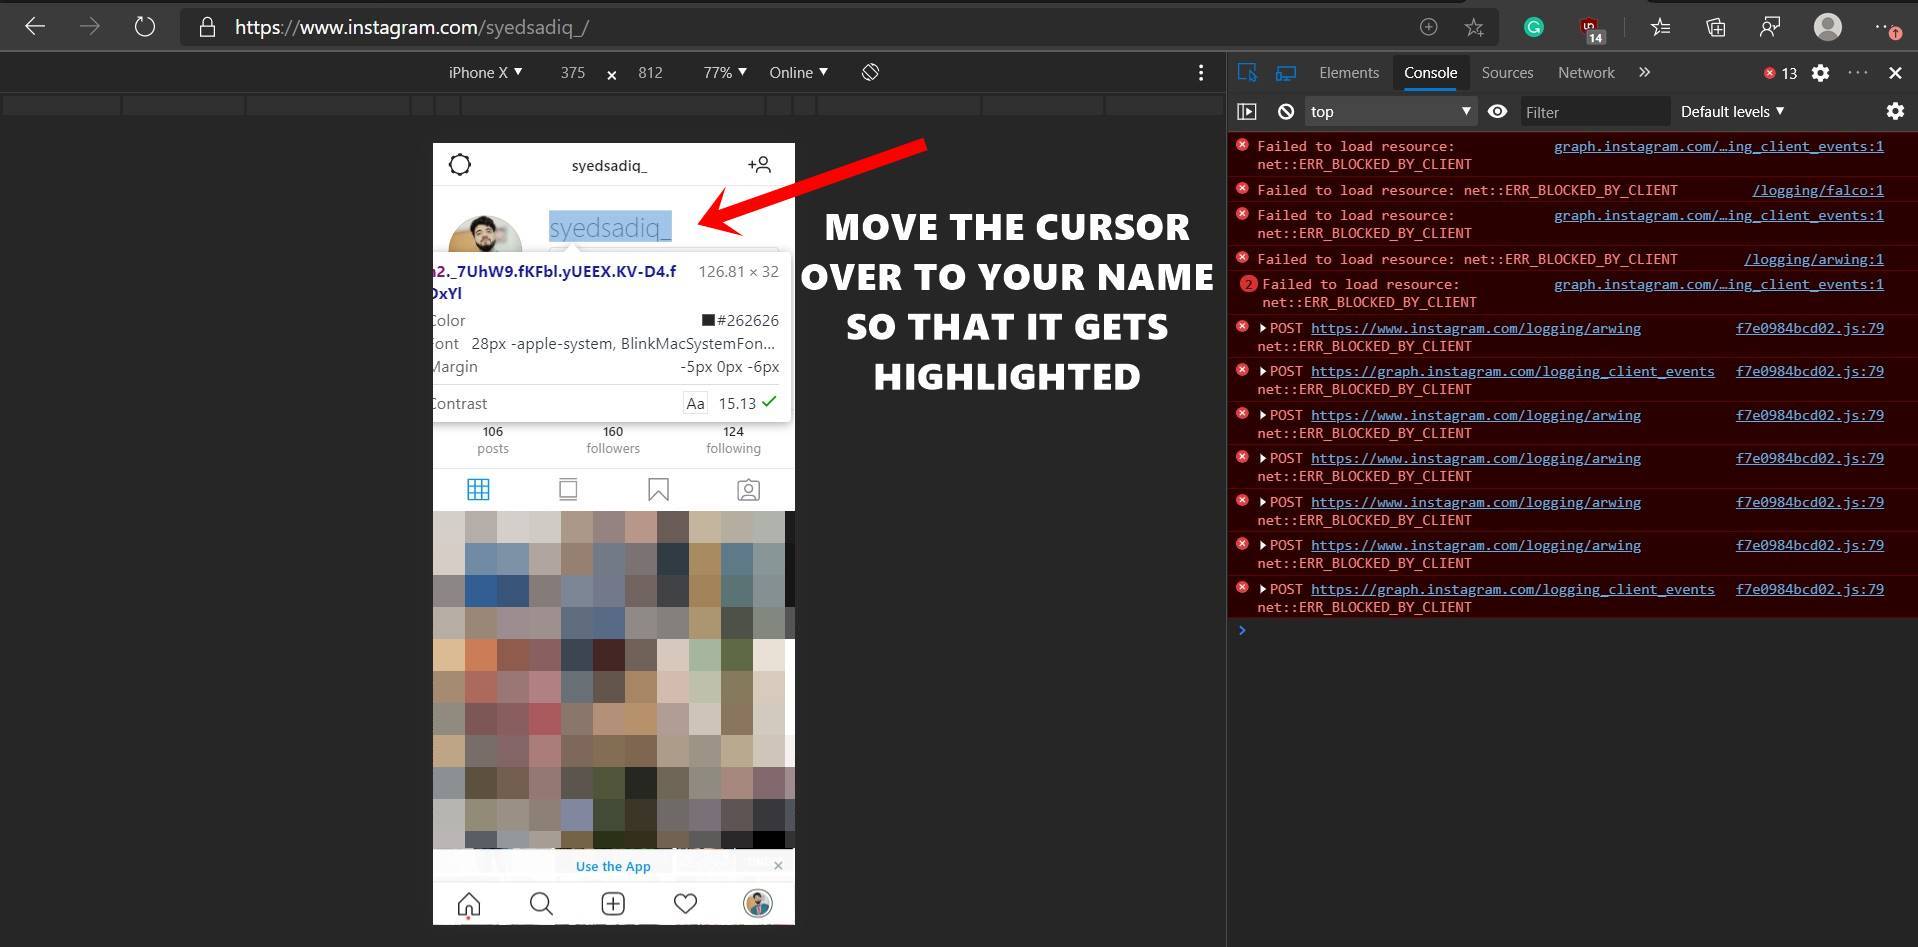
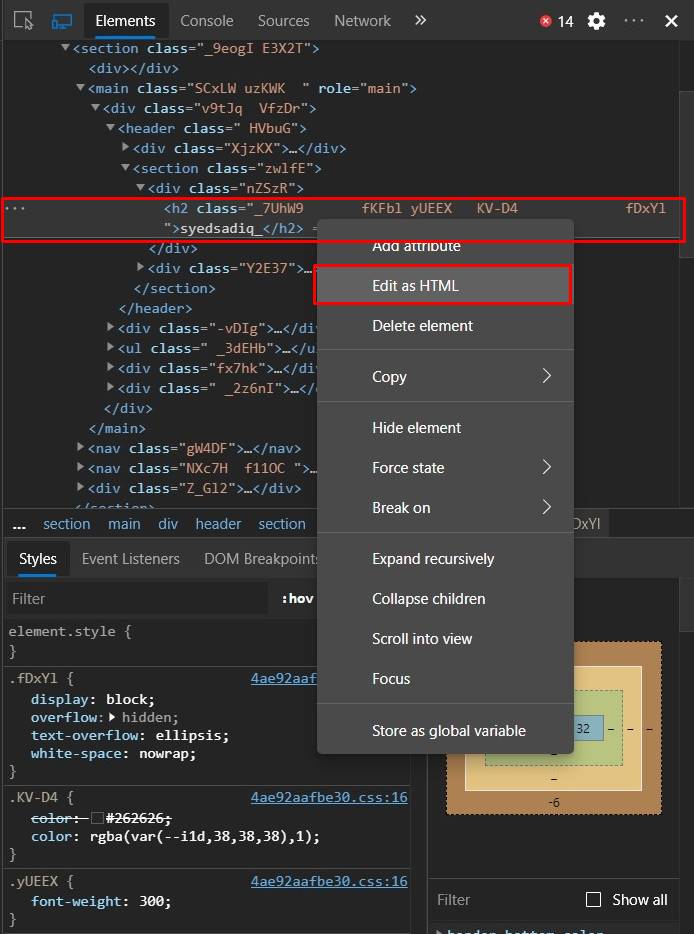
- Now place the cursor over to your username so that it gets highlighted.
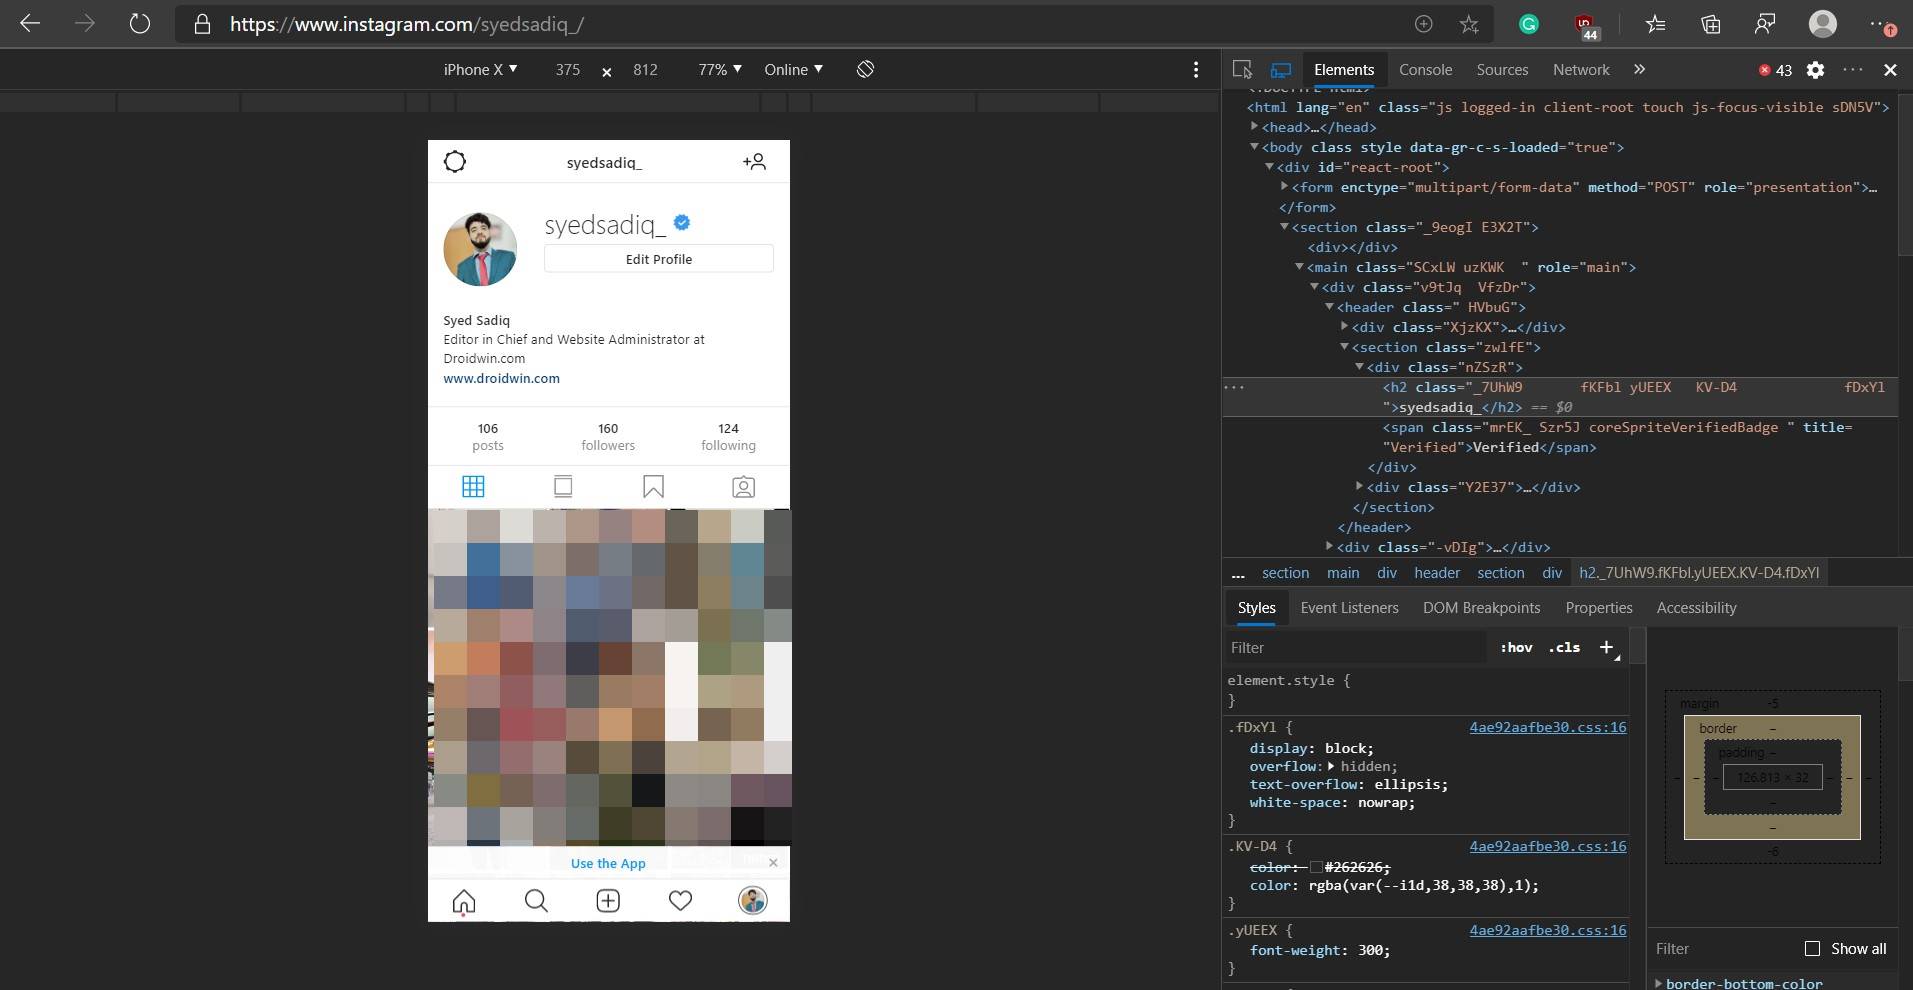
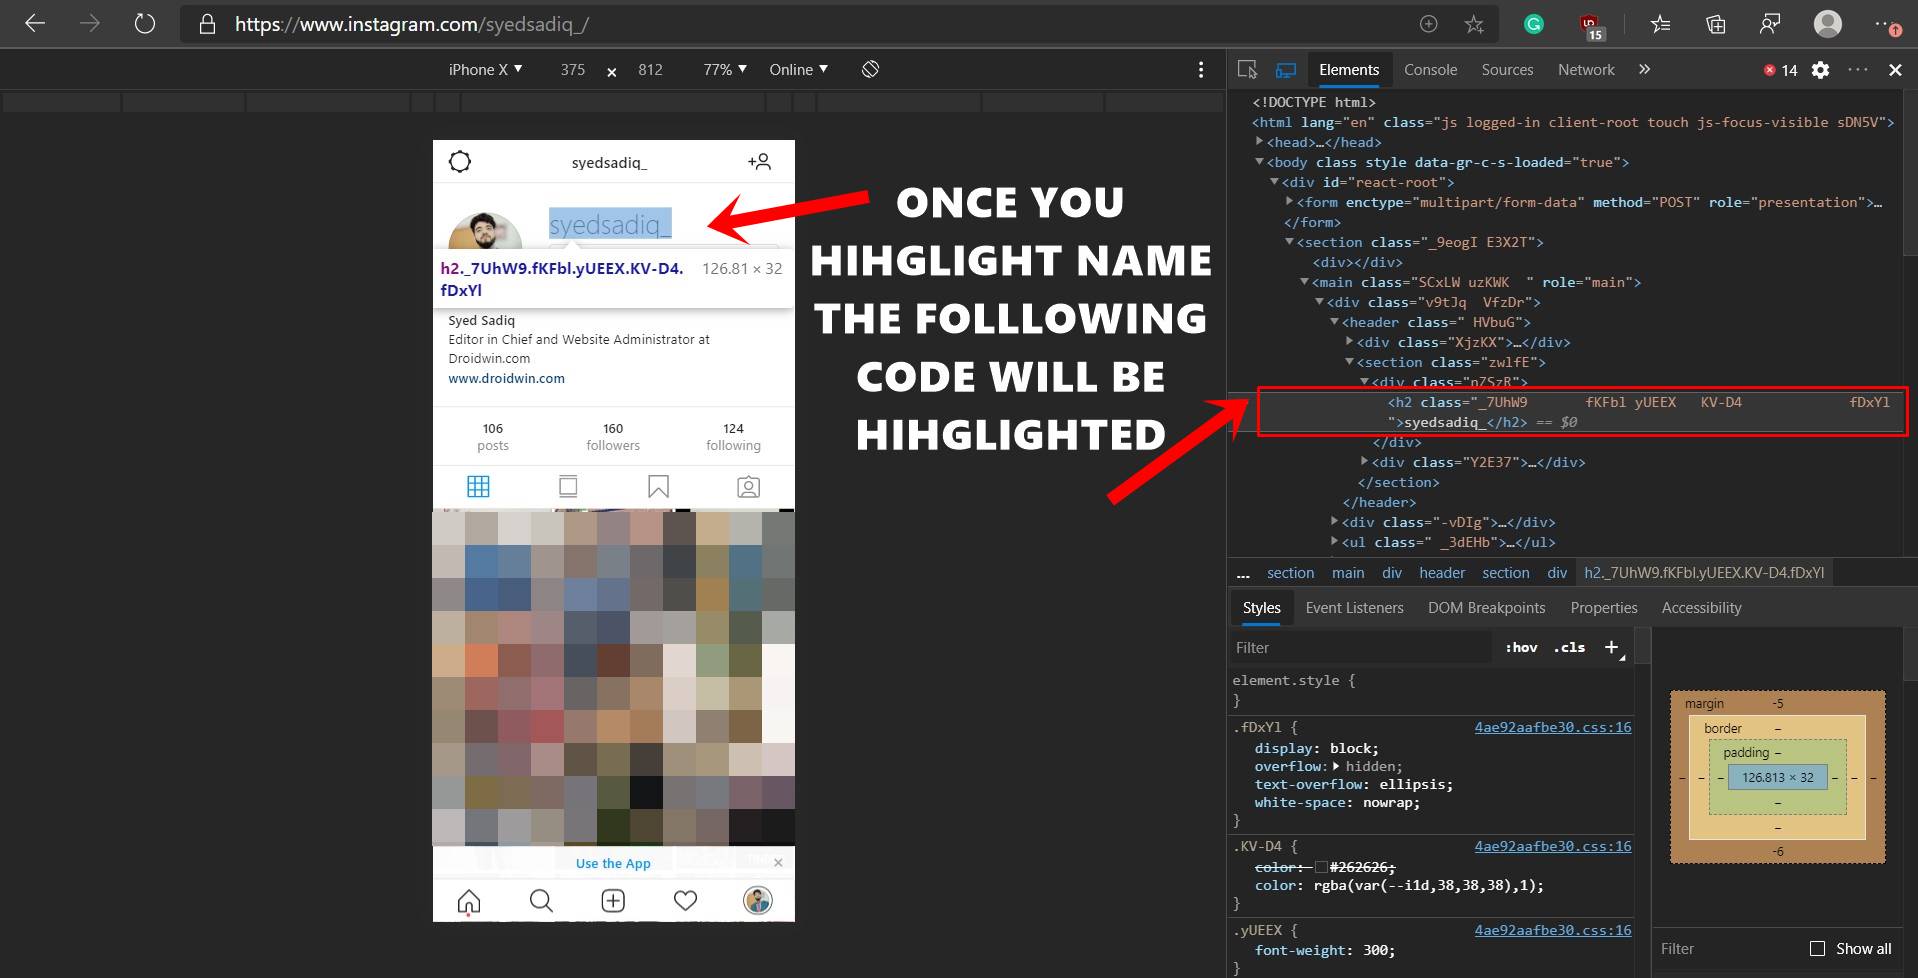
- As soon as that happens, you should see the following codes getting highlighted (instead of syedsadiq, the code will have your username, rest should be the same). See the below code or the attached image.
<h2 class="_7UhW9 fKFbl yUEEX KV-D4 fDxYl ">syedsadiq_</h2>
- Now right-click on that code and select Edit as HTML.
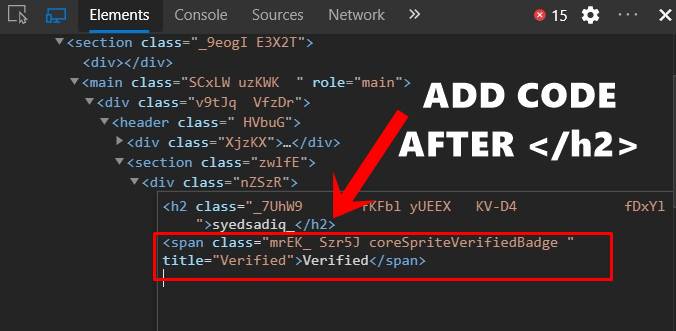
- Now add the following codes right after </h2>. See the attached image after the code for reference.
<span class="mrEK_ Szr5J coreSpriteVerifiedBadge " title="Verified">Verified</span>
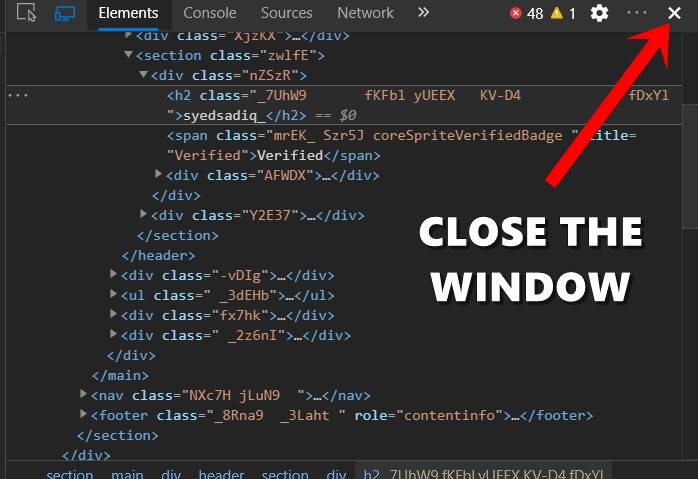
- Once the code has been added, you could hit the Close button situated at the top-right. That’s it!
You now have a temporary blue tick on your Instagram account. Now the next thing you should do is take a screenshot. If you are on Windows laptop or PC, use the Windows+Shift+S shortcut key to launch the Snipping Tool and take the screenshot of the desired region. And while bragging it off on your desired social media channels, don’t forget to tag us as well.
As far as its longevity goes, as soon as you refresh the page, all the codes get back to the normal and hence the tick will be removed. If you keep this page opened forever, the tick will remain forever! On that note, if you can’t see the verified badge, then maybe you missed an important point or two. Do let us know your queries in the comments section below. We will revert with a solution asap.


_mr_ahkam
Please 🙏 give me blue tick
I recvest
_mohit_don_5911
Blue tick dedo bhi
Rb smart
Blue tik
Muneeb
I want blue Tick
Adhyayan Kumar
Please may u verify my account i m unable i tried 20 times.
Ashley
Dude thx! ik is only visual but hey! can troll people.
Sadique Hassan
Yup, this is just for that 😀
suresh
i want blue tick forever
Fozo
Hello this is my Instagram account anonpacks please make it to be verified thanks
Aadil
contact me on insta @mr_aadil0.0
Ashish Kumar
Free ??
Sadique Hassan
Well, for that you will have to take the official route. Here’s the official Instagram blog post outlining the steps for the same: Verified Badges