In this guide, we will show you the steps to officially disable the Windows 11 license check for a considerable time frame. The latest iteration of the OS has bought in quite a few intriguing features, with the plentitude of UI changes managing to grab most of the limelight. Owing to all these, this time we saw quite a few users getting enrolled themselves in the developer and beta builds than ever before.
However, some users are currently getting bugged with the “Your Windows license will expire soon error” message on their Windows 11 PC. The point is they are already aware of their PC’s Windows expiry date and doesn’t want to get constantly notified of the same. If you are also on the same page and wish to disable the Windows 11 license check, then this guide is here to help you out. Follow along.
How to Disable the Windows 11 License Check, Officially!
The OS comes with an Update service file that is responsible for detecting the currently installed Windows build, checking pending Windows updates, and subsequently initiating the process of downloading and installing the latest updates. And as you might have guessed, we will simply disable this service. Doing so will prevent Windows from performing the check for the current OS build’s license expiration date.
However, before you proceed ahead with the steps to disable the Windows 11 License check, let’s make you aware of the negative consequence of this method. Upon disabling this service, you will stop receiving features and security updates from Microsoft. As a result, your PC would be at risk and more prone to attacks, viruses, and other malicious programs. So only proceed ahead with the steps to disable the Windows 11 license check if you understand the associated risk as well.
Instruction Steps
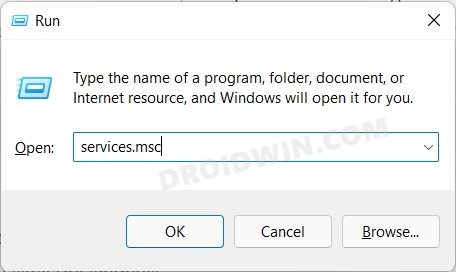
- To begin with, use the Windows+R shortcut keys to open the Run dialog box.
- Then type in the below command and hit Enter. It shall open the Services menu.
services.msc

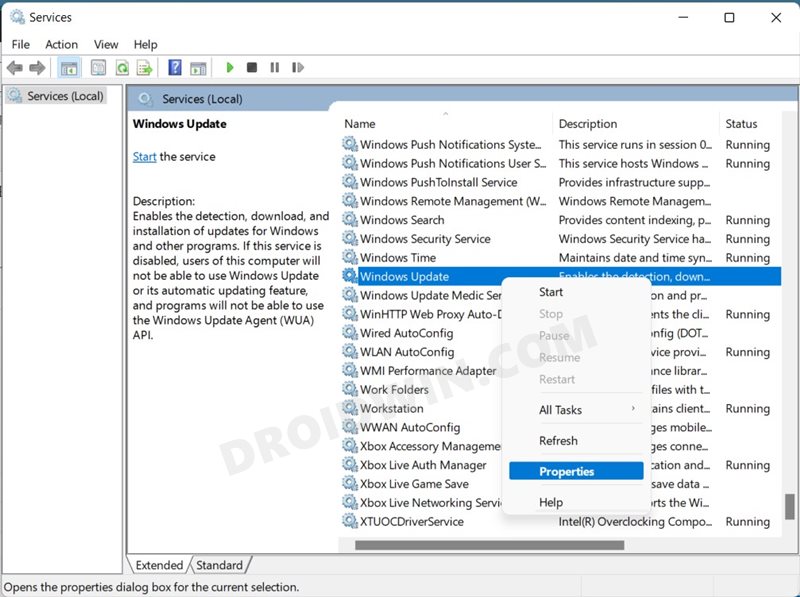
- Now scroll to Windows Update, right-click on it, and select Properties.
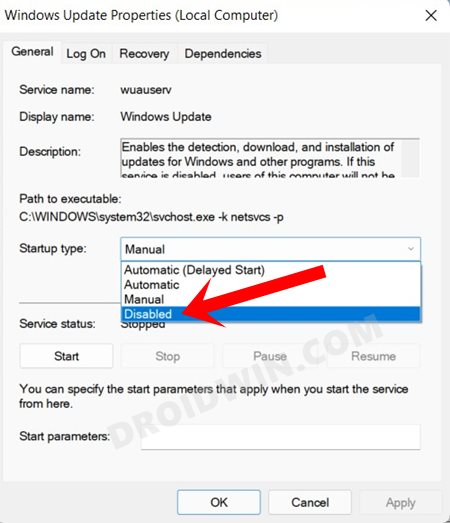
- Go to its Startup section and change its Startup Type to Disabled.
- Finally, click Apply > OK to save the changes.
- Now just restart your PC once for the changes to take place.
That’s it. These were the steps to officially disable the Windows 11 license check. If you have any queries concerning the aforementioned steps, do let us know in the comments. We will get back to you with a solution at the earliest.