In this guide, we will show you the steps to take ownership of the Temp folder on your Windows 11 PC. There have been a few users’ queries that they are unable to access the Temp folder on their PC. For some, the issue is all the more challenging as well as intriguing as they are logged in via an administrator account and even then are unable to access the said folder. So why is that the case? Well, it is because they don’t have explicit permission to access that folder.
Having administrative access gives you the gateway to access most of the files and folders on your PC, but not all. And the temp folder lies in the second category. So you will have to take ownership of the Temp folder on your Windows 11 PC. Once you do so, you will be in a position to access the contents of that folder, delete or modify the files that it beholds, or even change its permissions. So on that note, let’s check out how this could be carried out. Follow along.
How to Take Ownership of the Temp Folder in Windows 11

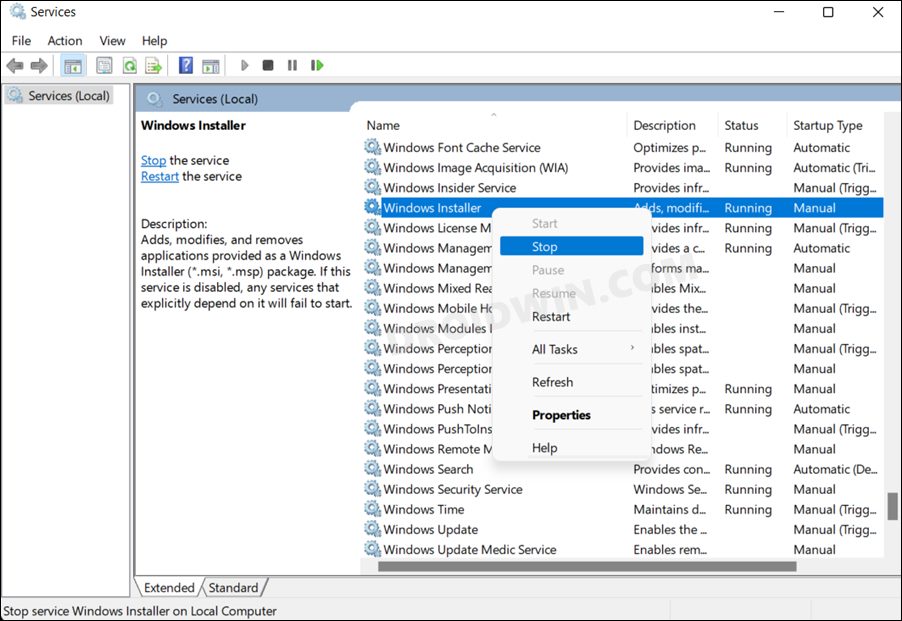
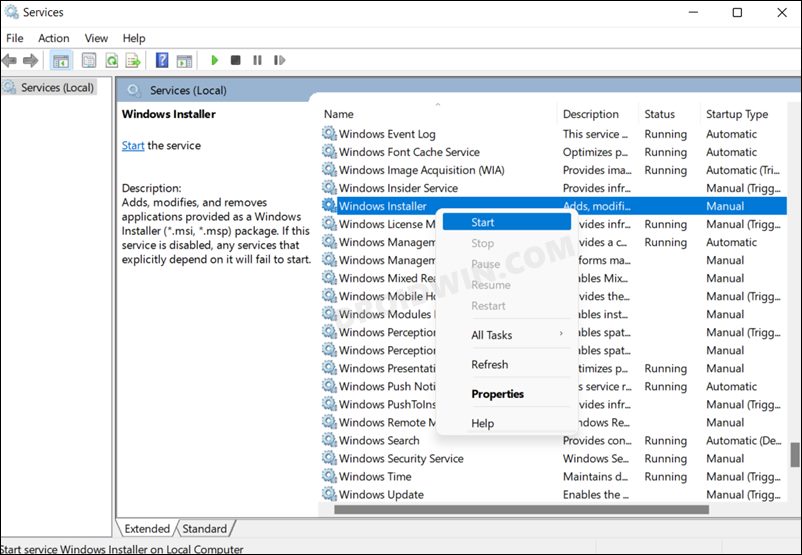
- Head over to the Start Menu, search Services, and open it.
- Then select the Windows Installer service, right-click on it and select Stop.

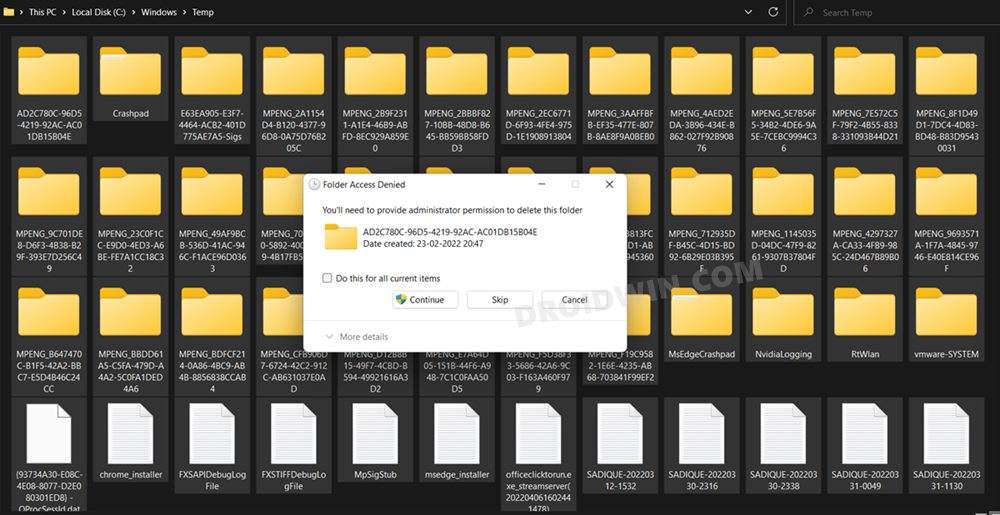
- Now open File Explorer via Windows+E shortcut and head over to the below location:
C:\Windows\Temp
- Use the Ctrl+A shortcut to select all the files and hit the Del key to delete them [skip the files that can’t be deleted].
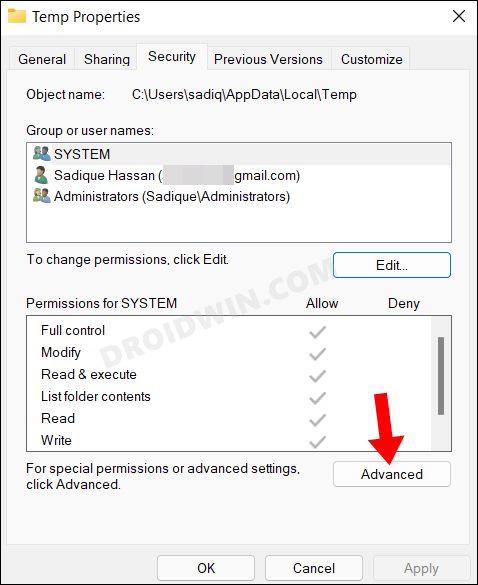
- After that, go to the following location [replace username accordingly]:
C:\Users\Username\AppData\Local
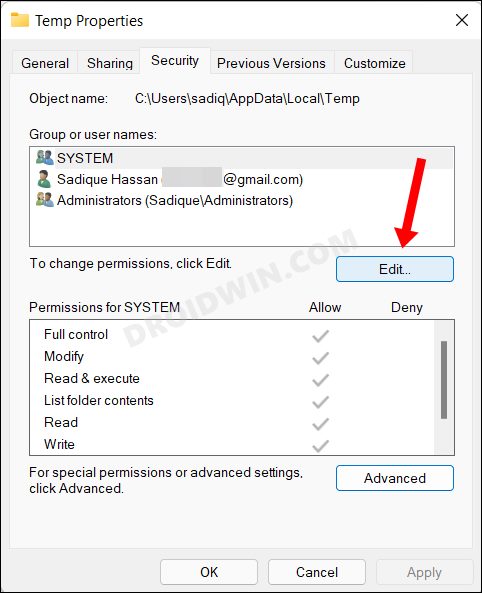
- Then right-click on the Temp folder and Properties. Now go to its Security tab and click Advanced.
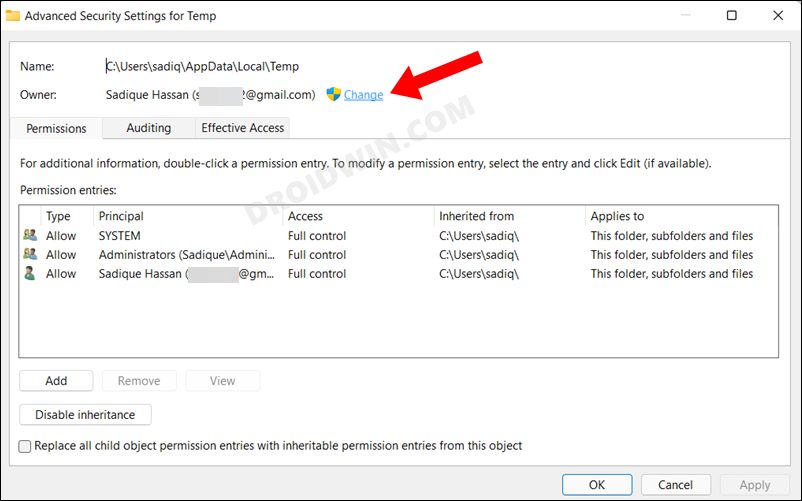
- Click on Change next to Owner.
- Type in Everyone and click on Check names, it should get underlined. So click OK to save it.
- After that, go back to the Temp Properties menu and click on Edit.
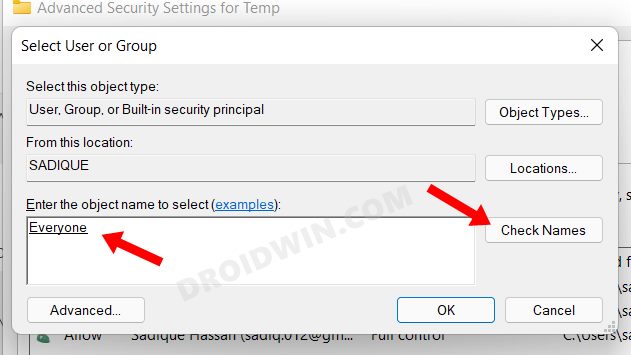
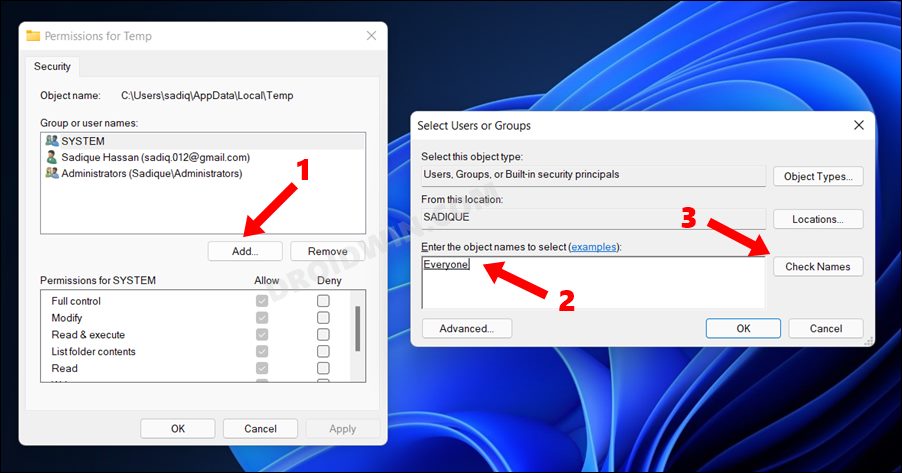
- After that, click on Add. Type in Everyone and click on Check names. Click OK to save it.
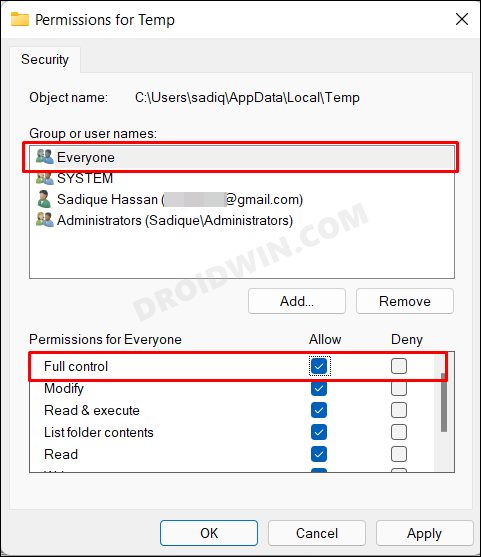
- Now select Everyone under Group or System name and checkmark Allow next to Full Control. Click OK to save the changes.
- Next up, open the Services menu, right-click on the Windows Installer service, and select Start.
- Finally, restart your PC and you will now have ownership of the Temp folder on your Windows 11 PC.
So on that note, we round off this tutorial. If you have any queries concerning the aforementioned steps, do let us know in the comments. We will get back to you with a solution at the earliest.


