In this guide, we will be sharing three different methods to open the WindowsApps folder in Windows 11. Generally, if you are having an administrator account on your PC, then you should be able to access all the system directories and files present inside the C Drive. However, in some instances, even being the administrator wouldn’t be sufficient enough to checkmark the required prerequisites.
The perfect example of the same is the inability of an admin to access the WindowsApps folder. Double-click on this folder and it will prompt you of insufficient privileges or in some cases, wouldn’t give out any notification as such. But why is the admin not able to access the contents of this folder? Well, this is because the WindowsApps folder is under the ownership of the built-in Microsoft user account called TrustedInstaller.
So if you are planning to access this folder, you will first have to transfer the ownership from the TrustedInstaller’s account over to your administrator account. And in this guide, we will show you three different methods to do the same. So follow along for the detailed instructions to open the WindowsApps folder in Windows 11.
- UWP Apps in Windows 11: Location, URI, Shortcut, Uninstall
- Where are the Windows 11 Default Icon Files Located
- How to Disable Online Search in Start Menu [Windows 11]
- How to Remove Ads in Windows 11
Table of Contents
Open the WindowsApps Folder in Windows 11 via Task Manager
This first method is the least technical of the three but calls for maximum effort. In this method, we will be manually opening the desired UWP app so that its processes get up and running in the background.
Then we will use the Task Manager to access that process’ file location. Doing so shall then directly take us to the WindowsApps directory, inside that Windows app’s folder. So without further ado, let’s put this trick to the test.
Instruction Steps
- To begin with, head over to the Start Menu and launch the desired Windows Store/UWP app (say, Groovy Music).
- Then launch the Task Manager via Ctrl+Shift+Esc shortcut key combinations.
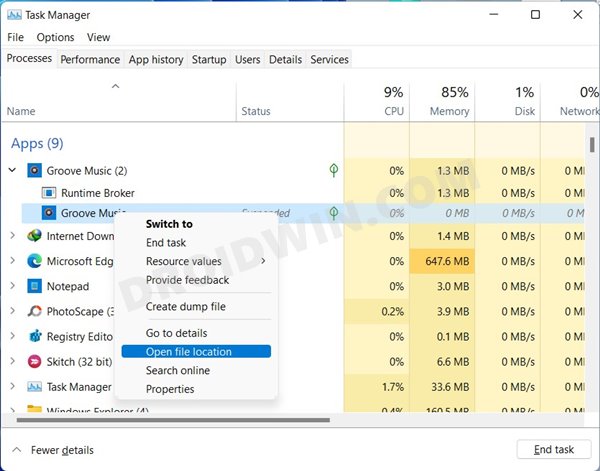
- Then go to the Processes tab and expand the Background Processes section.
- Now expand the app that you had just opened, right-click on any of its processes and select Open File Location.

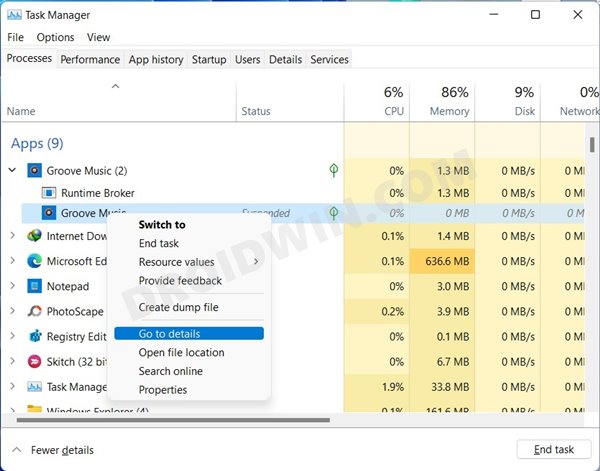
- However, if the Open File Location option is greyed out, then select the “Go to Details” option from the right-click menu.
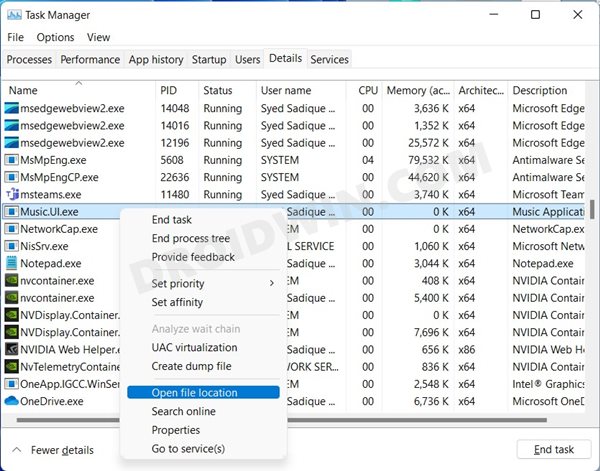
- This shall take you to the Details tab of Task Manager, with the process selected. Just right-click on it and select Open File Location.
- You shall now be taken to that concerned app’s folder inside WindowsApps. And that’s it, you have successfully accessed the desired folder.
Benefits
You don’t need to carry out any registry editor hacks or make use of a reg file. Likewise, the entire process was fairly simple.
Drawback
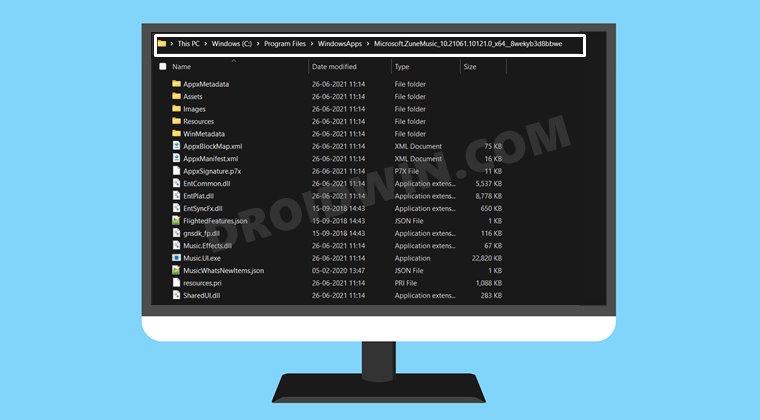
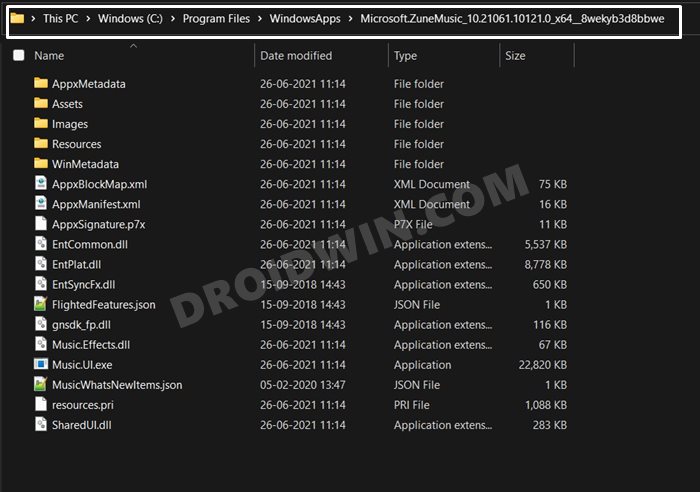
While this method was quite easy to execute, it does have a few drawbacks. First off, you will always have to open the app whose directory you need to access. And secondly, you will only be able to access that app’s directory only, you cannot hit the Back key and access any other app’s folder. As an example, I carried out this task using the Groove Music App and was hence taken to the following directory:
C:\Program Files\WindowsApps\Microsoft.ZuneMusic
Now I cannot hit the Back button and access the parent folder, which is the WindowsApps folder. So this method, at the very most, you could access the individual app’s directory only. To overcome this drawback, you should check out the below two methods to open the WindowsApps folder in Windows 11.
Open the WindowsApps Folder in Windows 11 via Registry Editor
This is the shortest and quickest method to carry out the aforementioned task. In this, you will just have to run a Registry Editor file which will help you to take ownership of the WindowsApps folder from the TrustedInstaller account.
Likewise, it also provides you the option to revert the changes. So once you are done using the WindowsApps folder, you could easily give the ownership back to TrustedInstaller. With that in mind, let’s get started.
Instruction Steps
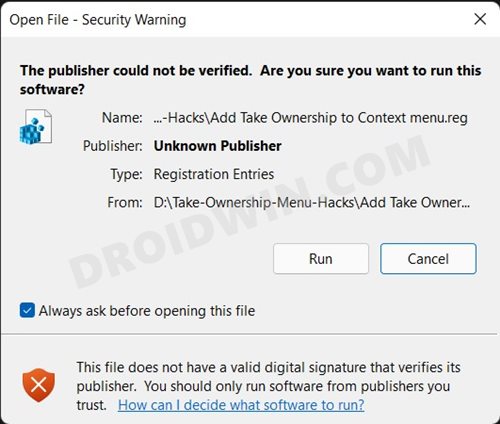
- To begin with, download the Take Ownership Registry File [Credits: HowToGeek] and extract it to any convenient location on your PC.
- Then double click on the Add Take Ownership to Context Menu.reg file and click Run in the dialog box that appears.
- After that, click Yes in the Windows confirmation dialog box. The process will hardly take a few seconds.
- Once done you shall get the “Add Take Ownership to Context Menu.reg has been successfully added to the registry” message.
- Now launch File Explorer via Windows+E shortcut keys and head over to the below location
C:\Program Files
- Right-click on the WindowsApp folder and select Take Ownership. A CMD window will now open confirming the transfer of ownership.
- Once that is done, restart the PC. You shall now be able to able to open and access all the contents of the WindowsApps folder on your Windows 11 PC.

Benefits
First off, it only takes a minute or two to carry out the entire process. Moreover, you could easily revert the changes to the default state and give back the permission to the TrustedInstaller account as and when required. To do so, head over to the extracted Take Ownership Registry File and just run the Remove Take Ownership from Context Menu (Default).reg file.
Risks
Dealing with registry hacks could sometimes prove to be risky, even more so when the publishers aren’t verified. So you will have to exert caution when trying out this tweak.
Open WindowsApps Folder in Windows 11 by Manually Taking Ownership
As is evident from the heading, in this section we will be manually doing the same work that the Registry Editor file did for us in the second method. Follow along.
Instructions Steps
- To begin with, launch File Explorer via Windows+E and go to the below location:
C:\Program Files
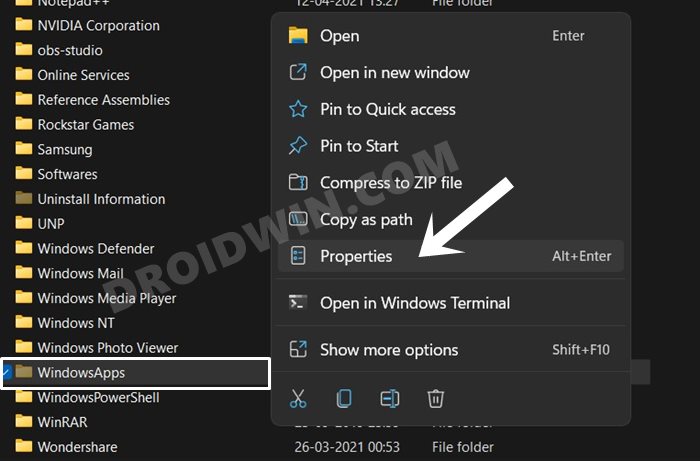
- Now right click on the WindowsApps folder and select Properties.
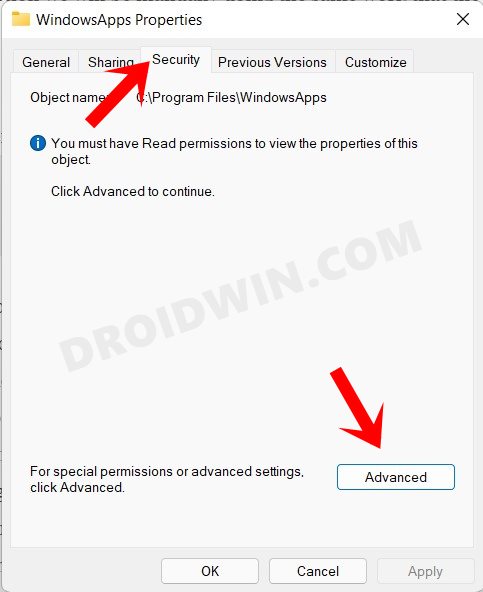
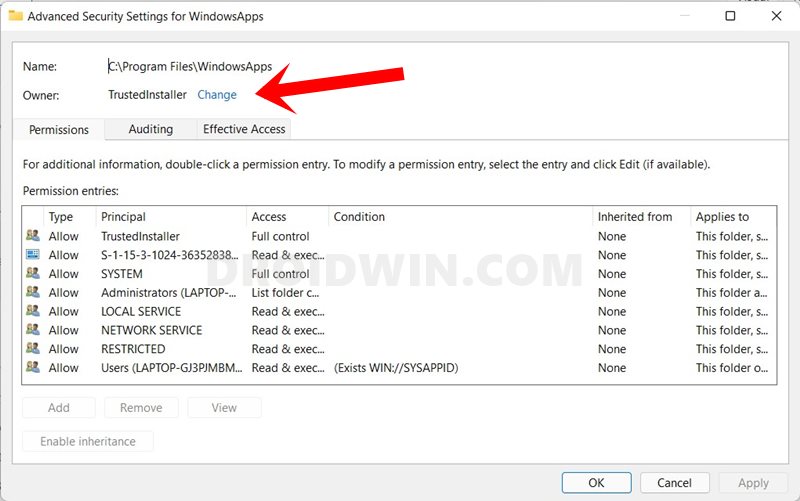
- Go to the Security tab and then click on the Advanced button situated at the bottom.
- Then click on the Change button next to Owner: TrustedInstaller.
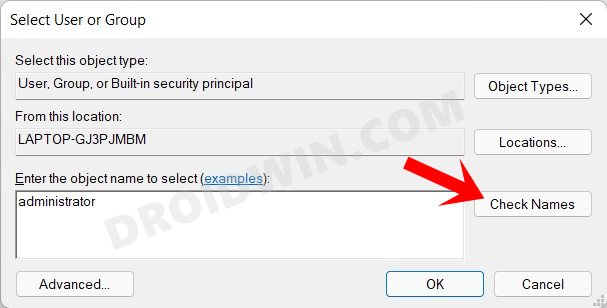
- Under the “Enter Object Names to select” field, type in administrator and click on the Check Names button.
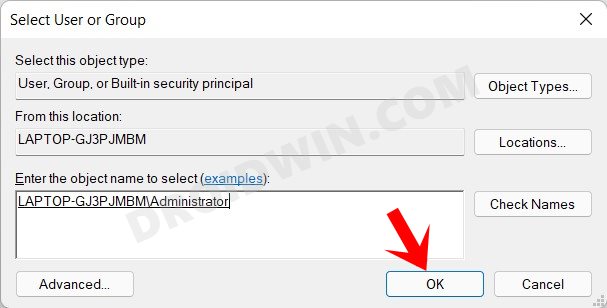
- It shall now bring up your PC’s Administrator name, click OK to continue ahead.
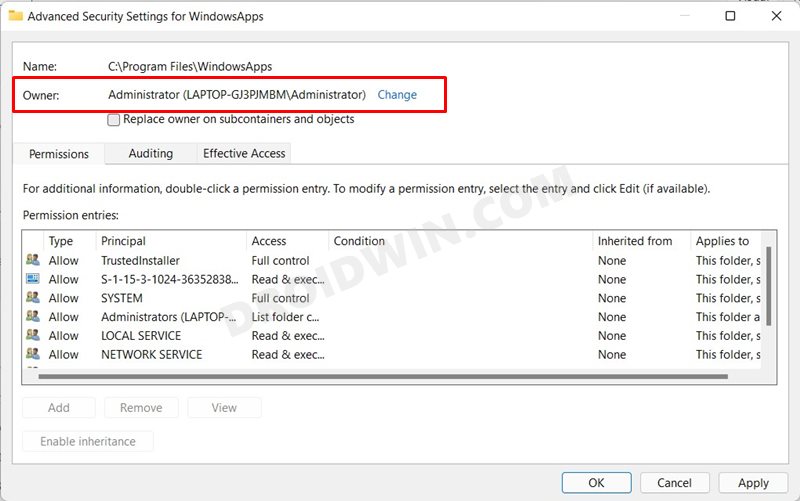
- You shall now see the Owner being changed from TrustedInstaller to your administrator account.
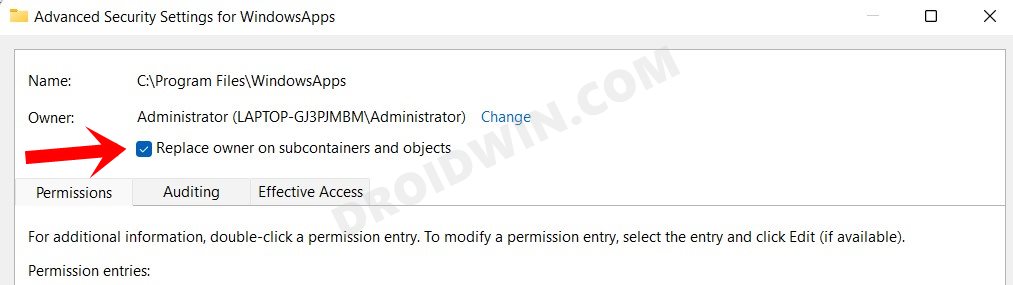
- Now, check-mark the “Replace owner on sub containers and objects” option situated just beneath the Owner field.
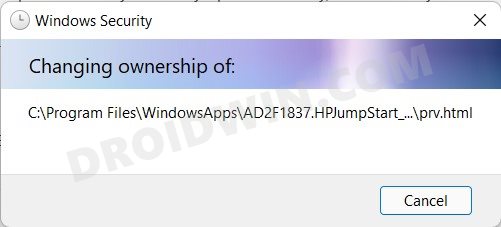
- Finally, click Apply > OK to save the changes. Windows will now begin the process of transferring the ownership.
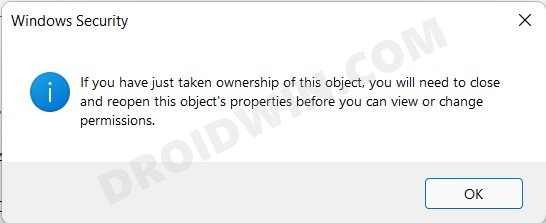
- Once done, you shall get a notification something along the lines of “If you have just taken ownership of this object…..”. Hit OK to close it.
- That’s it. You will now be able to open and access the WindowsApps folder on your Windows 11 PC.
Benefit
Unlike the first method, you will be able to access the entire directory and not just be limited to a particular app. Moreover, this method doesn’t require you to tweak any registry editor setting.
Drawback
This is quite a lengthy method and calls for maximum effort out of the three approaches that we have shared here.
Conclusion: Easily Access the WindowsApps Folder!
So with this, we round off the guide on how you could open the WindowsApps folder on your Windows 11 PC. We have shared three different methods for the same. Likewise, we have also listed the perks and caveats of each of these three methods. Do let us know in the comments section which method you ultimately decided to settle for. Likewise, all queries are welcomed in the comments below.


