In this guide, we will show you the steps to install numerous GSI ROMs on your Galaxy A52 5G. This device from the South Korean giant manages to checkmark most of the prerequisites for the general. suers. However, the same sentiments might not be echoed by tech enthusiasts because, at the time of writing, it hardly has any support for even a single custom ROM [which is definitely quite strange].
Well, this is where the role of Generic System Images comes in handy. Since your device is Project Treble Compatible, you could easily ditch the stock One UI and welcome abode the likes of Pixel Experience, LineageOS, crDroid, and tons of other noteworthy players in this domain. So without any further ado, let’s get started with the steps to install GSI ROMs on your Galaxy A52 5G.
Table of Contents
How to Install GSI ROMs on Galaxy A52 5G

The below process will wipe off all the data from your device, so please take a backup beforehand. Droidwin and its members wouldn’t be held responsible in case of a thermonuclear war, your alarm doesn’t wake you up, or if anything happens to your device and data by performing the below steps.
STEP 1: Install Android SDK
First and foremost, you will have to install the Android SDK Platform Tools on your PC. This is the official ADB and Fastboot binary provided by Google and is the only recommended one. So download it and then extract it to any convenient location on your PC. Doing so will give you the platform-tools folder, which will be used throughout this guide to install the GSI ROM onto your Samsung device.

STEP 3: Download Android 13/14 GSI
You may now get hold of the desired GSI for your Samsung device from any of the below-listed sources. Make sure to download the arm64 builds.
STEP 4: Enable USB Debugging and OEM Unlocking
You will also have to enable USB Debugging and OEM Unlocking on your device. The former will make your device recognizable by the PC in ADB mode. This will then allow you to boot your device to Fastboot Mode. On the other hand, OEM Unlocking is required to carry out the bootloader unlocking process.
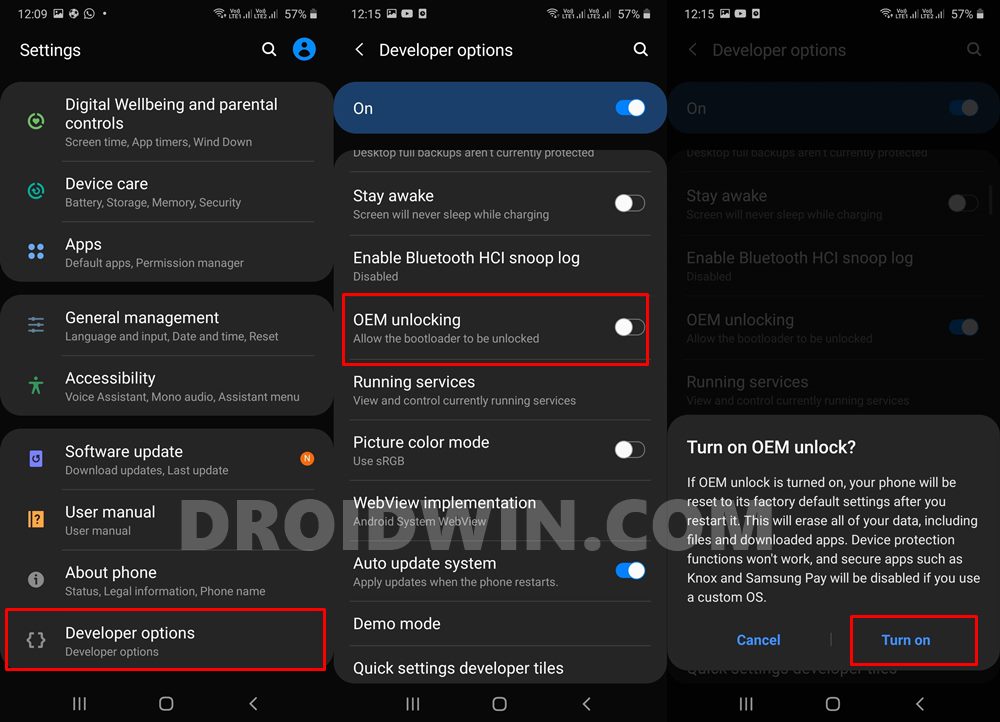
So head over to Settings > About Phone > Tap on Build Number 7 times > Go back to Settings > System > Advanced > Developer Options > Enable USB Debugging and OEM Unlocking.
STEP 5: Unlock Bootloader on Samsung
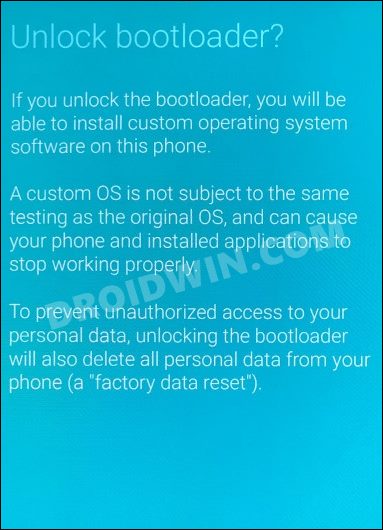
You will also have to unlock the device’s bootloader to install the LineageOS GSI ROM onto the Samsung device. Do note that doing so will wipe off all the data from your device and could nullify its warranty as well. So if that’s all and good, then please refer to our guide on How to Unlock Bootloader on any Samsung Device [New VaultKeeper Method]
STEP 6: Boot Samsung Device to Download Mode
You will have to boot your device to Download Mode so that you are able to flash the required mods. So either refer to our detailed guide on How to Boot any Samsung Device to Download Mode or refer to the below shorter instructions:

- To begin with, power off your device.
- Then press and hold the Power and Volume Up keys and your device will be booted to Stock Recovery.
- Now highlight the Reboot to Bootloader option using the Volume keys and then press the Power key to confirm it.
- Your device should now boot to the Download Mode.
STEP 7: Install Odin
Next up, you will have to download and install the Odin Tool onto your PC. This is needed to flash the TWRP and disable AVB on your device. So get hold of the latest Odin from here: Download: Odin3-v3.14.4.zip. Once downloaded, extract it to any convenient location on your PC.
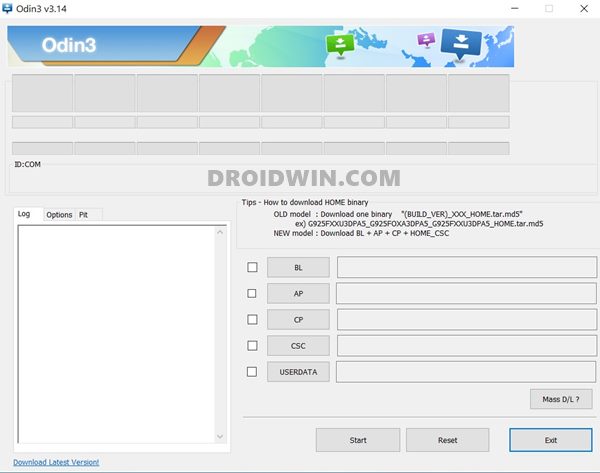
STEP 8: Disable Android Verified Boot
Next up, you will have to disable AVB on your device which would then allow you to flash the desired custom binary (in this case, TWRP).
- Download the vbmeta_disabled.tar for your device.
- Now connect your device to the PC via USB cable (make sure that it is booted to Download Mode)
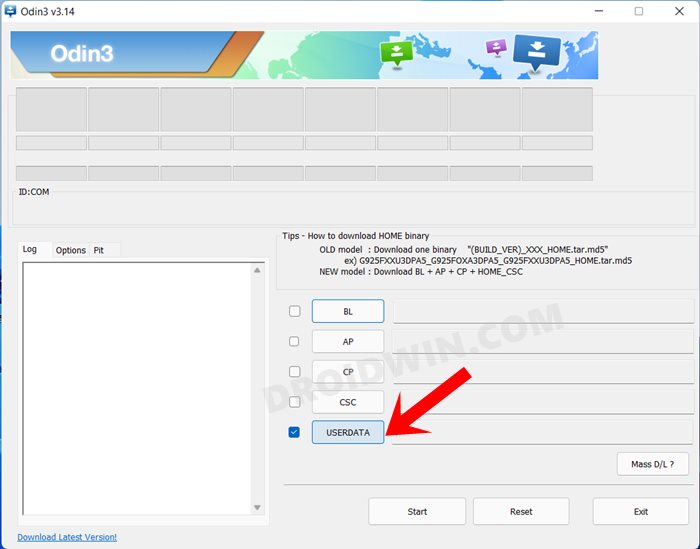
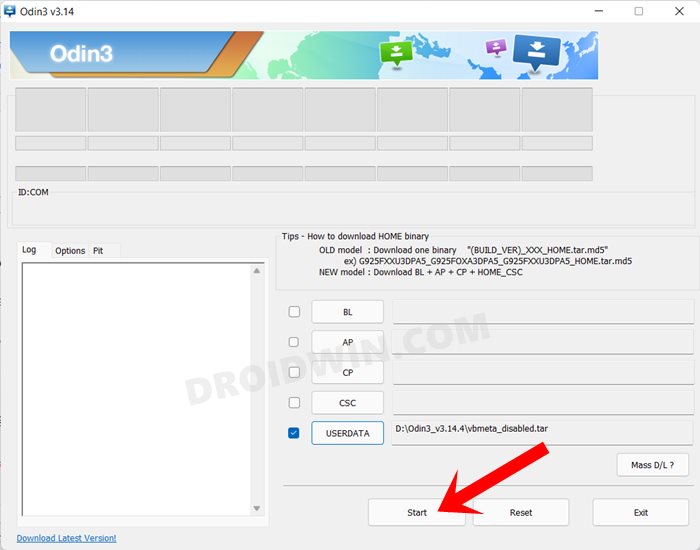
- Then launch the Odin Tool and click on the Userdata button.

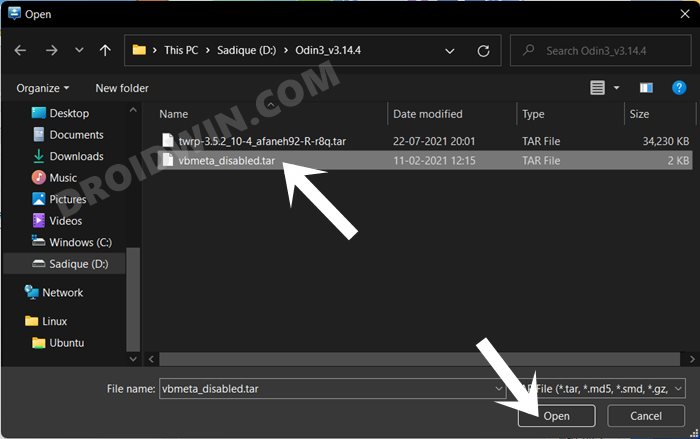
- Navigate to the vbmeta_disabled.tar file, select it, and click Open.

- Once the file has been loaded, make sure that Auto Reboot has been unchecked in Odin.

- Finally, click on the Start button. You shall now get a prompt on your device, stating that “You have to reset your device to factory settings”.

- So use the Volume Keys to select the reset option and hit the Power key to confirm it.
Your device will now undergo a reset and then, the AVB stands disabled. You may now proceed ahead to install the Recovery and the Android 13/14 GSI ROM on your Samsung device.
STEP 9: Flash Recovery.tar via Odin
- Download the Recovery for your device from here.
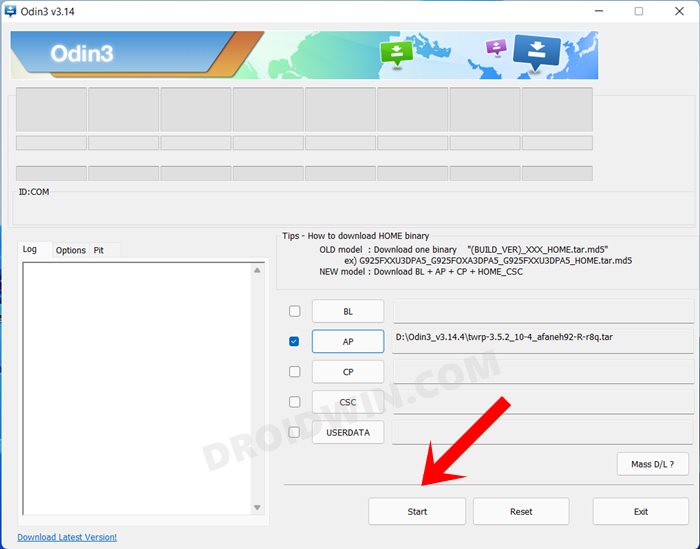
- Then launch the Odin Tool on your PC and click on the AP button.

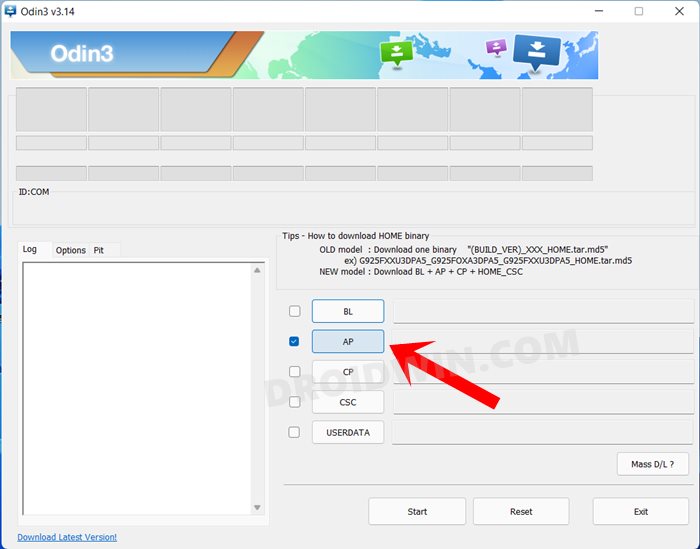
- Navigate to the downloaded recovery.tar file, select it, and click Open.

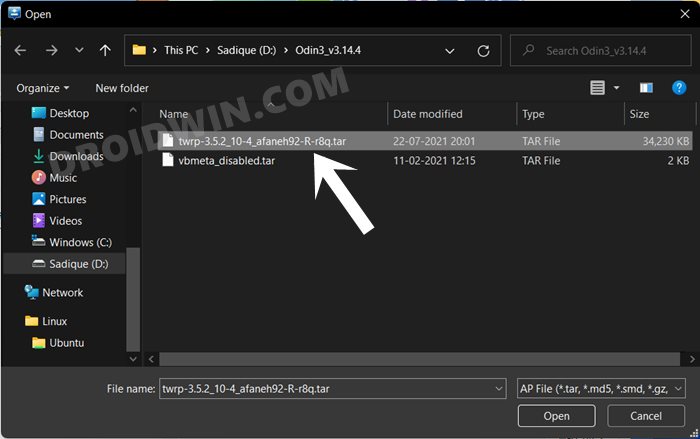
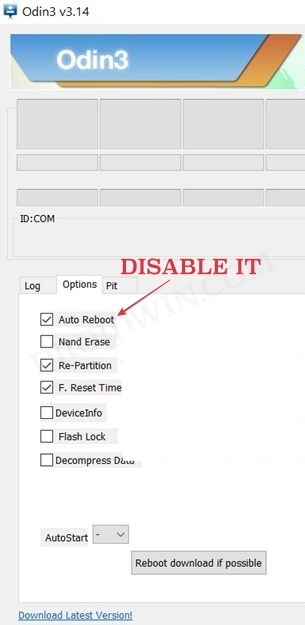
- Once the file has been loaded, make sure that Auto Reboot has been unchecked in Odin.


- Finally, hit the Start button and the recovery will be flashed onto your device.

- You’ll now have to reboot your device to recovery. For that, power it off (press and hold vol down and power button) until the screen goes off. Then press and hold the volume up and power buttons and make sure that your device is connected to the PC via USB.
STEP 10: Flash GSI ROMs on Galaxy A52 5G
Before starting, make sure that you have placed the GSI ROM [system.img] in the platform tools folder.
- From recovery, use the Volume keys to bring up the Fastboot option and press the Power key to confirm.
- Your device will boot to FastbootD Mode. So type in cmd in the platform-tools address bar and hit Enter.
- This will launch the Command Prompt. So type in the below command to erase the system_root partition:
fastboot erase system
- Now type in the below command to flash the GSI ROM [the flashing could take a while to complete]
fastboot flash system system.img
- Once the flashing is done, reset your device via the below command
fastboot -w
- Finally, you may now reboot to the newly flashed ROM via the following command
fastboot reboot
That’s it. These were the steps to install numerous GSI ROMs on your Galaxy A52 5G. If you have any queries concerning the aforementioned steps, do let us know in the comments. We will get back to you with a solution at the earliest.
