In this guide, we will show you the steps to boot your Qualcomm device to the Diag Mode. There’s no denying the fact that the devices with an underlying Qualcomm chipset are the most developer-friendly ones out there. As a result of which, you would be able to welcome a truckload of tweaks and customizations onto your device. From installing custom ROMs and recoveries, to gaining administrative rights via Magisk, there’s a lot to look forward to.
However, these modifications could result in a few issues as well. There’s a high chance of things going south and your device not working along the expected lines. In this regard, you could easily fix various device partitions by flashing the stock firmware via Fastboot Commands. However, with IMEI, things are a little bit different.
If your device’s QCN/EFS partition gets corrupted or damaged, then you might lose your IMEI number for good. Fortunately, there does exist a few handy ways of restoring the original IMEI or writing a new one onto your device. But for that, the first step is to boot your Qualcomm device to the Diag Mode. And in this guide, we will help you with just that. Follow along.
Table of Contents
How to Boot Qualcomm Device to Diag Mode
The below instructions are listed under separate sections for ease of understanding. Make sure to follow in the exact same sequence as mentioned. Droidwin and its members wouldn’t be held responsible in case of a thermonuclear war, your alarm doesn’t wake you up, or if anything happens to your device and data by performing the below steps.
NOTE: If you are instead looking for the OnePlus DIAG [Diagnostic Mode], then check out this simplified guide.
STEP 1: Install Android SDK

First and foremost, you will have to install the Android SDK Platform Tools on your PC. This is the official ADB and Fastboot binary provided by Google and is the only recommended one. So download it and then extract it to any convenient location on your PC. Doing so will give you the platform-tools folder, which will be used throughout this guide.
STEP 2: Enable USB Debugging and OEM Unlocking
Next up, you will also have to enable USB Debugging and OEM Unlocking on your device. The former will make your device recognizable by the PC in ADB mode. This will then allow you to boot your device to Fastboot Mode. On the other hand, OEM Unlocking is required to carry out the bootloader unlocking process.
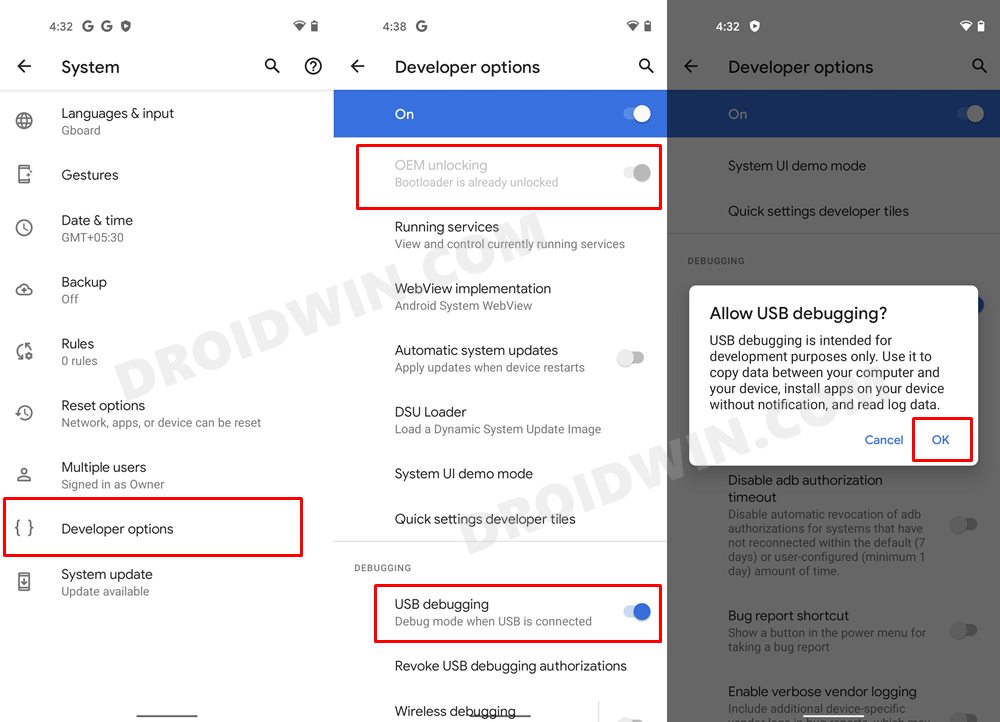
So head over to Settings > About Phone > Tap on Build Number 7 times > Go back to Settings > System > Advanced > Developer Options > Enable USB Debugging and OEM Unlocking.
STEP 3: Unlock Qualcomm Device Bootloader
You will have to unlock the device’s bootloader as well. Do keep in mind that doing so will wipe off all the data from your device and could nullify its warranty as well. So if that’s all well and good, then please refer to our guide to How to Unlock Bootloader on Any Android Device.
STEP 4: Root Qualcomm Device via Magisk
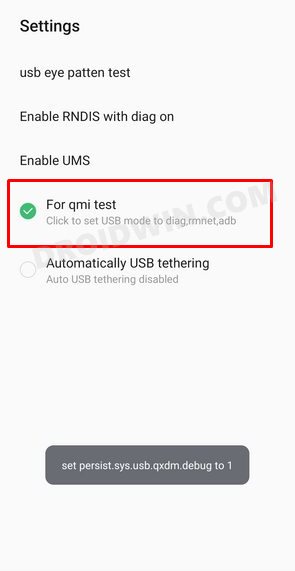
There are some devices out there that don’t need root in order to access the Diag Mode. For example, you could access Diag on Infinix X623 just by typing the ####8789# code. Likewise, Lenovo uses the *#*#33284#*#* code followed by the “For qmi test” option.
So it’s better to first Google for your device and if rooting is an absolute necessity, then you may refer to our below guides:
- How to Root Android 12 via Magisk patched boot.img (without TWRP)
- Root Android 11 via Magisk Patched boot.img (without TWRP)
- How to Root Android Devices via TWRP Recovery
STEP 5: Install Qualcomm USB Drivers
Next up, download and install the Qualcomm USB Drivers onto your PC. This is needed so that your PC is able to identify the connected Qualcomm device. So refer to our guide to Download and Install the Qualcomm HS-USB QDLoader 9008 Drivers.
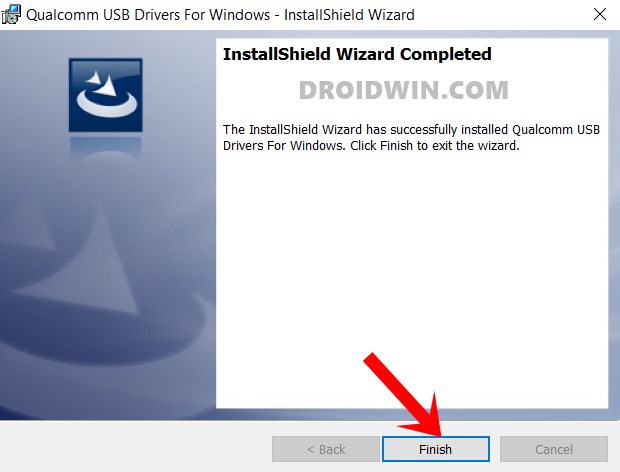
STEP 6: Install Qualcomm Diag QD Loader Drivers
- You will also have to install the Qualcomm Diag QD Loader driver in order to successfully boot your device to the Diag Mode.
- So download the setup file from here: Qualcomm_Diag_QD_Loader_2016_driver.exe.
- Once downloaded, launch the setup EXE file and proceed with the on-screen instructions to install it.
STEP 7: Boot Qualcomm Device to Diag Mode
- To begin with, head over to the platform-tools folder, type in CMD in its address bar, and hit Enter. This shall launch the Command prompt window.

- Now type in the below command in that CMD window to open the shell environment:
adb shell
- Then bring up the superuser request on your device via the below command
su
- Tap Allow/Grant in the SU request that pops up on your device.
- Now just execute the below command to boot your Qualcomm device to Diag mode
setprop sys.usb.config diag,adb


That’s it, the process stands complete. Now that your device is booted to Diag Mode, you could now flash the QCN via QFIL Tool, repair the EFS partition on your device or carry out other related tasks. If you have any queries concerning the aforementioned steps, do let us know in the comments. We will get back to you with a solution at the earliest.
Enable Qualcomm Diagnostic Mode on Snapdragon Insiders
Type in the below two commands in the ADB shell and then launch the QPST Tool:
su
setprop sys.usb.config diag,serial_cdev,rmnet,dpl,qdss,adb
Enable Qualcomm Diagnostic Mode on Samsung (Qualcomm)
Tested on: N20U, S21U, Fold3, Flip3, S22+, S22U
- Open the dialer app and type in
*#0808#
- Then select DM+MODEM
- Now launch QPST and carry out the desired task.
Enable Qualcomm Diagnostic Mode on Moto Edge+ 2023
Type in the below two commands in the ADB shell and then launch the QPST Tool:
su
setprop sys.usb.config diag,serial_cdev,rmnet,dpl,qdss,adb
Enable Qualcomm Diagnostic Mode on OnePlus
Tested with OP7TP5GMCL, OPN, OP8, OP8UW, OP8P, OP9, OP9P
- Type in the below code in the Dialer app:
*#8011#
- Now launch QPST and carry out the desired task.
Enable Qualcomm Diagnostic Mode on Sony Xperia 1 III
Type in the below two commands in the ADB shell and then launch the QPST Tool:
su
setprop persist.usb.eng 1
Enable Qualcomm Diagnostic Mode on Sony Xperia 1 IV
- Execute the below commands in ADB Shell
su
setprop sys.usb.ffs.ready 1
setprop vendor.usb.use_ffs_mtp 0
- Now switch USB mode to “file transfer”
- Then type in the below command and hit Enter
- $ setprop sys.usb.config diag,diag_mdm,adb
- Now launch QPST and get the job done.
Enable Qualcomm Diagnostic Mode on Google Pixel
Will only work till Pixel 5 because from 6 onwards, they switched over to the Tensor chipset.
- Execute the below commands in ADB Shell
su
resetprop ro.bootmode usbradio
resetprop ro.build.type userdebug
setprop sys.usb.config diag,diag_mdm,adb
diag_mdlog
- Cancel (ctrl+c) the process as soon as it starts to hang at “failed to open diag socket”
- Then change the USB config (file transfer, no file transfer) and wait for a few seconds.
- You may now launch the QPST Tool.
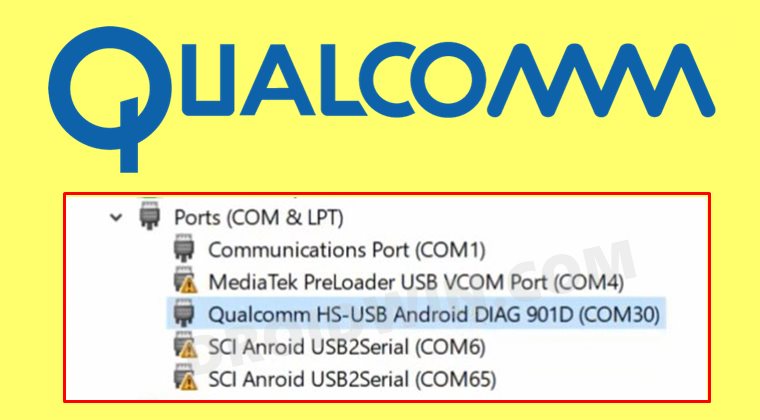
FAQ 1: How to Check if my Device is Booted to Diag Mode
Here’s how to verify whether your device has been booted to Diag Mode or not:
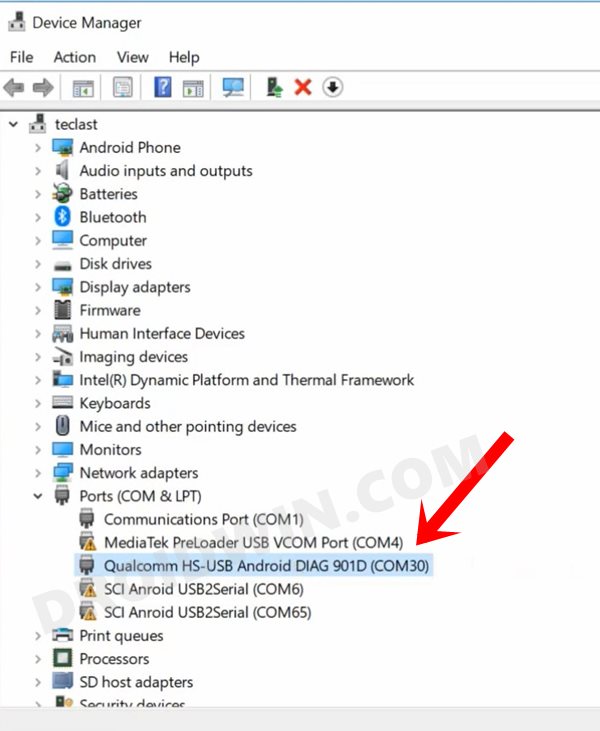
- Once you have executed the above steps, make sure that the device is still connected to the PC via USB cable.
- Then use the Windows+X shortcut keys and select Device Manager from the menu that appears.
- Expand the Ports section and your device shall now be listed as Qualcomm-HS-USB Android DIAG.
FAQ 2: How to Exit Diag Mode
Once you are done with your work, it’s better to exit the Diag Mode and return back to the MTP mode. To do so, you just need to execute the following three commands, one after the other:
adb shell
su
setprop sys.usb.config mtp,adb


