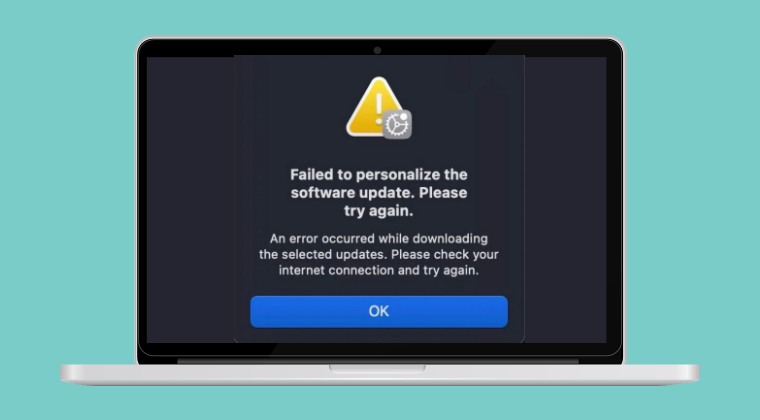
Many users are unable to download and install the latest available software updates on their Mac. The Apple Silicon chipset users are greeted with the following error: “Failed to personalize the software update. Please try again later”.
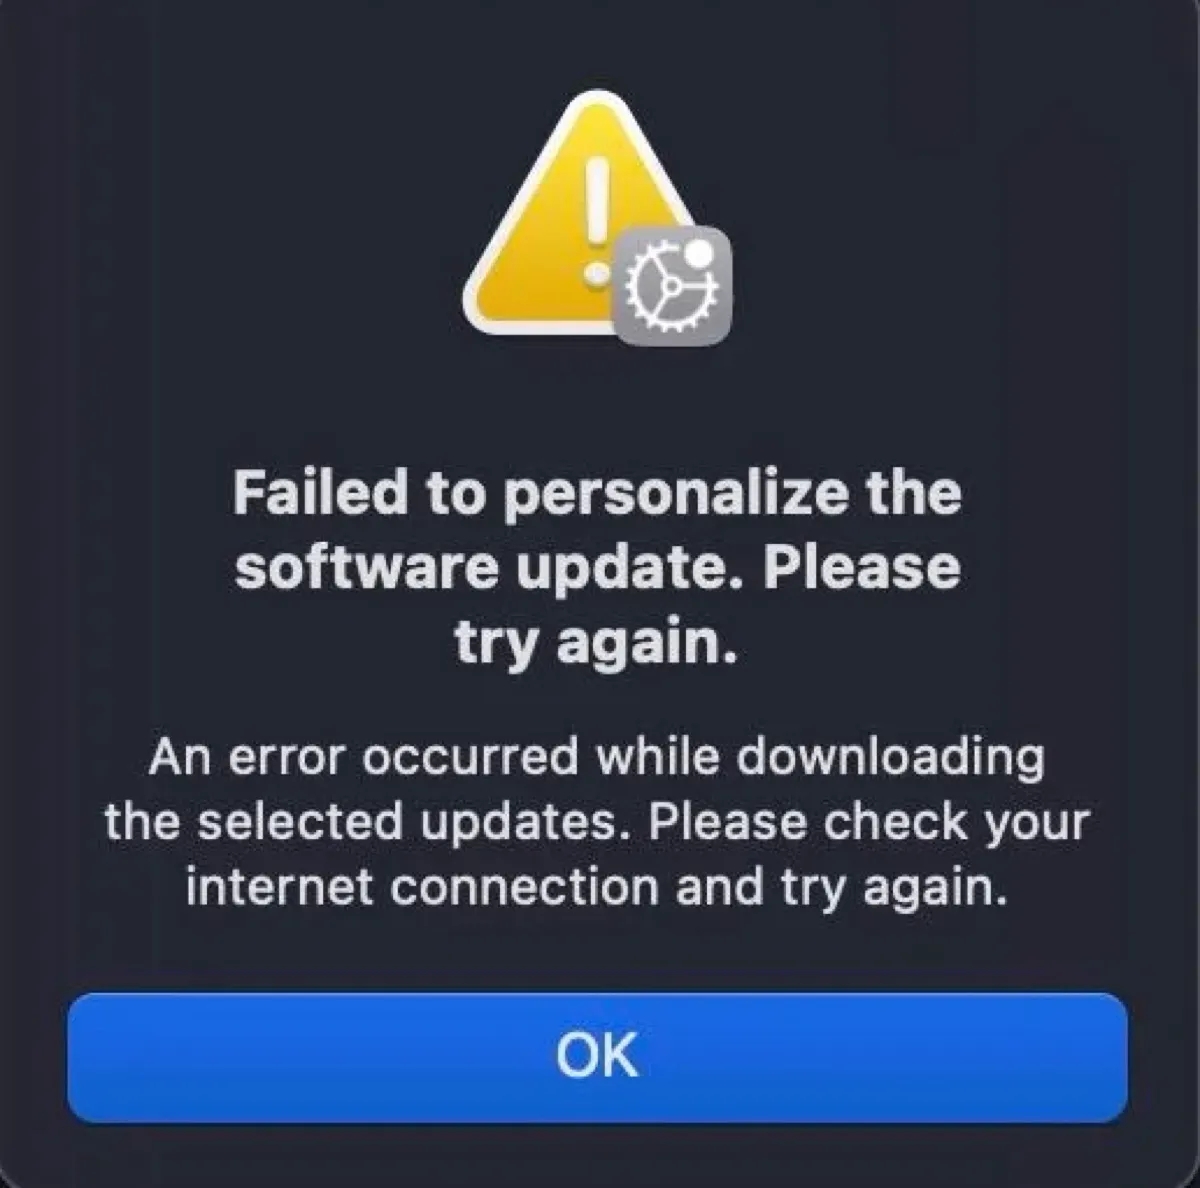
On the other hand, Intel chipset users are getting the “An error occurred preparing the update. Failed to personalize the software update. Please try again” error. The error has been reported across numerous OS builds, including Monterey, Ventura, and the latest Sonoma. If you are also facing this bug, then this guide will make you aware of numerous workarounds to rectify it.
Table of Contents
Fix Failed to personalize the software update on Mac
It is recommended that you try out each of the below-mentioned workarounds and then see which one spells out success. Moreover, before starting, please make sure that you have a backup of your Mac using Time Machine or any other preferred method of your choice. Droidwin and its members wouldn’t be held responsible in case of a thermonuclear war, your alarm doesn’t wake you up, or if anything happens to your device and data by performing the below steps.
FIX 1: Install in Safe Mode
In some instances, a third-party app or service might conflict with the proper installation of software updates. Therefore, you should disable these services by booting the Mac to Safe Mode and then check if you are able to install the updates. Here’s how it could be done:
Apple Silicon
- First off, click on the Apple menu and select Shut Down.
- Press and hold the power button on your Mac until “Loading startup options” appear.
- Now select a Volume. Press and hold the Shift key, then click Continue in Safe Mode.
- Your Mac will boot to Safe Mode. Now try installing the update.
Intel
- Turn on/restart your Mac.
- Then immediately press and hold the Shift key until you see the login window.
- Now login to your Mac and select the Safe Mode option.
FIX 2: Download from App Store
If you are unable to download the updates from the System Settings menu, then you could also try your luck downloading them from the App Store. Simply launch the App Store, search for the desired OS and click on Get. It will now be downloaded. Once done, try installing it on your Mac and check if it fixes the “Failed to personalize the software update. Please try again later” error.

FIX 3: Use Terminal Commands
Yes, you could even download the OS using terminal command. So if both the system settings and App Store didn’t spell out success, then let’s try out this method:
- Go to Launchpad> Others > Terminal. Then type in the below command:
softwareupdate -l
- It will bring up a list of available updates. Note down the name of the update that you wish to install.

- Then replace NAME in the below command with the name of that update.
softwareupdate --install NAME
- If the name has spaces between them, then you’ll have to put NAME in single quotes:
softwareupdate --install 'NAME'
- The update will now be downloaded and installed. Once done, check out the results.

FIX 4: Turn off VPN
If you are using a Virtual Private Network, then there could be a few issues with Mac being unable to establish a successful connection with its servers., thereby resulting in the “Failed to personalize the software update. Please try again later” error. Therefore, you should consider disabling the VPN and then retry downloading the updates.
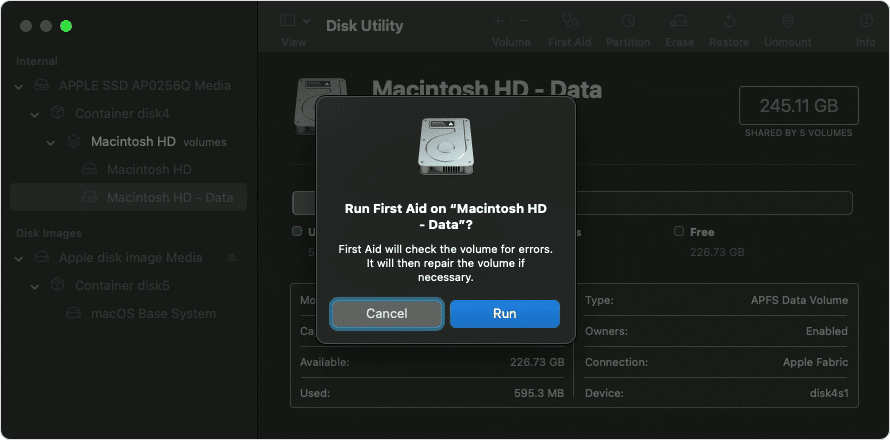
FIX 5: Repair Disk via Disk Utility
In case the Disk has been corrupted, then the OS might not be downloaded and installed in that partition. Fortunately, you could easily rectify this issue by preparing the disk using Mac’s own Disk Utility feature. Here’s how it could be done: [before starting, please make sure that you have a backup of your Mac using Time Machine or any other preferred method of your choice as repairing the disk might end up deleting some files].
- Go to LaunchPad > Others > Disk Utility. Then Choose View > Show All Devices.
- Now expand your Disk > Container > Volume from the left-hand side.
- Then start the repairing process in the order of Volume > Container > Disk.
- Once the process is complete, try installing the update and check out the result.
FIX 6: Install via Bootable USB Installer
If none of the methods worked out in your favor, then your last course of action is to install macOS via a bootable USB Installer. Here’s how it could be done [before starting, please make sure that you have a backup of your Mac as well as USB Installer using Time Machine or any other preferred method of your choice as reinstalling the OS will delete the data on your disk].
- To begin with, connect your USB Drive to your PC.
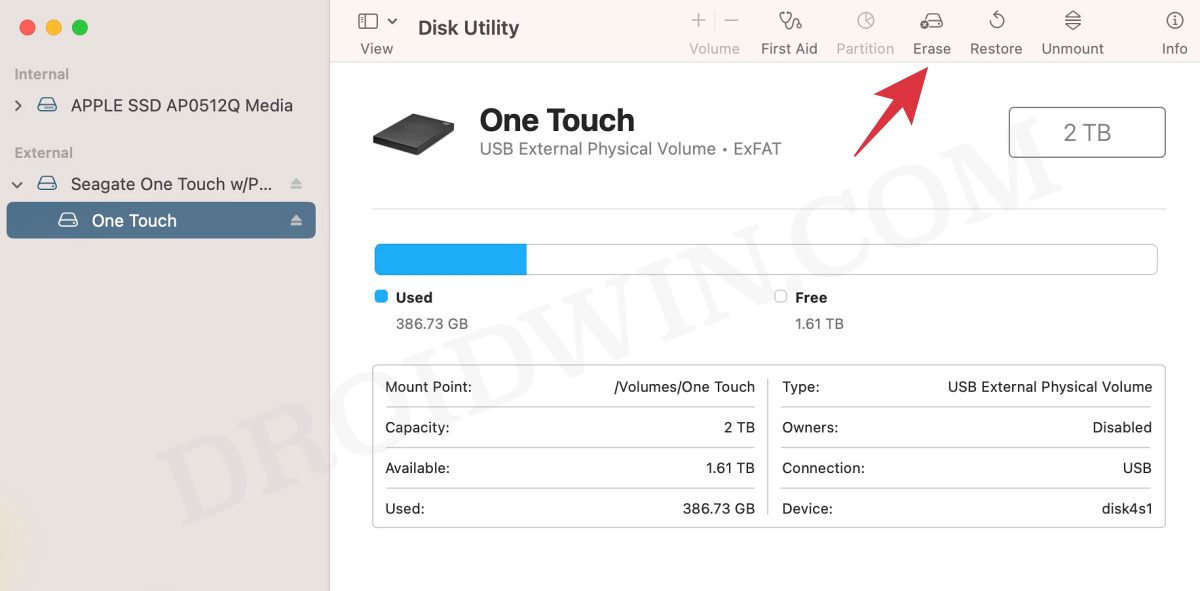
- Then go to Applications > Utilities, and open Disk Utility.
- Now select your USB Drive from the left-hand side and click Erase.
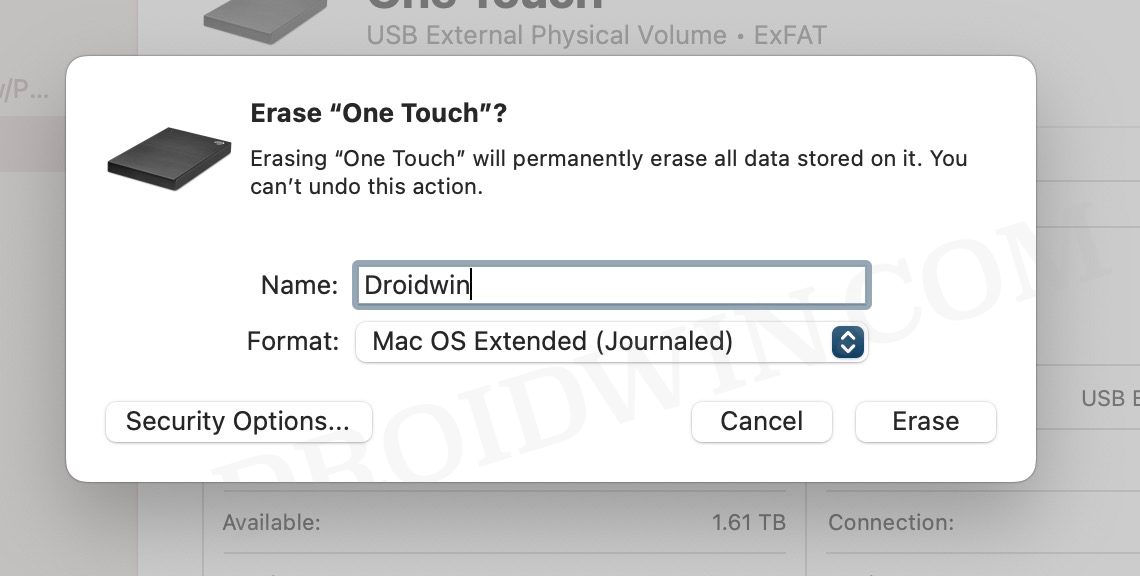
- Then give it a name, select Mac OS Extended (Journaled) under Format, and hit Erase.
- Now download the macOS installer app from the App Store and transfer it to USB Drive.
- Then open Terminal and type in the below command, replace Ventura with the name of your OS and MyVolume with the name of your Volume [Droidwin in out case].
sudo /Applications/Install\ macOS\ Ventura.app/Contents/Resources/createinstallmedia --volume /Volumes/MyVolume
- With this, we have a bootable USB Installer with macOS. Let’s now boot your Mac to Recovery Mode. Make sure to plug in the USB Drive beforehand.
Intel: Restart your Mac and immediately press and hold the Option key
Silicon: Restart your Mac and keep the Power button pressed
- You will now be taken to the disk selection screen, choose your USB Installer, and follow the on-screen instructions.
That’s it. These were the various methods that should help you fix the “Failed to personalize the software update. Please try again later” error on your Mac. If you have any queries concerning the aforementioned steps, do let us know in the comments. We will get back to you with a solution at the earliest.