In this guide, we will show you the steps to create and apply any Video/GIF as a Custom Boot Animation on your Android device. Out of the truckload of possibilities that an open-source ecosystem brings in with itself, one is the ability to carry out a plentitude of customizations onto your device. The basic level tweaks include the likes of sideloading apps outside the Play Store.
However, if you have unlocked the device’s bootloader, then you could take these customizations to the next level. From flashing custom binaries to installing custom ROMs or recoveries, there’s a lot to try out. However, there’s one customization that doesn’t get the limelight that it deserves- the ability to change the default boot animation.
The reason for that is our device’s booting screen isn’t something that we interact with on a daily basis. But even then, why saturate the display with the same animation every time your device boots up? Well, you shouldn’t! And this is where this guide shall come in handy. Today, we will show you the steps to create a custom boot animation using any video or GIF and then apply it to your Android device. Follow along.
Table of Contents
How to Create and Apply any Video/GIF as a Custom Boot Animation on Android
The below instructions are listed under separate sections for ease of understanding. Make sure to follow in the exact same sequence as mentioned. Droidwin and its members wouldn’t be held responsible in case of a thermonuclear war, your alarm doesn’t wake you up, or if anything happens to your device and data by performing the below steps.
STEP 1: The Prerequisites
The boot animation file is placed inside the system directory of your device. So you will need to have administrative level privileges to access this partition. In other words, your device needs to be rooted via Magisk. If you haven’t done so, then please refer to our guide: Root Android via Magisk Patched boot.img (without TWRP) OR How to Root Android Devices via TWRP Recovery.
STEP 2: Take a Backup of Stock Boot Animation
- Let’s now take a backup of the default boot animation so that if something goes wrong, you may easily revert to the stock one.
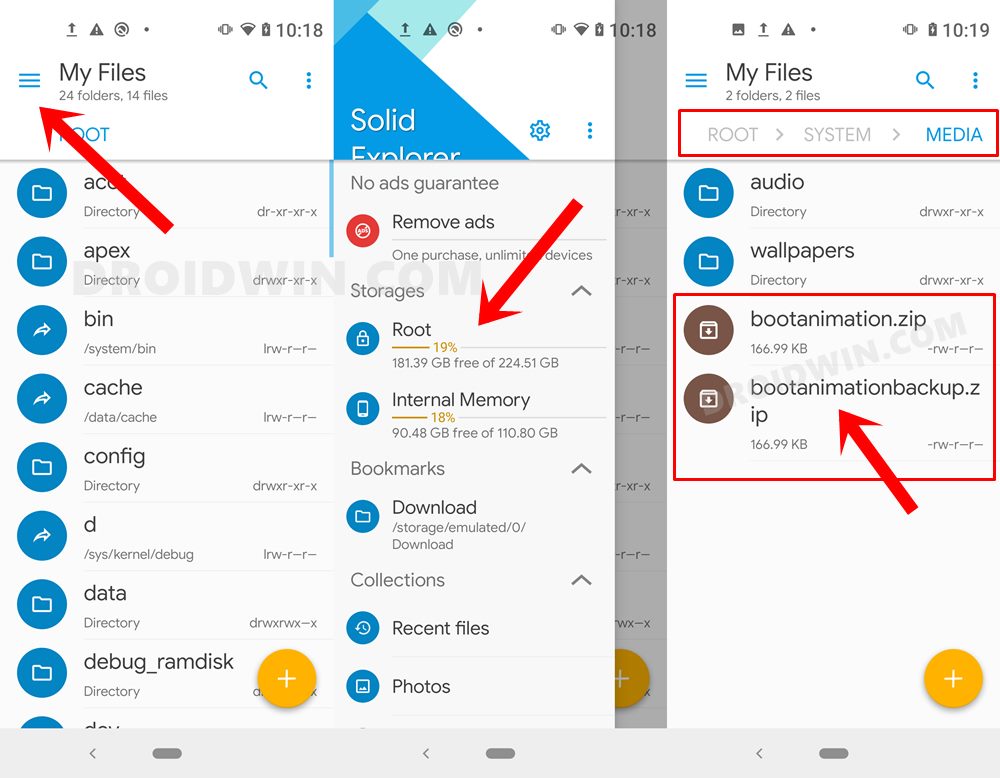
- Launch any File Explorer app that supports root capabilities (such as Solid Explorer).
- Then tap on the hamburger menu situated at the top left and select Root.

- You will now get a Magisk prompt, tap Allow. After that, browse to the system > media directory.
- You should see your default boot animation, take its backup (copy/paste), and assign it a name accordingly.
STEP 3: Create/Download a Boot Animation
Now get hold of the desired Video/GIF file that you want to apply as the Boot Animation. You may also download a custom made from Google Search or XDA-Developers Collection. Once downloaded, assign it a valid name- one that doesn’t have any spaces. For example, Boot_Animation is correct but Boot Animation is wrong.
What about the video resolution? Well, the tool that we are going to use in this guide will automatically force the video/GIF to adapt to your screen size. So you may download the video/GIF of any resolution whatsoever.
STEP 4: Download Boot Animation Maker Tool
- To begin with, download the Boot Animation Maker Tool. [Credits: XDA Senior Member BlassGO].
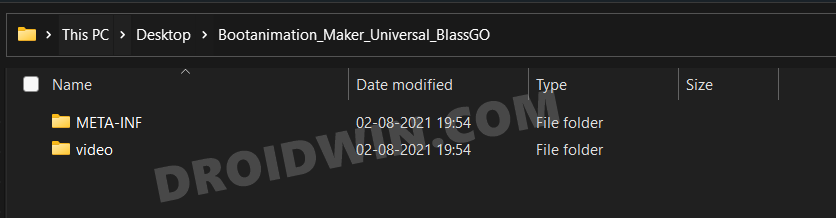
- Then extract it to any convenient location on your PC.
- Once the extraction is complete, you should see two folders: META-INF and Video.
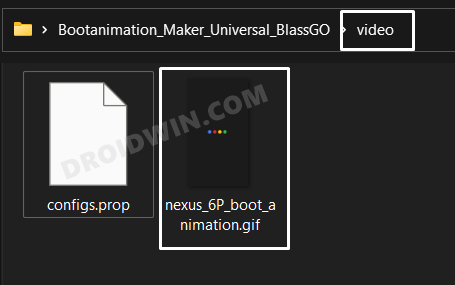
- Head over to the Video folder and transfer your Boot_Animation Video/GIF file there.
STEP 5: Customize the Boot Animation Settings
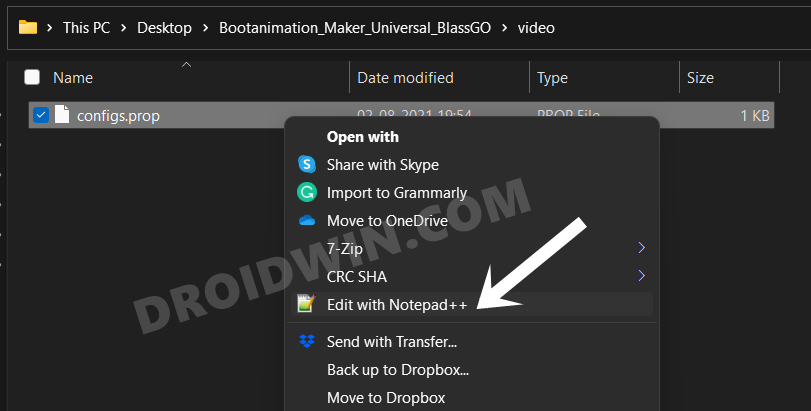
- To customize or tweak the boot animation’s setting, open the configs.prop file that is present inside the Video folder. You may use an advanced text editor such as Notepad++ to edit this file.
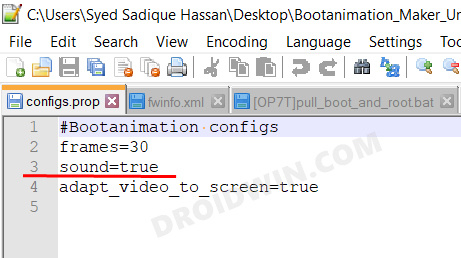
- The file has the following values:
#Bootanimation configs
frames=30
sound=true
adapt_video_to_screen=true
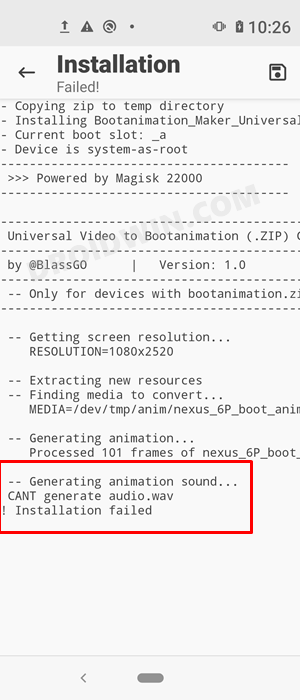
- You may make the changes as per your requirement and then save it. IMPORTANT: If your boot animation doesn’t have any audio, then change sound=false, otherwise, the flashing will fail (see below image).
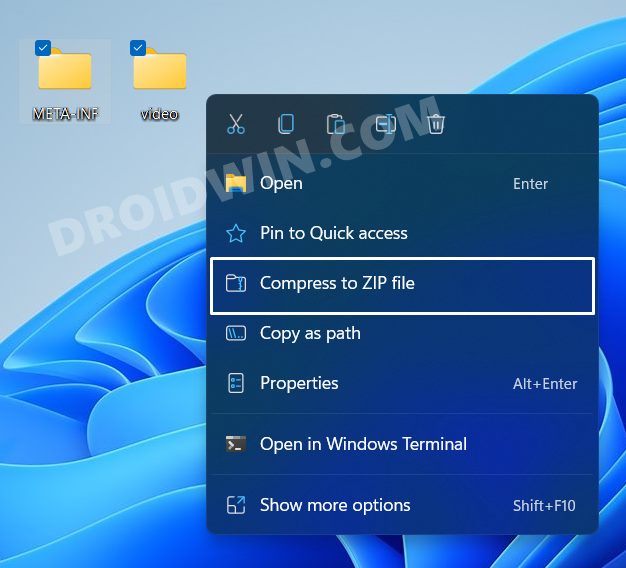
- Moving on, once you have made the desired tweaks and saved the changes, compress the entire folder. For that, select both the video and META-INF folders, perform a right mouse click and select Compress to ZIP File.
- NOTE: Do Not compress the entire Boot Animation Maker Tool folder as it will create a second directory inside the compressed folder, and the flashing will then fail.
With this, you have the required Boot Animation ZIP file at hand. Transfer it to your Android device and move over to the next step to finally put it to the test.
STEP 6: Apply the Custom Boot Animation via Magisk
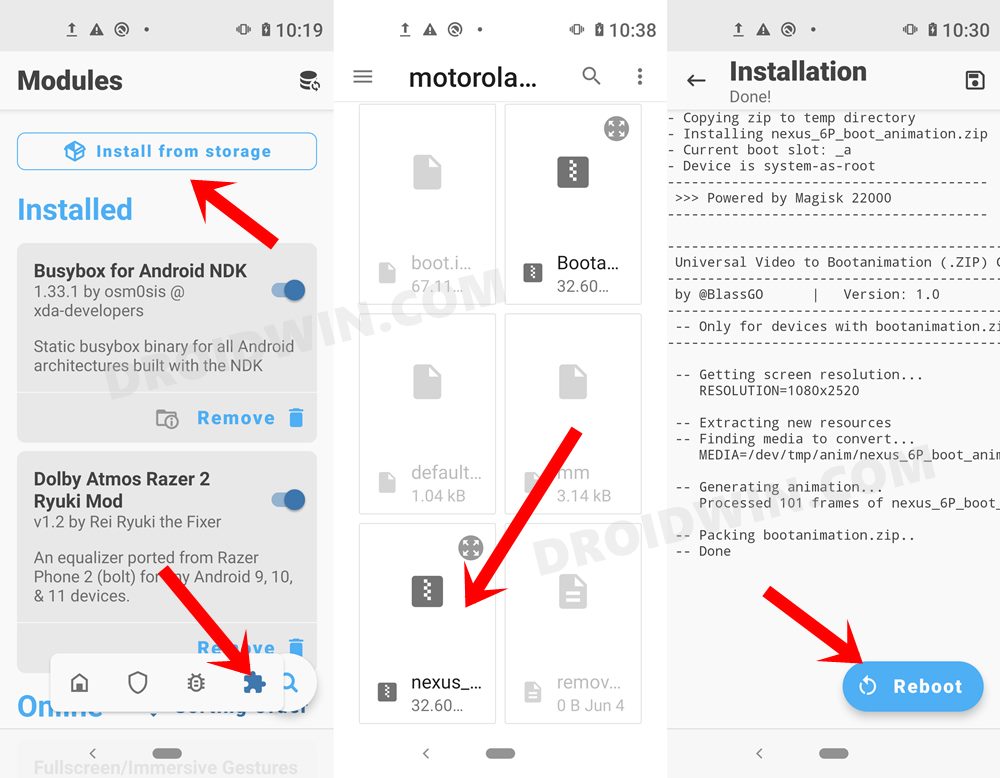
- Launch the Magisk App on your device and go to the Modules section.
- Then tap on the Install from Storage button present at the top,
- Scroll to the Boot_Animation.zip file, and select it.
- Magisk will now start flashing this file and would only take a few seconds.
- Once done, tap on the Reboot button situated at the bottom right.
- Your device will now reboot with the new boot animation in place!
So this was all from this guide on how you could create and apply any video/GIF as a Custom Boot Animation on your Android device. If you have any queries concerning the aforementioned steps, do let us know in the comments. We will get back to you with a solution at the earliest.


A user
Cant get screen size error