In this guide, we will show you a couple of workarounds to fix the “Can’t Update Visual Voicemail” error message on your Android device. This direct-access voicemail with a visual interface provides you with a list of messages for playback, as opposed to sequential listening [which is the case with traditional voicemail], and that is one of the many reasons why users opt for this type. However, many users are not able to make full use of the same.
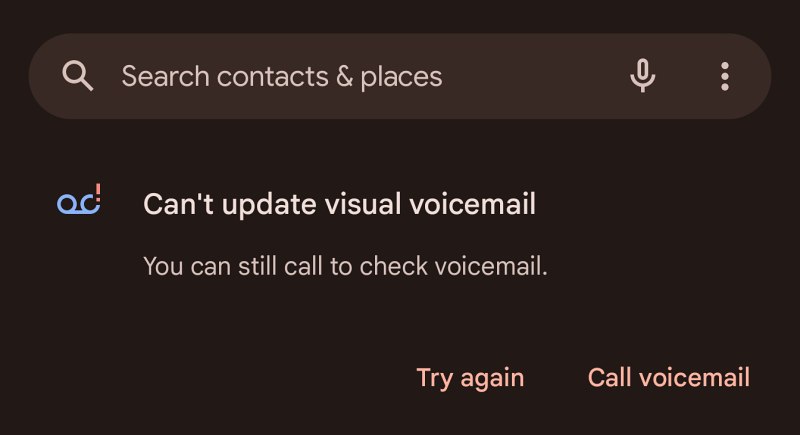
They have voiced their concern that they are getting the “Can’t Update Visual Voicemail” error message on their device. The issue is happening on an unlocked device across numerous carriers, including the likes of T-Mobile and Verizon. If you are also getting bugged by this issue, then this guide will make you aware of numerous workarounds to resolve this bug. Follow along.
Table of Contents
Fix Can’t Update Visual Voicemail
It is recommended that you try out each of the below-mentioned workarounds and then see which one spells out success. So with that in mind, let’s get started. [NOTE: For the sake of reference, we are using the T-Mobile app but the steps should be the same across all the other carrier apps as well].
FIX 1: Switch to Cloudflare DNS
First off, you should consider switching over to the Cloudflare Domain Name Server from the default one assigned by your ISP. Here’s how it could be done:
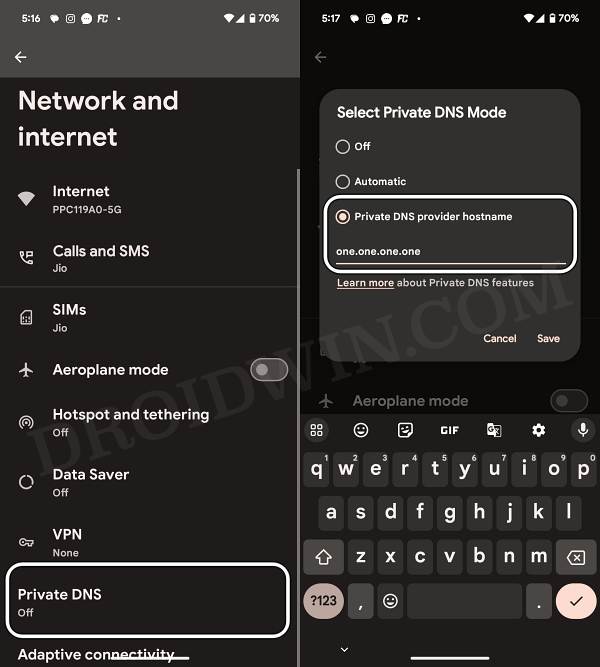
- To begin with, head over to Settings > Network and Internet > Private DNS.
- Then select Private DNS Provider Hostname and type in the below value:
one.one.one.one
- Finally hit Save and check if it fixes the “Can’t Update Visual Voicemail” error.

FIX 2: Delete Visual Voicemail Cache
Next up, consider deleting the app’s temporary data as well. If a lot of these cache files get accumulated over the course of time, then it might conflict with the app’s proper functioning and could also slow down its usability. Therefore, let’s put these files in the bin right away and then check out the results.
- To begin with, head over to the Settings menu on your device.
- Then go to Apps > See All Apps and select T-Mobile Visual Voicemail from the list.
- After that, go to the Storage section and tap on Clear Cache.
- Check if it fixes the “Can’t Update Visual Voicemail” error.

FIX 3: Remove Battery Restrictions
If you have put any battery restrictive measures in place, then the games and apps might have a tough time working in this restrictive environment. Therefore, you should consider removing all these roadblocks and then check out the results. Here’s how it could be done:
- First off, head over to the Settings > Battery section.
- Then go to Battery Saver and disable it, if it is enabled.
- After that, go to Apps > All Apps and select T-Mobile Visual Voicemail.
- Then go to its Battery section and select either Optimized or Unrestricted.
- Now check if it fixes the “Can’t Update Visual Voicemail” error.

FIX 4: Switch to Carrier Data
In some instances, the visual voicemail might only work with the carrier data. So turn off the WiFi, enable Carrier Data, and check if it rectifies the voicemail issue.
FIX 5: Reset App Preferences
In some cases, creating and implementing rules for an app might have an adverse impact on other apps installed on your device. So you should consider reverting all the app preferences to their default state. Doing so will reset the rules related to disabled and default apps as well as all the restrictions put in place (it will not wipe any app data) and will give you the stock settings to work upon. So let’s put this fix to the test and check out the results.
- Head over to the Settings > System menu on your device.
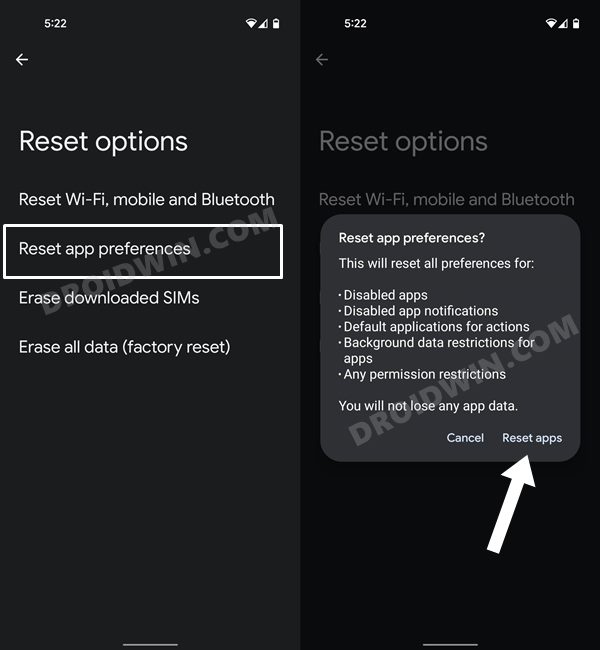
- Then go to Reset Options and tap on Reset App Preferences.
- After that, tap on the Reset Apps button in the confirmation dialog box.
- Now check if it fixes the “Can’t Update Visual Voicemail” error.
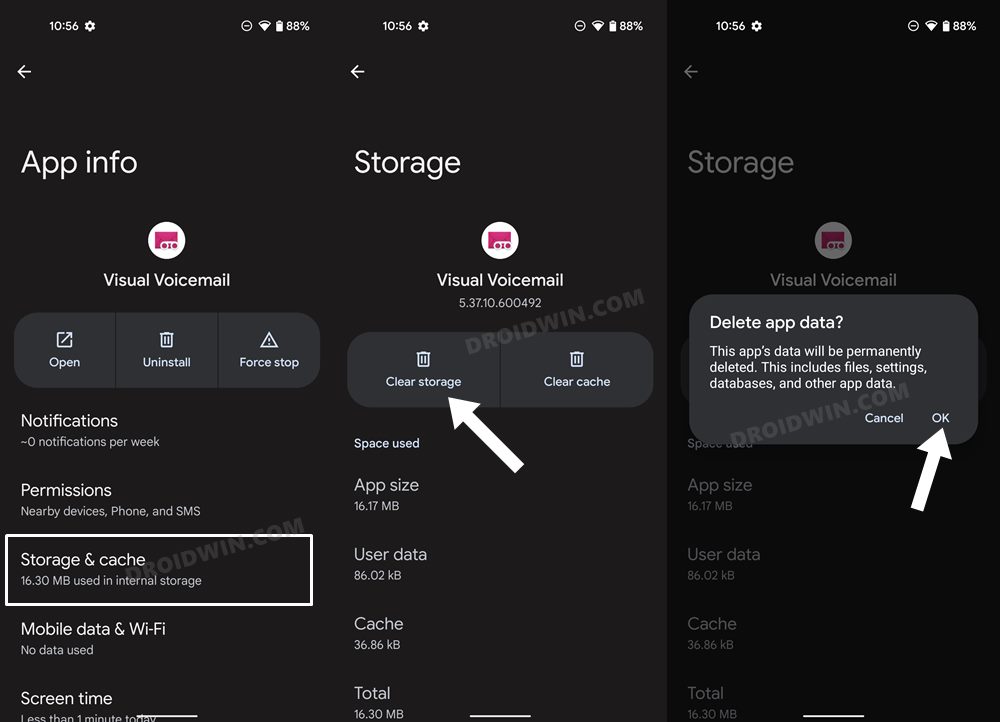
FIX 6: Delete Visual Voicemail Data
If the app’s data gets corrupted, then its negative consequences will be felt across the app as a whole. In such cases, you have no choice but to delete that app’s data and then let it repopulate the same from scratch. Here’s how it could be done:
- Head over to Settings Apps > See All Apps on your device.
- Then select the T-Mobile Visual Voicemail app from the list.
- After that, go to the Storage section and tap on Clear Data.
- Then tap OK in the confirmation dialog box that appears. Now launch the app and set it up.
- Verify if it fixes the “Can’t Update Visual Voicemail” error on your Android device.
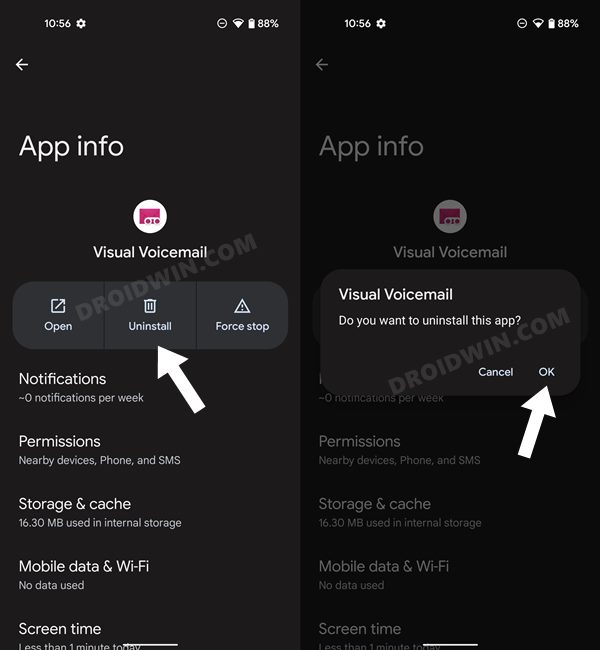
FIX 7: Reinstall Visual Voicemail
If the app’s configuration and settings file get corrupted, then simply deleting the app’s data and cache might not be enough. In such cases, you will have to completely remove the app from your device and reinstall its fresh build. Here’s how it could be done:
- Head over to Settings Apps > See All Apps on your device.
- Then select the T-Mobile Visual Voicemail app from the list.
- After that, tap on Uninstall followed by OK in the confirmation dialog box.
- Now go to the app’s official listing page on Play Store.
- Then download and install the app. Now launch it and set it up.
- Check if it fixes the “Can’t Update Visual Voicemail” error.
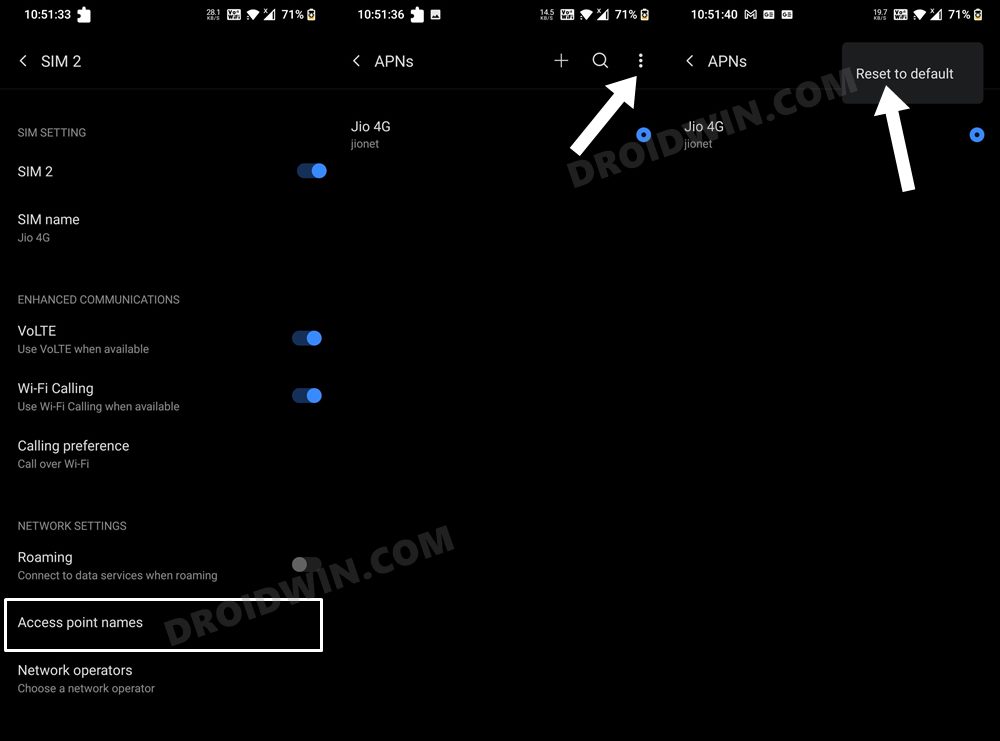
FIX 8: Reset APN
In some instances, the issue might also arise due to an incorrect Access Point Name setting as well. To resolve this issue, you will have to reset the APN configuration, using the instructions given below
- Head over to Settings > WiFi and Network > SIM and Network.
- Then select your active SIM card and go to Access Point Names.
- After that, tap on the overflow icon situated at the top right and select Reset to Defaults.
- Now remove your SIM card from the device and re-insert it.
- The APN settings will be downloaded and this should rectify the underlying issue.
So with this, we round off the guide on how to fix the issue of Visual Voicemail not working on your Android device. If you have any queries concerning the aforementioned steps, do let us know in the comments. We will get back to you with a solution at the earliest.