In this guide, we will show you the steps to download and install Android 13 onto your Asus ZenFone 8. This flagship-level offering from Asus beholds an impressive specs sheet and it now also become the first device from this OEM to get blessed with the thirteenth iteration of the OS. As a result, you could now welcome a slew of intriguing features onto your device.
These include the likes of expansion of the Material You theme from 4 to 16, per-app language settings, QR Code scanner in Quick Settings, revamped clipboard, the ability to choose between two clock styles on the lock screen, and a few under-the-hood changes. So without any further ado, let’s get started with the steps to download and install Android 13 onto your Asus ZenFone 8.
Table of Contents
Download Android 13 for Asus ZenFone 8
From this section, you could download the latest Android 13 build for your Vivo X80/Pro device. Do note that the Developer Preview/Beta builds are quite unstable and you might come across a few issues as well [all of them are listed below]. So only try out these builds if you are ready to deal with these bugs on a daily basis.
Android 13 Beta 1
Bugs
- Fingerprint authentication is not supported
- Face unlock feature not supported
- System stability issues
- 3rd-party apps compatibility issues
Download Link
OPEN-ZS590KS-32.0301.0403.10-BSP-2204-user-20220505.zip
How to Install Android 13 on Asus ZenFone 8
The below process will wipe off all the data from your device, so take a complete device backup beforehand. Droidwin and its members wouldn’t be held responsible in case of a thermonuclear war, your alarm doesn’t wake you up, or if anything happens to your device and data by performing the below steps.
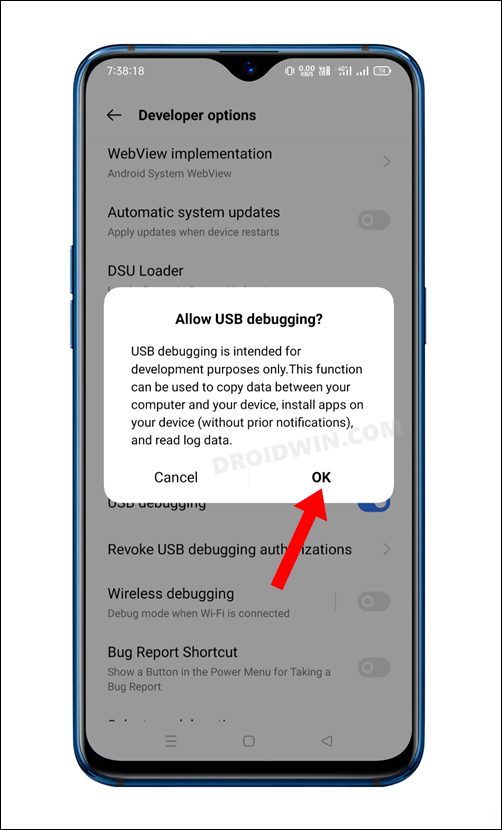
Enable USB Debugging
Next up, enable USB Debugging on your device so as to make it recognizable by the PC in ADB mode. This will then allow you to boot your device to Fastboot Mode. So head over to Settings > About Phone > Tap on Build Number 7 times > Go back to Settings > System > Developer Options > Enable USB Debugging.
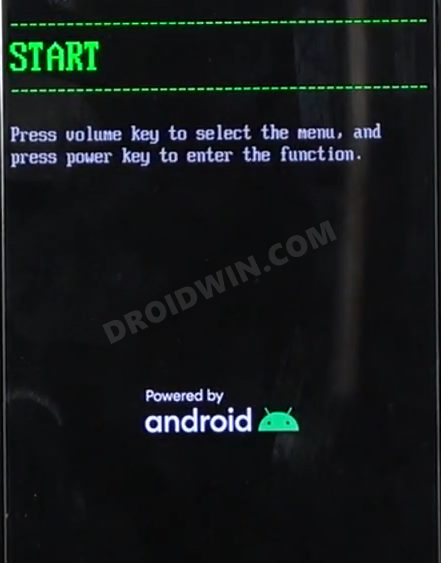
Boot Asus ZenFone 8 to Fastboot Mode
- Connect your device to the PC via USB cable. Make sure USB Debugging is enabled.
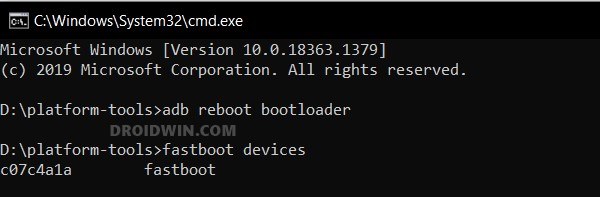
- Then head over to the platform-tools folder, type in CMD in the address bar, and hit Enter. This will launch the Command Prompt.

- After that, type in the following command in the CMD window to boot your device to Fastboot Mode
adb reboot bootloader

- To verify the Fastboot connection, type in the below command and you should get back the device ID.
fastboot devices
Install Android 13 on Asus ZenFone 8
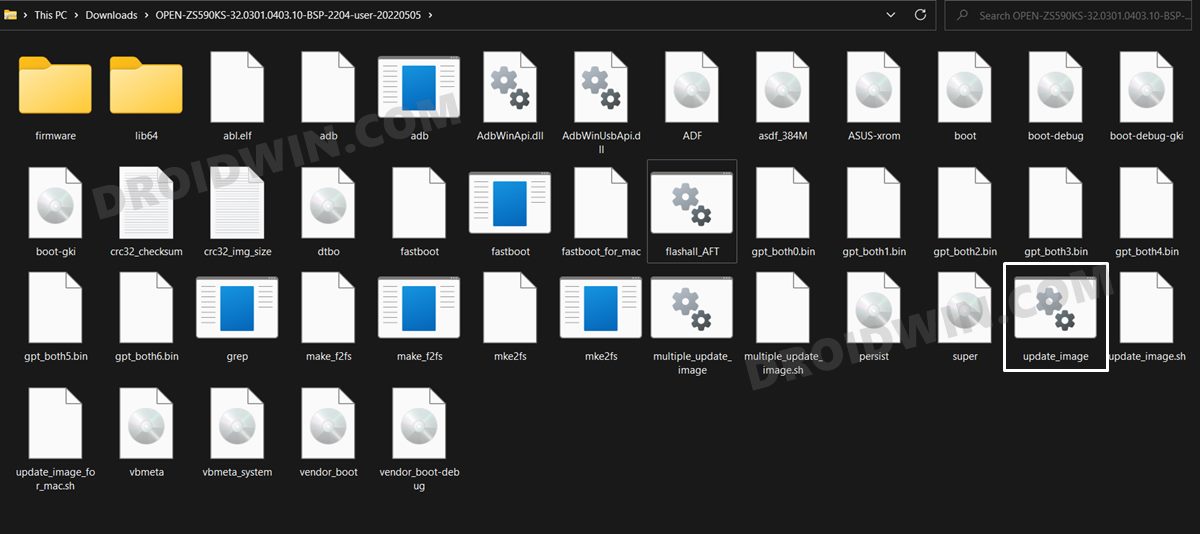
- Extract the Android 13 firmware to any convenient location on your PC.
- Then double click on the update_image.bat file and the flashing will start.
- Once done, you will get the Download Complete message in the CMD.
- Hit Enter and your device will now boot to the newly installed OS.
That’s it. These were the steps to download and install Android 13 onto your Asus ZenFone 8. We will continuously update this guide as and when a new build gets live. In the meantime, if you have any queries concerning the aforementioned steps, do let us know in the comments. We will get back to you with a solution at the earliest.