In this guide, we will show you the steps to flash the firmware on your Pixel device via Android Flash Tool. Natively, there exist three different methods to flash firmware onto your device. The first one is for general users who could directly download and install updates from the device’s Settings menu. The next method is by using the stock recovery and the ADB Sideload feature.
The third and most technical method is via the Fastboot Commands. You have to execute the Fastboot Commands corresponding to each partition file (in IMG format) and then flash it to their respective partition. Google has streamlined this third method by incorporating all these commands into a single Batch file. You just need to execute this batch file and the rest will be taken care of by that file itself.
But the Silicon Valley giants didn’t stop here. They have taken this third method a step ahead and introduced an online tool through which you could easily flash the firmware onto your Pixel device. And in this guide, we will help you with just that. So without ado, let’s check out the steps to flash the firmware on your Pixel device via Android Flash Tool.
Table of Contents
What is Android Flash Tool?
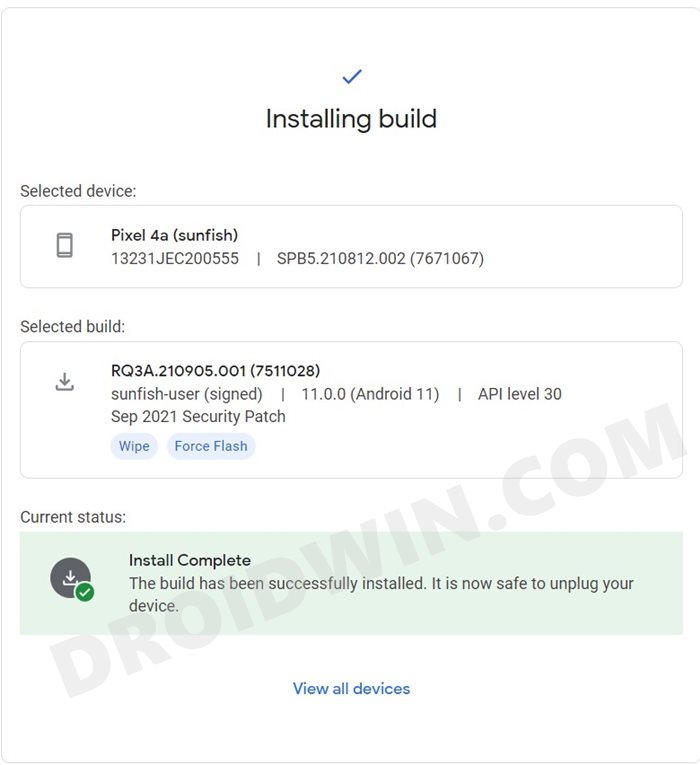
Android Flash Tool is a web-based tool that is used to flash firmware onto various Pixel devices. It is supported across all the popular web browsers, including Chrome and Edge. Here are some of its noteworthy feature that deserves your attention:
Support Various Pixel devices
At the time of writing, the tool supports the following Pixel devices (with more to be added in the near future):
Pixel 7 Pro
Pixel 7
Pixel 6 Pro
Pixel 6
Pixel 6A
Pixel 5
Pixel 5A
Pixel 4 XL
Pixel 4
Pixel 4A
Pixel 4A 5G
Pixel 3a XL
Pixel 3a
Pixel 3 XL
Pixel 3
Pixel 2 XL
Pixel 2
No setup required
Since it is an online tool, there’s no need to download and set it up onto your PC.
No Need For Manual Firmware Download
The tool will automatically identify your device and download its latest firmware, without any manual intervention from your end.
Flash in a Few Clicks
The entire flashing process only takes a few clicks.
Relock Bootloader
The tool supports re-locking the device’s bootloader after the flashing is complete.
Force-Flash Firmware
You could also instruct the tool to force flash the firmware to all the partitions on your device.
DM-Verity
Using the tool, you could also disable the DM-Verity Checks on your device.
Factory Reset
It also supports resetting your device with just a single click.
So with this, you would’ve got a decent idea regarding this tool. Let’s now check out the steps to flash the firmware on your Pixel device via Android Flash Tool.
How to Flash Firmware on Pixel Devices via Android Flash Tool
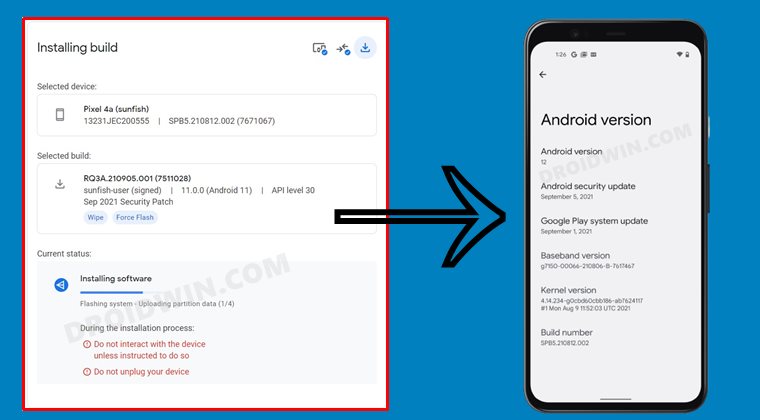

The below instructions are listed under separate sections for ease of understanding. Make sure to follow in the exact same sequence as mentioned. Droidwin and its members wouldn’t be held responsible in case of a thermonuclear war, your alarm doesn’t wake you up, or if anything happens to your device and data by performing the below steps.
STEP 1: Install Android SDK


First and foremost, you will have to install the Android SDK Platform Tools on your PC. This is the official ADB and Fastboot binary provided by Google and is the only recommended one. So download it and then extract it to any convenient location on your PC. Doing so will give you the platform-tools folder, which will be used throughout this guide.
STEP 2: Enable USB Debugging and OEM Unlocking
Next up, you will also have to enable USB Debugging and OEM Unlocking on your device. The former will make your device recognizable by the PC in ADB mode. This will then allow you to boot your device to Fastboot Mode. On the other hand, OEM Unlocking is required to carry out the bootloader unlocking process.
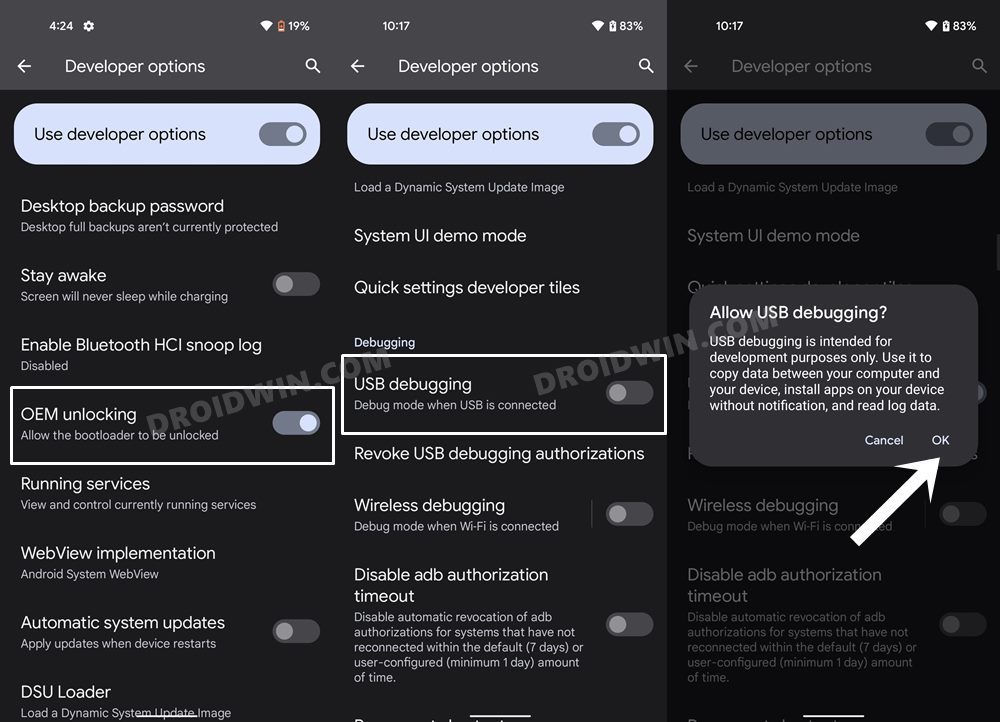

So head over to Settings > About Phone > Tap on Build Number 7 times > Go back to Settings > System > Advanced > Developer Options > Enable USB Debugging and OEM Unlocking.
STEP 3: Unlock Bootloader
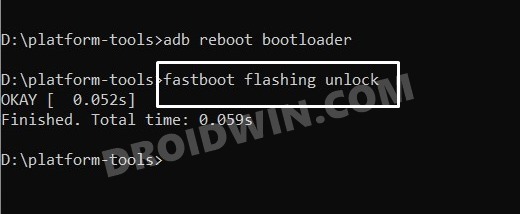
In order to flash the firmware on your Pixel device via Android Flash Tool, you will have to unlock the device’s bootloader as well. If you haven’t done so, then you may refer to our guide on How to Unlock the Bootloader on Google Pixel Devices.

STEp 4: Install Fastboot Drivers
- First off, let’s verify if your PC has the necessary drivers installed or not.
- For that, launch Device Manager from the Start Menu.
- Then expand the Portable Devices (or Other Devices) section.

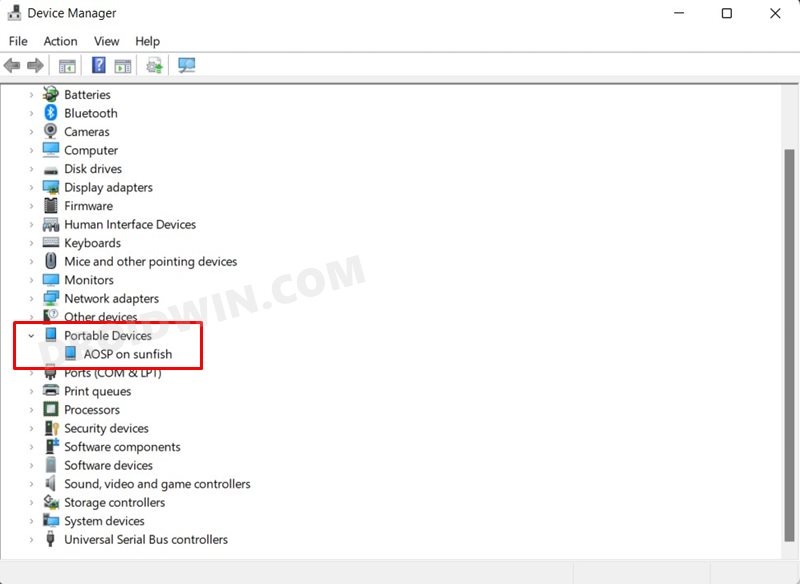
- If you see your Pixel device listed there, then the necessary drivers are already installed.
- If your device is not listed there, then please download and install the Google Android Bootloader Interface Drivers.
STEP 5: Flash Firmware on Pixel Devices via Android Flash Tool
- To begin with, connect your device to the PC via a USB cable. Make sure USB Debugging is enabled.
- Then head over to the Android Flash Tool website and click on the Get Started button.

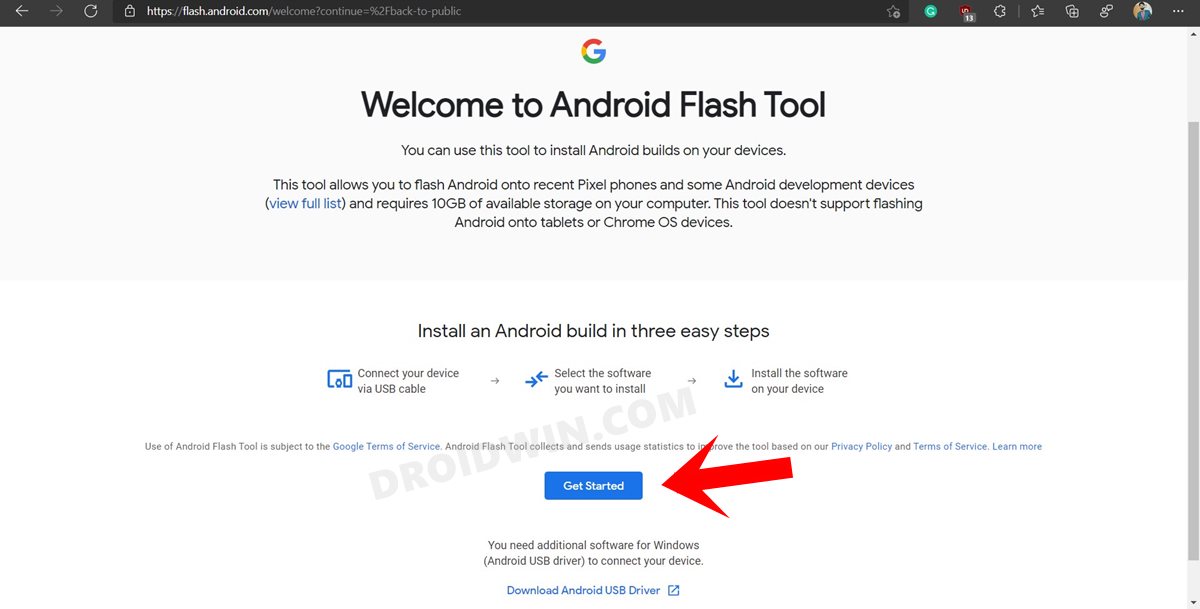
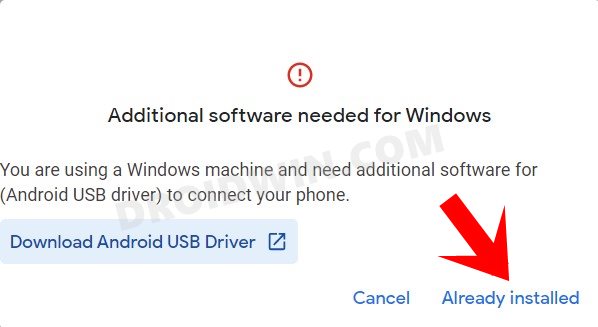
- It will now ask you to install the USB drivers, since we have already done so, click on Already Installed.

- If the pop-up is blocked on your browser, then the tool will notify you of the same. So click on the browser’s pop-up icon (usually situated at the right of the taskbar) and select “Always Allow pop-ups and redirects from flash.android.com”.

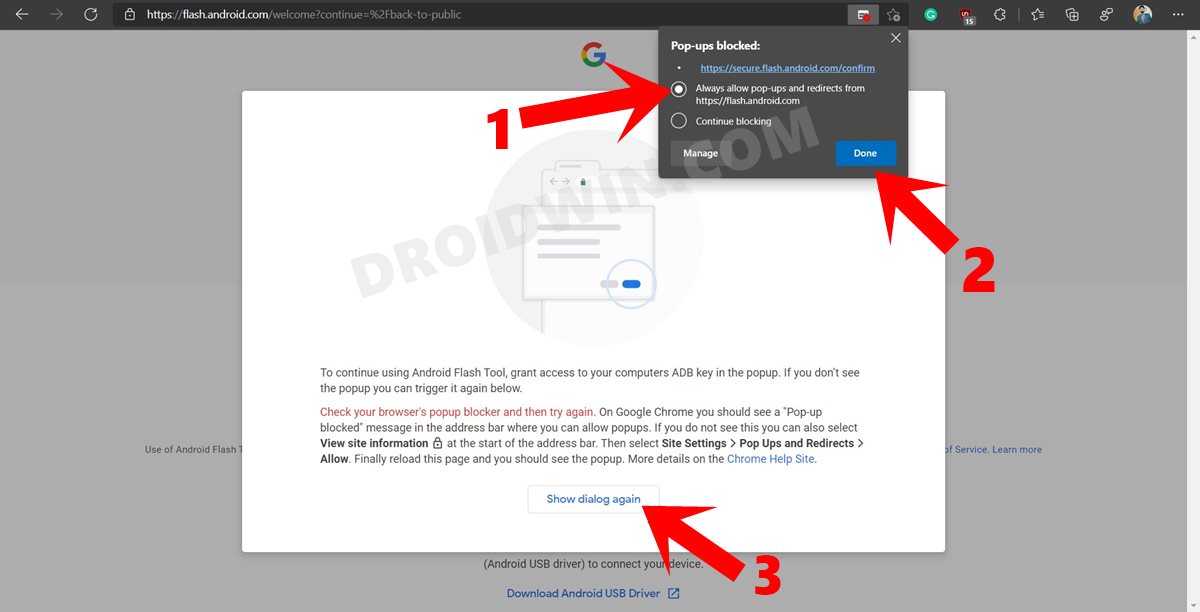
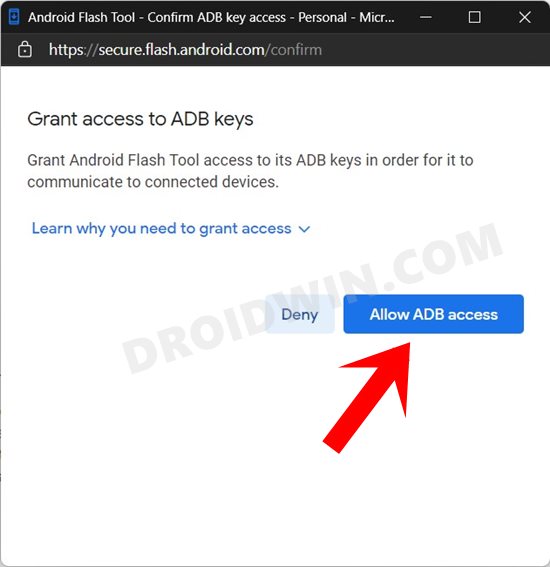
- Once that is done, click on the Show dialog again. You will now get the ADB dialog box, click on the Allow ADB Access button.

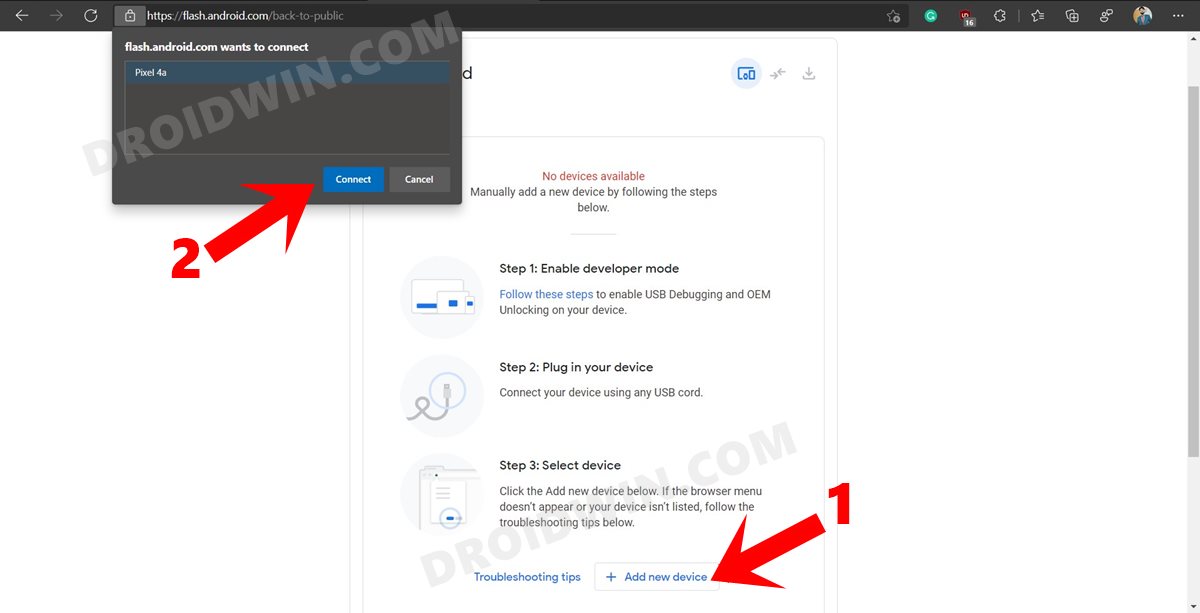
- After that, click on the Add new device button. Select your device from the top left menu and hit Connect.

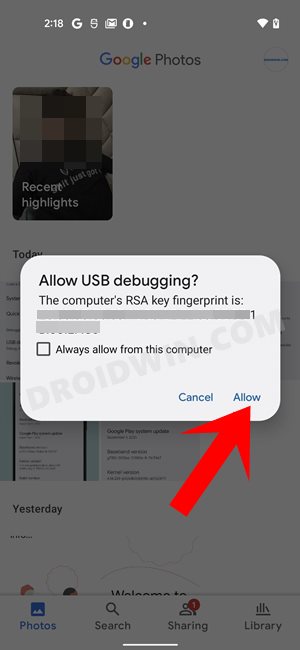
- You will now get a USB Debugging prompt on your device, tap Allow.

- After that, expand the Selected Device section and select your device.

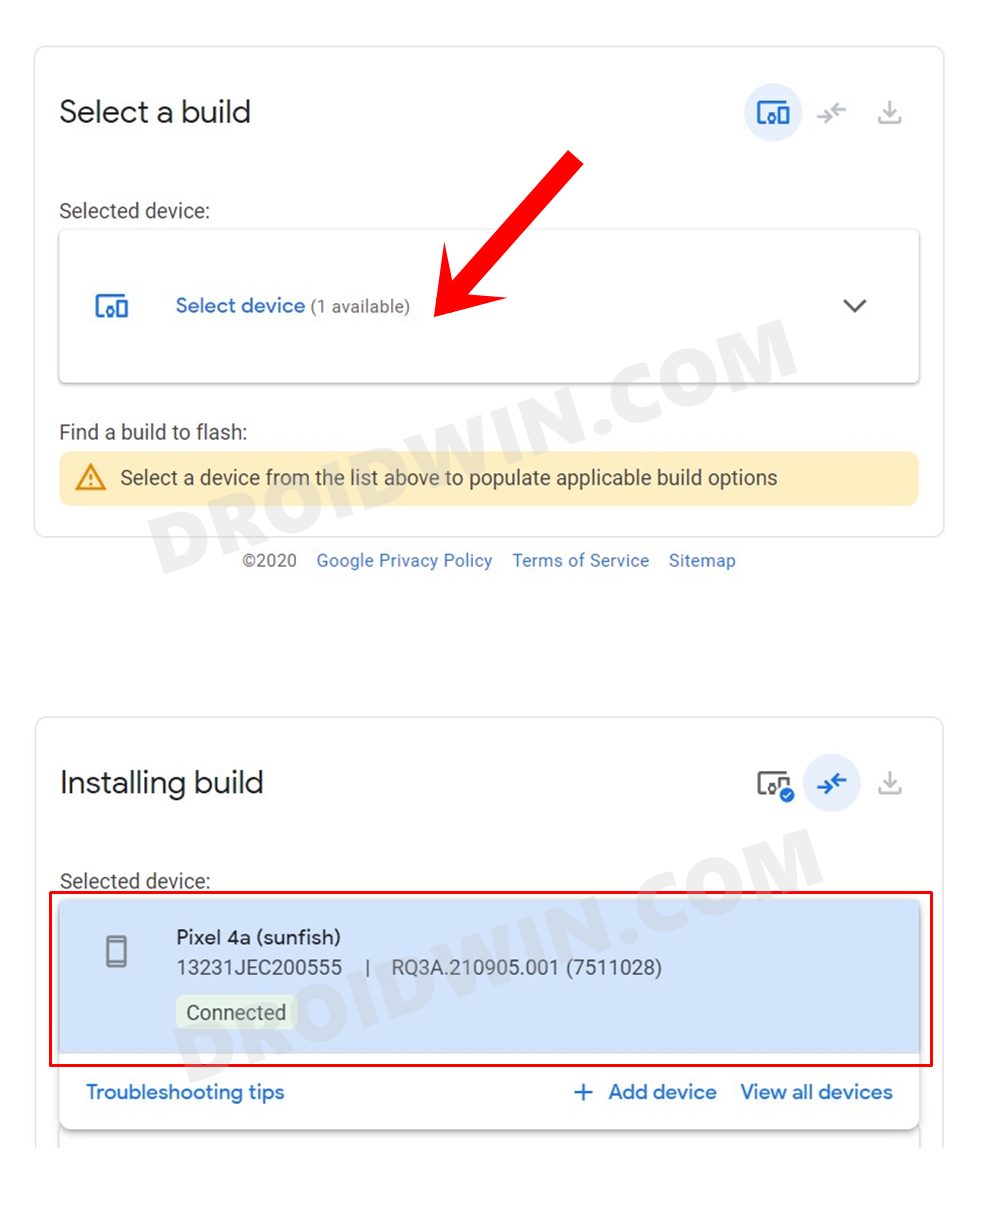
- Now refer to the Selected Build section. By default, Google would have already loaded the latest available firmware for your device.
- Likewise, it will factory reset your device, re-lock the bootloader after the flash, and force-flash the firmware onto your device. If you wish to modify any of these settings, then click on the pencil icon.

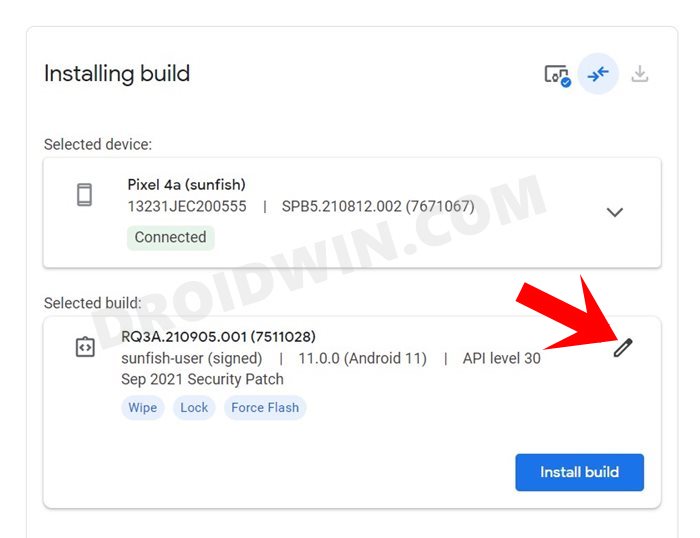
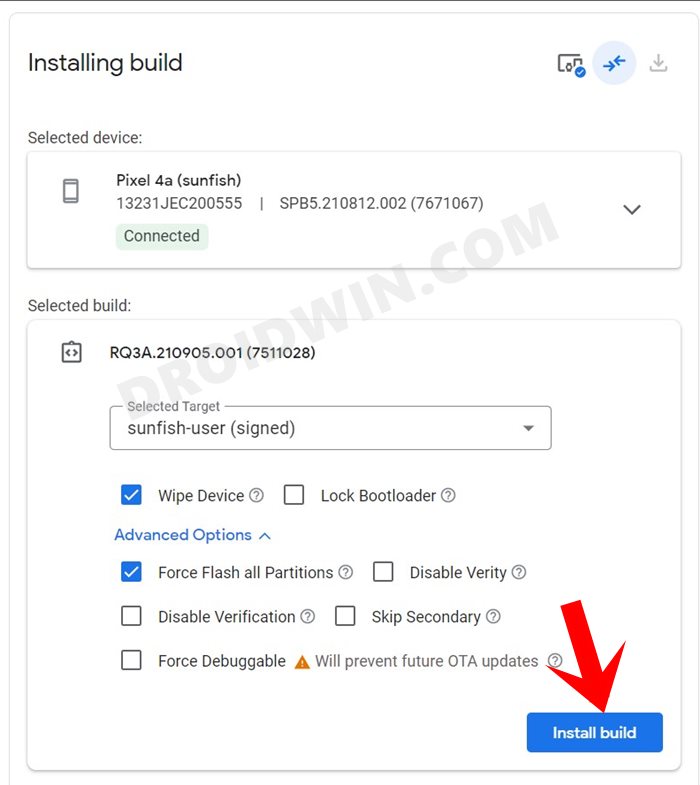
- Now if you are performing a downgrade or upgrading to a newer OS version, such as updating your device from Android 11 to Android 12 via Android Flash Tool, then the Wipe Device option should be checked.
- However, if you are just installing monthly OTA updates, then you may uncheck it. Moreover, if you want your bootloader to remain unlocked after flashing the firmware, then uncheck the Lock Bootloader option.

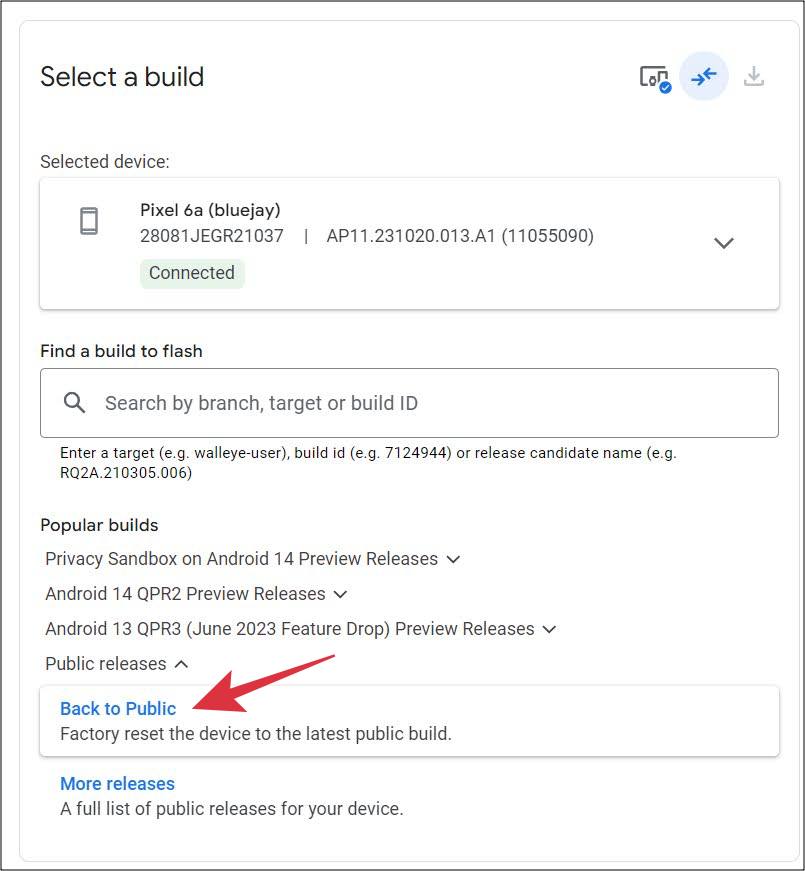
- TIP: If you are going from a Beta to a Stable build, then click on Select a different build, and under Public Releases, select Back to Public.

- Once you have made the desired selections, click on the Install Build button situated at the bottom right.

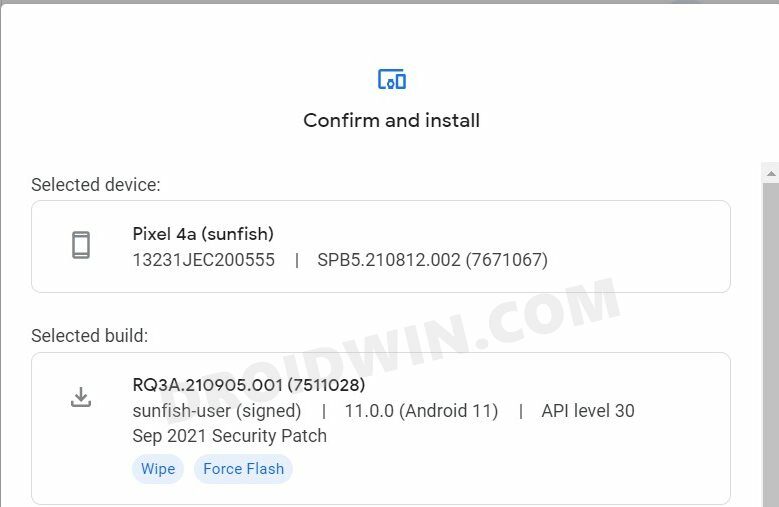
- The tool will now show you all the changes that you have made. If that’s well and good, then click on the Confirm button.

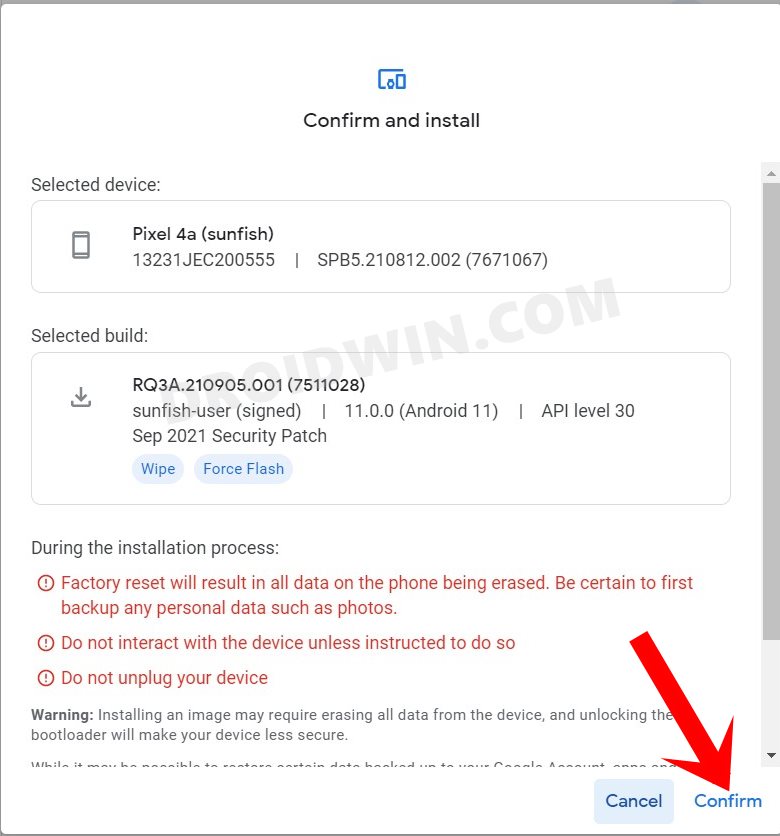
- After that, accept the Terms and Conditions by clicking on the I Accept button.


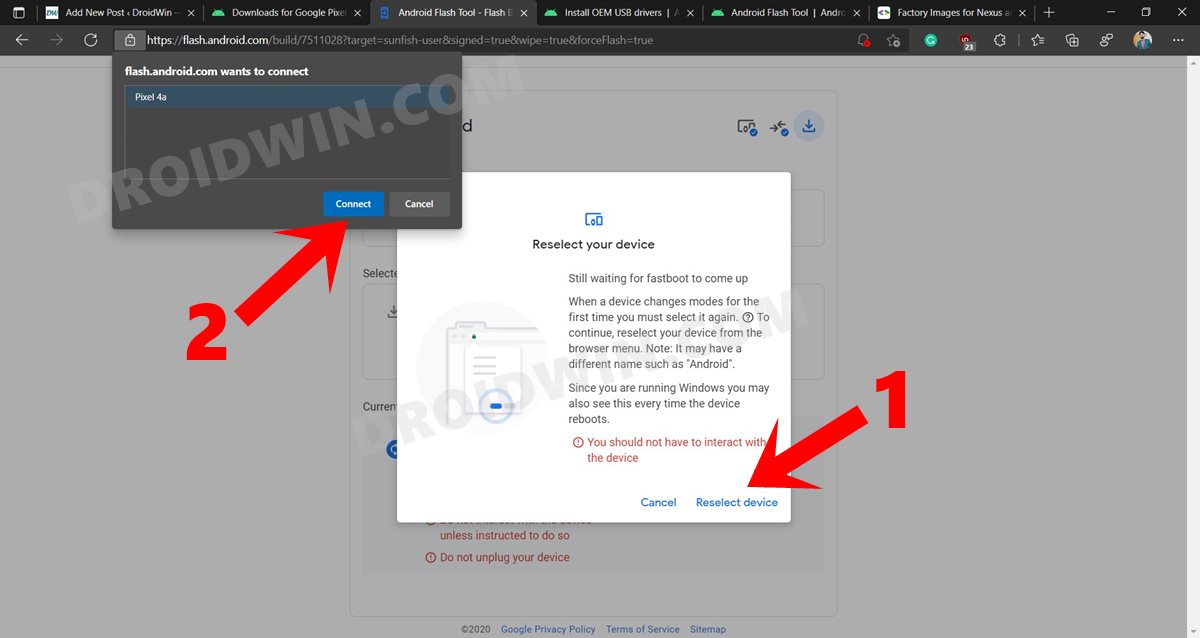
- Your device will now reboot to Fastboot Mode. If this is the first time you are using this tool, then you will get a prompt. Click on the Reselect Device, select your device from the top left prompt, and click Connect.

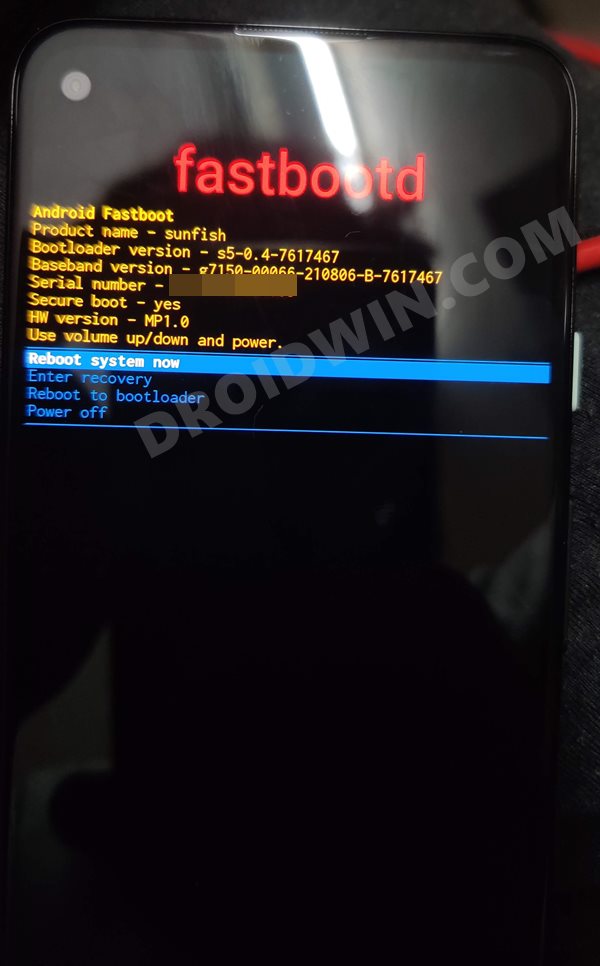
- The flashing process will now begin and during the process, your device will boot to Fastboot and FastbootD modes, you don’t have to do anything during the flashing process.

- Once the flashing is complete, you shall get the Flash Complete message in the tool. Likewise, your device will now boot to the newly flashed firmware.


So these were the steps to flash the firmware on your Pixel device via Android Flash Tool. If you have any queries concerning the aforementioned steps, do let us know in the comments. We will get back to you with a solution at the earliest.


