In this guide, we will show you the steps to downgrade your preferred Adobe Creative Cloud apps to an earlier version. The tech behemoth has bundled in some of its most important apps under one package. From graphic design, video editing, web development, photography to optional cloud services, there’s a truckload of essential software that is part of this bundle. So the likes of Acrobat Pro, Premiere Pro, Photoshop, InDesign, Illustrator, and After Effects could all be found under one roof.
Acting as a single platform for all your Adobe products, it efficiently streamlines the app management and handling process and is a boon for professional who deals with multiple Adobe software. Moreover, these apps also tend to receive upgrades at regular intervals which enhance the app’s performance and improve its existing features. However, sometimes, a buggy update might be rolled out that could have an adverse effect on the app’s performance.
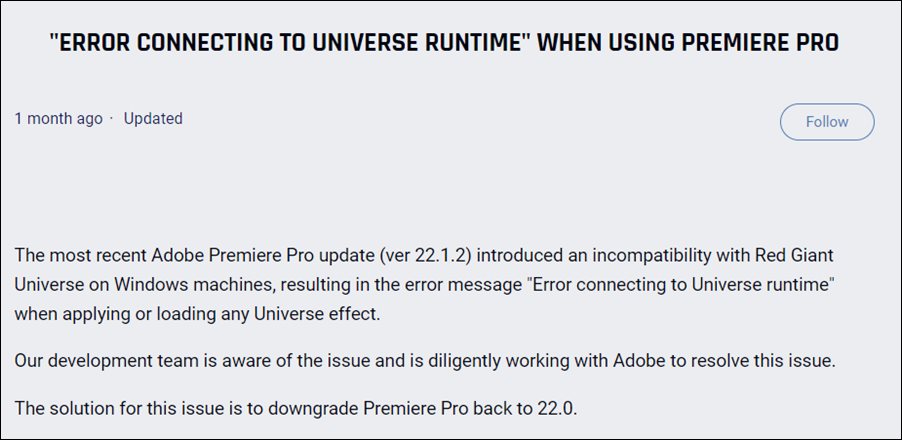
For example, Adobe Premiere Pro recently received an update (version 22.1.2) which ended up breaking the Red Giant Universe plugin. Well, this isn’t just a one-off instance, few such cases have been reported in the past and there are also chances of it happening again in the near future. When that happens, your best bet is to downgrade that app to the previous stable build and stay on that version until Adode releases a patch. So in this guide, we will show you the steps to downgrade your Adobe Creative Cloud apps to an earlier version. Follow along for the instructions.
Table of Contents
How to Downgrade Adobe Creative Cloud Apps to an Earlier Version
We will be breaking this guide into three headers. The first section will help you in retaining your current app preferences. The next section will show you how to retain previous versions of your app (that is about to be uninstalled). The third and final section will show you the downgrade steps. Do note that the first and second steps are completely optional. Moreover, if you are planning to go for a fresh downgrade, then you may easily skip both those sections and directly head over to the third one.
STEP 1: Retain Current App Preference
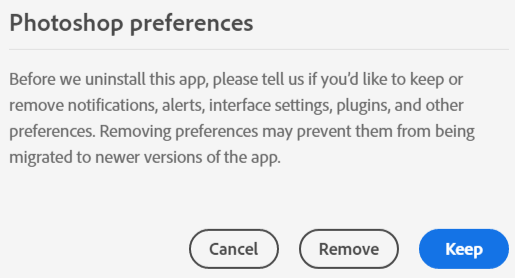
In order to retain the app’s preference settings (alerts, interface settings, plugins, etc), you will first have to uninstall that app. During the uninstallation process, it will ask whether you want to retain the preferences, reply in the affirmative and your task stands complete. As far as the uninstallation is concerned, well, we anyhow had to remove the app for the downgrade process, so let’s do it right now itself.
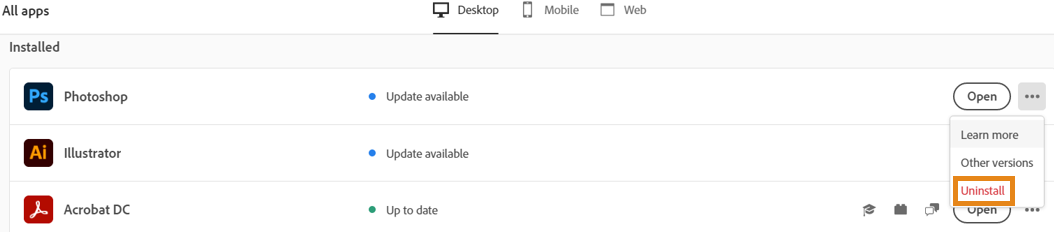
- To begin with, launch the Creative Cloud app and go to the All Apps section.
- Then click on the More (…) button next to the app that you wish to uninstall.

- After that, select Uninstall from the drop-down menu.
- Finally, click on the Keep button to retain the app preferences.

STEP 2: Retain Previous Version of the App
When you install a different (older/newer) version of the app, then the currently installed version will be automatically removed from your PC. However, if you wish to keep both versions installed on your PC, then refer to the below instructions. Do note that this isn’t generally recommended while performing a downgrade as the downgrade version might cause conflict with the newer/currently installed one.
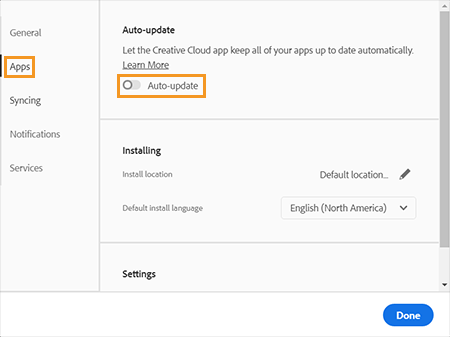
- Launch the Creative Cloud app and click on your profile icon situated at the top right.
- Then select Preferences from the drop-down menu that appears.
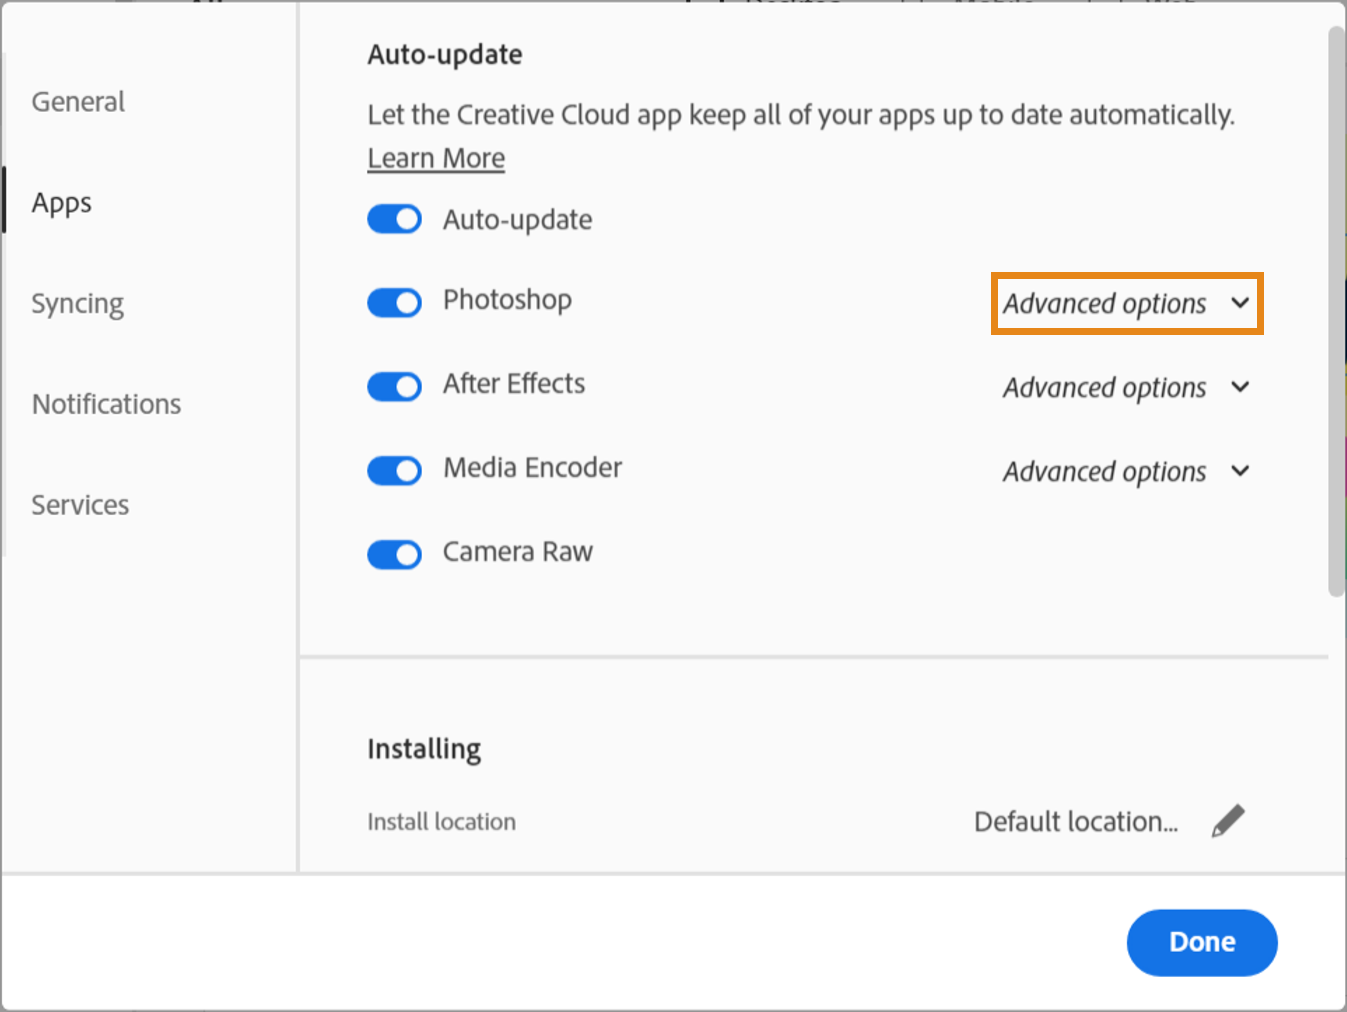
- Next, select Apps from the left menu bar and enable the Auto-Updates toggle.
- After that, click on the Advanced Options button next to the desired app.
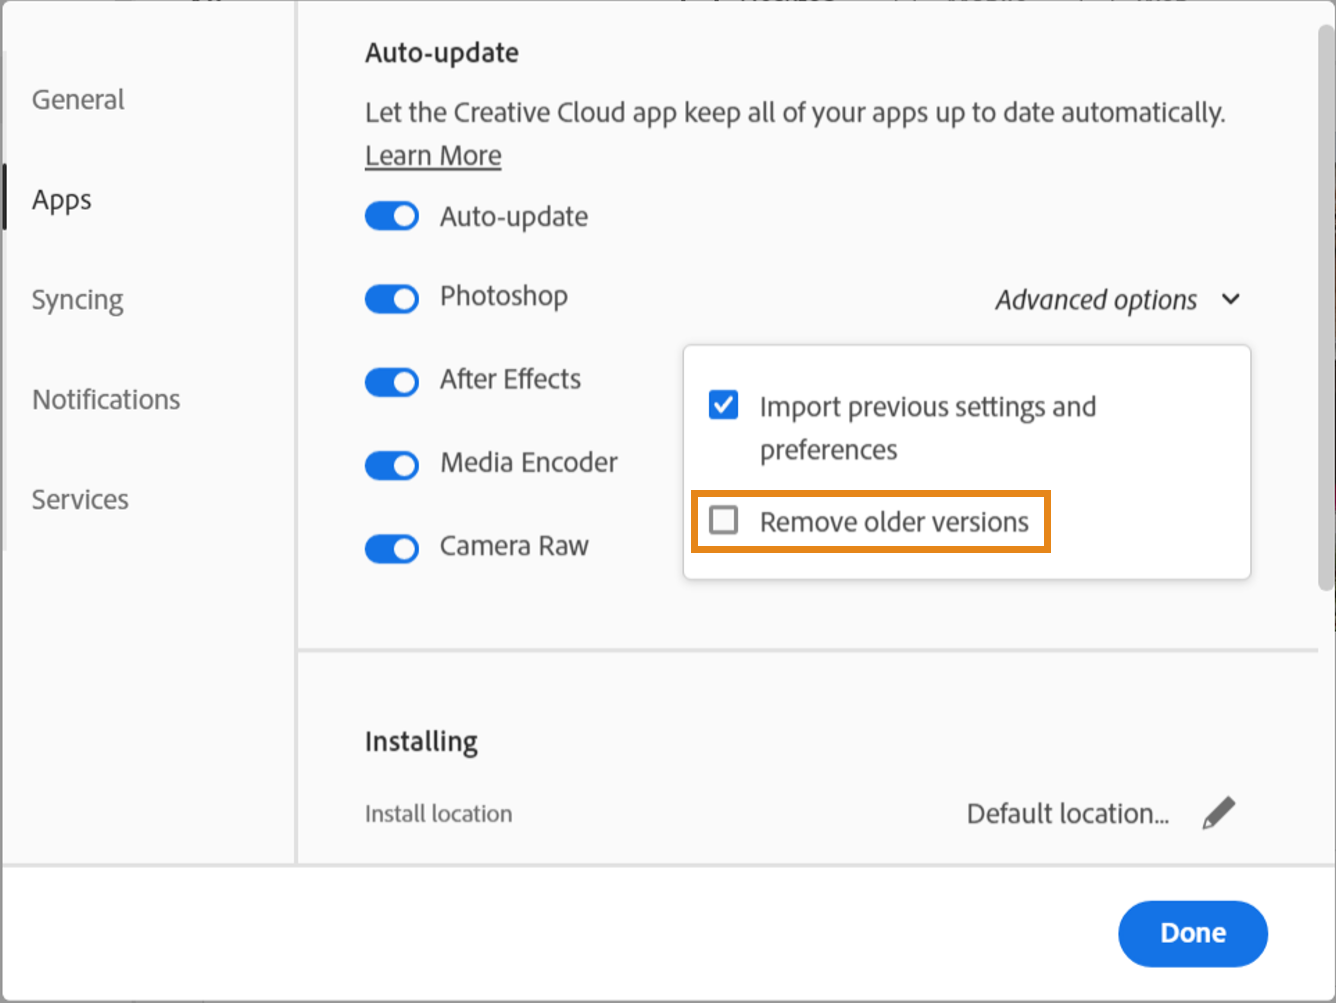
- Finally, uncheck Remove previous versions and hit Done. That’s it.

STEP 3: Downgrade Adobe Creative Cloud Apps
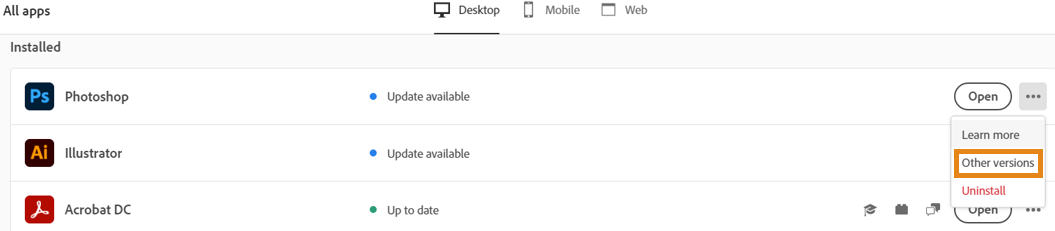
- Open the Creative Clouds app and scroll to the app that you wish to downgrade.
- Then click on the More (…) button next to that app.
- After that, select Other Versions from the drop-down menu.
- Now click on the Install button next to the app version of your choice.
- That’s it, the older build of that app will now be installed onto your PC.


So this was all from this guide on how you could downgrade your preferred Adobe Creative Cloud apps to an earlier version. If you have any queries concerning the aforementioned steps, do let us know in the comments. We will get back to you with a solution at the earliest.
- Citation: Adobe Express
- Screenshots Credits: Adobe HelpX Forum.


