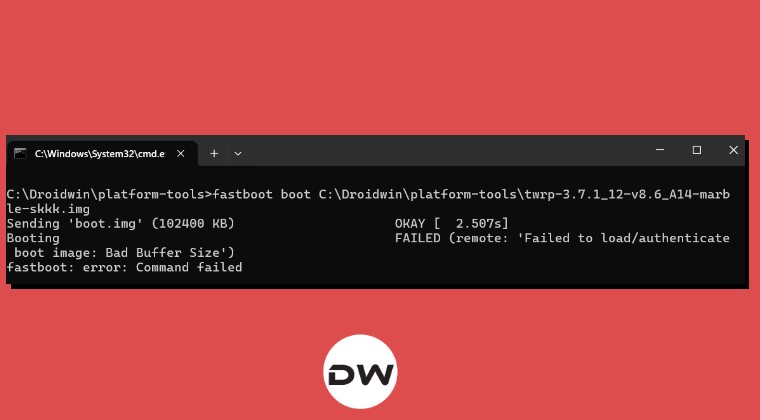
In this guide, we will show you the steps to fix the FAILED (remote: ‘Failed to load/authenticate boot image Bad Buffer Size’) error and make you aware of the reason behind this error so that you don’t end up replicating it again. Flashing files used to be a pretty straightforward process until the introduction of the A/B partition scheme. One of the biggest takeaways from that is most OEMs decided to ditch the recovery mode whereas some still decided to proceed ahead with it.
Not only did the removal of the recovery partition result in confusion but the fact that it wasn’t a uniformly implemented decision and some devices still tend to have it led to further confusion among the masses. Not only it panted the seed in the minds of users while flashing recoveries like TWRP and OrangeFox, but even flashing the patched boot/init_boot for rooting was also riddled with disarray.
All this resulted in quite a few errors and issues, including the FAILED (remote: ‘Failed to load/authenticate boot image Bad Buffer Size’). So in this guide, we will list the reasoning behind this issue and more importantly, the steps on how you could rectify this error. So without further ado, let’s get started.
Reason for Bad Buffer Size Error
There exists two methods to flash a custom recovery or patched boot/init_boot: either temporary boot them via fastboot boot or permanently flash it via fastboot flash recovery/boot command. While many users prefers to first use the boot command to verify the legitimacy of the file and also to make sure it’s free from all the issues before proceeding ahead with the permanent installation.
However, you cannot always have a say in this. The ability to temporary boot a file completely depends on the fact whether your device supports it or not. And to check the same, you have to confirm whether your device has a dedicated recovery partition. if your device does has a recovery partition, then you cannot use the fastboot boot, instead you can only permanently flash it via the fastboot flash recovery command.
If you end up using the fastboot boot command, then you will be greeted with the FAILED (remote: ‘Failed to load/authenticate boot image Bad Buffer Size’) error. On the other hand, if your device doesn’t have a recovery partition, then you can use the fastboot boot command [and after that, make the root/recovery permanent]. So with that said, let’s make you aware of the steps to check if your device has a recovery partition or not.
- Download and extract the Android SDK Platform Tools on your PC.
- Then enable USB Debugging and connect your device to PC via USB.
- Now open Command Prompt inside platform-tools folder and type in
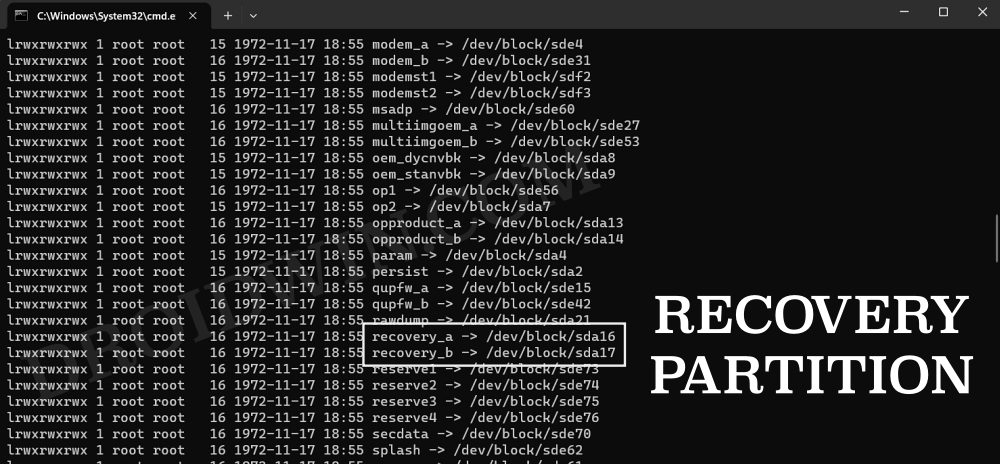
adb shell
cd /dev/block/platform
ls -la /dev/block/bootdevice/by-name
- Now refer to the output and check if your device has a recovery partition.
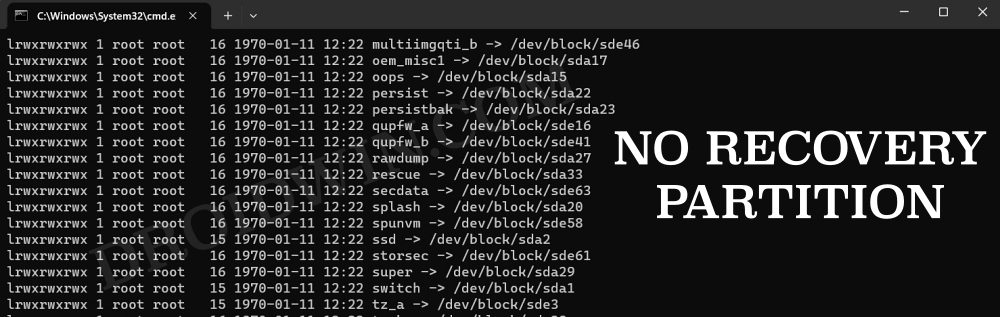
If your device does has a recovery partition, then you’ll have to use the fastboot flash command. On the other hand, if your device doesn’t have a recovery partition, then you can use the fastboot boot command.
Fix FAILED (remote: ‘Failed to load/authenticate boot image Bad Buffer Size’)
As of now, your device will be stuck in the Fastboot Mode. What’s even worse is that using the fastboot reboot command or the hardware key combinations isn’t going to do any good either. This is because the boot partition has got corrupted and you’re only way out is to fix that corrupt partition. So let’s get that job done via the below-listed steps and check out the result.
- To begin with, download and extract Android SDK Platform Tools
- Then download the stock firmware that is installed on your device.
- If you don’t know the installed version, then download the latest one.
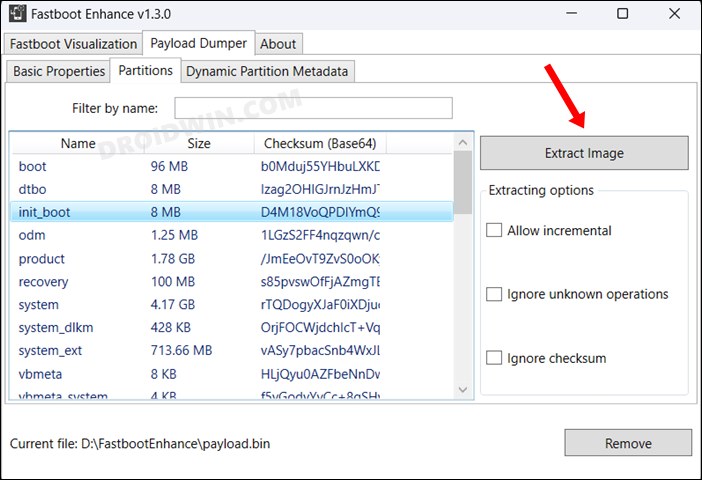
- Then extract it, copy the boot/init_boot, and transfer it to platform-tools
 .
.NOTE: Use boot/init_boot depending on what you use for rooting purpose.
- With your device booted to Fastboot Mode, connect it to your PC via a USB.
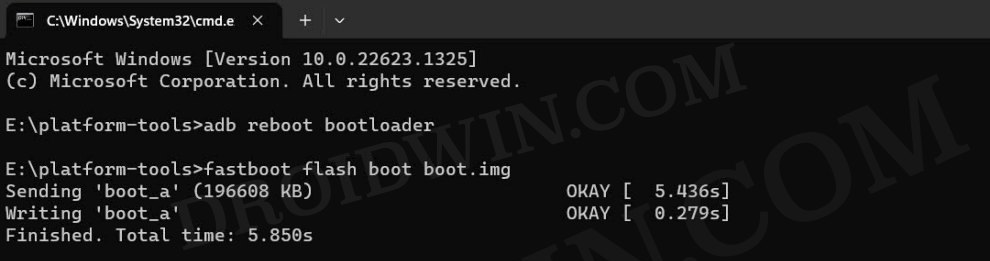
- Now type in either of the two below command to flash the boot/ini_boot.img
fastboot flash boot boot.img
fastboot flash init_boot init_boot.img
- Finally, type in the below command and your device will now boot to the OS:
fastboot reboot
 .
.
That’s it. These were the steps to fix the FAILED (remote: ‘Failed to load/authenticate boot image Bad Buffer Size’) error. Likewise, we have also made you aware of the plausible ecuase of this error. If you have any queries concerning the aforementioned steps, do let us know in the comments. We will get back to you with a solution at the earliest.