In this guide, we will show you the steps to downgrade your iPhone from iOS 18 to iOS 17. The Cupertino giant has recently rolled out the eighteenth iteration of the OS for its iPhone, alongside the new OS for Mac, VisionOS Pro, and Apple Watch. While each of them has been blessed with a slew of intriguing goodies, if we talk about the iPhone, then it has probably received its biggest updates in years, with some of the features that users have been requesting for ages finally making their way over these devices.
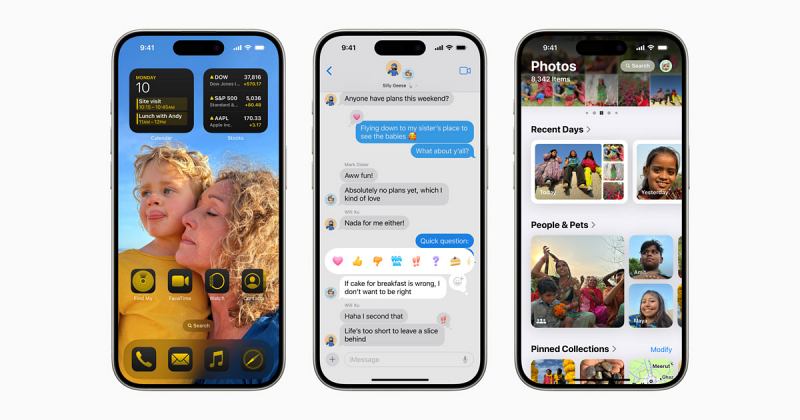
With the ability to change home screen icons, theme them based on the dominant color of the wallpaper, change lock screen options, app lock, customizable control center, tweaks to iMessage, Photos, and Control Center, and Apple’s very own AI, there is a plenitude of goodies to look forward to. However, one shouldn’t forget the fact that the update is still in the beta stage, so a few bugs and issues are along the expected lines.
Not to mention the fact that you might come across some performance issues as well, including the likes of excessive battery drainage, device overheating, and apps not functioning along the expected lines. So if you are indeed facing any such issue and it has made it quite difficult for you to use the device, then your best course of action is to downgrade your iPhone to the earlier stable iOS 17 build. And in this guide, we will show you how to do just that. Without further ado, let’s get started.
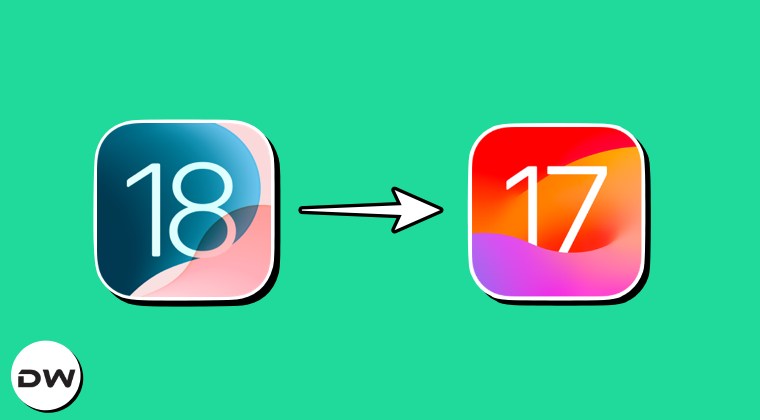
How to Downgrade iPhone from iOS 18 to 17
Before starting, I would like to discuss an important point regarding the backup and restore. If you have created a backup on iOS 18 Beta, then you cannot restore it on the iOS 17 stable beta [Apple never allows restoring the backup made on a beta build over to the stable version]. Therefore, you should either manually back up the data on iCloud or other cloud services.
Apart from that, you can restore the data that you had made before updating to iOS 18 beta. Moreover, in this guide, we will be using a Mac, so the downgrading process will be taken care of by the Finder. If you are a Windows user, then you’ll have to install iTunes for downgrading your iPhone. So on that note, let’s get started with the instructions.
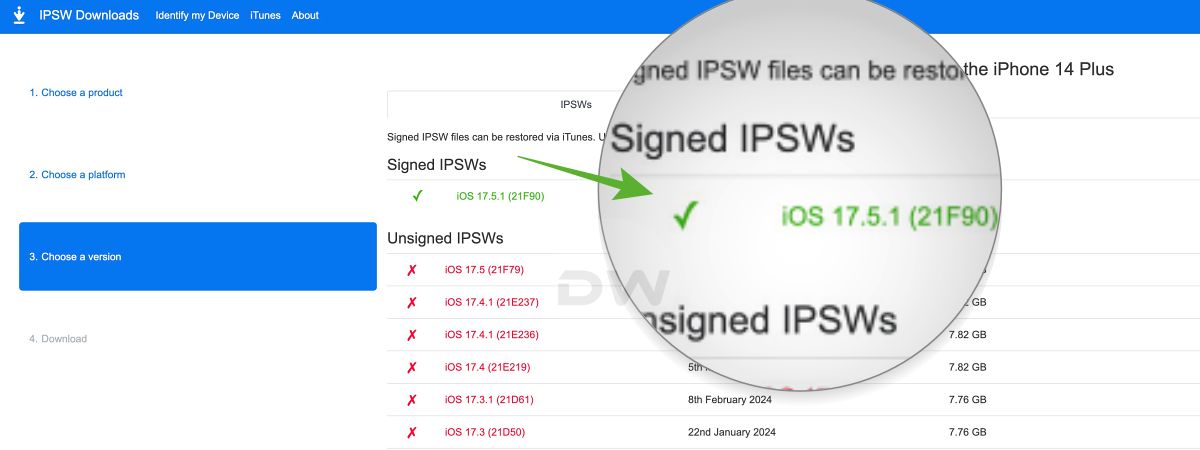
- Head over to the IPSW website and download the iOS 17 firmware for your iPhone.
- Make sure to download the signed version [which is green in color].

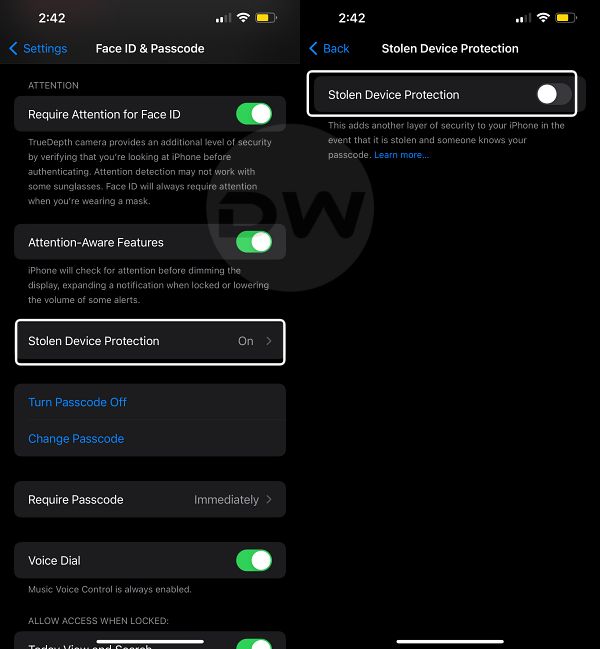
- Now on your iPhone, go to Settings > Face ID and Passcode > Type in your passcode.
- Then go to Stolen Device Protection and turn it off.
- Once done, go to Settings > Your Name > Find My > Find My iPhone > Turn it off.
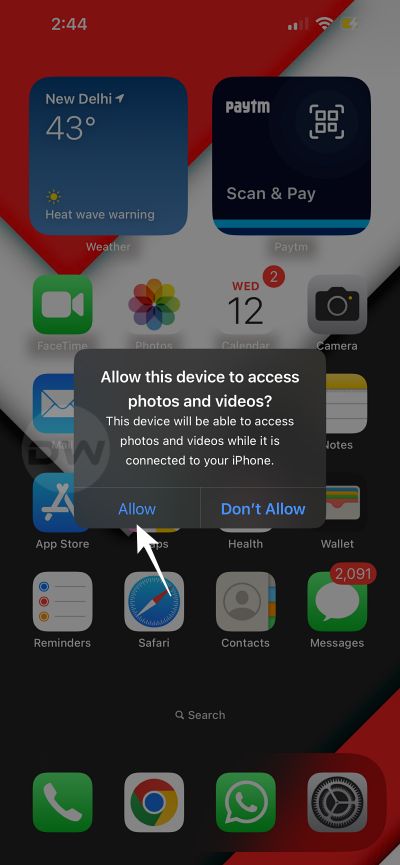
- Now plug in your iPhone to your Mac/Windows PC. Tap Allow on your iPhone if asked.
- Open Finder on your Mac or iTunes on a Windows PC.
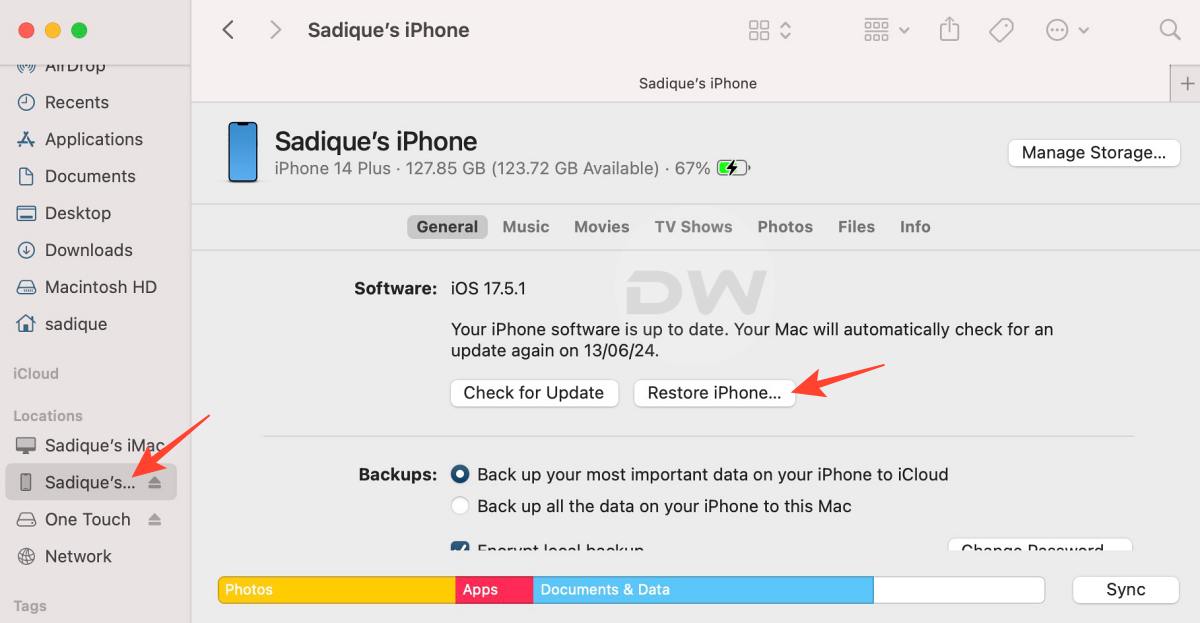
- Then select your iPhone from the left-hand side under Locations in the Finder window.
- Now press and hold the Options key [on your Mac] or Shift key [on your Windows].
- While holding the said key, click on Restore iPhone. Then select the iOS 17 firmware.
- Finally, select Open > Restore. The process will now start and could take a while.
- Once done, your device will boot to the downgraded OS on the setup screen. That’s it.
These were the steps to downgrade your iPhone from iOS 18 to iOS 17. If you have any queries concerning the aforementioned steps, do let us know in the comments. We will get back to you with a solution as soon as possible.
Fix Cannot Disable Find My iPhone For Downgrading iPhone
For downgrading your iPhone from iOS 18 to 17, one major requirement involves disabling Find My iPhone. However, we have seen quite a few user complaints wherein they are unable to turn off Find My iPhone because it is greyed out.
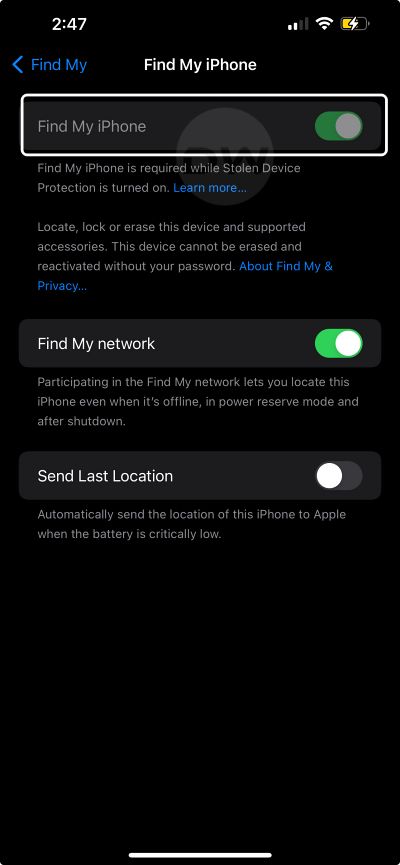
If you are also facing the same issue, then fret not. All that you need to do is turn off Stolen Device Protection from Settings > Face ID and Passcode and then you’ll be able to disable Find My iPhone from Settings > Your Name > Find My without any issues.