Widevine L1 Certification on OnePlus 7 Pro on an unlocked bootloader? Yes, you read that right! Read to know more about this interesting development that’s currently going on in custom development. As you all might be aware, there are quite a few perks of unlocking the device’s bootloader. But at the same time, it isn’t free from its fair share of downsides as well.
One among them is the degradation of WideVine L1 Certification to L3. For the unaware, this results in the inability of the users to watch or stream content on Netflix and other related apps in Full HD quality. SD is the maximum attainable quality in those devices. In this regard, there do exist a few workarounds that could bring back the L1 Certification on unlocked bootloader devices.
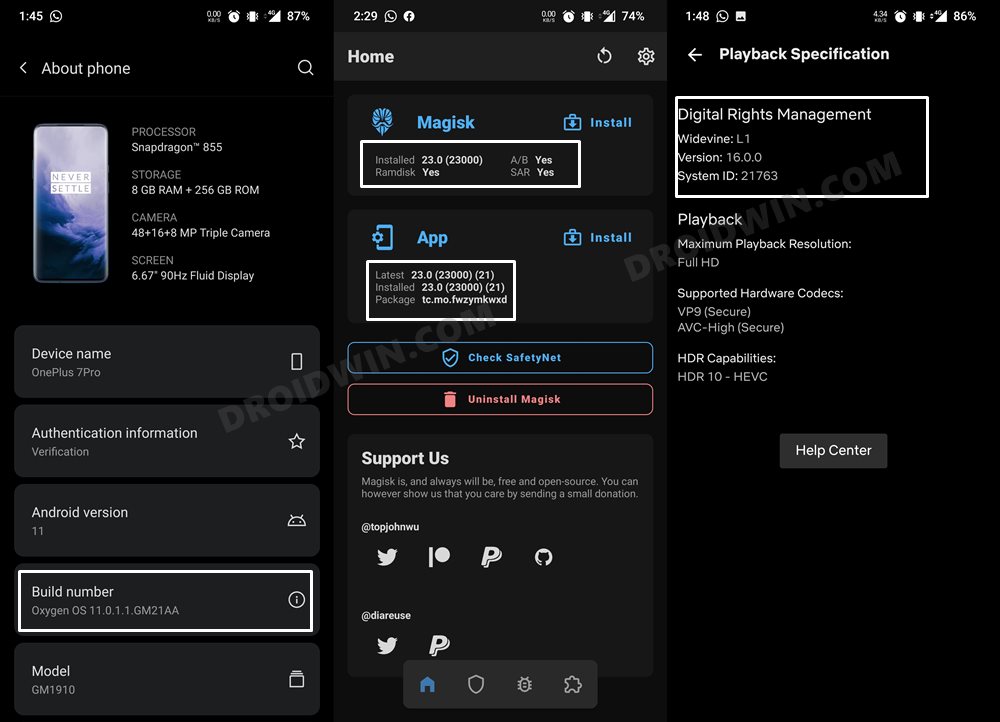
But those tweaks tend to bring in a few risks as well. However, if you are having the seventh iteration of the OnePlus series, then you would be in for a treat. After device owners recently installed the OxygenOS 11.0.1.1 update on their OnePlus 7 Pro, they were able to get back the WideVine L1 on their unlock bootloader and rooted devices.
Widevine L1 on Unlocked Bootloader on OnePlus 7 Pro
It has been confirmed working on the GM1910, GM1917, GM1913 variants of OnePLus 7 Pro, but with a varying degree of success. That is, while some have achieved success simply by installing the said update, others weren’t so lucky. Infact even after using the Magisk Hide feature, it didn’t work out for them. If you also belong to this latter category of users, then here’s a workaround that you could try out.
- First and foremost, make sure that you have installed the OxygenOS 11.0.1.1 update (Settings > System > System Updates).
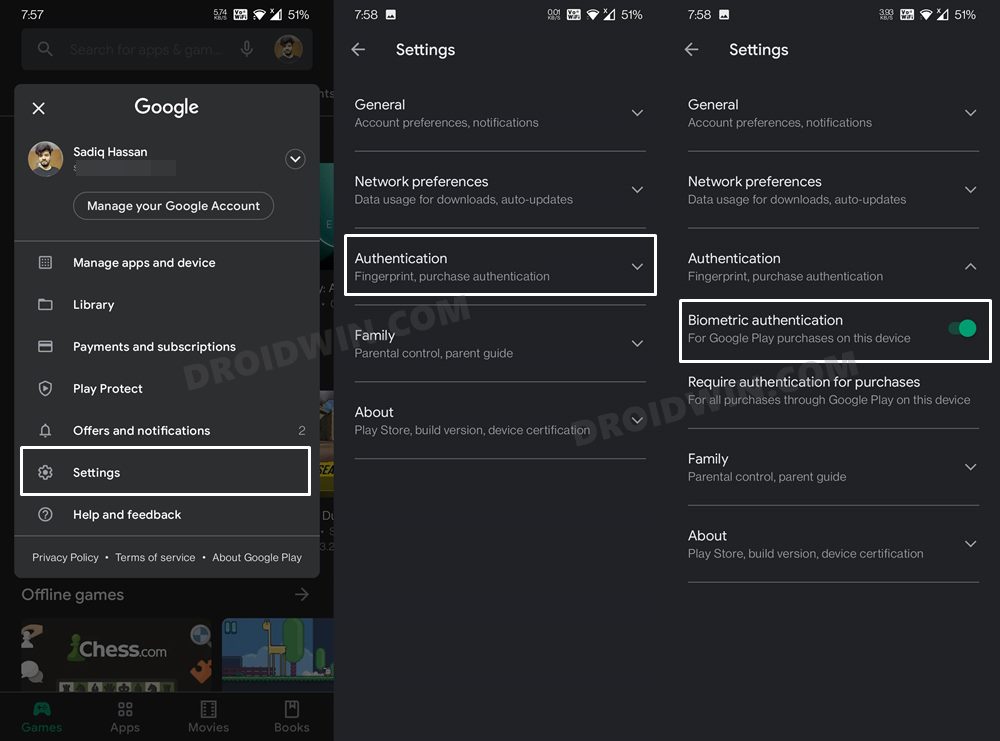
- If that’s well and good, then head over to Play Store and tap on your avatar situated at the top right.
- Select Settings and then expand the Authentication section.
- Now disable the Biometric Authentication toggle and then re-enable it.

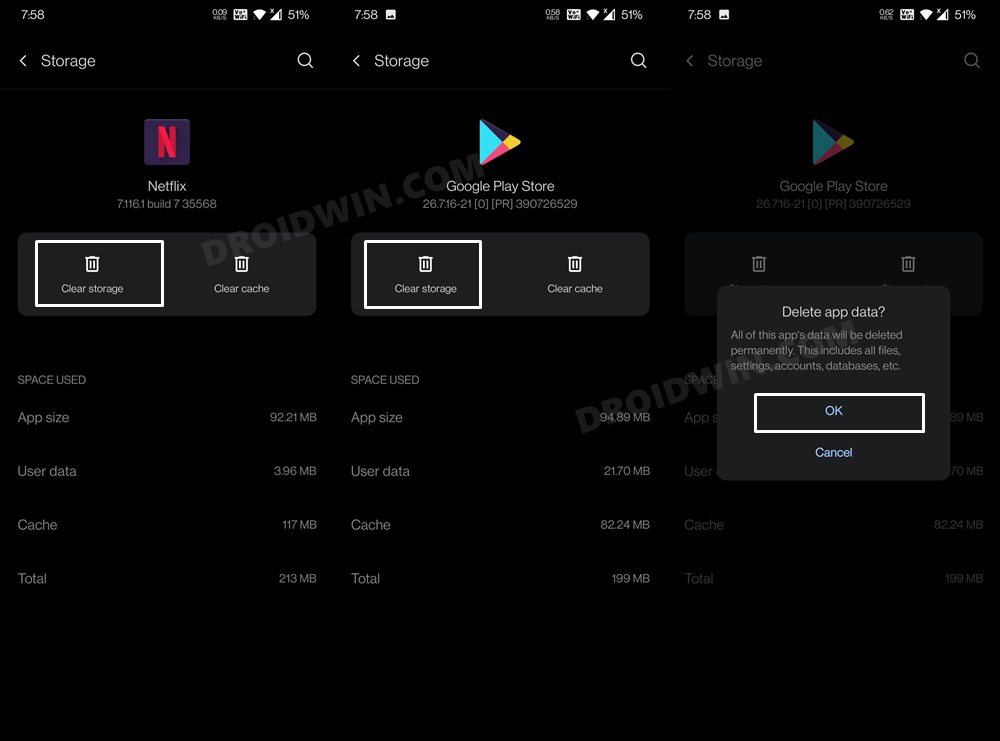
- Once that is done, you will have to delete the data of Play Store and Netflix. For that, long press on their app icon and select App Info.
- Then go to their Storage and Cache section and tap on Clear Storage. Click OK in the confirmation dialog box that appears.
- Now if you use any third-party app to check the DRM status on your device (such as the DRM Info app), then please delete its data as well.
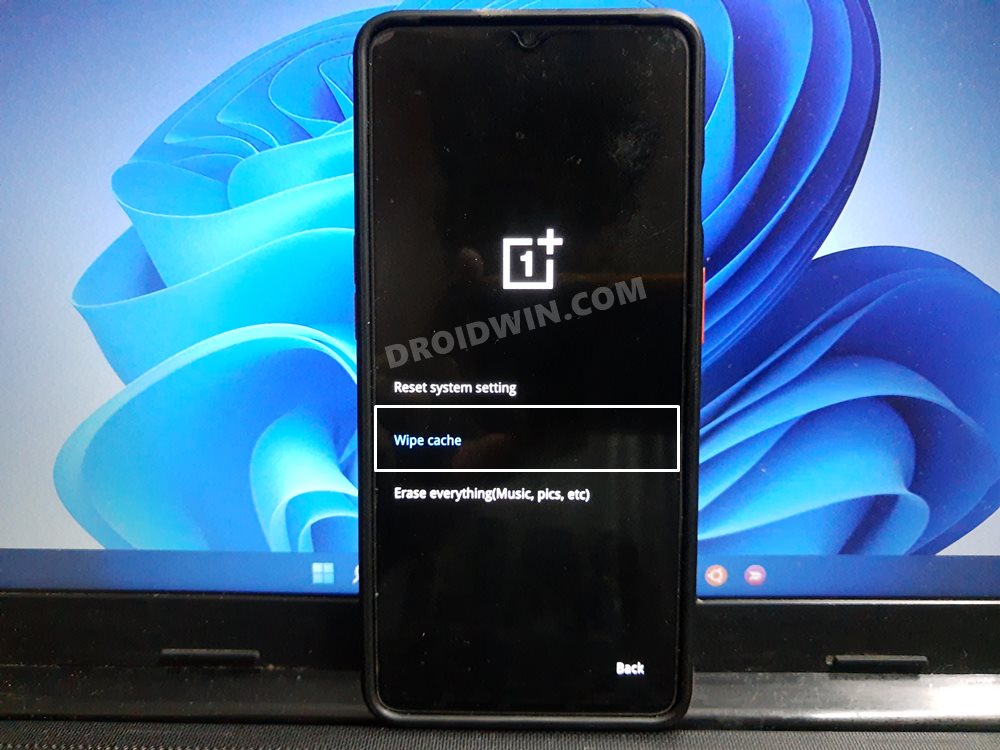
- Once that is done, reboot your device to Recovery. For that, long-press the Power menu, tap on the overflow icon, and select Recovery (make sure Advanced Reboot is enabled under Developer Options).
- Once your device boots to Recovery, type in your password > Select Langauge > Wipe Data and Cache > Wipe Cache > Yes.
- Once the cache has been deleted, reboot your device to the OS. Now open the Play Store and sign in with your Google Account.
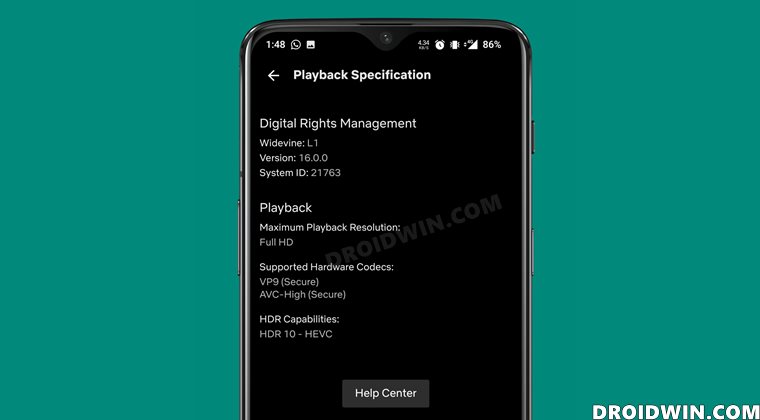
- Now check the DRM status, and hopefully, you would have got the L1 Certificate.
With this, we round off this article on Widevine L1 Certification on OnePlus 7 Pro on an unlocked bootloader. The actual reason behind this is still anyone’s guess, but hey, there are no complaints whatsoever. The only concern that many users are having is whether this would survive the next OTA update or not. Well, many have even opted not to install the subsequent security patches till they are able to enjoy the L1 Certification. What are your views on the same? Do let us know in the comments section below.