In this guide, we will show you the steps to uninstall the Microsoft Edge browser from your Windows 11 PC. Ever since Microsoft decided to make a switch to the Chromium source engine, it has seen a massive rise in its popularity. The reason for the same is there for everyone to see. Up until that point, Internet Explorer and the Legacy Edge were quite impressive in terms of providing a smooth UI and decent performance.
However, it lacked all the goodies that Chrome had to offer. Well, sooner than later, the tech giants realized this fact and adopted the Chromium source code. And everything is going great until now. Upon upgrading my PC to Windows 11, I realized that Microsoft had made Edge the default browser on its OS.
While that was acceptable up to an extent, what isn’t is the fact that you cannot bid adieu to this browser from your PC (the normal way). However, I managed to found out a handy workaround through which you uninstall the Microsoft Edge browser from your Windows 11 PC. And in this guide, we will be sharing just that. So without further ado, let’s get started.
Table of Contents
How to Uninstall Microsoft Edge in Windows 11
We have listed three different methods through which you could carry out the said. Go through each of them and then try out the one that is in sync with your requirement.
Method 1: Uninstall Edge Via Command Prompt
- To begin with, launch File Explorer via Windows+E shortcut keys.
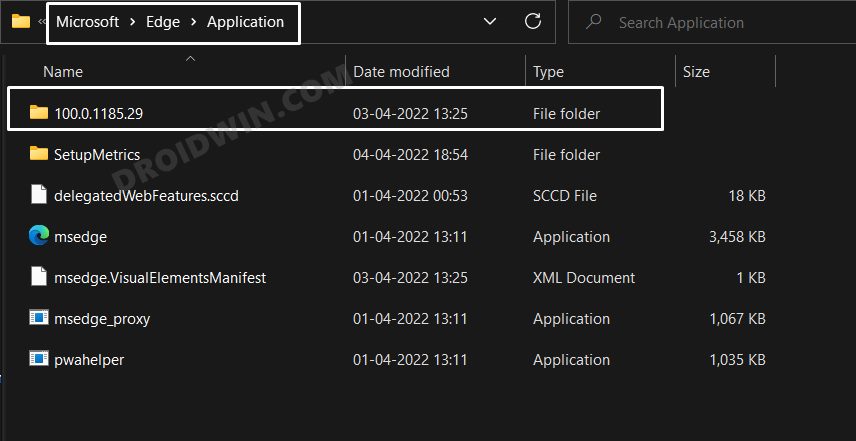
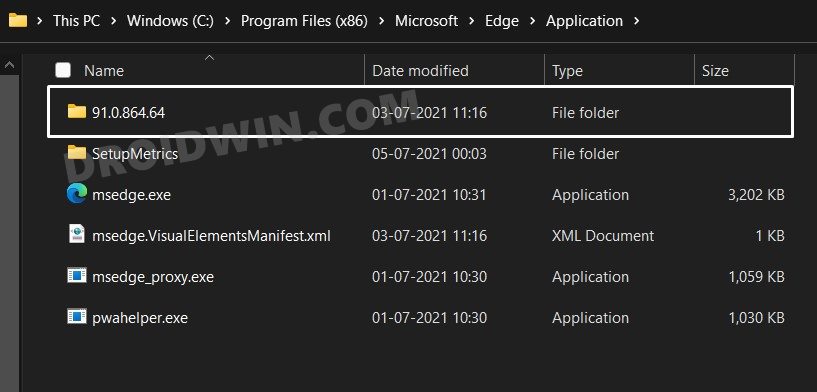
- Then copy-paste the below location in its address bar and hit Enter:
C:\Program Files (x86)\Microsoft\Edge\Application
- Now go to the folder that corresponds to your current browser version number.

- Then head over to that folder’s address bar, type in CMD, and hit Enter.
- This will launch Command Prompt. Type in the below command in that CMD window:
setup – uninstall – system-level – verbose-logging

- You will now get a prompt, click Uninstall. That’s it. Microsoft Edge has been removed from your Windows 11 PC.
Method 2: Uninstall Edge Via PowerShell
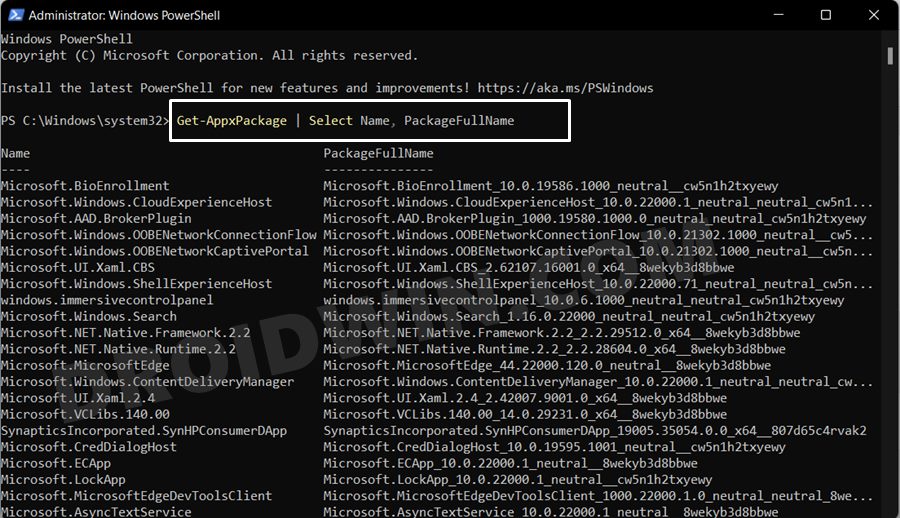
- Head over to the Start Menu, search Powershell, and launch it as an administrator.
- Then execute the below command to get a list of all the installed apps on your PC:
Get-AppxPackage | Select Name, PackageFullName

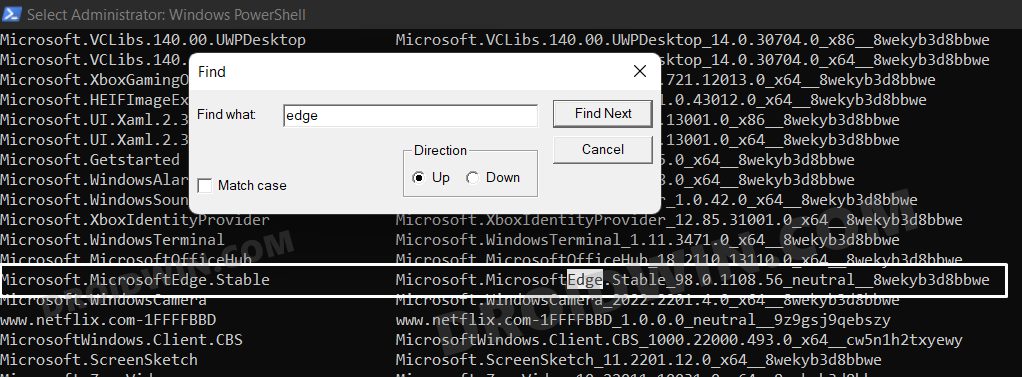
- Search Microsoft Edge and note down its PackageFullName next to it. It will be something along the lines of
Name: Microsoft.MicrosoftEdge.Stable
PackageFullName: Microsoft.MicrosoftEdge.Stable_98.0.1108.56_neutral__8wekyb3d8bbwe

- Now use the below command to uninstall Edge. Make sure to replace Name and PackageFullName accordingly:
Get-AppxPackage -allusers Name PackageFullName | Remove-AppxPackage
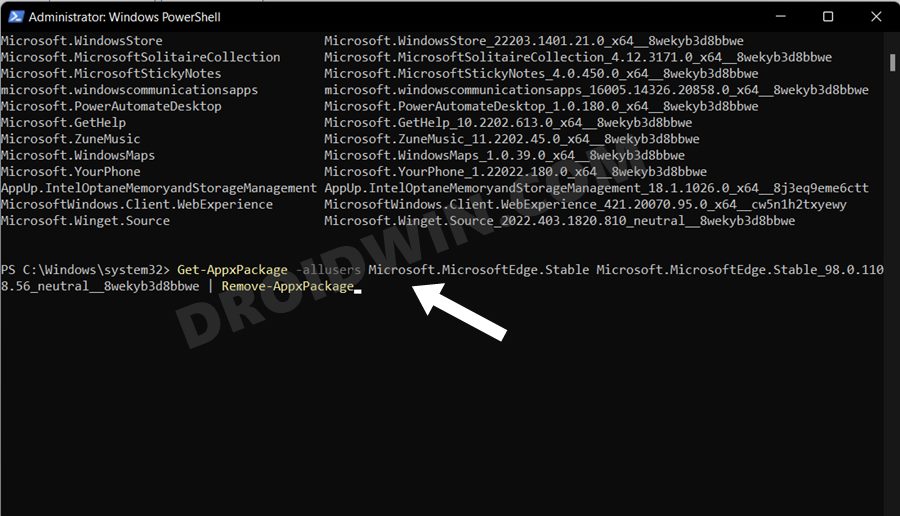
- For example, in our case, the above command will transform to:
Get-AppxPackage -allusers Microsoft.MicrosoftEdge.Stable Microsoft.MicrosoftEdge.Stable_98.0.1108.56_neutral__8wekyb3d8bbwe | Remove-AppxPackage

- As soon as you execute the said command, the Microsoft Edge browser will be uninstalled from your Windows 11 PC.
Method 3: Uninstall Edge Via Windows Terminal
- To begin with, launch File Explorer on your PC and head over to the below location:
C:\Program Files (x86)\Microsoft\Edge\Application
- Within that, go to the folder that has a numerical value in its name (which signifies the version number).

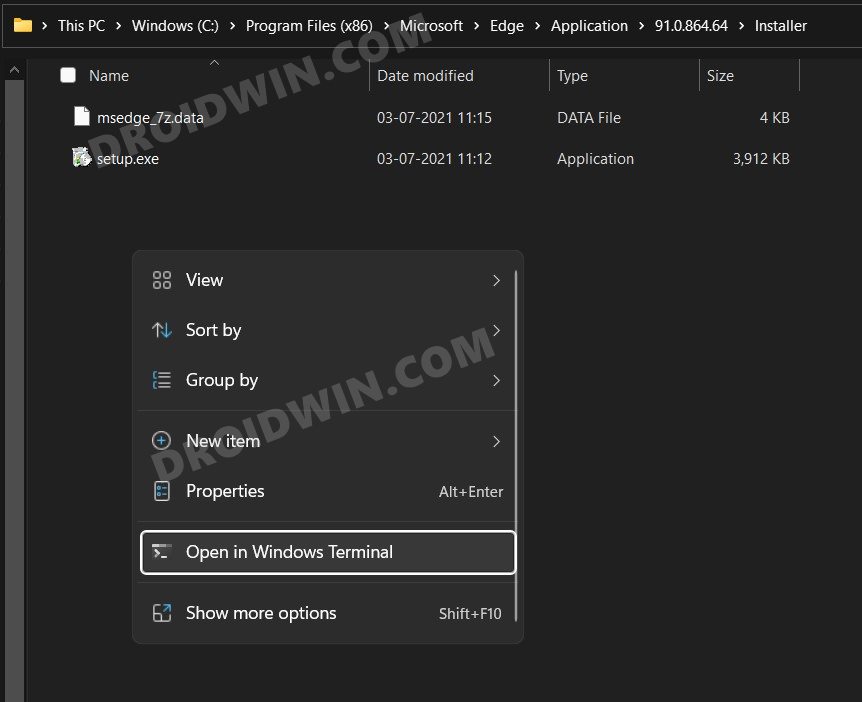
- Inside that, go to the Installer folder. Then press and hold the shift key and while doing so, right-click in an empty location.
- Select Open in Windows Terminal or Open in PowerShell Window. This shall launch the PowerShell window.

- Now just copy-paste the below command in this window and hit Enter:
.\setup.exe -uninstall -system-level -verbose-logging -force-uninstall

- The command will be executed and the browser will be removed from your PC for good.
So this was all from this guide on how you could uninstall the Microsoft Edge browser from your Windows 11 PC. If you have any queries with regards to any of the three methods, then do let us know in the comments section below. We will get back to you with a solution at the earliest.
