In this guide, we will show you two different methods to uninstall drivers from your Windows 11 PC. But first off, why would one need to carry out this task? Well, there could be quite a few reasons for the same. Among them, the most common is installing a buggy or corrupt driver file. Along the same lines, installing an old or outdated driver build could also result in this issue.
Likewise, if you are installing or updating a driver but the internet got interrupted in between, there is every chance of drivers spelling out trouble for you. Then in some cases, if a user tends to make any changes to the driver’s registry files (DWord 32-Bit Value files), then it could conflict with the proper functioning of the device and your only way out is to remove the existing drivers and install the fresh ones.
Well, there could be a plethora of reasons as to why the need for driver uninstallation might arise. But rather than divulging into the requirement for the same, let’s make you aware of the two different methods through which you could uninstall drivers from your Windows 11 PC. So without any further ado, let’s get started.
Table of Contents
The Prerequisites
There are two different approaches to carry out this task. The first one is via Driver Rollback whereas the second one is the manual removal of each driver file from your system. The first method is an easier one, involves little to no risk, and hence is the preferred method for many. On the downside though, it will only remove the currently installed driver and would take you back to the older build.
Whereas the second to uninstall drivers in Windows 11 is a lengthy approach and quite risky as well. But it will remove each and every trace of that driver from your PC. Anyways, with this, you are aware of the perks and risks of both these methods, so the ultimate decision lies in your hands.
But as a personal recommendation, it is advised that you start off with the first approach and if it doesn’t pell out success for you, then only proceed with the second method. Droidwin and its members wouldn’t be held responsible in case of a thermonuclear war, your alarm doesn’t wake you up, or if anything happens to your PC by performing the below steps.
Method 1: Uninstall Drivers in Windows 11 via Rollback
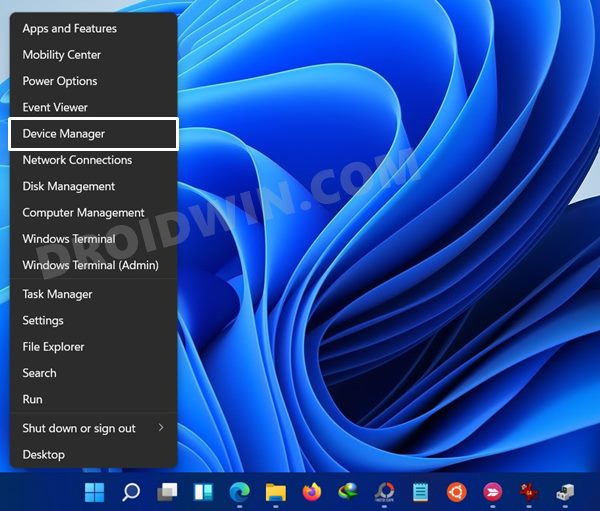
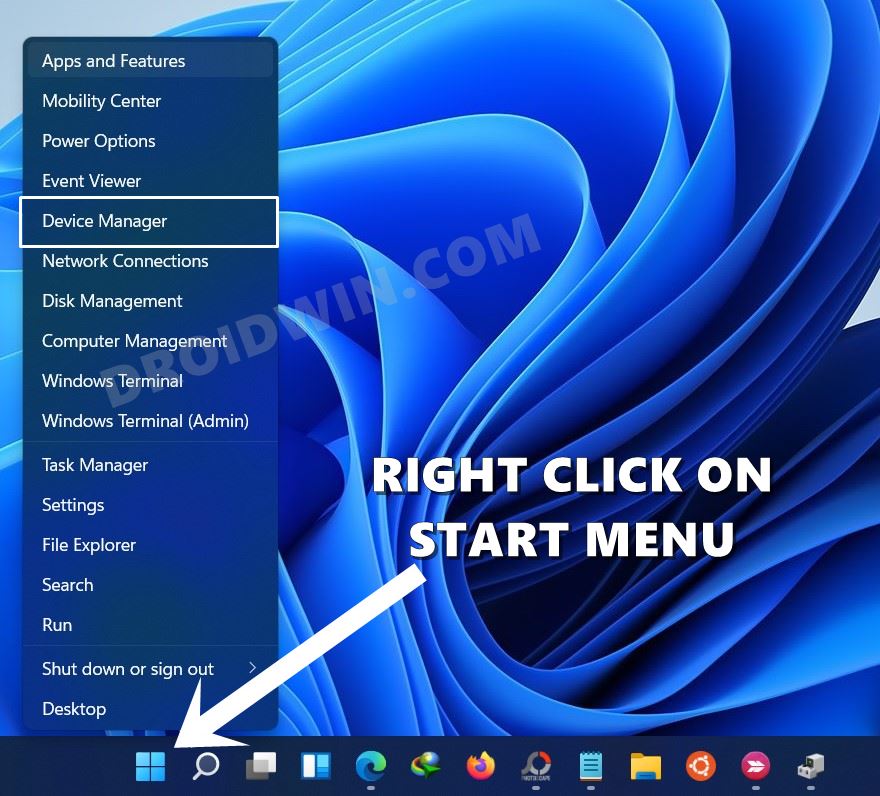
- To begin with, use the Windows+X shortcut keys and select Device Manager from the menu that appears.

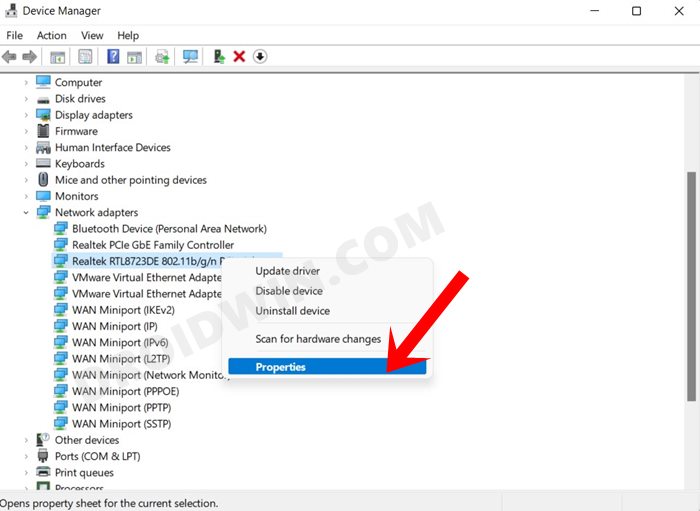
- Then head over to the section whose driver you need to roll back, and click on it. It shall further expand that section.
- Now right-click on the desired driver and select Properties.
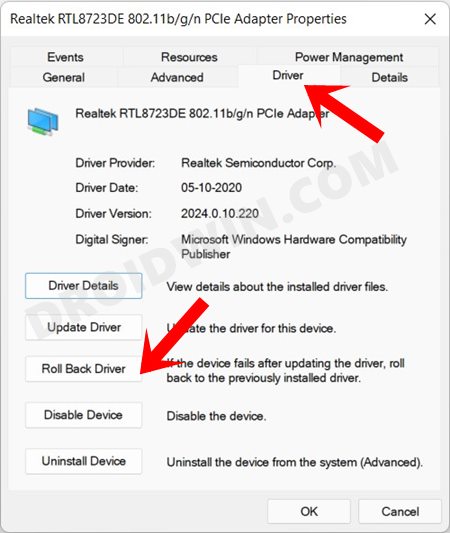
- Go to the Driver tab from the Properties window and click on Roll Back Driver.
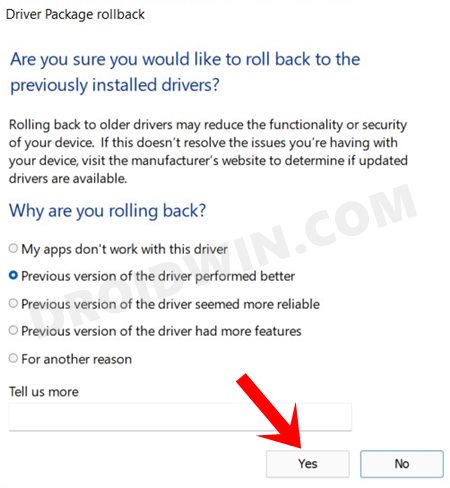
- It shall bring up the Driver Package Rollback window. Select the reason for the rollback and click Yes.
- Windows will then rollback the drivers to the earlier build. Once that is done, restart your PC for the changes to take place.
That’s it. This was the first method to uninstall the drivers in Windows 11 via the Rollback method. This process takes you to the older version of that driver, so it is still occupying an abode on your PC. If you wish to bid it adieu for good, then hop onto the next method given below.
Method 2: Uninstall Drivers in Windows 11 via Manual Removal
- Right-click on the Windows icon present on the taskbar and select Device Manager.
- Head over to the section whose drivers need to be removed and click on it to further expand it.
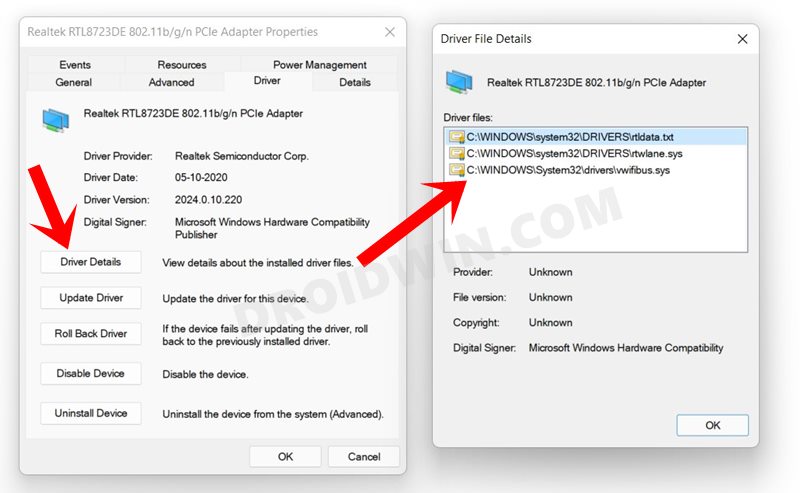
- Then right-click on the desired drivers and select Properties.
- Now click on the Driver Details button and it shall bring up the associated driver files, along with their locations.
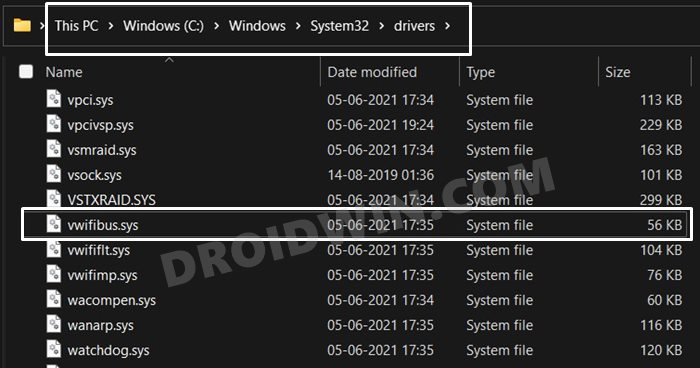
- So open File Explorer, go to those locations, and delete the said files. The location would be something along the lines of:
C:\Windows\System32\drivers
- But our job is only half done yet, as we only have deleted the driver’s configuration and system files, the actual driver file (.INF) is yet to be deleted.
- So again right-click on the driver and bring up its Properties dialog box.
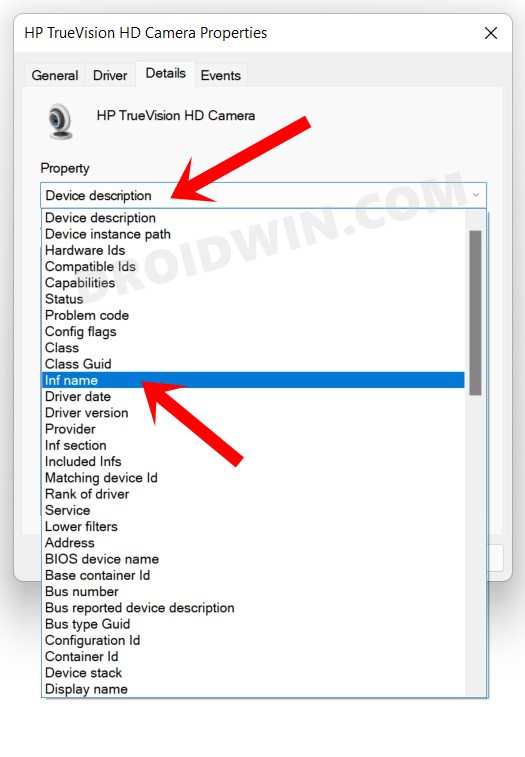
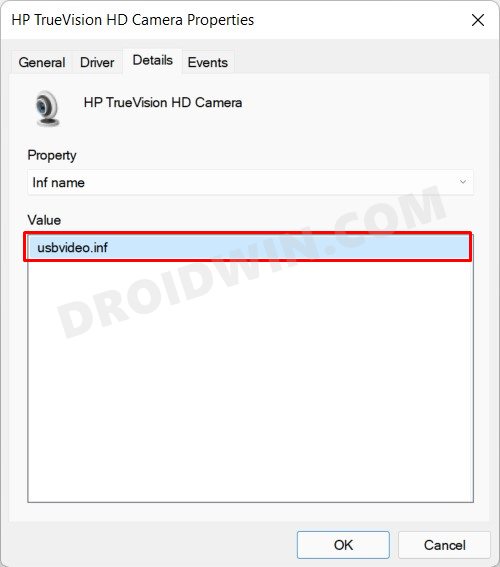
- Then, go to its Details tab. Click on the Property drop-down menu and select Inf Name.
- This shall bring up the driver’s INF file name under the Value field. Note done that file name.
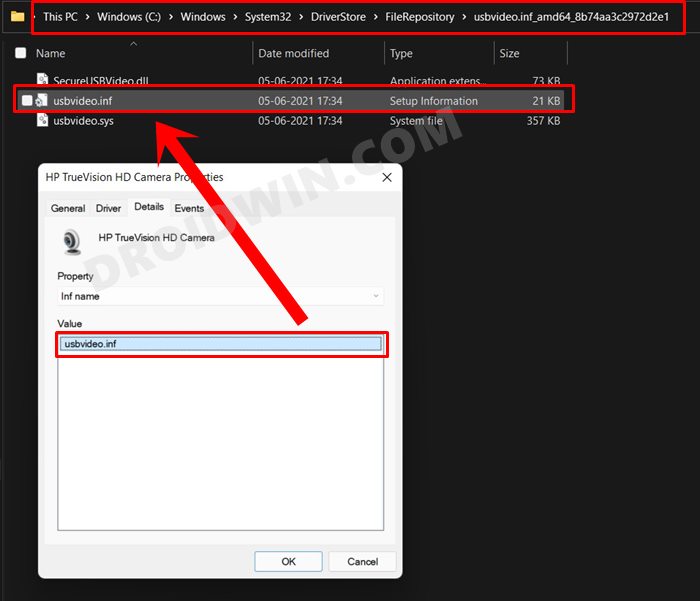
- Then use Windows+E shortcut keys to open File Explorer and copy-paste the below location in its address bar:
C:\Windows\System32\DriverStore\FileRepository
- You should now see the folder with the name of that INF file. Go inside that folder and delete the corresponding INF file. That’s it. The driver is completely removed from your PC.
So these were the steps to uninstall drivers in Windows 11. We have shared two different methods for the same. Do let us know in the comments section if you have any queries concerning any of the two aforementioned methods.