In this guide, we will show you two methods to unbrick your OnePlus 10T by flashing the stock firmware- via Fastboot Commands and using the Fastboot Enhance Tool. The latest addition to the OnePlus family generates a kind of mixed feeling. Depending on which side on the fence you are on, you might either love it for its Snapdragon 8 Gen chipset and 150W charging or hate it for the removal of the alert slider and the Hasselblad camera.
If we shift our focus towards custom development, then things are getting complicated there as well. While you could still gain administrative privileges by rooting the device via Magisk and flash tons of custom ROMs, however, the biggest asset might no longer be under our control. Yes, we are talking about the MSM Tool that has now been hijacked by Oppo and could no longer be accessed by the general user until they have authenticated access.
Fortunately, when it comes to softbrick or bootloop, you don’t need the help of the MSM Tool as you could easily unbrick your OnePlus 10T by flashing the stock firmware via Fastboot Commands. And in this guide, we will show you two different methods to do so. The first one is the automated approach wherein the Fastboot Enhance Tool will do the work on your behalf. On the other hand, the second method is the manual approach wherein you will have to manually flash each partition file using the commands provided by us. We have listed both these methods below, you may refer to the one that is in sync with your requirement.
Table of Contents
Unbrick OnePlus 10T: Flash Firmware via Fastboot Enhance Tool
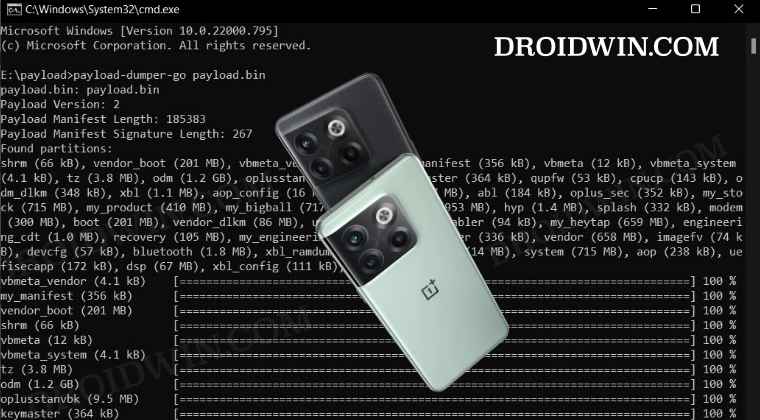
The below process will wipe off all the data from your device. So take a complete device backup beforehand by any means possible. Droidwin and its members wouldn’t be held responsible in case of a thermonuclear war, your alarm doesn’t wake you up, or if anything happens to your device and data by performing the below steps.
STEP 1: Download Fastboot Enhance Tool
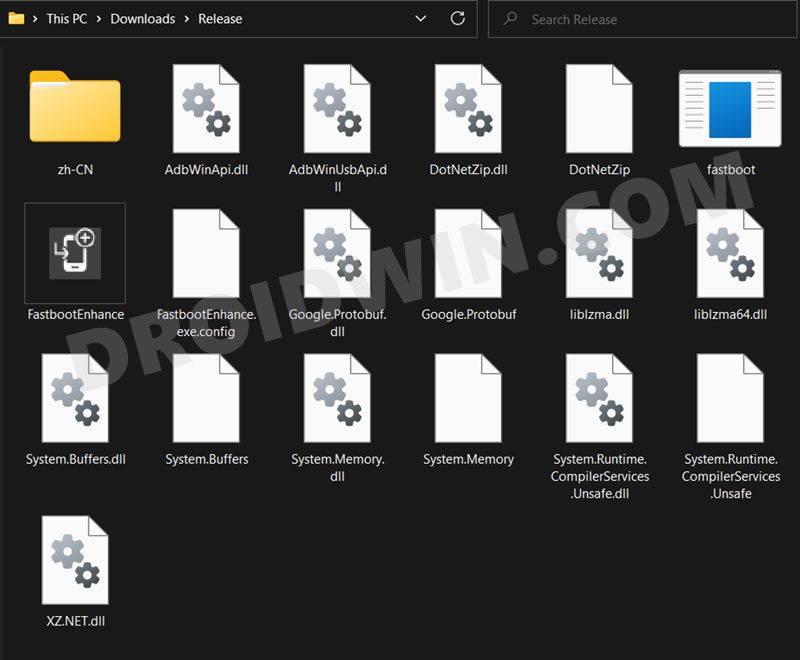
Download the Fastboot Enhance Tool from GitHub [direct link][Credits: XDA Senior Member xzr467706992]. Once downloaded, extract it to any convenient location on your PC. The biggest advantage of this tool is that you could directory flash the payload.bin file, there is no need to extract it and get the resultant IMG files!
STEP 2: Download OnePlus 10T ROM
- Next up, get hold of the Indian ROM for your OnePlus 10T from below:
OnePlus 10T Stock Firmware Collection
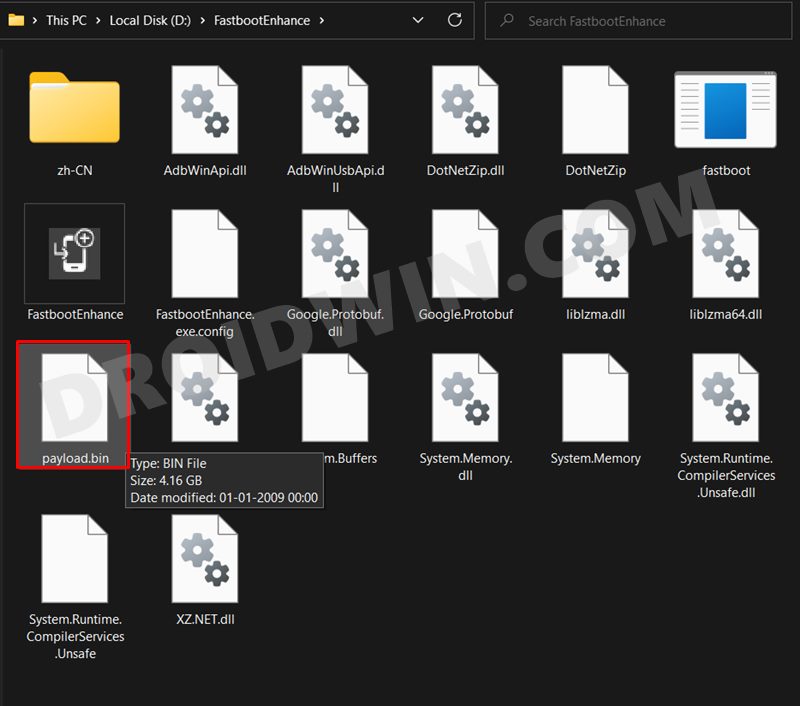
- Once downloaded, extract it and transfer the resultant payload.bin file to the Fastboot Enhance Tool folder.

STEP 3: Install Android SDK
Next up, install the Android SDK Platform Tools on your PC. This is the official ADB and Fastboot binary provided by Google and is the only recommended one. So download it and then extract it to any convenient location on your PC. Doing so will give you the platform-tools folder, which will be used throughout this guide.

STEP 4: Install Fastboot Drivers
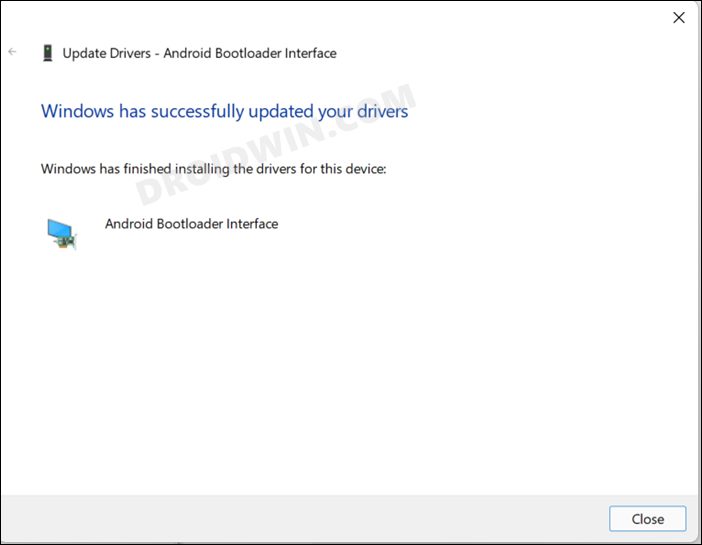
The tool doesn’t come with the Fastboot Drivers, so you will manually have to install it on your PC. For that, please refer to our guide on How to Install Fastboot Drivers in Windows 11. Likewise, make sure to install the OnePlus USB Drivers as well [they are usually automatically installed as soon as you connect your device to the Windows PC for the first time].

STEP 5: Boot to Fastboot Mode
In most cases, a soft-bricked or boot-looped device might already be in the Fastboot Mode. However, if you are stuck in a bootloop, then long-press the Power key to turn it off. Then press and hold the Power and Volume Down keys (or Power and Volume Up) together to boot your device to Fastboot Mode.
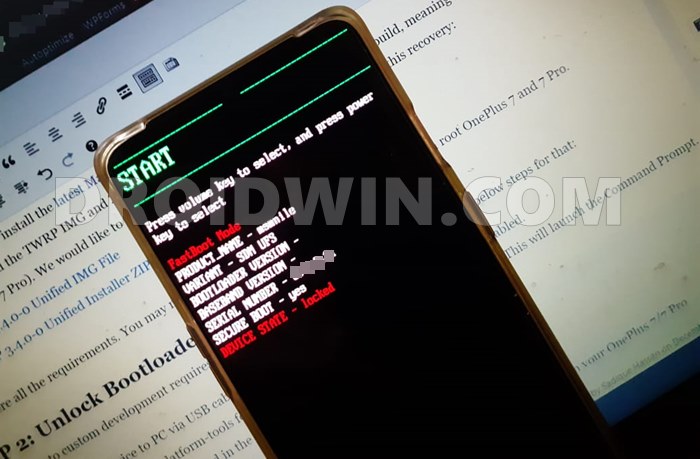


However, if you are unable to power off the device, then let its battery drain out. Once that happens, connect it to the charger. Then as soon as it is about to boot up, use the Power and Volume Up/Down keys and it will straightaway boot to Fastboot Mode.
STEP 6: Flash Stock Firmware on OnePlus 10T via Fastboot
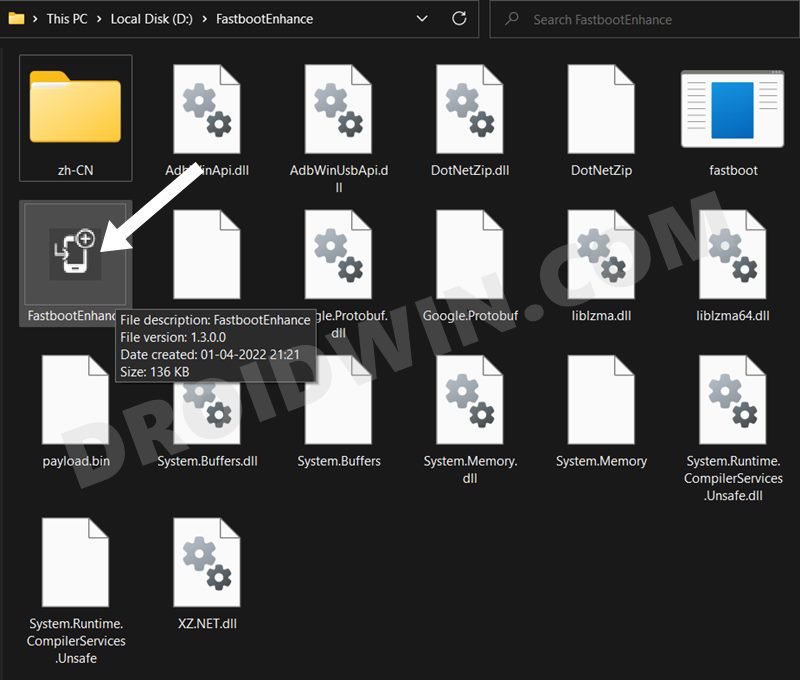
- To begin with, launch the Fastboot Enhance Tool via its EXE file.

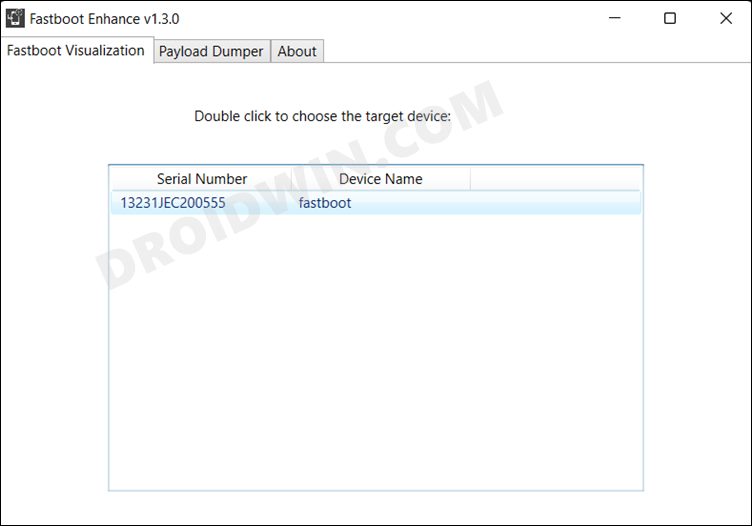
- Your device should be listed under the Fastboot Virtualization tab, select it.

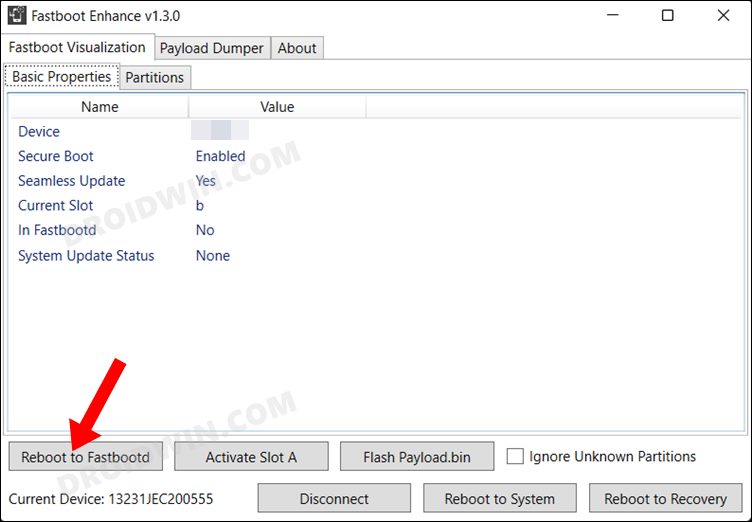
- After that, click on the Reboot to FastbootD button.

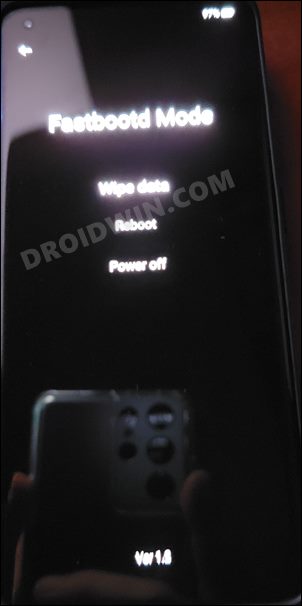
- Your device will boot to FastbootD Mode.

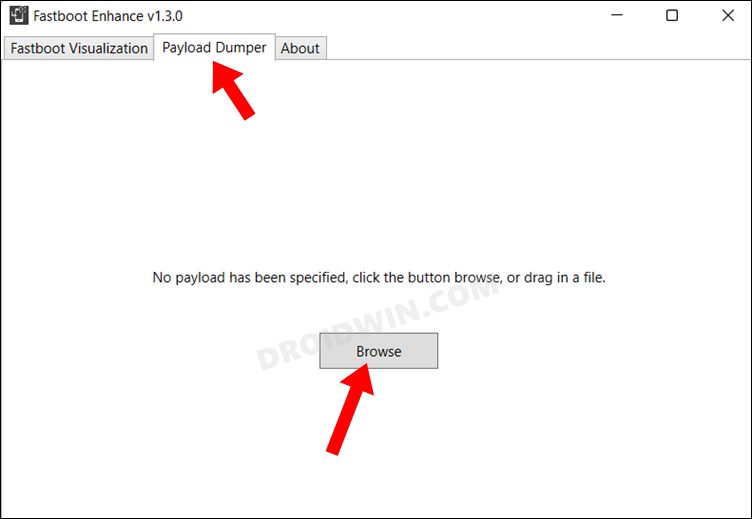
- Now go to the Payload Dumper tab and click on Browse.

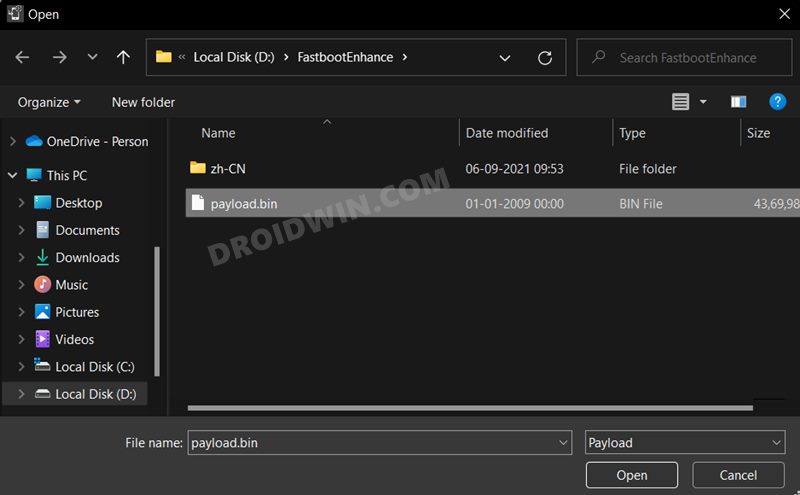
- Navigate to the payload.bin file, select it and click Open.

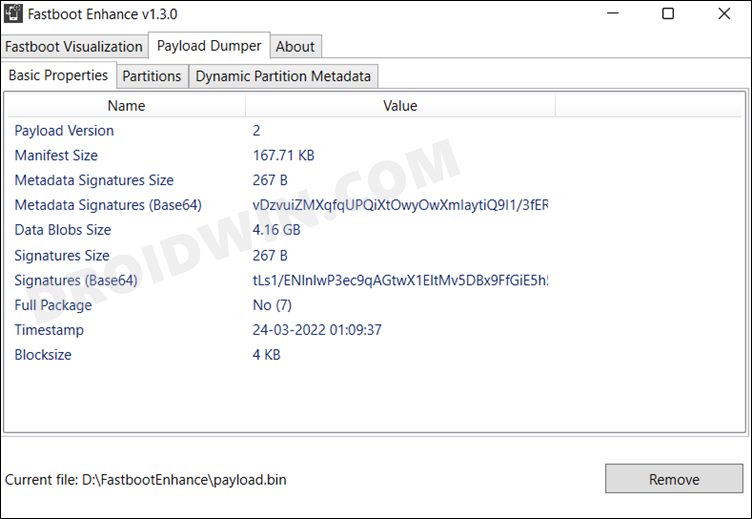
- The file will now be loaded in the tool, displaying the resultant information.

- Now go to the Fastboot Virtualization tab and click on Flash payload.bin. If the flashing starts, well and good.

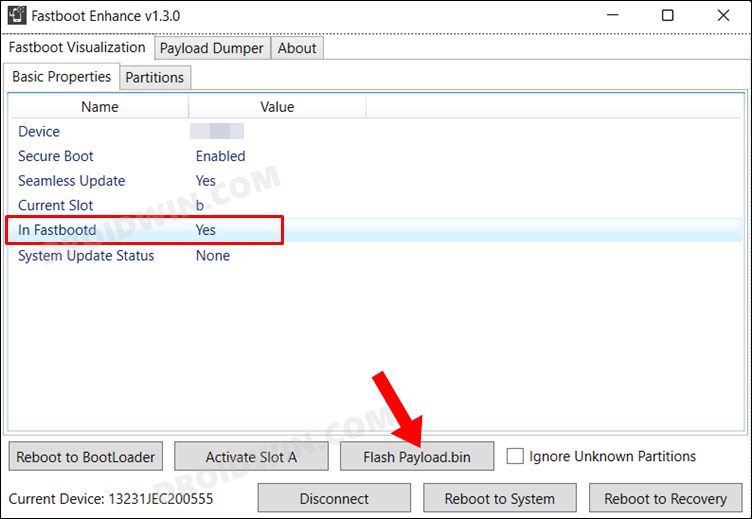
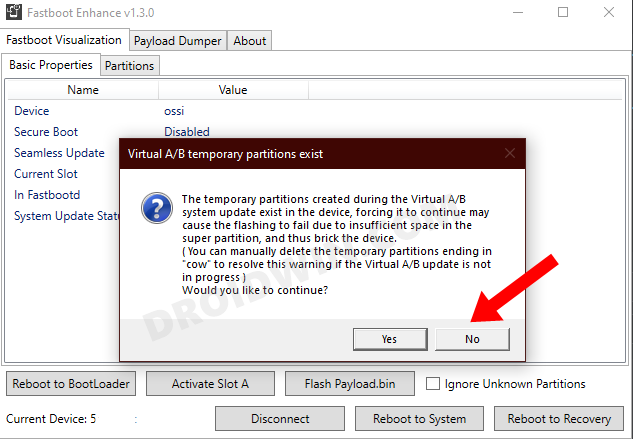
- However, if you get the ‘Virtual A/B temporary partitions exist’ popup, then click on No.

- After that, go to the Partitions tab and type in cow in the Filter by name box.

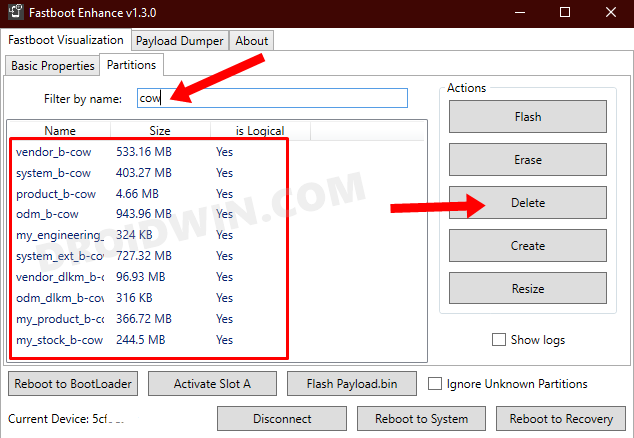
- Select all the partitions from the results that have cow in their name and hit the Delete button.
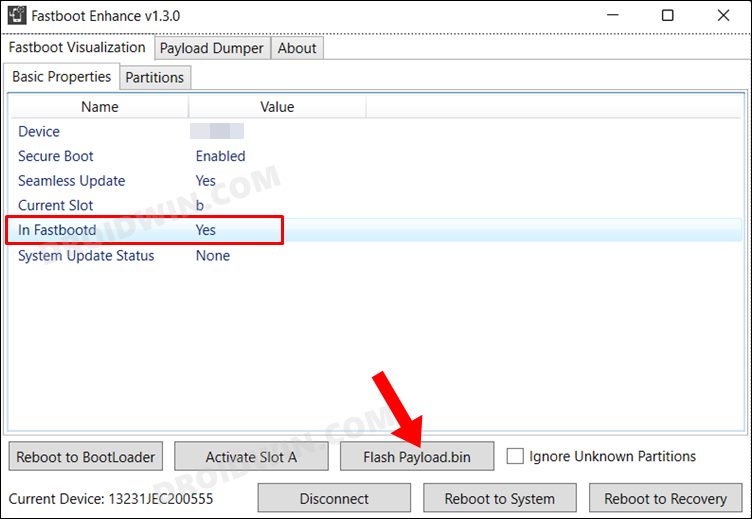
- Once done, click on Flash payload.bin. This time the flashing will start without any issues.

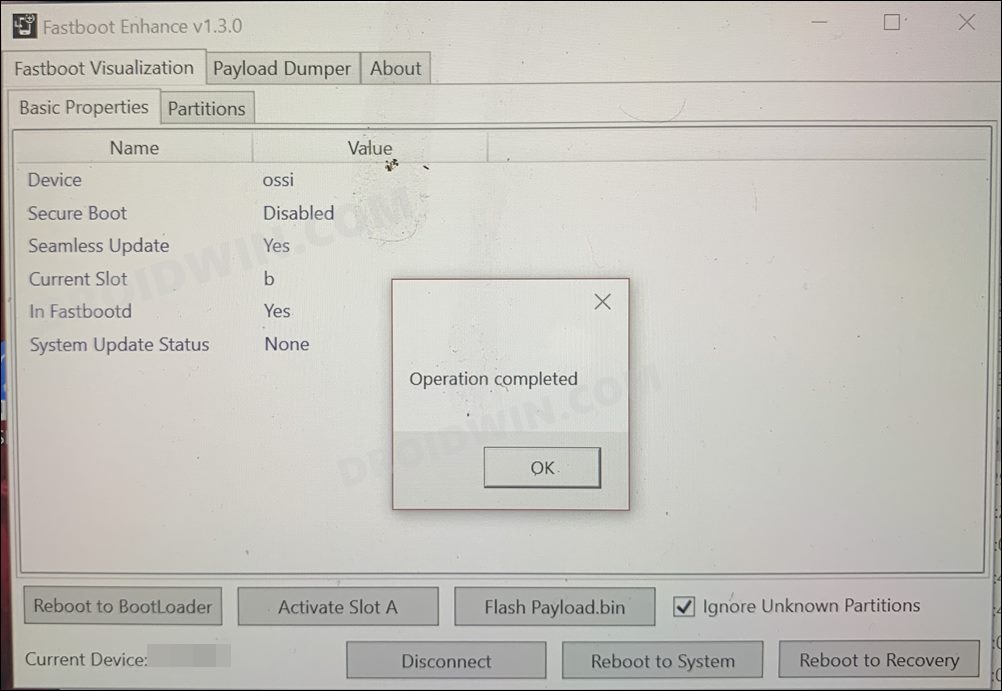
- Once complete, you will be notified of the same. You may now boot to the OS by clicking on Reboot to System.

That’s it. These were the steps to flash stock firmware on the OnePlus 10T via the Fastboot Enhance Tool. If you have any queries concerning the aforementioned steps, do let us know in the comments. We will get back to you with a solution at the earliest.
Unbrick OnePlus 10T: Flash Firmware via Fastboot Commands
The below process will wipe off all the data from your device. So take a complete device backup beforehand by any means possible. Droidwin and its members wouldn’t be held responsible in case of a thermonuclear war, your alarm doesn’t wake you up, or if anything happens to your device and data by performing the below steps.
STEP 1: Install Android SDK


First and foremost, you will have to install the Android SDK Platform Tools on your PC. This is the official ADB and Fastboot binary provided by Google and is the only recommended one. So download it and then extract it to any convenient location on your PC. Doing so will give you the platform-tools folder, which will be used throughout this guide to unbrick your OnePlus 10T via Fastboot commands.
STEP 2: Download OnePlus 10T Firmware
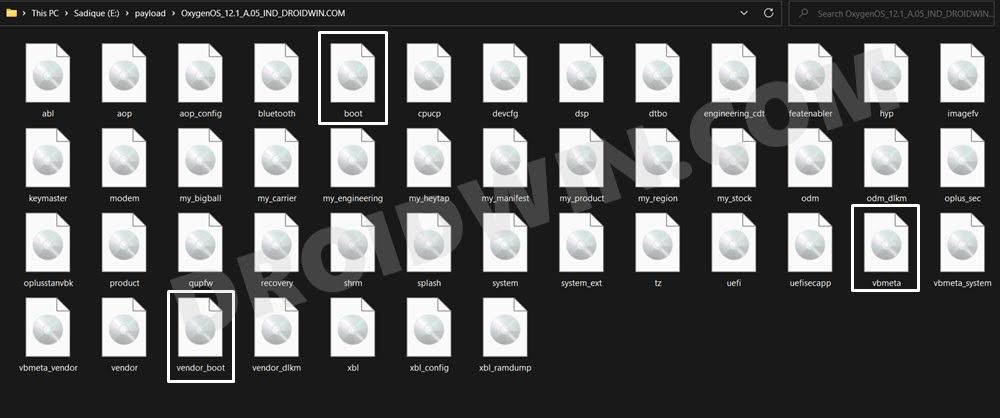
Next up, download the stock firmware for your device from the below link. OnePlus provides its firmware in payload.bin, which you need to extract in order to get hold of the partition files. I have already done that for a few firmware versions. So if your device has the same firmware/build installed, then you could directly download the Fastboot ROM [extracted payload] instead of the payload.bin
ONEPLUS 10T FASTBOOT ROM AND STOCK FIRMWARE

STEP 3: Extract OnePlus 10T Payload.bin
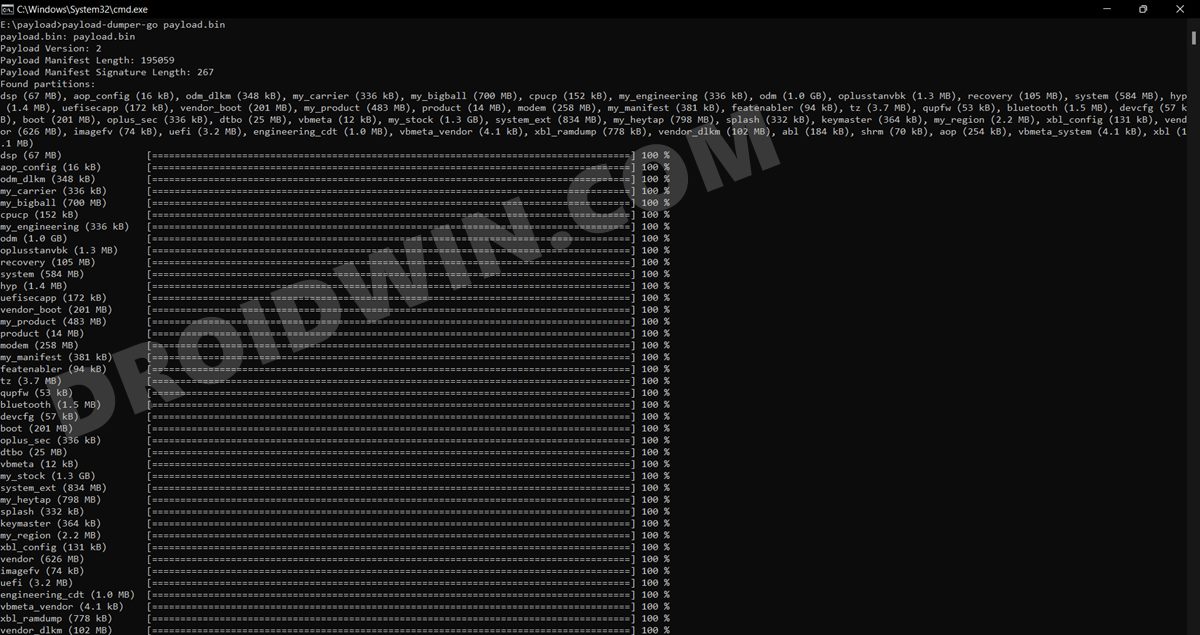
If you have downloaded the Fastboot ROM, then you could skip this step. On the other hand, if you have a payload.bin firmware, then you will have to extract it first and get the resultant IMG files. To do so, you may refer to our guide on How to Extract OnePlus Payload.bin file. Once extracted, make sure to transfer all the files to the platform-tools folder.

STEP 4: Boot Bricked OnePlus 10T to Fastboot Mode
In most cases, a soft-bricked or boot-looped device might already be in the Fastboot Mode. However, if you are stuck in a bootloop, then long-press the Power key to turn it off. Then press and hold the Power and Volume Down keys (or Power and Volume Up in some devices) together to boot your device to Fastboot Mode.


However, if you are unable to power off the device, then let its battery drain out. Once that happens, connect it to the charger. Then as soon as it is about to boot up, use the Power and Volume Up/Down keys and it will straightaway boot to Fastboot Mode.
STEP 5: Format Device via Fastboot
- Head over to the platform-tools folder where the extracted ROM is present.
- Then go to its address bar, type in CMD in its address and hit Enter. This will launch the CMD window.


- Now execute the below command to perform a factory reset (optional but recommended)
fastboot -w
STEP 6: Flash OnePlus 10T Firmware via Fastboot Commands
Execute the below commands in the CMD window [that is opened in the platform-tools folder] to flash the partition file. Make sure to execute one command at a time. Furthermore, if you get an error, then don’t leave the process mid-way, rather move over to the next flashing command.
fastboot flash bluetooth bluetooth.img
fastboot flash boot boot.img
fastboot flash cpucp cpucp.img
fastboot flash dtbo dtbo.img
fastboot flash engineering_cdt engineering_cdt.img
fastboot flash modem modem.img
fastboot flash oplus_sec oplus_sec.img
fastboot flash oplusstanvbk oplusstanvbk.img
fastboot flash recovery recovery.img
fastboot flash shrm shrm.img
fastboot flash splash splash.img
fastboot flash tz tz.img
fastboot flash uefi uefi.img
fastboot flash uefisecapp uefisecapp.img
fastboot flash vbmeta vbmeta.img
fastboot flash vendor_boot vendor_boot.img
fastboot flash vbmeta_system vbmeta_system.img
fastboot flash vbmeta_vendor vbmeta_vendor.img
STEP 7: Flash OnePlus 10T Firmware Files in FastbootD Mode
- o begin with, boot your device to FastbootD Mode using the below command:
fastboot reboot fastboot


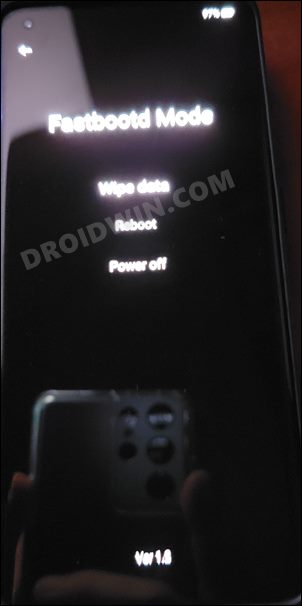
- Now execute the below commands in the CMD window [that is opened in the platform-tools folder] to flash the remaining files-
fastboot flash abl abl.img
fastboot flash aop aop.img
fastboot flash aop_config aop_config.img
fastboot flash devcfg devcfg.img
fastboot flash dsp dsp.img
fastboot flash featenabler featenabler.img
fastboot flash hyp hyp.img
fastboot flash imagefv imagefv.img
fastboot flash keymaster keymaster.img
fastboot flash my_bigball my_bigball.img
fastboot flash my_carrier my_carrier.img
fastboot flash my_engineering my_engineering.img
fastboot flash my_heytap my_heytap.img
fastboot flash my_manifest my_manifest.img
fastboot flash my_product my_product.img
fastboot flash my_region my_region.img
fastboot flash my_stock my_stock.img
fastboot flash vendor vendor.img
fastboot flash odm odm.img
fastboot flash odm_dlkm odm_dlkm.img
fastboot flash product product.img
fastboot flash qupfw qupfw.img
fastboot flash system system.img
fastboot flash system_ext system_ext.img
fastboot flash vendor vendor.img
fastboot flash vendor_dlkm vendor_dlkm.img
fastboot flash xbl xbl.img
fastboot flash xbl_config xbl_config.img
- Finally, execute the below command to boot your device to the OS
fastboot reboot
That’s it. These were the steps to unbrick your OnePlus 10T by flashing the stock firmware via Fastboot commands. All your queries are welcomed in the comments section below. However, if this method didn’t work out for you, then refer to the second method listed below.
Unbrick OnePlus 10T by Resizing Partition and Flashing Firmware
In this section, we will flash a few bootloader.img files in the Fastboot Mode, then boot to FastbootD Mode and flash a few files there. After that, we will delete and create the logical partitions and then flash the logical partitions files. So without further ado, let’s get started. Make sure to carry out STEP 1 to 5 from the above section first and then refer to the below instructions.
STEP 1: Flash OnePlus 10T Firmware via Fastboot Commands
Execute the below commands in the CMD window [that is opened in the platform-tools folder] to flash the partition file. Make sure to execute one command at a time. Furthermore, if you get an error, then don’t leave the process mid-way, rather move over to the next flashing command.
- To begin with, set A Partition as the active one using the below command. This is because we will be flashing all the files to this partition only.
fastboot --set-active=a
- Then flash the following files in the Fastboot Mode
fastboot flash --slot=all boot boot.img
fastboot flash --slot=all modem modem.img
fastboot flash vendor_boot vendor_boot.img
fastboot flash vbmeta vbmeta.img
fastboot flash vbmeta_system vbmeta_system.img
fastboot flash vbmeta_vendor vbmeta_vendor.img
- You will now have to flash the rest of the files in FastbootD Mode, so move over to the next step.
STEP 2: Flash OnePlus 10T Firmware Files in FastbootD Mode
- To begin with, boot your device to FastbootD Mode using the below command:
fastboot reboot fastboot


- Now execute the below commands in the CMD window to flash the partition files to both the slots.
fastboot flash --slot=all abl abl.img
fastboot flash --slot=all aop aop.img
fastboot flash --slot=all bluetooth bluetooth.img
fastboot flash --slot=all cpucp cpucp.img
fastboot flash --slot=all devcfg devcfg.img
fastboot flash --slot=all dsp dsp.img
fastboot flash --slot=all dtbo dtbo.img
fastboot flash --slot=all engineering_cdt engineering_cdt.img
fastboot flash --slot=all featenabler featenabler.img
fastboot flash --slot=all hyp hyp.img
fastboot flash --slot=all imagefv imagefv.img
fastboot flash --slot=all keymaster keymaster.img
fastboot flash --slot=all oplus_sec oplus_sec.img
fastboot flash --slot=all oplusstanvbk oplusstanvbk.img
fastboot flash --slot=all qupfw qupfw.img
fastboot flash --slot=all shrm shrm.img
fastboot flash --slot=all splash splash.img
fastboot flash --slot=all tz tz.img
fastboot flash --slot=all uefisecapp uefisecapp.img
fastboot flash --slot=all xbl xbl.img
fastboot flash --slot=all xbl_config xbl_config.img
fastboot flash --slot=all xbl_ramdump.img xbl_ramdump.img
STEP 3: Resize Logical Partition on OnePlus 10T
It’s now time to resize the logical partitions by deleting and creating them. You just need to copy-paste the below commands one at a time.
fastboot delete-logical-partition odm_a
fastboot delete-logical-partition odm_b
fastboot delete-logical-partition system_a
fastboot delete-logical-partition system_b
fastboot delete-logical-partition system_ext_a
fastboot delete-logical-partition system_ext_b
fastboot delete-logical-partition product_a
fastboot delete-logical-partition product_b
fastboot delete-logical-partition vendor_a
fastboot delete-logical-partition vendor_b
fastboot delete-logical-partition my_carrier_a
fastboot delete-logical-partition my_carrier_b
fastboot delete-logical-partition my_engineering_a
fastboot delete-logical-partition my_engineering_b
fastboot delete-logical-partition my_heytap_a
fastboot delete-logical-partition my_heytap_b
fastboot delete-logical-partition my_manifest_a
fastboot delete-logical-partition my_manifest_b
fastboot delete-logical-partition my_product_a
fastboot delete-logical-partition my_product_b
fastboot delete-logical-partition my_region_a
fastboot delete-logical-partition my_region_b
fastboot delete-logical-partition my_stock_a
fastboot delete-logical-partition my_stock_b
fastboot delete-logical-partition odm_a-cow
fastboot delete-logical-partition odm_b-cow
fastboot delete-logical-partition system_a-cow
fastboot delete-logical-partition system_b-cow
fastboot delete-logical-partition system_ext_a-cow
fastboot delete-logical-partition system_ext_b-cow
fastboot delete-logical-partition product_a-cow
fastboot delete-logical-partition product_b-cow
fastboot delete-logical-partition vendor_a-cow
fastboot delete-logical-partition vendor_b-cow
fastboot delete-logical-partition my_carrier_a-cow
fastboot delete-logical-partition my_carrier_b-cow
fastboot delete-logical-partition my_engineering_a-cow
fastboot delete-logical-partition my_engineering_b-cow
fastboot delete-logical-partition my_heytap_a-cow
fastboot delete-logical-partition my_heytap_b-cow
fastboot delete-logical-partition my_manifest_a-cow
fastboot delete-logical-partition my_manifest_b-cow
fastboot delete-logical-partition my_product_a-cow
fastboot delete-logical-partition my_product_b-cow
fastboot delete-logical-partition my_region_a-cow
fastboot delete-logical-partition my_region_b-cow
fastboot delete-logical-partition my_stock_a-cow
fastboot delete-logical-partition my_stock_b-cow

fastboot create-logical-partition odm_a 1
fastboot create-logical-partition odm_b 1
fastboot create-logical-partition system_a 1
fastboot create-logical-partition system_b 1
fastboot create-logical-partition system_ext_a 1
fastboot create-logical-partition system_ext_b 1
fastboot create-logical-partition product_a 1
fastboot create-logical-partition product_b 1
fastboot create-logical-partition vendor_a 1
fastboot create-logical-partition vendor_b 1
fastboot create-logical-partition my_carrier_a 1
fastboot create-logical-partition my_carrier_b 1
fastboot create-logical-partition my_engineering_a 1
fastboot create-logical-partition my_engineering_b 1
fastboot create-logical-partition my_heytap_a 1
fastboot create-logical-partition my_heytap_b 1
fastboot create-logical-partition my_manifest_a 1
fastboot create-logical-partition my_manifest_b 1
fastboot create-logical-partition my_product_a 1
fastboot create-logical-partition my_product_b 1
fastboot create-logical-partition my_region_a 1
fastboot create-logical-partition my_region_b 1
fastboot create-logical-partition my_stock_a 1
fastboot create-logical-partition my_stock_b 1
STEP 4: Flash Logical Partition on OnePlus 10T
It’s now time to flash the logical partitions on your device. So use the below commands for the same-
fastboot flash vendor vendor.img
fastboot flash odm odm.img
fastboot flash system system.img
fastboot flash system_ext system_ext.img
fastboot flash product product.img
fastboot flash my_carrier my_carrier.img
fastboot flash my_engineering my_engineering.img
fastboot flash my_heytap my_heytap.img
fastboot flash my_manifest my_manifest.img
fastboot flash my_product my_product.img
fastboot flash my_region my_region.img
fastboot flash my_stock my_stock.img
STEP 5: Reboot Device
Now that we are done with all the commands execution processes, it’s time to check out the results. So use the below command to boot your device to the OS:
fastboot reboot
That’s it. These were the steps to unbrick your OnePlus 10T by flashing the stock firmware via Fastboot commands. If you have any queries concerning the aforementioned steps, do let us know in the comments. We will get back to you with a solution at the earliest.


yassine
salamo aliakom.always reboot plz bro sadik any solution
Eang
Hi sir, my phone is brick, black screen, and cannot go to Fastboot mode. Any solution?
Lin
Hello, sir
Sorry for disturbing you.
In my case is my devise get totally brick.
Only the 9008 can Identify the device.
Can I do anything?
Ravi
I have Oneplus 10T with OOS 12.1 A.05
I have unlocked bootloader,
Can I install Color OS 12.1 A.07 for this device with Fastboot Enhance.
Want to try Color OS 12.1
Please Help Thanks in Advance.