To temporarily root your Android device via Magisk, it should have come with Android 12 or older versions out of the box [such as Pixel 6 Pro and OnePlus 10 Pro]. It doesn’t matter which version it is currently running, what matters is the fact that it should be running Android 12 or earlier versions. This is because beginning with devices that came with Android 13 or higher versions [Pixel 7 Pro and OnePlus 11], you will need to get hold of init_boot.img instead of boot.img for root. But as of now, there’s no way to temporarily boot your device via the patched init_boot.img file. So with that said, let’s now get started with the guide.
In this guide, we will show you the steps to temporarily root your Android device via Magisk. There has always been a long discussion about whether one should really root their smartphones or not. On one hand, tech enthusiasts have this at the top of their priority list. Unlocking the bootloader and gaining administrative rights are the go-to choices for these geeks.
However, the general user wishes to maintain a safe distance from it. The major reason for that is the plethora of risks and complications that rooting brings in with itself. Right from SafetyNet Issues to the device getting boot looped/bricked, there are quite a few issues that you might have to go through. Then there’s the third set of users, who falls in between them.
They are willing to root their device but at the same time, the associated risks aren’t allowing them to do so. What they want is a small window of opportunity from which they could temporarily root their Android device via Magisk, check out if everything is working fine or not, and then decide accordingly. If you are also in the same group, then this guide is here to help you out. Follow along.
Table of Contents
How to Temporarily Root an Android Device via Magisk
The below instructions are listed under separate sections for ease of understanding. Make sure to follow in the exact same sequence as mentioned. Droidwin and its members wouldn’t be held responsible in case of a thermonuclear war, your alarm doesn’t wake you up, or if anything happens to your device and data by performing the below steps to temporarily root your Android device via Magisk.
STEP 1: Install Android SDK

First and foremost, you will have to install the Android SDK Platform Tools on your PC. This is the official ADB and Fastboot binary provided by Google and is the only recommended one. So download it and then extract it to any convenient location on your PC. Doing so will give you the platform-tools folder, which will be used throughout this guide.
STEP 2: Unlock the Device’s Bootloader
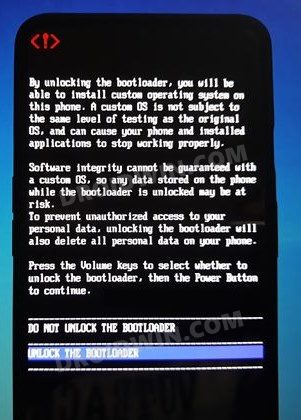
First snd foremost, you will have to unlock the device’s bootloader. Doing so will wipe off all the data from your device and could also nullify its warranty. So if that is all well and good, then please refer to our guide on How to Unlock the Bootloader on Any Android Device.
STEP 3: Get Stock Boot.img File
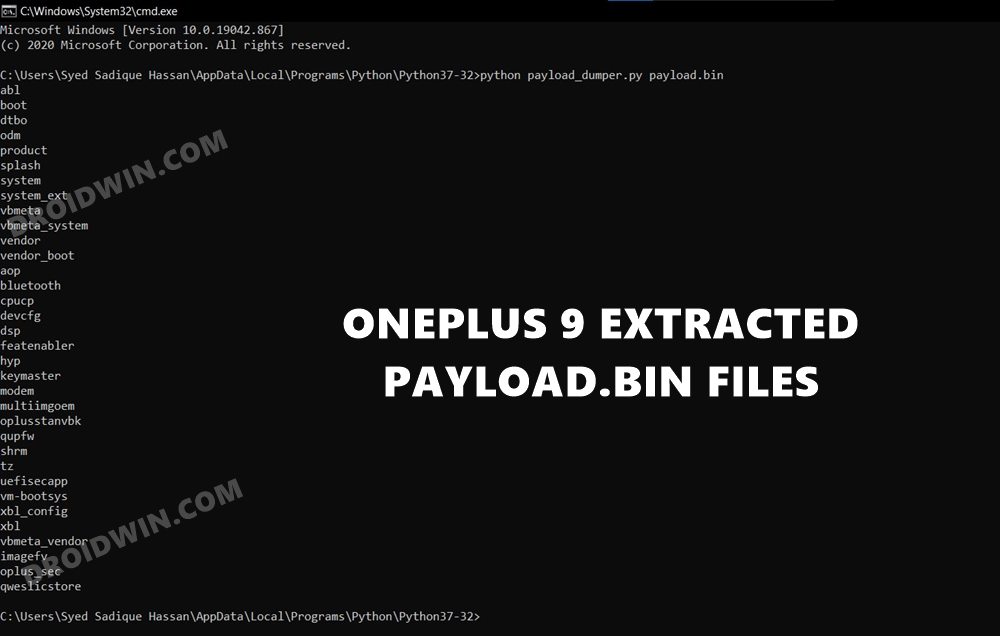
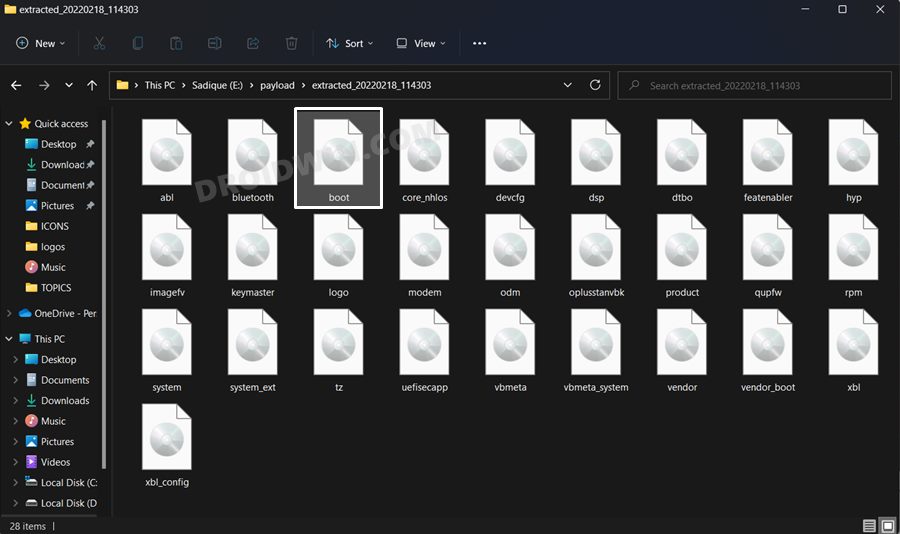
Next up, download the firmware file that is currently installed on your device. Make sure that its firmware version matches the installed one. Once downloaded, extract it to any convenient location on your PC. If you own a Pixel device, then you would directly see the boot.img file. On the other hand, OnePlus users should see the paylaod.bin file. So refer to our guide on How to Extract payload.bin and get the stock boot image file.
Oppo and Realme users should see the OZIP file. They could extract it via How to Extract Fastboot Images from Realme/Oppo OZIP Firmware. Then if we talk about Sony devices, they should convert the boot.sin file to boot.img using the instructions given here: How to Extract Sony Boot.sin and get the Stock Boot.img File.
LG users would have to deal with DZ/KDZ firmware, as given here: How to Extract Boot.img from LG KDZ or DZ Firmware. So refer to the guide corresponding to your device and get hold of the stock boot.img file. Once done, move over to the next step to temporarily root your Android device via Magisk.
STEP 4: Patch Stock Boot.img File via Magisk
- First off, transfer the boot.img file to your device.
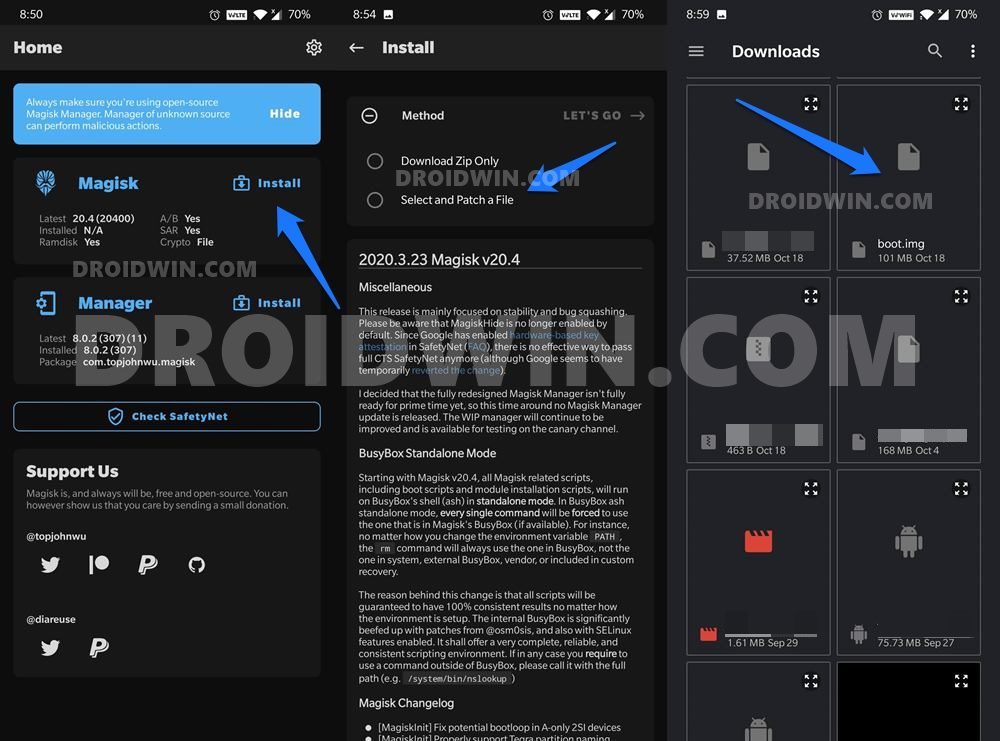
- Then install the Magisk App onto your device
- Launch the app and tap on the Install button situated next to Magisk.
- From the Method section, choose Select and Patch a file.

- Browse to the extracted boot.img file and select it.
- Then tap on the Let’s Go option situated at the top right.
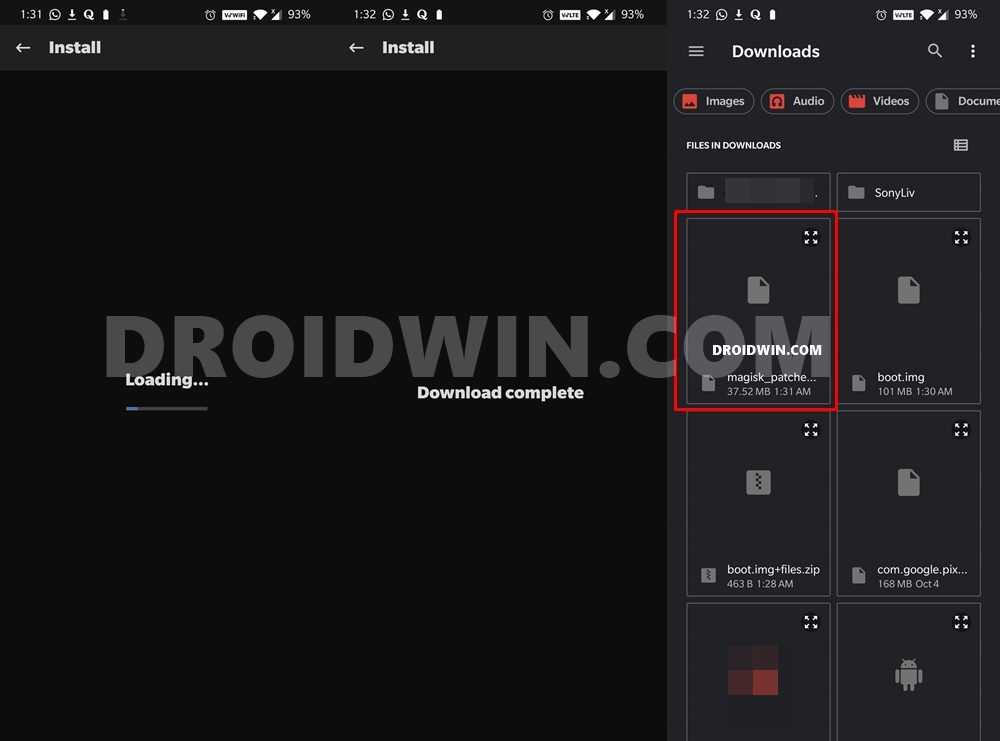
- Magisk will now load the boot.img file and will patch it accordingly. Once that is done, you would get the Download Complete message.
- The patched boot image file will be saved in Internal Storage > Downloads. The name of the file will be magisk_patched.img and a few random numbers at the end.
- Make sure to delete them so that the complete file name remains magisk_patched.img. Once that is done, proceed to the next step to temporarily root your Android device via Magisk.
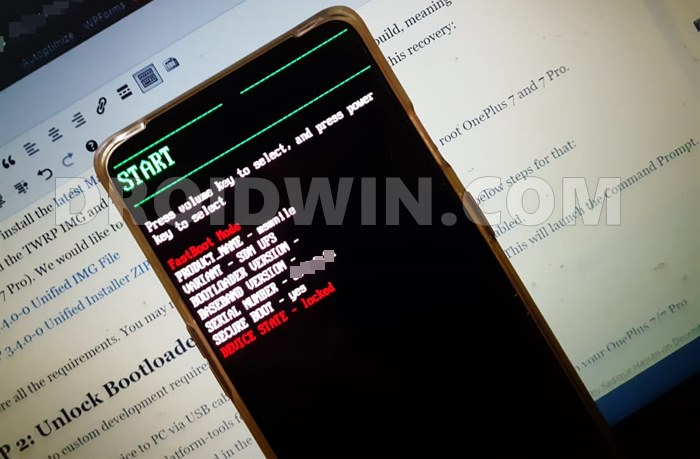
STEP 5: Boot Device to Fastboot Mode
- Connect your device to the PC via USB cable. Make sure USB Debugging is enabled.
- Then head over to the platform-tools folder, type in CMD in the address bar, and hit Enter. This will launch the Command Prompt.
- Type in the following command in the CMD window to boot your device to Fastboot Mode
adb reboot bootloader

STEP 6: Boot Magisk Patched Boot.img | Temporary Root Android
Now comes the most important part of this guide to temporarily root your Android device via Magisk. We would now be temporarily booting your device via the magisk patched boot.img. However, do keep in mind that this is a one-time root. The next time you reboot your device, the root would be gone.
Therefore, when the device is rooted, it is highly recommended that you don’t do any heavy modifications to the system partition. This is because when your device boots the next time, it wouldn’t be having root and if you have installed any mods that are root dependent, then it would result in your device going to a bootloop.
Tasks such as making changes to build.prop, changing app permissions, uninstalling a system app, checking whether a banking apps conflicts with Safetynet, could all be performed without any issues. Howevr, if you are planning to install a module, then make sure to uninstall it before the next reboot. With that said, let’s now make you aware of the steps to temporarily root your Android device via Magisk.
- Make sure your device is booted to Fastboot Mode and connected to the PC.
- Likewise, the Command Prompt window should be opened inside the plaftorm-tools folder (by entering cmd in its address bar).
- You would also have to transfer the magisk_patched.img file to the platform-tools folder.
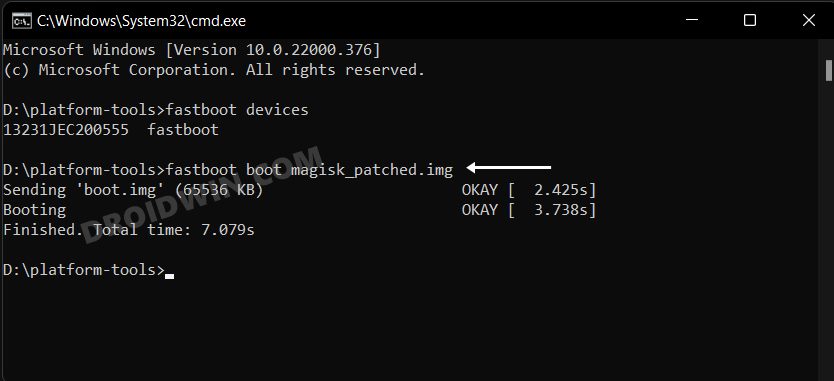
- If that’s all well and good, then use the execute the below command in the CMD window to boot your device to the rooted OS via Magisk patched boot.img file:
fastboot boot magisk_patched.img
- Once the file has been flashed, your device will boot to the OS with a temporary root. You may now carry out the desired task. As and when you need to remove the root, just reboot your device once.
So with that, we conclude the guide on how to temporarily root your Android device via Magisk. If you have any queries concerning the aforementioned steps, do let us know in the comments. We will get back to you with a solution at the earliest.
FAQ: Converting Temporary Root to Permanent
- If you wish to convert this temporary root to permanent, then do not reboot your device after flashing the magisk patched boot.img file.
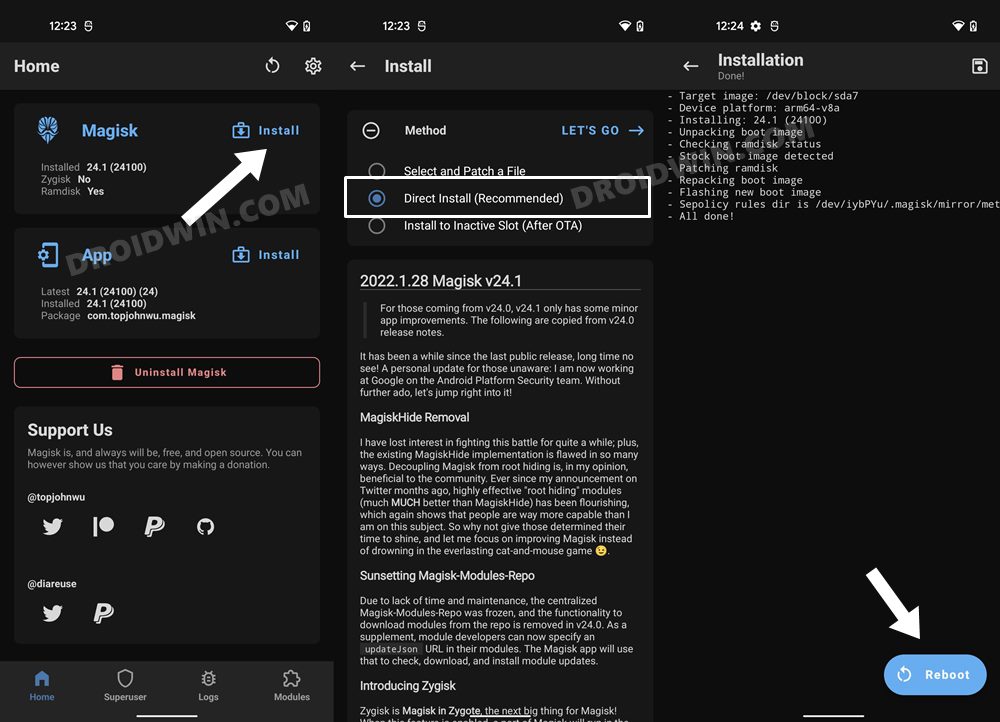
- Instead, launch the Magisk App and tap on Install. Then tap on Direct Install (Recommended).
- After that, tap on Let’s Go situated at the top-right and wait for the process to finish.
- Once done, hit the Reboot button situated at the bottom right. Your device will now boot with a permanent root via Magisk


NikkiDevil
Do the temporary root erase all data on the phone ?
Does it works on samsung devices ?
Chris wizzey
How can I unlock my bootloarder without the unlock code