In this guide, we will list out numerous methods to take screenshots in restricted apps on Android. Well, this is one topic that I don’t need to explain the reason, perks, and benefits of capturing screenshots on your device. However, there is one important aspect that needs to be looked upon. There are some apps that don’t allow you to take screengrabs while using them.
While there exist quite a few methods through which you could take a screenshot in a normal scenario, unfortunately, none of them manages to give out desirable results in such restricted cases. Rather, you would be greeted with the following notification: “Couldn’t save screenshot. Taking screenshots isn’t allowed by the app or your organization”.
Many banking apps or streaming services that use DRM certificate follows this protocol. Apps such as Netflix, HotStar, Amazon Prime, Hulu all have placed this limitation. But let’s not forget the fact that Android is an open-source ecosystem, and this gives birth to a plethora of tweaks. One such tweak (or rather three!) shall help us out in this guide. So without further ado, here are the various methods to take screenshots in restricted apps on Android. Follow along for detailed instructions.
Table of Contents
How to Take Screenshots in Restricted Apps on Android
Given here are four different methods to get this job done. The first two methods are for non-rooted devices whereas the next two are for rooted devices. Out of all these four methods, the third one works best [Using Disable Flag Secure Xposed]. NOTE: It is illegal to use copyrighted images for commercial purposes. If you want to capture screenshots in restricted apps, then do so for personal use only.
Method 1: Take Screenshots in Restricted Apps Using Google Assistant
- To begin with, launch the Google app on your device.
- Then go to the More section situated at the bottom right and select Settings.
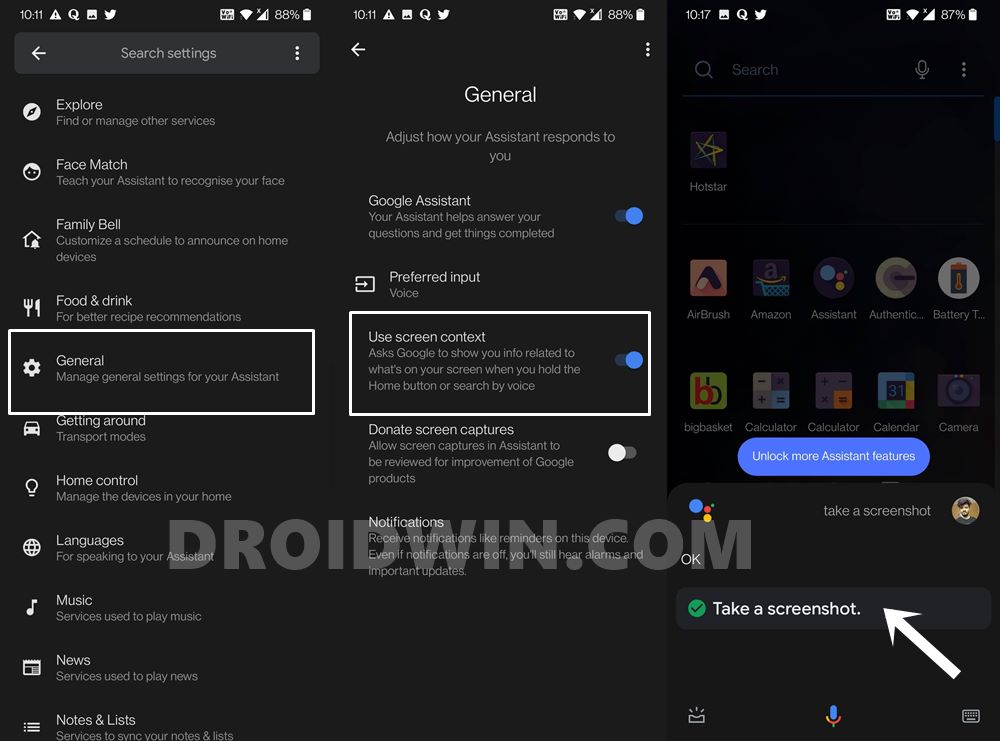
- Select Google Assistant and then scroll to the General section.
- Enable the Use screen context menu.

- Now open the app that has placed the screenshot restriction.
- Now invoke Google Assitant, either by long-pressing the Home button or saying “OK Google” or “Hey Google”.
- Once the assistant app is opened, say “Take a Screenshot”. That’s it. The task stands complete.
So this was the first method to take screenshots in restricted apps on Android. In my testing, the results were generally mixed. While in some banking apps this trick worked, in Netlfix it just took a screengrab of a black screen. If that is the case with you as well, then move over to the next method given below.
Method 2: Take Screenshots in Restricted Apps Using Scrcpy App
This method gives out the perfect result, but there’s a catch! For this method to be executed correctly, you will need a PC. But the app is extremely lightweight with no technicalities involved. Furthermore, I tried on Netflix and it worked perfectly. And not only screenshots, you could also take the screen recording of the restricted contents. To try it out, here are the required instructions:
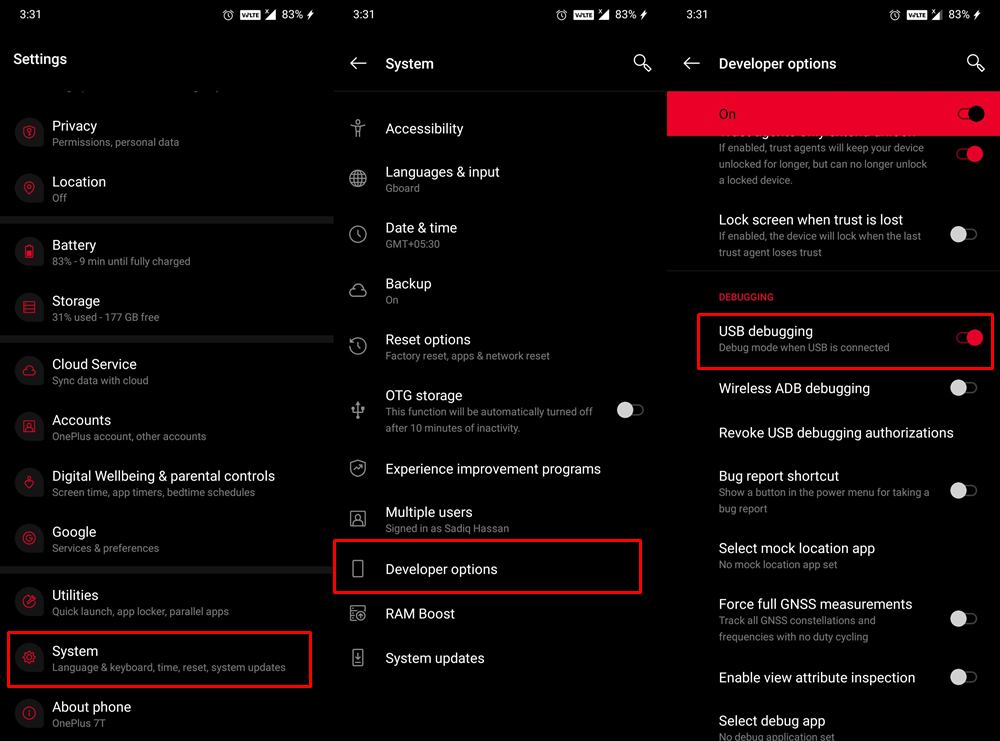
- To begin with, you will need to enable USB Debugging on your device. For that, head over to Settings > About Phone > Tap on Build Number 7 times > This will enable Developer Options > Now go back to Settings > System > Advanced > Developer Options > Enable USB Debugging.
- Now connect your device to the PC via USB cable.
- Next up, download the Scrcpy Tool for your PC: scrcpy-win64-v1.17.zip (if you want to know more about this tool, then check it out at GitHub). Once downloaded, extract it to a convenient location on your PC.
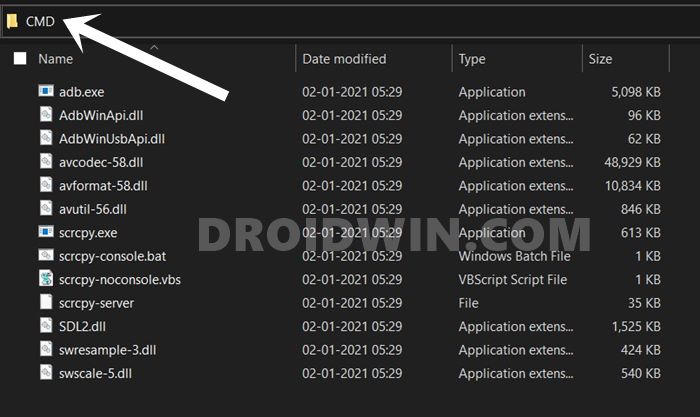
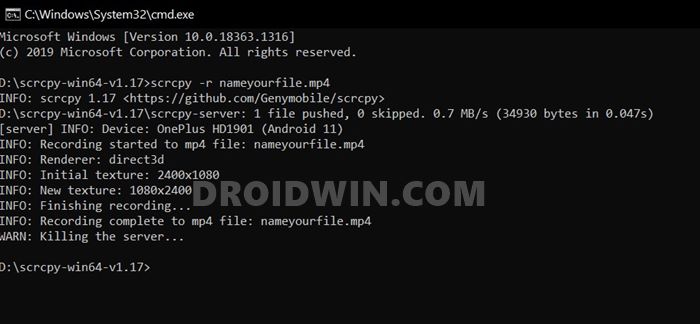
- Head over to the address bar of the scrcpy folder (where you have extracted its contents, not the compressed folder), type in CMD, and hit Enter. This will launch the Command Prompt window inside the scrcyp directory itself.
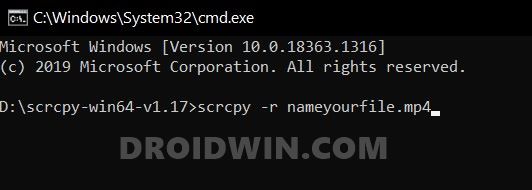
- Now type in the below command and in the CMD window and hit Enter (replace nameyourfile in the below command with the name you wish to give to the screenshot, or you may also copy-paste the command as it is and rename the file later)
scrcpy -r nameyourfile.mp4
- As soon as you enter this command, it will bring up your smartphone’s screen onto your PC. Now whatever ask you on your smartphone will be displayed right here and subsequently, it will be recording it in the video nameyourfile.mp4.
- So launch Netflix (or the desired app) on your device and record the desired length or take a screenshot of the desired moment.
- Now they are two different ways of taking a screenshot. Either record the video of the desired length and then take the required screengrab or use the Windows+Shift+S shortcut keys to bring up the Snippet Tool and take the screenshots at that very instance.
- Once done with the recording, just close the device window that scrcpy has bought up on your PC. You could also directly unplug the device from the PC to close the recording.
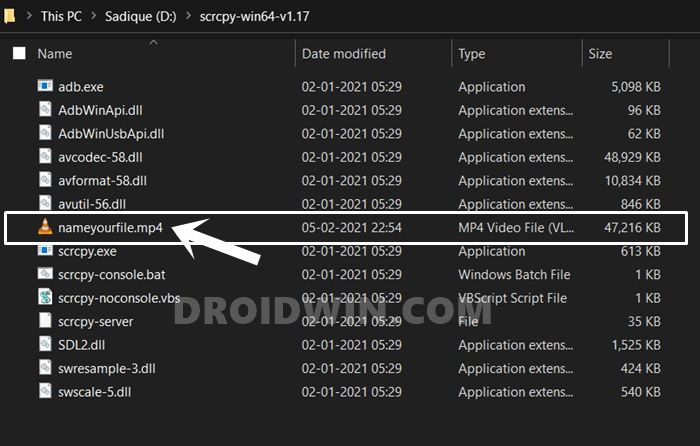
- The recording will be placed inside the same scrcpy folder where all its other files are present.
For me, this is personally the best method to take screenshots in restricted apps on Android. While some might argue that it requires a PC, but the perks of this method outweighs the associated caveats. With that said, if you consider yourself a tech enthusiast, then here are two methods that require a rooted Android device. Do check them out as well!
Method 3: Using Disable Flag Secure Xposed
When it comes to rooted devices, then this is perhaps the best way to take screenshots in restricted apps on your Android device. Here’s how it could be done:
- To begin with, root your device via Magisk patched boot.img.
- Then install the Xposed/LSPosed Framework on your device.
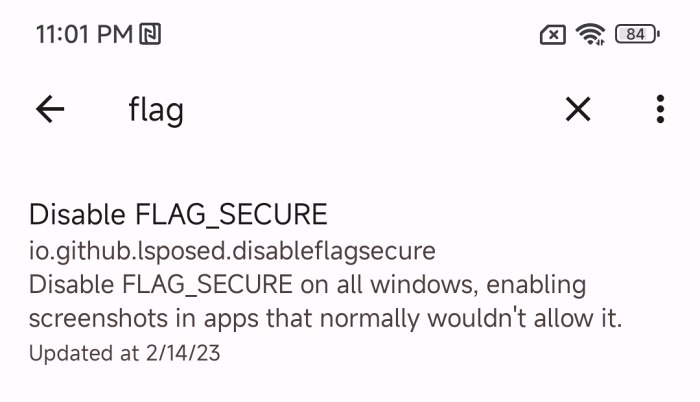
- Now launch LSPosed, go to the Repository tab, and search Disable FLAG_SECURE [there might be quite a few versions of it, make sure to download the one that is shown below as it has been recently updated].
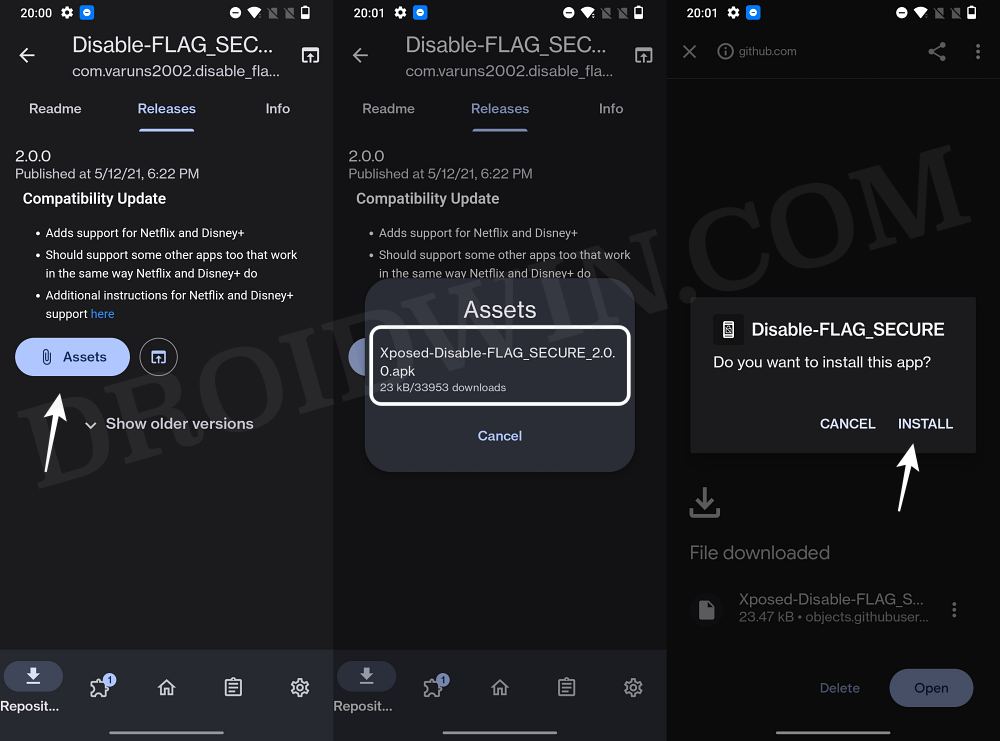
- Then go to the Releases tab, tap on Assets, and then tap on the APK. Now download and install this APK.
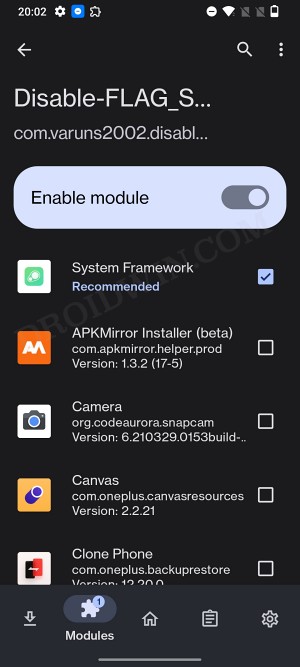
- Once done, go to the Modules tab, and turn on the toggle next to Enable Module.
- Now checkmark System Framework and the app in which you want to take a screenshot.
- Once your device boots up, delete the data of the app in which you want to take a screenshot [which you had checked in LSPosed].
- Finally, launch the app and you’ll now be able to take screenshots in restricted apps on your Android device without any issues.
Method 4: Via Smali Patcher and Magisk
First and foremost, your device needs to be rooted. If you haven’t done so, then you may refer to any of our below articles (knowing the consequences involved, do it at your own risk): Droidwin and its members wouldn’t be held responsible in case of a thermonuclear war, your alarm doesn’t wake you up, or if anything happens to your device and data by performing the below steps.
- To begin with, root your device via Magisk: How to Root Android via Magisk Patched Boot.
- Then connect it to the PC via a USB cable with USB Debugging enabled.
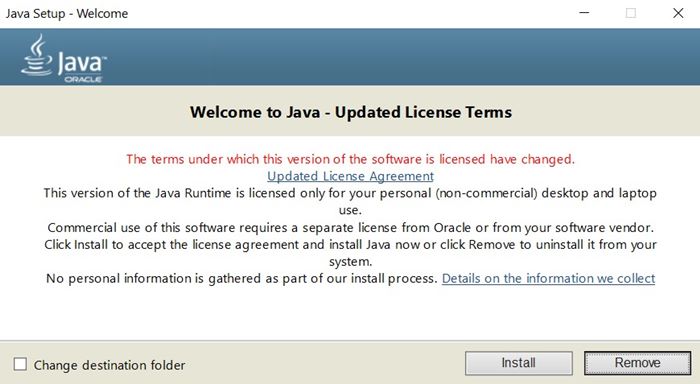
- You will also need to have Java installed on your PC. If that is not the case, then download it from their official page and install it right away.
- Now download the Smali Patcher Tool [Credits: XDA Recognized Developer fOmey] and extract it to an easily accessible location on your PC.
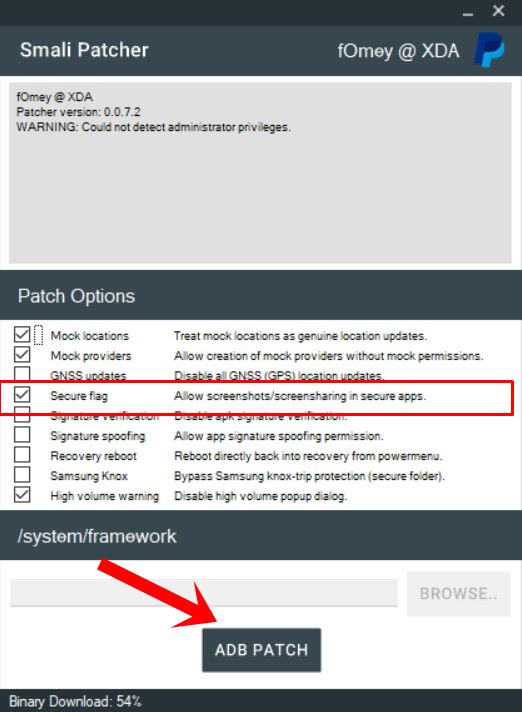
- Then right-click on the “SmaliPatcher.exe” file and select Run as Administrator. The tool will now launch.
- Under the Patch options, enable the Secure Flag option.
- Then click on Browse and select the location where the created module needs to be placed.
- Finally, click on the ADB Patch button situated at the bottom.
- Once the process has been completed, the Magisk Module will be created inside the same directory where the SmaliPatcher.exe is placed. The name of the module will be “[email protected]”.
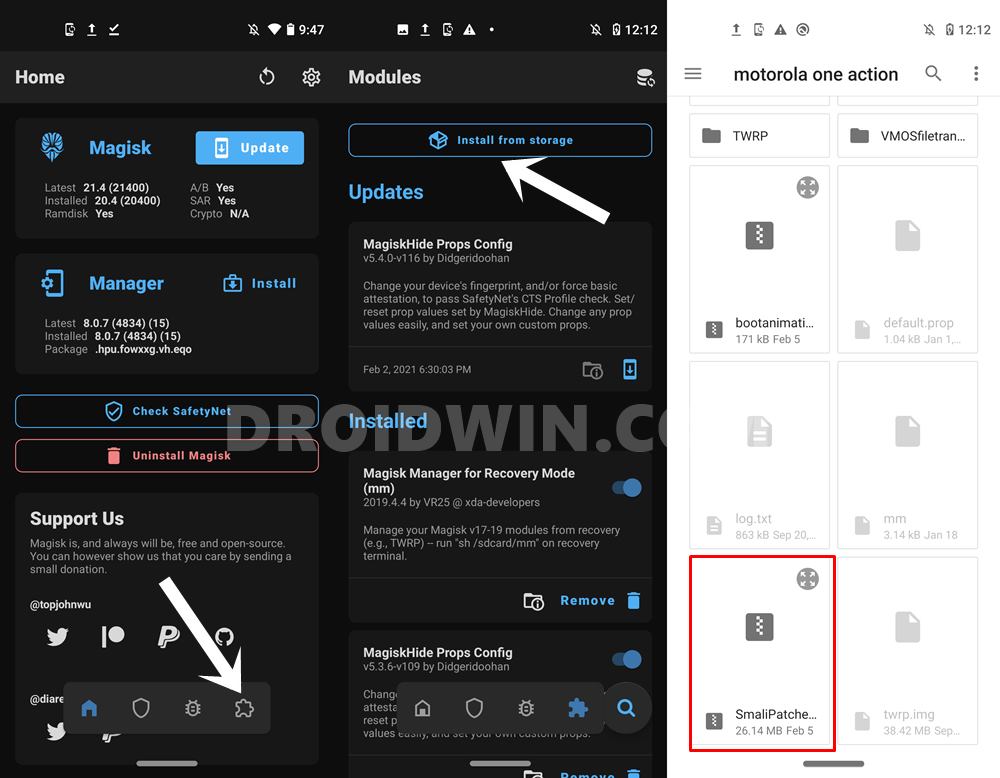
- Now transfer this ZIP file to your rooted device. Launch the Magisk Manager app and go to the Modules section.
- Tap on Install from storage and navigate to the location where the [email protected] is placed and select it.
- Magisk will now begin flashing the module. Once done, reboot the device for the module to come into action.
- Now launch the app that was earlier restricting you from taking the screenshot and try taking a screengrab. You should achieve success now.
With this, we conclude the guide on how to take screenshots in restricted apps on Android. We have shared three different methods for the same. For me, the second method worked perfectly. The third method also worked along the expected lines, but not many would refer to it since it requires a rooted device. With that said, do let us know in the comments which method you ultimately settled for. On that note, it’s now time to bid adieu to “Couldn’t save screenshot. Taking screenshots isn’t allowed by the app or your organization”.


