In this guide, we will show you the steps to take a data backup in a bricked or bootloop device. The Android OS, thanks to its open-source nature, allows us to carry out a plentitude of customizations. We aren’t just talking about the sideloading of apps outside of Play Store or trying out icon packs and themes, to be fair those are just the tip of the iceberg.
To unlock the device’s full potentiality, you will have to unlock its bootloader. Once you do so, you will be in a position to try out custom firmware such as LineageOS, install a custom recovery like TWRP, or flash tons of mods such as Magisk Modules, Xposed Framework, Substratum Themes, Viper4Android, and the likes. Likewise, you could also gain administrative access by rooting the device via Magisk.
However, this is just one side of the coin. These tweaks do bring in a few risks as well. The good thing is that more often than not you could easily fix all such issues, be it softbrick, bootloop, or even hard-bricked devices (at least in Qualcomm-powered devices via EDL Mode). But bringing the device back to life comes at a cost- more often than not, you would have to bid adieu to your all-important data.
To be fair, this is the last thing that any user would want to have. So what else could be done? Well, there does exist a handy workaround through which you could easily take a data backup in a soft-bricked or bootloop device. And this guide shall make you aware of just that. So without further ado, let’s get started.
Table of Contents
How to Take a Data Backup in Bricked or Bootloop Device
First and foremost, there’s an important prerequisite you need to checkmark- your device’s bootloader needs to be unlocked. For most of our readers that will already be the case, since a locked device rarely faces brick issues. But what if the bootloader is locked? Can’t we unlock the bootloader on a bricked or boot looped device?
Well, truth be told, you could easily unlock the bootloader on any bricked or boot looped device, but doing so wouldn’t make much sense. This is because as soon as you unlock the bootloader, it will wipe off all the data from your device. The very notion of this guide is to take a data backup, which would hence be destroyed. Therefore, only proceed ahead with the rest of the steps to take a data backup in a soft-bricked or bootloop device if the bootloader has already been unlocked.
- How to Fix Magisk Bootloop using TWRP Recovery [2 Methods]
- Unbrick Samsung | Flash Stock Firmware via Odin
- Fix Mi Account Authorization | Unbrick Xiaomi | EDL Mode
- Fix Sahara communication failed error in MSM Download Tool
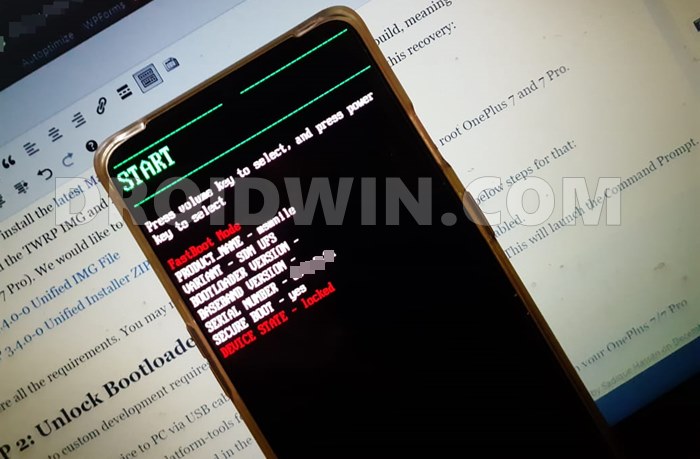
STEP 1: Boot your Bricked Device to Fastboot Mode
To begin with, you will have to boot your device to Fastboot Mode. Since it is in a bootloop or bricked state, you wouldn’t be able to use the adb reboot bootloader command. Rather, you would have to take the help of hardware key combinations:
- So start by powering off your device. If you can’t power off the normal way, then let the battery ‘near about’ drain out.
- Then press and hold the Power and Volume Down keys for a few seconds. Your device shall now boot to the Fastboot Mode.
- If that doesn’t happen, then use the Power and Volume Up key combinations and it should now boot to Fastboot.
STEP 2: Install Android SDK Platform Tool

Next up, install the Android SDK Platform Tools on your PC. This is the official ADB and Fastboot binary provided by Google and is the only recommended one. So download it and then extract it to any convenient location on your PC. Doing so will give you the platform-tools folder, which will be used throughout this guide.
STEP 3: Download TWRP Recovery
So here comes the crux of this article: you will now have to download a working custom recovery for your device. For that, you should first visit the TWRP official device catalog. If it is present for your device, then download it right away.
However, if an official TWRP Recovery is not yet available for your device, then head over to the XDA Developers website and grab hold of the unofficial recovery. [You may also download any TWRP based recovery as well, such as OrangeFox Recovery].
STEP 4: Set Up Working Environment
- Once you have downloaded the recovery file, transfer it to the platform-tools folder on your PC.
- Likewise, rename it to twrp, so that the complete name becomes twrp.img.
- Now connect your device to the PC via USB Cable (make sure that it is booted to Fastboot Mode).
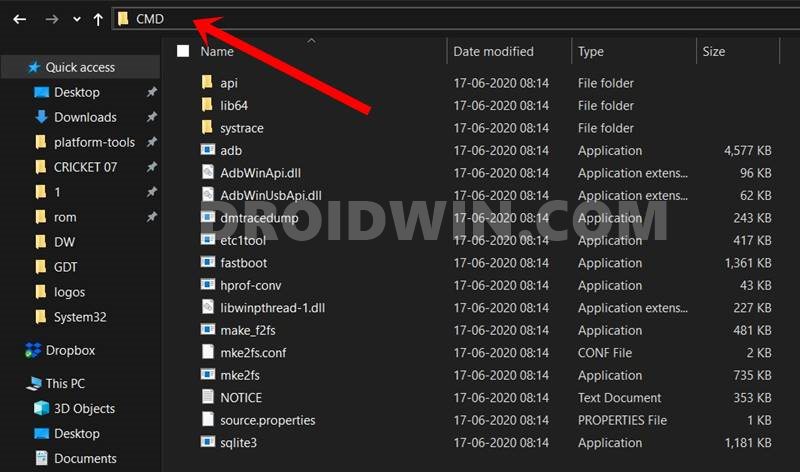
- Then head over to the platform-tools folder, type in CMD in the address bar, and hit Enter. This will launch the Command Prompt window.

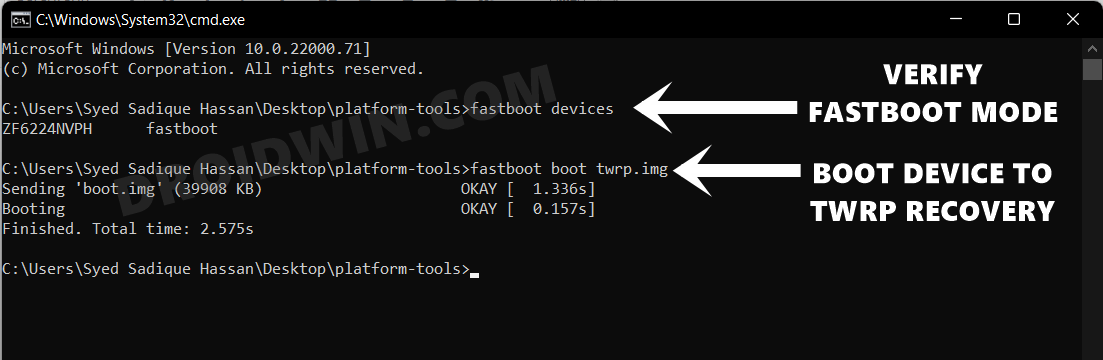
- Execute the below command to verify for the Fastboot Connection (if you get the Device ID and Fastboot keyword, then the connection stands successful, see image in Step 5):
fastboot devices
STEP 5: Boot Device to TWRP Recovery
You will now have to temporarily boot your device to the TWRP Recovery. The recovery is just for one-time usage, and wouldn’t survive the next reboot. We are doing this on purpose as permanently installing the TWRP in a bricked device wouldn’t be a good idea.
Once the device is up and running again, you may then install the TWRP Recovery on a permanent basis. So type in the below command in the CMD window that you have opened inside the ADB directory (make sure that the device is connected to PC and is booted to the Fastboot Mode):
fastboot boot twrp.img
Your device will now boot to the TWRP Recovery. Let’s now move over to the final section of this guide to take a data backup in a soft-bricked or bootloop device.
STEP 6: Take Nandroid Backup in Bricked/Bootloop Device
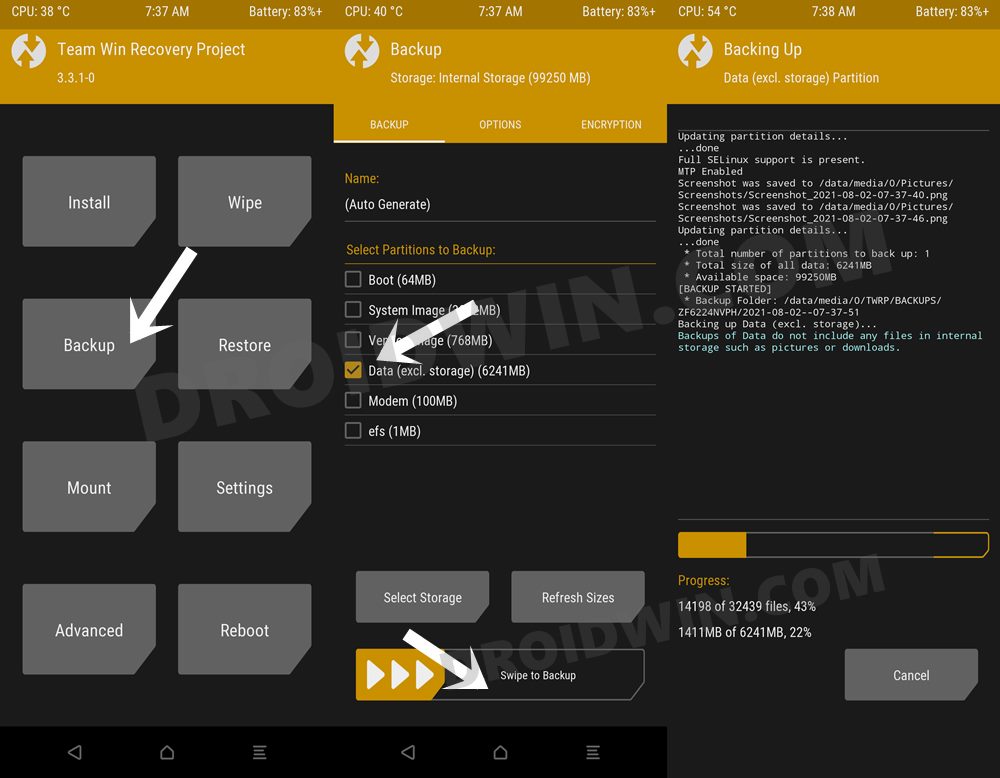
- Head over to the Backup section of the TWRP.
- Then select the Data partition and perform a right swipe to take its backup.
- The Nandroid backup will now begin and could take a few minutes. Once done, you shall be notified of the same
STEP 7: Unbrick Your Device
Now that you have taken a backup of all your important data, you may refer to our guide to Unbrick any Android device: Fix Softbrick/Hardbrick/Bootloop. Refer to the instructions listed in that linked guide and your device will now be back to life.
STEP 8: Restore the Backup
Since your device is now working well and good, you may now restore the backed-up Nandroid data. For that, make sure that your device’s bootloader is still unlocked. If you have locked it during the unbrick process, then consider unlocking it: How to Unlock Bootloader of Any Android Device.
Do keep in mind that doing so will wipe off all the data from your device (and will nullify the warranty as well), so make sure to transfer the backup to any safer location. Once the unlock is done, transfer the backup to your device and then proceed with the below steps:
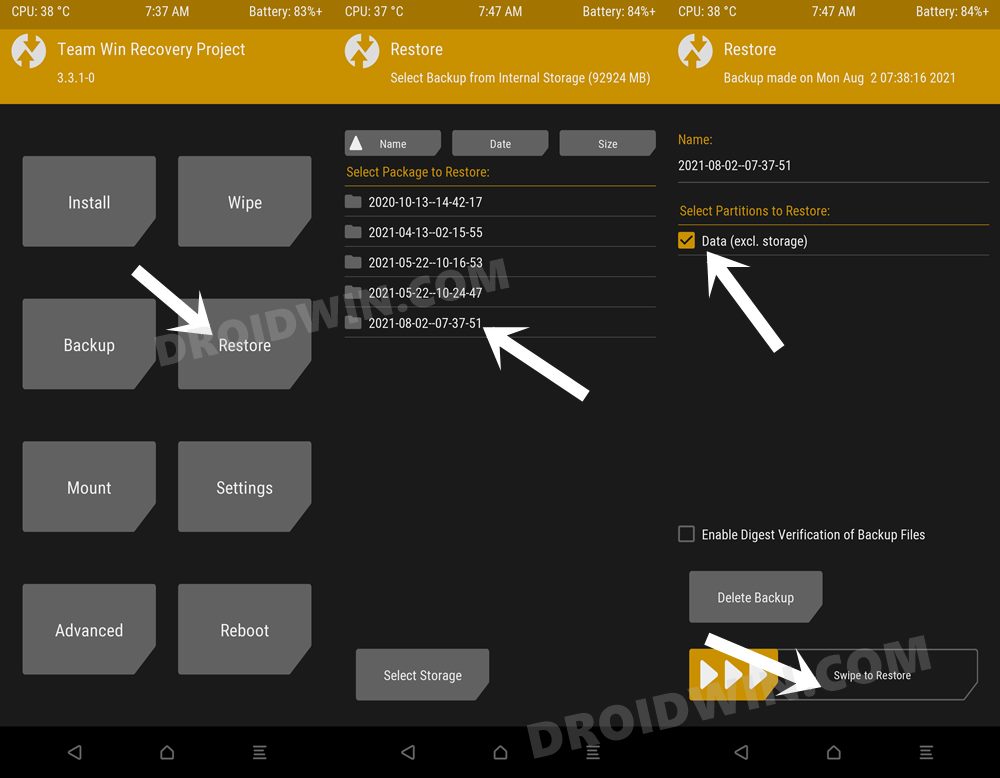
- To begin with, boot your device to the TWRP Recovery (see STEP 5).
- Then go to the Restore section and select your Nandroid Backup.
- Checkmark the Data partition and then perform a right swipe to restore it.
- The restore will now begin and could take a few minutes.
- Once done, you may now reboot the device to the OS via Reboot > System.
Conclusion
That’s it, the process strands complete. So this was all from this guide on how you could take a data backup in a bricked or bootloop device. As already mentioned before, TWRP was only temporarily installed. If you want to have it permanently installed, then do check out our guide on How to Install TWRP Recovery on Android.
Furthermore, apart from the Nandroid Backup route, I couldn’t think of any better approach to carry out this task. if you have any other tricks up your sleeves, do share with us in the comments section. Likewise, all queries are welcomed in the comments.


Arbaz
fastboot boot twrp.img booting failed (Status read too many links)
Ye error show karra h bhai kya karu ?
Shubham
Hi,
Thanks fro the article, I will try this process soon on my bricked mi.
I just had a question, will this process work if my phone is not unlocked?
If so, is there a way I can unlock my phone without losing the data?
Thanks