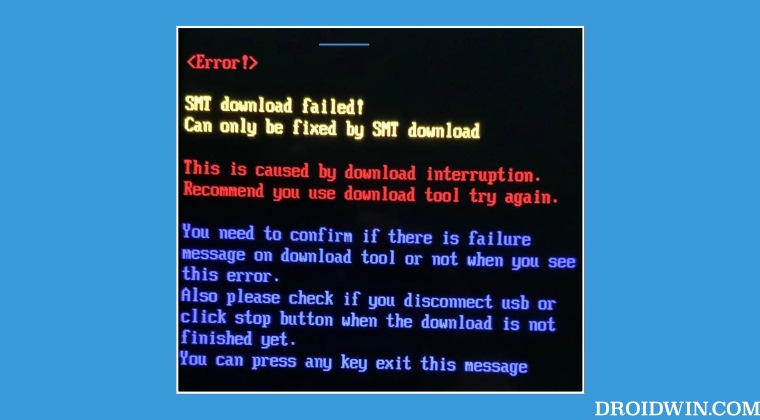
This guide will show you the steps to fix the SMT Download Failed error on your OnePlus device. While the devices from the Chinese OEM are actually a shadow self of what they actually once used to be, it is still among the go-to choices for the tech enthusiast. One reason for the same is the fact that it beholds a Qualcomm chipset which allows us to access the Emergency Download Mode.
Using this EDL Mode, we could easily unbrick our device by flashing the OFP firmware via the dedicated MSM Tool [well, at least till the OnePlus 9 series]. With that said, numerous users have voiced their concern that they are getting the SMT Download Failed error on their OnePlus devices. If you are also currently facing this issue, then this guide will help you out. Follow along.
Table of Contents
How to Fix SMT Download Failed on OnePlus
This process will wipe off all the data from your device [while you aren’t in a position to take a backup anyways, but still, just a warning nevertheless!]. Droidwin and its members wouldn’t be held responsible in case of a thermonuclear war, your alarm doesn’t wake you up, or if anything happens to your device and data by performing the below steps.
STEP 1: Install Android SDK

First and foremost, you will have to install the Android SDK Platform Tools on your PC. This is the official ADB and Fastboot binary provided by Google and is the only recommended one. So download it and then extract it to any convenient location on your PC. Doing so will give you the platform tools folder, which will be used throughout this guide.
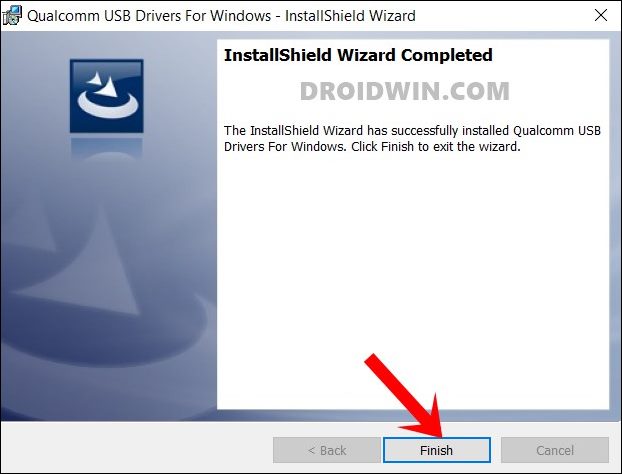
STEP 2: Install Qualcomm USB Drivers
Next up, you will have to download and install the Qualcomm USB Drivers. This is needed so that your PC (and the MSM Tool) is able to identify the connected device in EDL Mode. So refer to our guide on Qualcomm HS-USB QDLoader 9008 Drivers: Download & Install
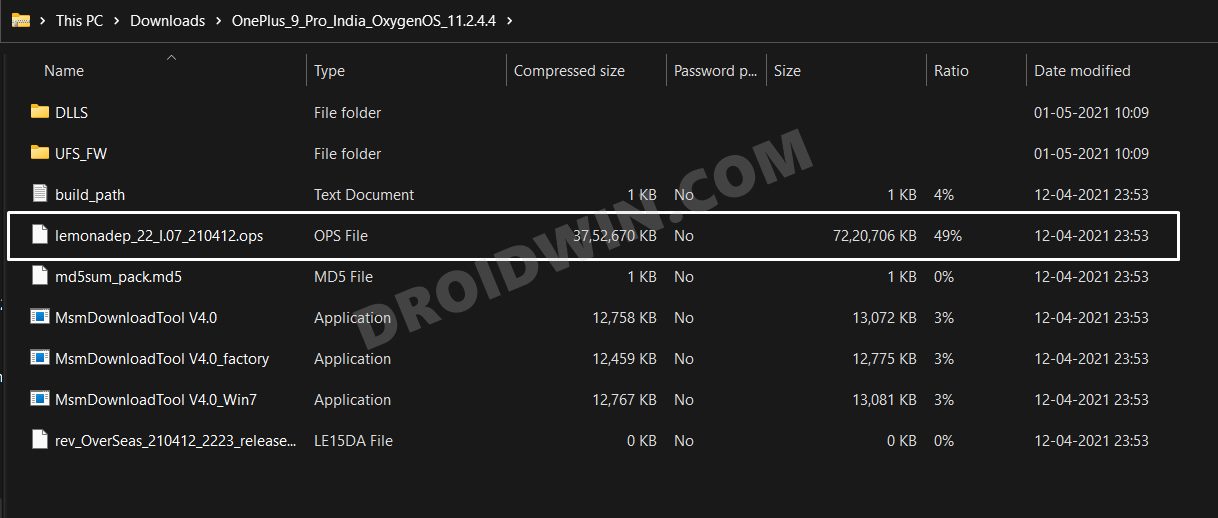
STEP 3: Download MSM Download Tool
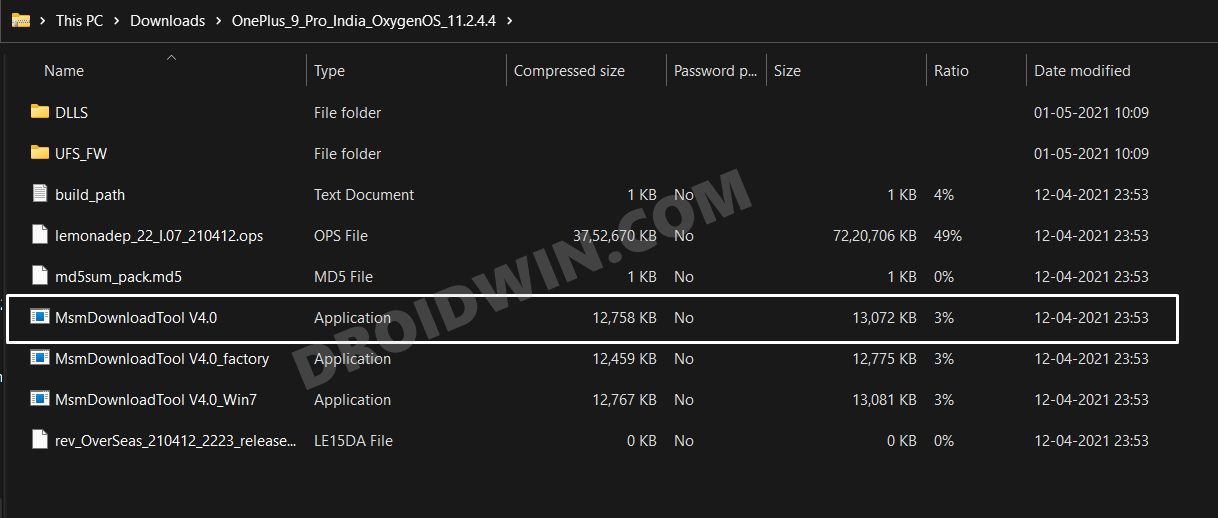
Next up, get hold of the MSM Download Tool corresponding to your device from this post. Once downloaded, extract it to any convenient location on your PC. This will give you the Tool as well as the OPS Firmware for your device.
STEP 4: Boot OnePlus to EDL Mode
you will now have to boot your OnePlus device to Emergency download mode. For that, please refer to our comprehensive tutorial on How to Boot any OnePlus Device to EDL Mode. Or you could also refer to the below shorter instructions.
- To begin with, power off your device.
- Then press and hold the Volume Up and Volume Down keys together.
- With both these keys pressed, connect your device to the PC via USB cable.

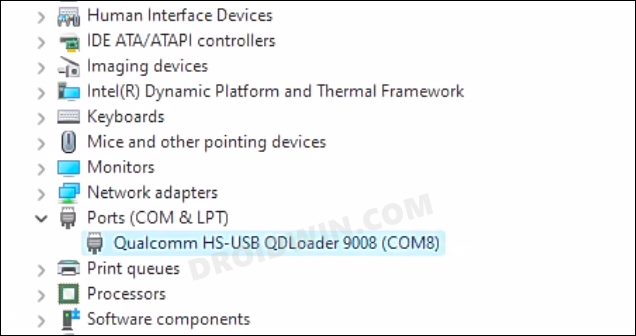
- That’s it. Your device is now booted to EDL Mode. To verify the same, press Windows+X and select Device Manager.
- Then expand the Other Device or Ports section and your device will be listed as Qualcomm HS-USB QDLoader 9008.
If your device is still being shown as QHUSB_BULK, then reverify driver installation, use USB 2.0 Port, or try using a different USB cable. Any one of these tweaks could fix the EDL connection error.
STEP 5: Fix SMT Download Failed via MSM Download Tool
- To begin with, launch the MSM Tool by double-clicking on the MsmDownloadTool V4.0.exe file.
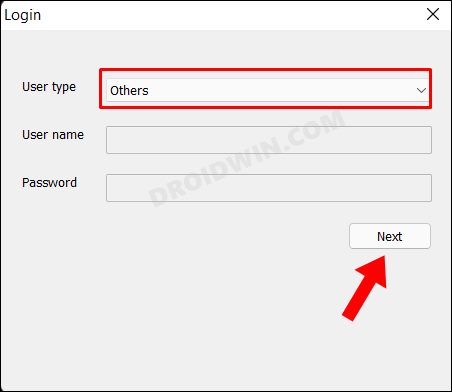
- In the Login screen, select Others under User Type. Leave Username and Password blank and click Next.
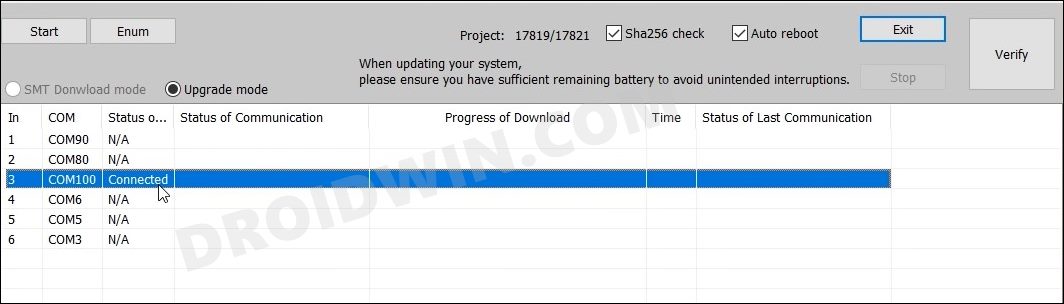
- The tool will now load and it should detect the connected device.
- You could verify the same from the COM/Status of Connection section.
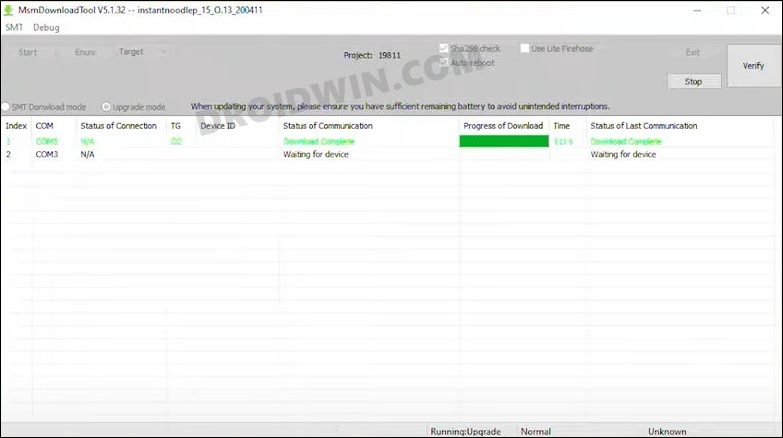
- If that’s well and good, then press Start to initiate the flashing process. It could take a few minutes for the process to complete.
- Once done, you will be notified of the same and your device will automatically boot to Android 11.
That’s it. These were the steps to fix the SMT Download Failed error on your OnePlus device. If you have any queries concerning the aforementioned steps, do let us know in the comments. We will get back to you with a solution at the earliest.