In this guide, we will show you the steps to fix the issue of SMB File Share not working in macOS Ventura. The Server Message Block (SMB) is a network protocol that enables users to communicate with remote computers and servers. Many Mac users use this protocol to share files with non-Appple devices, such as Windows PC. However, with the thirteenth iteration of the OS released by the Cupertino giant, this functionality seems to be broken.

In this regard, many have voiced their concern that SMB file sharing is not working along the expected lines in macOS Ventura. The OS is now trying to force implement the use of SMB 3 from SMB 2 and it seems to have messed up big time. Moreover, users aren’t even able to view files stored in SMB share [though they work just fine in local drive]. If you are also getting bugged by this issue, then this guide will help you out. Follow along for the fix.
Table of Contents
Fix SMB File Share not working in macOS Ventura
Since the culprit is the force implementation of SMB 3, you could fix this issue by switching over to SMB 2 using two different methods. First off, you could give the liberty to the OS and let it select between SMB 3 and 2. Since the latter isn’t working, it would auto-switch to the former. Or you could take the second and more aggressive approach of forcing the OS to stick with SMB 2. In this guide, we will be discussing both these methods. So without further ado, let’s get started.
FIX 1: Let OS Auto Switch between SMB 2 & 3
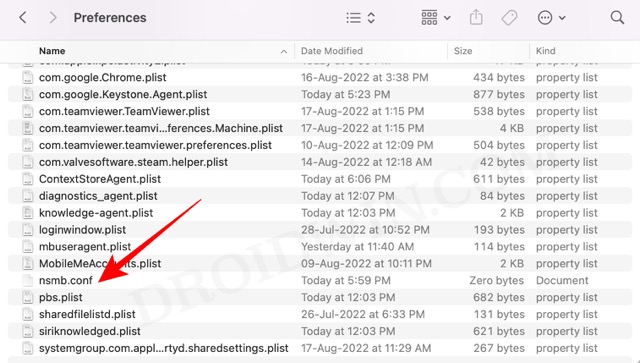
- Open Finder and click on Command+Shift+. shortcut keys to view hidden folders.

- Then go to Library/Preferences/nsmb.conf (only for a user) or /etc/nsmb.conf (for all users).
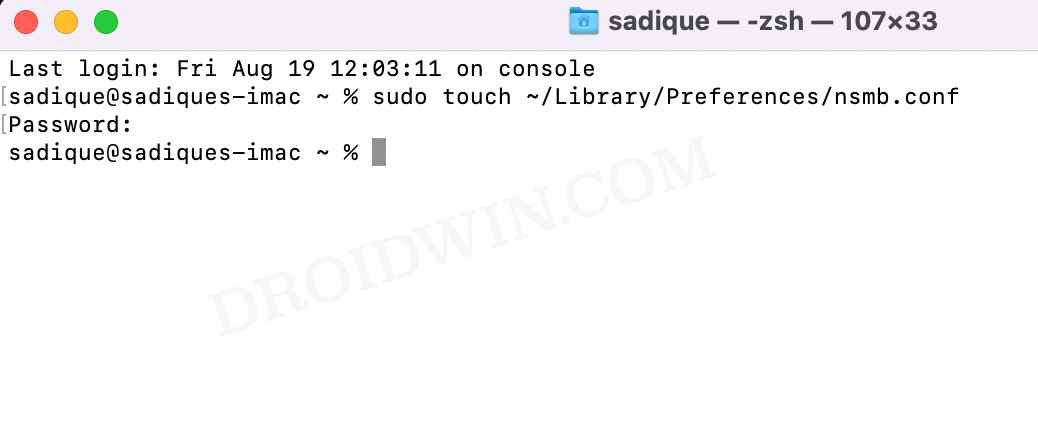
- If you haven’t interacted with this file before, then it would be missing from that directory. So let’s create it first.
- For that, launch Terminal and execute either of the two commands, depending on the location where you need to create the nsmb.conf file.
sudo touch ~/Library/Preferences/nsmb.conf
sudo touch /etc/nsmb.conf
- Once done, go to that directory and open the nsmb.conf file. Then add the following lines and save the file.
[default]
protocol_vers_map=6
- Finally, restart your Mac. This should fix the issue of SMB share not working in macOS Ventura.

FIX 2: Force Switch to SMB 3
- Open Finder and click on Command+Shift+. shortcut keys to view hidden folders.
- Then go to Library/Preferences/nsmb.conf (only for a user) or /etc/nsmb.conf (for all users).
- If you haven’t interacted with this file before, then it would be missing from that directory. So let’s create it first.
- For that, launch Terminal and execute either of the two commands, depending on the location where you need to create the nsmb.conf file.
sudo touch ~/Library/Preferences/nsmb.conf
sudo touch /etc/nsmb.conf
- Once done, go to that directory and open the nsmb.conf file. Then add the following lines and save the file.
[default]
protocol_vers_map=2
- Finally, restart your Mac. This should fix the issue of SMB share not working in macOS Ventura.
What is the protocol_vers_map Command?
Before understanding that, you should note down that there are basically 5 settings that the protocol_vers_map could accept. These are:
7: This will enable SMB 1/2/3 (default)
6: This wil enable SMB 2/3 enabled
4: This will enable only SMB 3 enabled
2: This will only enable SMB 2 enabled
1: This will only enable SMB 1 enabled
In method 1, we have used protocol version 6. This would enable support for both SMB 2.0 and 3.0. On the other hand, in the second method, we have used protocol version 2, which will only enable SMB 2.0. On that note, we round off this guide. If you have any queries concerning the aforementioned steps, do let us know in the comments. We will get back to you with a solution at the earliest.


andrew
Terrible analysis. “Forcing an implementation” is not the reason for any problem. The problem at the core will be something like “SMB3.0 itself is broken in Ventura, so forcing only 3.0 means your machine won’t have a choice but to use a broken protocol”.
If the problem is Ventura’s SMB 3.0 stack then it is a problem that Apple has to solve, and anything mentioned here is a hack-eyed workaround, as many commenters have observed.
It’s terrible troubleshooting practice to identify a symptom and claim it to be the root cause; and your workarounds are happy fixes for underlying (and unaddressed) issues. Anyone who forces SMB 2.0 is going to be shafted once SMB 2.0 is switched off (which will likely happen soon for most people not fully in charge of their own environments. And those that -are- fully in charge of their own envs. already know that they’re inviting hackers and ransomware by leaving SMB2.0 enabled.
Forcing 2.0 is a terrrible idea because many systems (Windows esp.) are already phasing out
Ben Grey
I tried the first solution which worked for a while and then stopped for some reason. I then changed it to SMB 3.0 (protocol_vers_map=4) which seems to be working but slower. It did need a reboot to take effect.
The question is the heading for fix 2 says SMB 3 but the instructions mentions the protocol for SMB 2.0 what is the official suggestion.
JohnR
This fix doesn’t work, but a way easier fix is to just remove and re-add the problem share item, restoring the “custom” user permissions.
Jack LaCorte
You would have to do this every time you wanted to run another Time Machine backup.
Jack LaCorte
But it seems you have to do this every time you need to run another Time Machine backup.
sth
This does not seem to work with server running Ventura 13.2.1. Also Fix #2 should be titled “Force use of SMB 2” not 3.
/etc/nsmb.conf file must be edited as a super user as root:wheel. You might need to give instructions to use sudo vim /etc/nsmb.conf from terminal.
Lastly can smbutil command be used remotely to determine if the server is using protocol version 2 or 3? For example I have
smbutil status -a opsserver
which returns available services. But if I use
smbutil view //XXX@opsserver
I get “smbutil: server connection failed: Operation timed out”
Jan
I do not know how go open the nsmb.conf file? Can you pls help?
AJC
I followed your suggestions and it didn’t work. As usual, worked for a while, then failed again. Same with other suggestions I’ve found on the Web.
Henrik
Hi!
Thanks for this solution.
Do I need to edit the nsmb.conf on both the hosting cpu and the cpu’s that connect to the file sharing cpu?
Markus
This does not seem to be working. The nsmb.conf file, after being created (/etc/nsmb.conf ) ends up being uneditable. TextEdit opens it locked, and says “this file cannot be edited, do you wnt to make a copy?
When trying to change permissions via the terminal:
chmod 755 /private/etc/nsmb.conf
I get the following error:
chmod: Unable to change file mode on /private/etc/nsmb.conf: Operation not permitted
PS: Yes, the file ends up in /private/etc/nsmb.conf , because /etc is just an alias to /private/etc
Seems like Apple is hell-bent on preventing sharing files to Windows and a million of other devices 🙁
Frank
Or best way ad to /etc like this:
echo “[default]” | sudo tee -a /etc/nsmb.conf
echo “protocol_vers_map=2” | sudo tee -a /etc/nsmb.conf
Find the hidden /etc folder:
Press Shift + Cmd + G and type /etc
Frank
Open the filen in TextEdit
Ad the lines
Save as copy
Delete the original
Open file preferenses
Rename the copied file from nsmb.conf.txt to nsmb.conf and leave the file type visible
Close and reboot
It worked for me using SMB 2
Dirk
I tried it with protocol_vers_map=6 for all users, but it did not work. My Mac is on 13.3, I tried to access it with another Mac on 10.15.7 (Catalina).