In this guide, we will show you various methods to save your screenshots on your Mac in JPG, GIF, TIFF, HEIC, or PDF format, instead of PNG. macOS beholds a nifty screenshot tool. You just need to press the Shift+Command+3 keys to capture the entire screen or use the Shift+Command+4 keys to capture a specific portion.
No matter which of the two approaches you opt for, the screenshots are always saved in PNG format. However, this default format might not be in sync with everyone’s requirements. For example, in the blogging community, we usually upload JPG images due to their smaller size in comparison with PNG.
So converting every image from PNG to JPG before uploading it ended up taking quite a lot of time. And this is just one instance. There could be many more such cases wherein you want to save the screenshots on your Mac in JPG, GIF, TIFF, HEIC, or PDF format. So without further ado, let’s check out how this could be achieved.
Table of Contents
How to Save Mac Screenshots as JPG, GIF, TIFF, HEIC, or PDF [instead of PNG]
There exists three different methods through which you could get this job done. We have listed each of them below, along with their perks and drawbacks. You may refer to the one that is in sync with your requirement
Method 1: Using Terminal
The benefit of this method is all your screenshots from now on will automatically be taken in your chosen format. However, it might as well turn to a drawback for some users if they want to take a single screenshot in any other format. This isn’t possible via this method as the conversion is universal and applicable across all the captured screenshots. In such cases though, you could revert the setting back to PNG, take a screengrab, and switch back to JPG [we will show you how to do that as well].
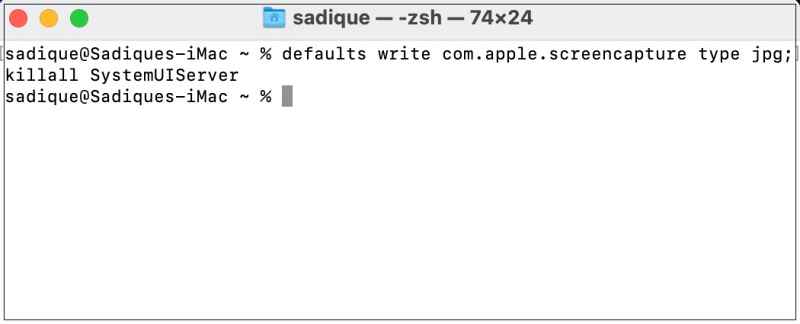
- Open Launchpad, go to the Others folder, and launch Terminal.
- Then execute the below command to save Mac screenshots in JPG format:
defaults write com.apple.screencapture type jpg;killall SystemUIServer

- On the other hand, to save Mac screenshots in HEIC format, input the below command
defaults write com.apple.screencapture type heic;killall SystemUIServer
- Likewise, use the below command to save Mac screenshots as PDF:
defaults write com.apple.screencapture type PDF;killall SystemUIServer
- Or, if you wish to save Mac screenshots as GIFs, then execute the below command
defaults write com.apple.screencapture type gif;killall SystemUIServer
- Finally, use the following command to save Mac screenshots as TIFF:
defaults write com.apple.screencapture type tiff;killall SystemUIServer
- However, if you wish to revert the change and save the screenshot in the PNG format as before, then just type in the below command:
defaults write com.apple.screencapture type png;killall SystemUIServer
Method 2: Using Right Click
The drawback with this method is the fact that it requires that the screenshot should be saved first [which is automatically saved to your desktop]. Likewise, you will have to manually carry out the conversion for every image. Not to mention the fact that it only has four supported formats- JPEG, PNG, HEIF, and PDF. Moreover, once the conversion has been done, you will have to manually delete the original PNG file.
On the good side though, it has an Image size option which makes it quite easy to compress the image. Moreover, it doesn’t require any third-party app and the entire process requires just a right-click, so it’s quite a fast process. So with that in mind, here’s how you could save your screenshots in JPG format on your Mac via a right-click.
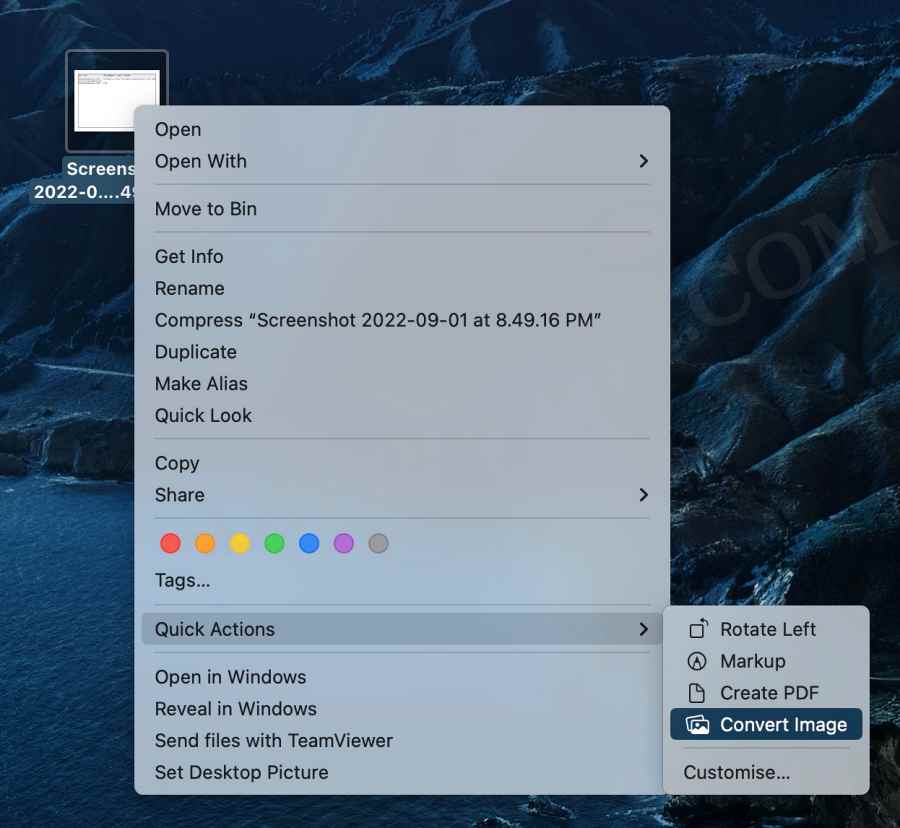
- To begin with, take a screenshot. It will be automatically saved onto your desktop.
- Then right-click on it and select Quick Actions > Convert Image.
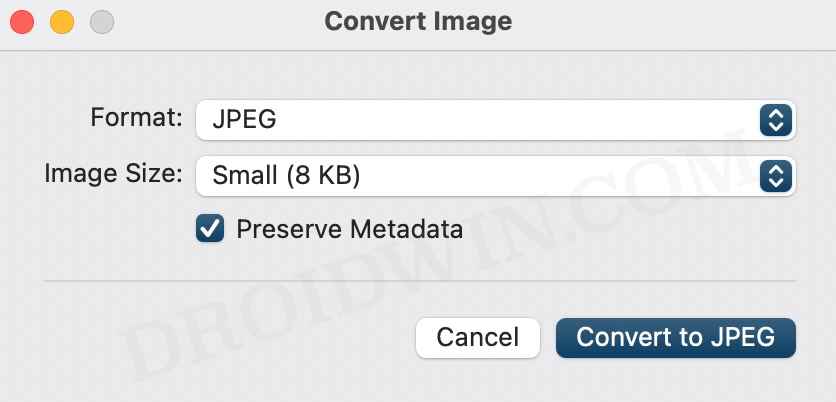
- Now select the format from the list and click Convert to <format>.
- To save it as a PDF, right-click on the image and select Quick Actions > Create PDF.
Method 3: Using Preview App
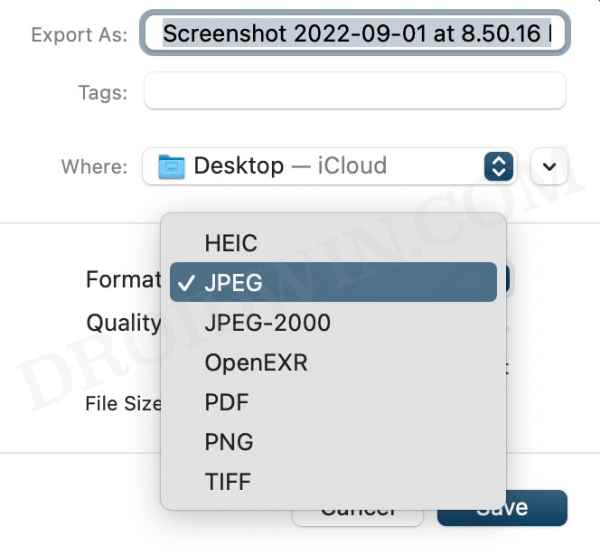
Similar to the Right Click method, it also requires saving the file first, and then you will have to manually delete the original PNG file In addition, it also requires your interaction with an app [Preview] so that’s a few seconds spent. The perks of this method are the support for numerous formats [HEIC, JPEG, JPEG-2000, OpenEXR, PDF, PNG, or TIFF] as well as the ability to adjust the image quality.
- Take a screenshot and open it in Preview.
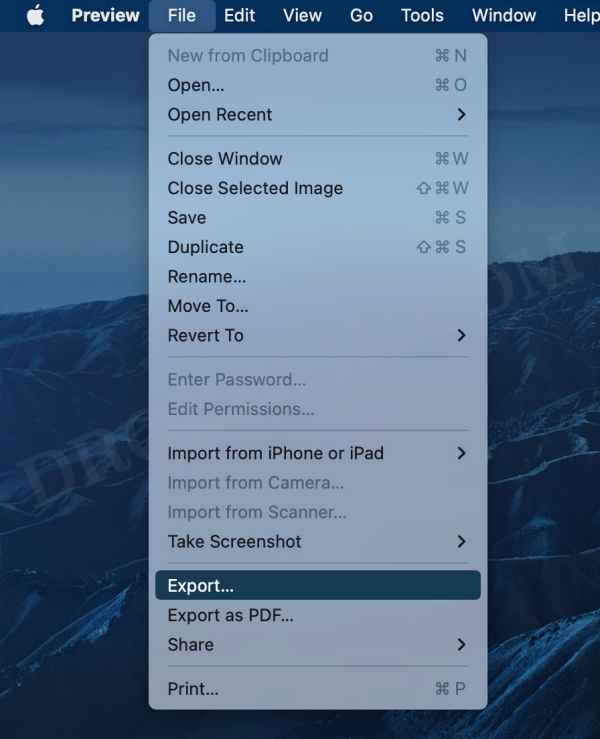
- Then go to File > Export.
- Now select the desired format from the list and hit Save.
That’s it. These were the three different methods to save your screenshots in JPG, GIF, TIFF, HEIC, or PDF format on your Mac. Do let us know which method you ultimately settled for. Likewise, if you have any queries concerning the aforementioned steps, do let us know in the comments. We will get back to you with a solution at the earliest.


