In this guide, we will show you the steps to root any Sony device using Magisk and the boot.sin file. While Sony devices are now just shadow of its yesteryears, but it still manages to churn out some decent handsets every now and then. However, on the flip side, it isn’t usually associated with custom development. There aren’t many mods, tweaks, or customizations that you could carry on your devices. One major reason for the same is the fact that rooting Sony devices were never a cakewalk.
There were quite a few complexities involved. First off, not every Sony device comes with a working TWRP Recovery. Even does who do have to suffer from encryption issues. Then if we turn our attention towards rooting without using a custom recovery, it also had its fair share of issues. The biggest of which was the complexities involved in carrying out the entire process. For the unaware, to root any device without TWRP, you need to get the stock boot.img file, patch it via Magisk and flash it via Fastboot.
The biggest issue with Sony devices is the fact that their boot file comes in a SIN format, which is not supported by Magisk and Fastboot Commands. And there was no help either in case someone wishes to make a conversion from SIN to IMG. But you could now put all these doubts to rest. Today, we will show you how to convert the boot.sin to boot.img and then root your Sony device via Magisk, without using TWRP Recovery. So without further ado, let’s get started.
Table of Contents
How to Root Sony Devices via Magisk and Boot.Sin File
The below instructions are listed under separate sections for ease of understanding. Make sure to follow in the exact same sequence as mentioned. Furthermore, please take a backup of all the data present on your device beforehand. Droidwin and its members wouldn’t be held responsible in case of a thermonuclear war, your alarm doesn’t wake you up, or if anything happens to your device and data by performing the below steps.
Install Android SDK

First and foremost, you will have to install the Android SDK Platform Tools on your PC. This is the official ADB and Fastboot binary provided by Google and is the only recommended one. So download it and then extract it to any convenient location on your PC. Doing so will give you the platform-tools folder, which will be used throughout this guide.
Enable USB Debugging and OEM Unlocking
Next up, you will also have to enable USB Debugging and OEM Unlocking on your device. The former will make your device recognizable by the PC in ADB mode. This will then allow you to boot your device to Fastboot Mode.
On the other hand, OEM Unlocking is required to carry out the bootloader unlocking process. So head over to Settings > About Phone > Tap on Build Number 7 times > Go back to Settings > System > Advanced > Developer Options > Enable USB Debugging and OEM Unlocking.
Unlock Sony Phone’s Bootloader
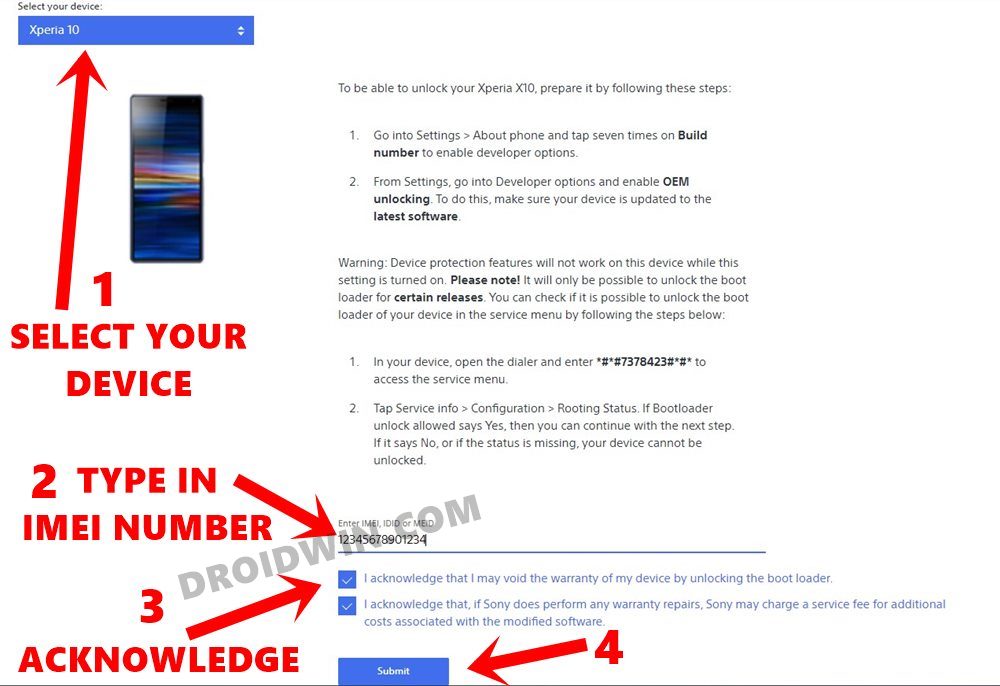
You will also have to unlock your device’s bootloader. Do keep in mind that doing so will wipe off all the data on your device and could nullify the device warranty as well. So if that is all well and good, then please refer to our guide on How to Unlock Bootloader on any Sony Xperia Device.
Convert Sony Boot.sin to Boot.img
Sony doesn’t upload their firmware on their server. As a result, you would have to carry out the download via a third-party tool. In this regard, the XperiFirm is the most trusted tool that does its job without any issues. Furthermore, once you have downloaded the firmware, extract it and you should get the boot.sin file.
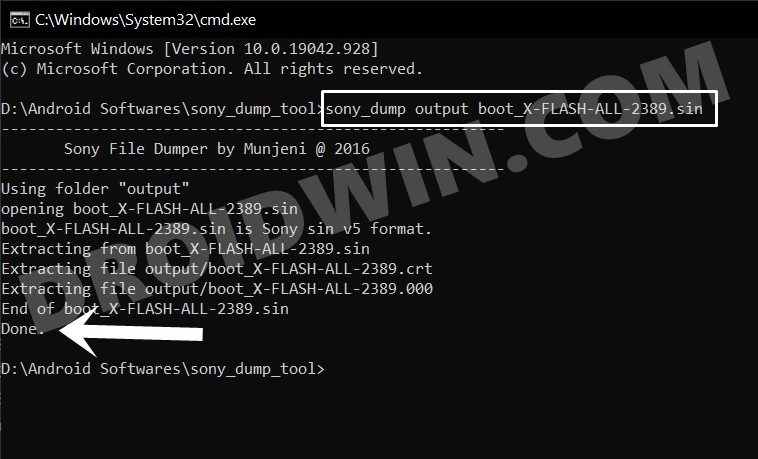
However, this would be of no good and you will have to convert it to the IMG format. For that, you will have to use the Sony Dump Tool. All these instructions are given in the following guide, please refer to it: How to Extract Sony Boot.sin and get the Stock Boot.img File.
Patch Sony Boot.img/Boot.sin via Magisk
Now that you have got the Sony boot.img file from boot.sin, its time to root your device. Follow the below steps for that:
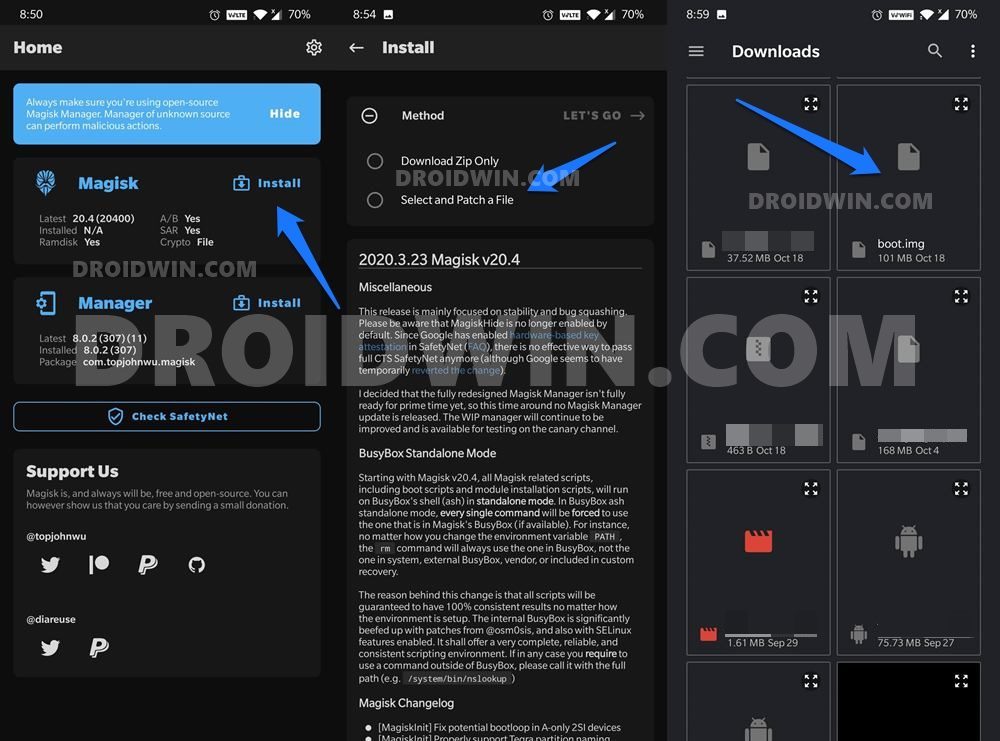
- First off, install the Magisk App onto your device
- Likewise, make sure that the boot.img has been transferred to your device.
- Then tap on the Install button situated next to Magisk.
- From the Method section, choose Select and Patch a file.

- Browse to the extracted boot.img file and select it.
- Then tap on the Let’s Go option situated at the top right.
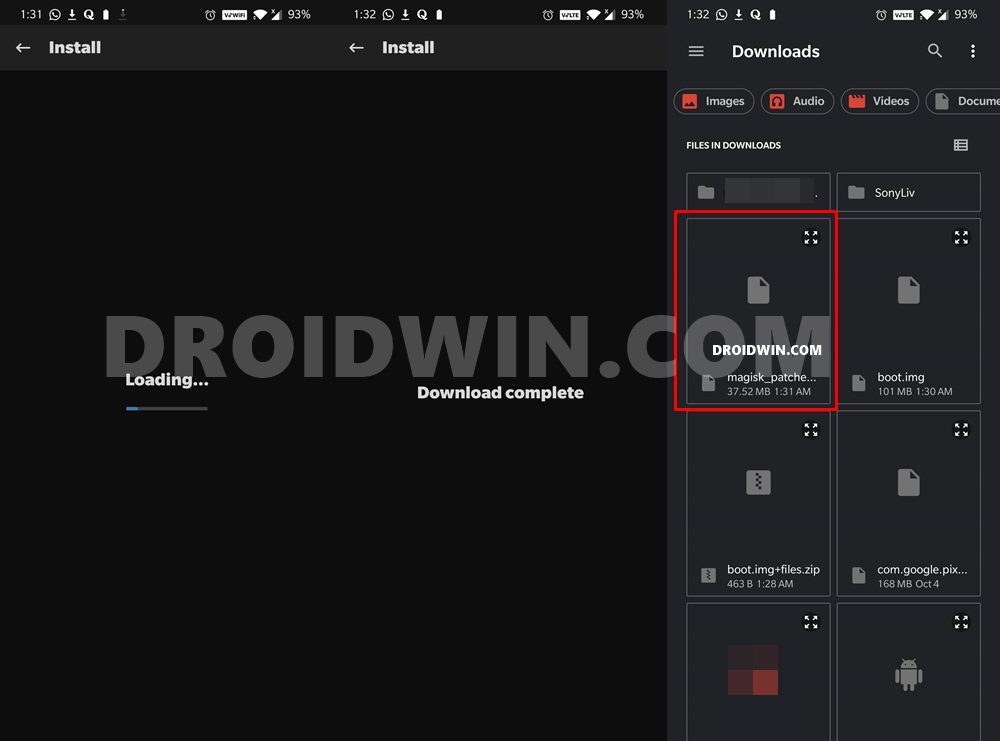
- Magisk will now load the boot.img file and will patch it accordingly. Once that is done, you would get the Download Complete message.
- The patched boot image file will be saved in Internal Storage > Downloads. The name of the file will be magisk_patched.img (if there are a few random characters at the end, then delete them so that the name becomes magisk_patched.img).
Boot Sony Device to Fastboot
- Connect your device to the PC via USB cable. Make sure USB Debugging is enabled.
- Then head over to the platform tools folder, type in CMD in the address bar, and hit Enter. This will launch the Command Prompt.
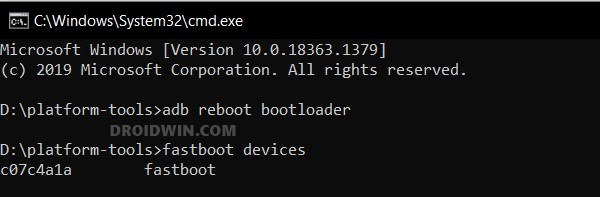
- Type in the following command in the CMD window to boot your device to Fastboot Mode:
adb reboot bootloader
- To verify the connection, type in the below command. You should get the device ID followed by the Fastboot keyword, signifying that the connection has been successfully established.
fastboot devices

Flash Boot.Sin/Boot.img File and Root Sony
- To begin with, make sure that you have transferred the magisk_patched.img file to the platform-tools folder.
- Now type in the below command in the CMD window (that is opened inside the platform-tools folder) to flash the Magisk Patched file:
fastboot flash boot magisk_patched.img
- Once that is done, reboot your device to the OS via the following command:
fastboot reboot
That’s it. These were the steps to root your Sony device via Magisk and boot.sin file. If you have any queries concerning the aforementioned steps, do let us know in the comments. We will get back to you with a solution at the earliest.


Sugerfunk
Thanks for your very clear and concise instructions. I will be trying your technique after upgrading my Sony Xperia IV. If you wouldn’t mind, I would just like to know if this technique will erase the userdata partition or if it will keep it intact. I’m trying to gauge if I will be able to use Newflasher to update to the latest version and then use your technique to re-root whole keeping all of my custom configurations intact, almost like a manual triggered OTA update Thank you in advance!
Mario Viano
Wow thank you so much! It finally worked.
I was at a loss because TWRP broke after the Android 12 update and couldn’t get my device rooted, I was about to give up until I found your article, again thanks!
Very well written and clear instruction, keep up the good work and helping people out!
Dmitry
Many-many thanks for your work and articles! I can say, You give THE BEST instructions all over the similar web-sources! Most clear, actual and useful!
About this method:
this the the best solution for sony root (I made it with XZ2 andr 10). If you’re a middle user without exact demands — Dont spend hours with the TWRP implementation going through different mods and bugs! It’s really elegant solution to save your time and nerves.
Sadique Hassan
Thanks a lot for these encouraging words Dmitry, means a lot.