In this guide, we will show you the steps to root the Pixel Experience ROM via Magisk, without using TWRP Recovery. [If you instead prefer to use a custom recovery, then refer to our other guide: How to Root Pixel Experience ROM via TWRP Recovery]. The Custom ROM market is currently brimming up with a plethora of offerings from various developers. While some are pure AOSP, others tend to lean towards providing heavy customizations.
Likewise, some have now even incorporated their own custom recovery along with the ROM. So with such a long list of options at hand, users are generally spoilt for choices as to which one they should ultimately settle for. However, for the users who are looking for a clean, fresh, and stock OS experience, their priorities are all but set. They straightaway hop onto the Pixel Experience custom ROM. As is evident from its name, it gives your device a complete overhaul and makes it akin to a Pixel device.
With that said, some find it a little bit monotonous and lacking some theming options. As a result, they prefer to root this ROM. This would then allow them to flash tons of mods such as Xposed Framework, Magisk Modules, Substratum Themes, Viper4Android, etc. If you are also on the same page and are looking to gain administrative privileges, then this guide is here to help you out. Given here are the detailed instruction steps to root your Pixel Experience ROM via Magisk.
Table of Contents
How to Root Pixel Experience ROM via Magisk
![]()
The below instructions are listed under separate sections for ease of understanding. Make sure to follow in the exact same sequence as mentioned. Droidwin and its members wouldn’t be held responsible in case of a thermonuclear war, your alarm doesn’t wake you up, or if anything happens to your device and data by performing the below steps.
Method 1: Root Pixel Experience ROM via Pixel Experience Recovery
If your Pixel Experience ROM comes with a built-in Pixel Experience Recovery, then this should be your go-to method. So proceed with the below steps to root the Pixel Experience ROM using this recovery.
STEP 1: Install Android SDK
First and foremost, you will have to install the Android SDK Platform Tools on your PC. This is the official ADB and Fastboot binary provided by Google and is the only recommended one. So download it and then extract it to any convenient location on your PC. Doing so will give you the platform-tools folder, which will be used throughout this guide.

STEP 2: Enable USB Debugging
Next up, you will have to enable USB Debugging so as to make your device recognizable by the PC in ADB mode. So head over to Settings > About Phone > Tap on Build Number 7 times > Go back to Settings > System > Advanced > Developer Options > Enable USB Debugging.
![]()
STEP 3: Download Magisk
- Download the latest Magisk APK and transfer it to your device as well as the platform-tools folder.
- Then rename the Magisk.apk inside the platform-tools folder to Magisk.zip.

STEP 4: Boot to Pixel Experience Recovery
- Connect your device to the PC via a USB cable. Make sure USB Debugging is enabled.
- Then head over to the platform-tools folder, type in CMD in the address bar, and hit Enter. This will launch the Command Prompt.
- After that, type in the following command in the CMD window to boot your device to Pixel Experience Recovery
adb reboot recovery
STEP 5: Sideload Magisk via Pixel Recovery
- From Recovery, go to Apply Update > Apply from ADB.
- Then type in the below command in the CMD window to sideload the Magisk ZIP
adb sideload Magisk.zip
- Wait for the process to complete. Once done, select Reboot System now.
STEP 6: Install Magisk
- Even though you have flashed Magisk ZIP via sideload, it might still not be available in the app drawer.
- So go ahead and install the Magisk APK file that you have transferred in STEP 3. Once installed, launch it.
- Magisk will now ask to complete additional setup, tap OK. Your device will now automatically reboot.
- Once it boots up, the Magisk will be successfully installed and your device stands rooted via Magisk.
That’s it. These were the steps to root the Pixel Experience ROM via Magisk via Pixel Experience Recovery. If you have any queries concerning the aforementioned steps, do let us know in the comments. We will get back to you with a solution at the earliest.
Method 2: Root Pixel Experience ROM via Patched Boot.img
If your Pixel Experience ROM didn’t come with a built-in Pixel Experience Recovery, then you will have to take the traditional route of flashing the Magisk patched boot.img to root your device. So proceed with the below steps to root the Pixel Experience ROM using the patched boot method.
STEP 1: Install Android SDK
First and foremost, you will have to install the Android SDK Platform Tools on your PC. This is the official ADB and Fastboot binary provided by Google and is the only recommended one. So download it and then extract it to any convenient location on your PC. Doing so will give you the platform-tools folder, which will be used throughout this guide.
STEP 2: Download Pixel Experience ROM
![]()
next up, you will have to download the Pixel Experience ROM for your device. Make sure to download the same version that is currently installed on your device. Once downloaded, extract it to any convenient location on your PC. Doing so will give you a couple of files including the all-important payload.bin, which we will be used to root the Pixel Experience ROM via Magisk.
STEP 3: Extract Pixel Experience Payload.bin File
![]()
You will now have to extract the payload.bin file of Pixel Experience. Doing so shall give you all the partition files (including boot.img) in their IMG Format. We would just be using the boot.img file for this guide. So refer to our detailed guide on How to Extract payload.bin and get the stock boot image file. Once done, copy the boot.img file from the Python’s Output folder to your device’s Internal Storage.
STEP 4: Patch Pixel Experience Stock Boot Image via Magisk
- To begin with, transfer the LineageOS boot.img file (that you had just extracted) to your device.
- Then download and install the Magisk App onto your device.
- Launch it and tap on the Install button situated next to Magisk.
- From the Method section, choose Select and Patch a file.
- Browse to the extracted boot.img file and select it.
- Then tap on the Let’s Go option situated at the top right.
- Magisk will now load the boot.img file and will patch it accordingly.
- Once that is done, you would get the Download Complete message.
- The patched boot image file will be saved in Internal Storage > Downloads. The name of the file will be magisk_patched.img. We will be using this file to root the Pixel Experience ROM via Magisk.
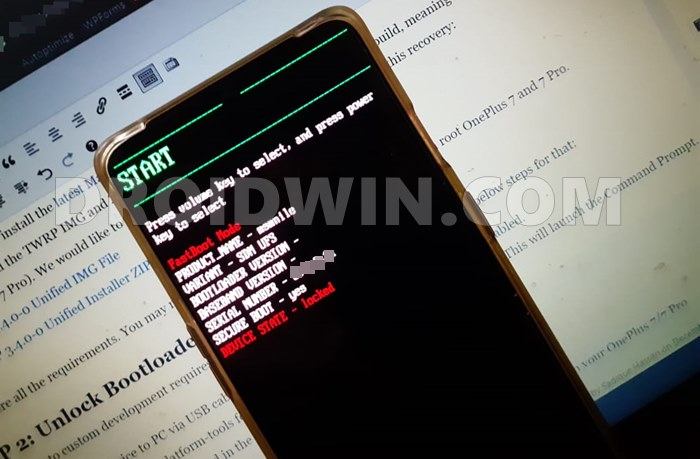
STEP 5: Boot Device to Fastboot Mode
- Connect your device to the PC via USB cable. Make sure USB Debugging is enabled.
- Then head over to the platform-tools folder, type in CMD in the address bar, and hit Enter. This will launch the Command Prompt.
- Type in the following command in the CMD window to boot your device to Fastboot Mode
adb reboot bootloader
STEP 6: Flash Pixel Experience Magisk Patched Boot.img via Fastboot
- First off, transfer the magisk_patched.img file from your device to the platform-tools folder on your PC.
- Then head over to this folder’s address bar, type in CMD, and hit Enter. This will launch the Command Prompt.

- Type in the below command in this CMD window to flash the patched boot.img file:
fastboot flash boot magisk_patched.img
- Once done, you may now reboot the device to the OS via the following command:
fastboot reboot
So this was all from this guide on how to root the Pixel Experience ROM via Magisk, without TWRP. If you have any queries concerning the aforementioned steps, do let us know in the comments. We will get back to you with a solution at the earliest.


Artech تیم طراحی آرتک
i got bootloop even after trying to flash orginal boot again
Hans
Hello, can I use the same procedure to install TWRP Recovery and go back from pixel experience recovery
Hannya
Thanks for the tutorial especially the part to extract payload.bin, it really helps.
tler
yeah that part is golden, real timesaver