In this guide, we will show you the steps to root any Oppo device via Magisk without using the TWRP Recovery. So how will the entire process be carried out? To begin with, we will download your device’s stock firmware which is OZIP format. Then we will extract that file and get hold of the stock boot.img file. Then this boot.img file will be flashed via Magisk which will give us magisk_patched.img file. Finally, this patched file will be flashed via Fastboot Commands onto your device and the task stands completed.
Oppo devices have managed to carve out a rich fanbase for itself in recent years. If we focus on the budget segment, then it has to face some tough competition from the like of Realme, Xiaomi, and the likes. But even then it has firmly established itself in this domain. Even though it belonged to the same parent company to which OnePlus Vivo Realme belongs, but is now created its own niche. Furthermore, out of the box, all its devices run the popular ColorOS software which is among the most customizable OS skin in the market.
However, this is just the beginning. If you take your Oppo device and have a visit to the custom development scene, you will be able to explore the device’s full potentiality. There is just requires that you need to qualify- an unlocked bootloader. Once you do so, you will be able to flash tons of custom binaries and mods onto your device, or even gain administrative privileges via root. And in this guide, we will help you with just that. So without further ado, here are the steps to root your Oppo device via Magisk without TWRP Recovery.
- How to Install OTA Updates in Rooted Android Device
- How to Install TWRP Recovery on Android
- Permanently Install TWRP without TWRP ZIP File (only using TWRP.img file)
- Root Android Devices Without TWRP Recovery
Table of Contents
Benefits and Risk of Rooting Oppo devices
Rooting an Oppo smartphone opens the floodgates to a plethora of customizations. To begin with, you will now have access to the system partition. This in turn will allow you to make tweaks to the build,prop file, or change the default boot animation on your device. Likewise, you will now be in a position to install Magisk Modules, Substratum Themes, and Xposed Framework.
But on the flip side, rooting might also lead to a few issues. For example, the first step in rooting asks for an unlocked bootloader. Once you do so, the device’s warranty will become null and void. All the data will also be wiped. Furthermore, banking apps like Google Pay might not function correctly [FIX: How to Pass Magisk SafetyNet on Rooted Android].
Then the device’s WideVine L1 Certification will be degraded to L3 [FIX: How to Watch Netflix in HD on Rooted Devices ( Get Widevine L1 Support )]. This would result in the inability to watch Netflix, Prime Video, etc in Full HD (1080p). If all these are well and good, then proceed ahead with the steps to root your Oppo device via Magisk without TWRP Recovery.
How to Root any Oppo Device Magisk without TWRP
The entire instructions have been listed in separate sections for ease of understanding. Proceed ahead in the exact same sequence as mentioned. Make sure to take a backup of all the data on your device before starting off with the rooting instructions. Droidwin and its members wouldn’t be held responsible in case of a thermonuclear war, your alarm doesn’t wake you up, or if anything happens to your device and data by performing the below steps.
STEP 1: Unlock Bootloader on Oppo device
First and foremost, you will have to unlock the bootloader on your device. For that, please refer to our comprehensive guide on How to Unlock Bootloader on any Oppo Device. In short: you need to use the fastboot oem unlock command inside the CMD window with the device booted to Fastboot and connected to the PC via USB cable.
STEP 2: Download Oppo Stock Firmware
Next up download the Stock Firmware for your device. Oppo has hosted all the firmware on its official site, so download it from there only. Furthermore, you should download that version of stock firmware that is currently installed on your device. But why? Well, this is because we will be using the stock boot.img from this firmware to patch and then flash onto your device.
If the boot.img file’s version number doesn’t match with the current software build installed on your device, then it might lead to issues. This rule is applicable to all Android devices. So if you ever wish to root any of your devices using this method, then make sure to always follow this rule. With that said, once you have downloaded the Oppo firmware in OZIP format, proceed to the next step to extract it and then root your device via Magisk without TWRP.
- How to Update Magisk ZIP and Magisk Manager (without TWRP)
- Disable DM-Verity or Android Verified Boot without TWRP
- Root Android 11 via Magisk Patched boot.img (without TWRP)
- Fix Magisk patched boot.img issue while Rooting Android 11
STEP 3: Extract Oppo OZIP Stock Firmware
Nowadays, only a few OEMs uploads the firmware as a normal ZIP package. As an example, OnePlus uses the payload.bin format, Realme and Oppo follow OZIP, etc. The issue with these types of formats is the fact that they aren’t supported by popular extraction software such as WinZIP or WinRAR. But fret not.
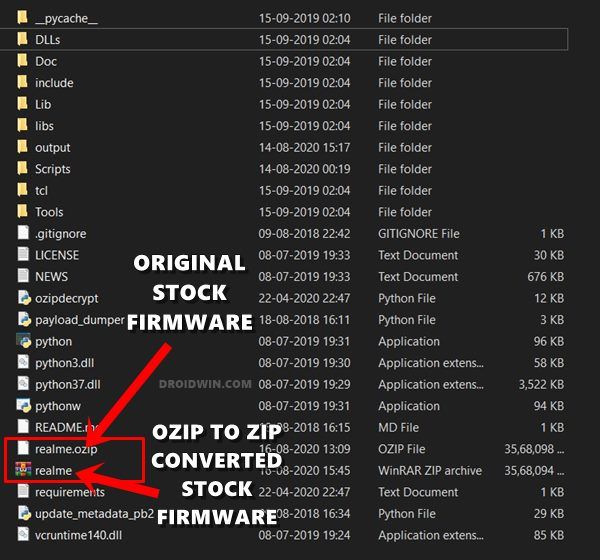
There exists a pretty handy tool that you could use to extract the OZIP file. Please refer to our comprehensive step by step guide to How to Extract OZIP Realme/Oppo Stock ROM (Firmware). Once the conversion is complete, it’s time to get the stock boot.img file and then root your Oppo device via Magisk without TWRP.
STEP 4: Get Oppo Stock Boot.img File
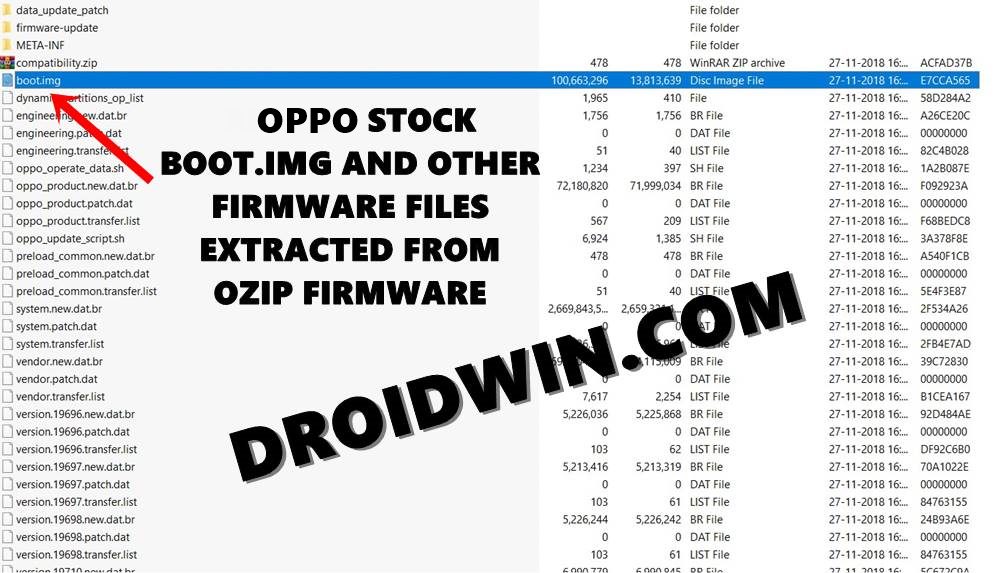
After carrying out the above steps, you would have got the firmware file in a ZIP format. You could now easily extract it via WinZIP/WinRAR/7ZIP, etc. Once extracted, copy the boot.img file and transfer it to your device.
STEP 5: Patch Oppo Stock Boot.img file via Magisk
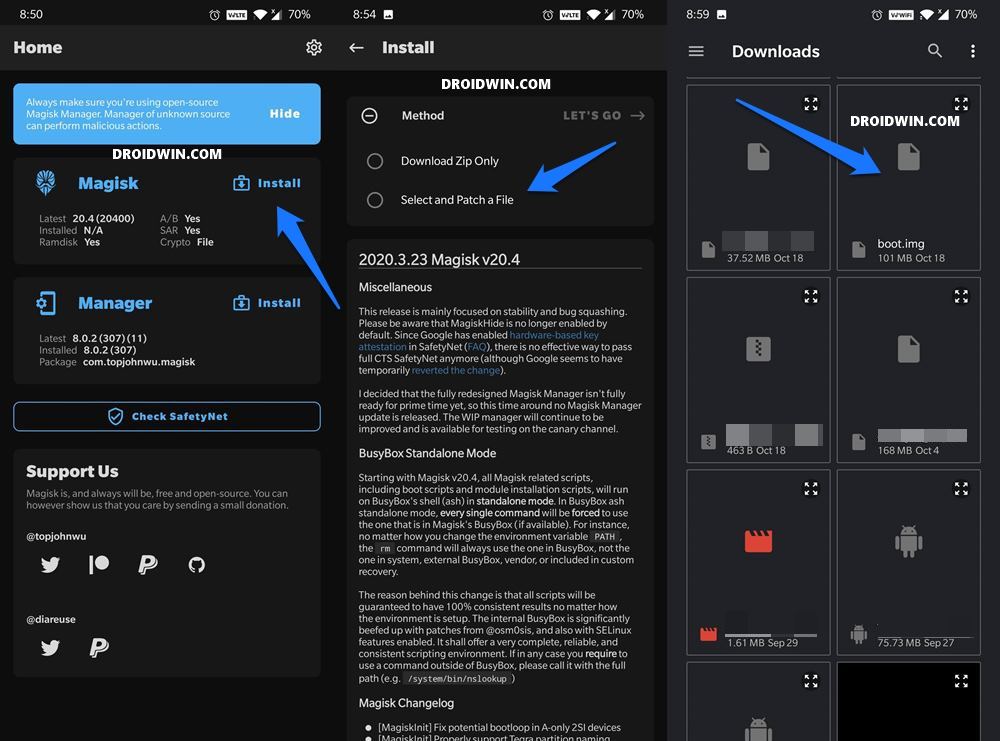
- Download and install the Magisk Manager app onto your device
- Now launch the app and tap on the Install button situated next to Magisk.
- Choose Select and Patch a file.

- Navigate to the boot.img file and select it.
- Then tap on the Let’s Go button situated at the top right.
- The patching process will now begin and should take a couple of seconds.
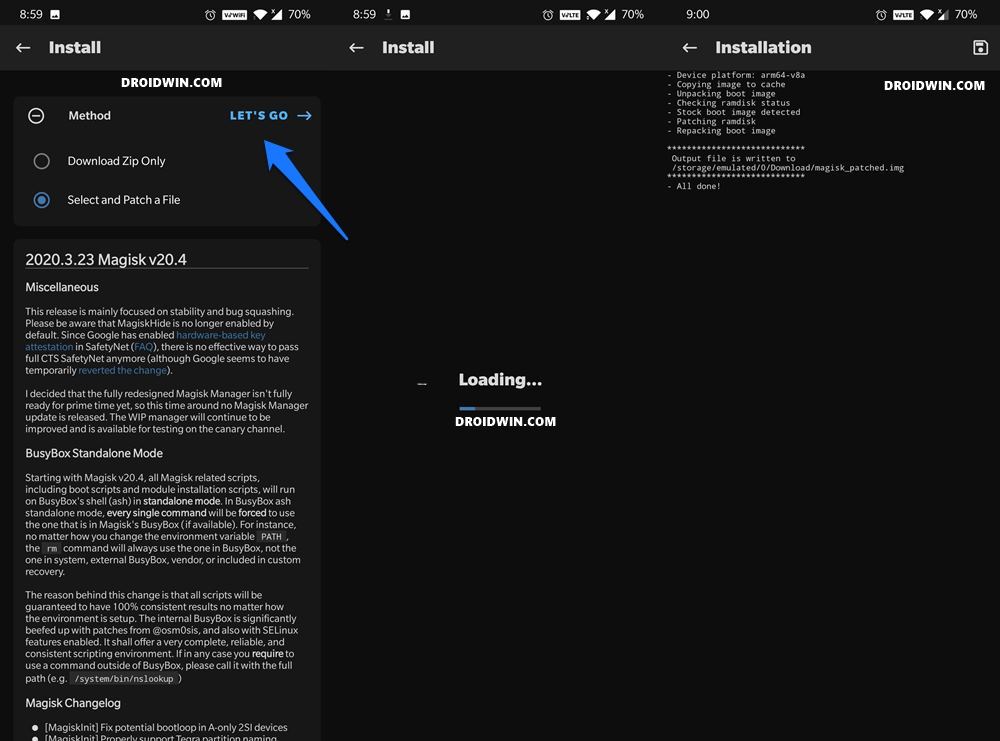
Once done, you should get the magisk_patched boot.img file in the Downloads folder. We will now use this file to root your Oppo device via Magisk without TWRP.
- Pass SafetyNet test after installing Xposed or EdXposed
- How to Pass Magisk SafetyNet on Rooted Android 11
- How to use Core Only Mode in new Magisk Manager?
- Fix ctsProfile Mismatch Error on Rooted Android
STEP 6: Flash magisk_patched boot.img and Root Oppo Device
- First off, download and install the Android SDK Platform Tools on your PC. These are the official ADB and Fastboot binary provided by Google. If you have any other third party ADB tool, I would suggest you switch over to this one.
- Now enable USB Debugging on your device. This is needed so that your PC recognizes your device in the ADB mode. But why do we need ADB mode? Well, this will be needed to boot your device to Fastboot Mode. So head over to Settings > About Phone > Tap on Build Number 7 times > Go back to Settings > System > Developer Options > Enable USB Debugging.
- When that is done, connect your device to the PC via USB cable.
- Now transfer the magisk_patched boot.img file from your device’s Download’s folder to your PC’s platform-tools folder.
- Likewise, inside the same platform-tools folder, type in CMD in its address bar and hit Enter. This will launch the Command prompt window.
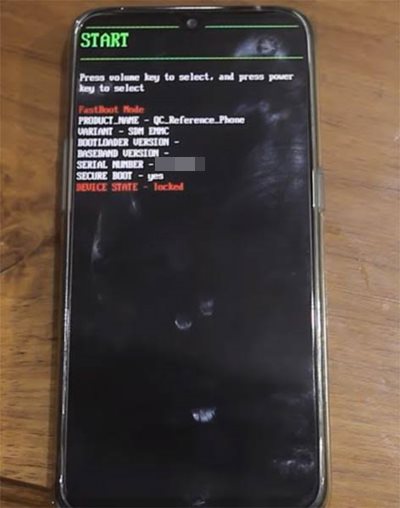
- Now type in the below command to boot your Oppo device to Fastboot Mode:
adb reboot bootloader
- Finally, type in the below command to flash the patched boot.img file to your device:
fastboot flash boot magisk_patched.img
- That’s it. The process is now complete. You may now reboot your device to the OS using the below command:
fastboot reboot

With this, we conclude the guide on how to root any Oppo device via Magisk without using TWRP Recovery. If you have any queries concerning the aforementioned steps, do let us know in the comments section below. We will get back to you with a solution at the earliest.