In this guide, we will show you the steps to root the OnePlus Nord CE 5G device via Magisk patched boot.img file. The newest entry to the budget domain, the Nord series is, without a shadow of a doubt, among the most popular lineup as of today. Being able to check-mark all the required features at a price that wouldn’t burn a hole in your pockets, one couldn’t have asked for more. Instead, OnePlus took it a step ahead and offered an even better value-for-money device in the form of the Nord’s CE variant.
While there are a few cuts in this variant as compared with its counterpart, in some areas, it manages to outclass the original one. For example, you’re getting the upgraded OxygenOS 11 out of the box, a bigger 4500mAh battery, and even a headphone jack! Along the same lines, this OEM is known to be an active player in custom development, and the Nord CE variant is no exception either. There are a plethora of tweaks that you could try out on your device.
These include the likes of flashing Magisk Modules, Xposed Framework, Substratum Theme, Viper4Android, and the likes. However, there’s just one requirement that your device needs to fulfill- you need to have the administrative privilege, or in other words, a rooted device. And in this guide, we will show you how to do just that. So without further ado, let’s get started with the steps to root the OnePlus Nord CE 5G via Magisk patched boot.img file. Follow along.
Table of Contents
How to Root OnePlus Nord CE 5G via Magisk Patched Boot.img

The below instructions are listed under separate sections for ease of understanding. Make sure to follow in the exact same sequence as mentioned. Droidwin and its members wouldn’t be held responsible in case of a thermonuclear war, your alarm doesn’t wake you up, or if anything happens to your device and data by performing the below steps.
STEP 1: Install Android SDK

First and foremost, you will have to install the Android SDK Platform Tools on your PC. This is the official ADB and Fastboot binary provided by Google and is the only recommended one. So download it and then extract it to any convenient location on your PC. Doing so will give you the platform-tools folder, which will be used throughout this guide.
STEP 2: Enable USB Debugging and OEM Unlocking
Next up, you will also have to enable USB Debugging and OEM Unlocking on your device. The former will make your device recognizable by the PC in ADB mode. This will then allow you to boot your device to Fastboot Mode. On the other hand, OEM Unlocking is required to carry out the bootloader unlocking process.
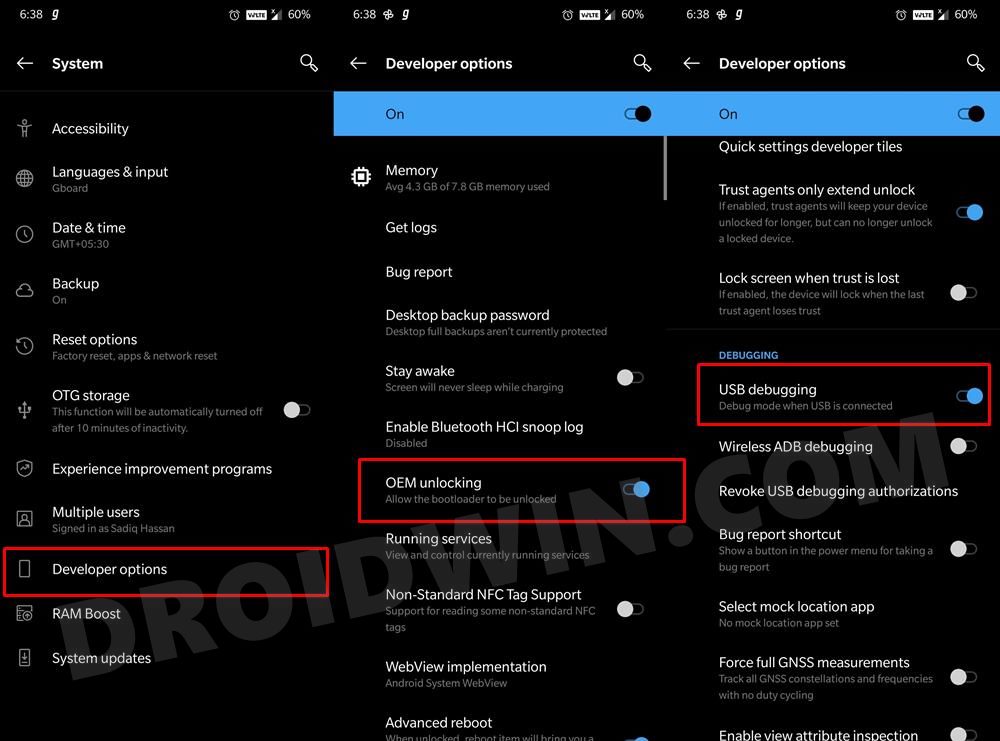
So head over to Settings > About Phone > Tap on Build Number 7 times > Go back to Settings > System > Advanced > Developer Options > Enable USB Debugging and OEM Unlocking.
STEP 3: Unlock Bootloader on OnePlus Nord CE 5G
You will also have to unlock the bootloader on your device. Do keep in mind that doing so will wipe off all the data on your device and could nullify the device’s warranty as well. If that’s well and good, then please refer to our guide on How to Unlock the Bootloader on OnePlus Nord.
NOTE: The next two steps require you to download the firmware and then extract the payload.bin file to get boot.img. As of now, I’m currently using the Nord CE with software version 11.0.5.5.EB13DA. So if you are also on the same version, then you could directly download the boot.img file from here, skip the next two steps, and directly move over to the Magisk patching instructions.
Download: nord-ce-11.0.5.5.EB13DA-boot.img
STEP 4: Download OnePlus Nord CE 5G Stock Firmware
- Next up, grab hold of your device’s official firmware from OnePlus’ official site [Direct Link].
- Make sure to download the same firmware that is currently installed onto your device [verify it from Settings > About Phone > Build Number].
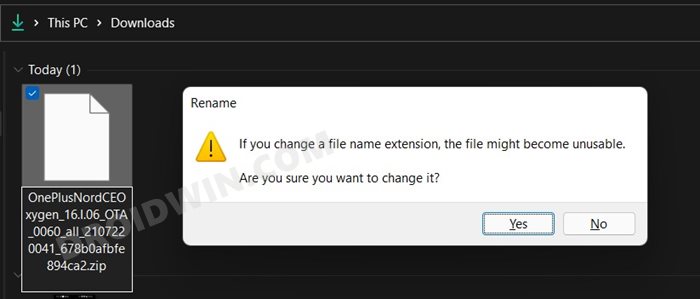
- Once downloaded, you will notice that the firmware is in JAR format. So right-click on it, select Rename, and change the extension to ZIP. You will get a confirmation prompt, click YES.

- Now extract this ZIP firmware via WinRAR/7ZIP, etc.

STEP 5: Extract Stock Boot.img from Nord CE 5G Firmware
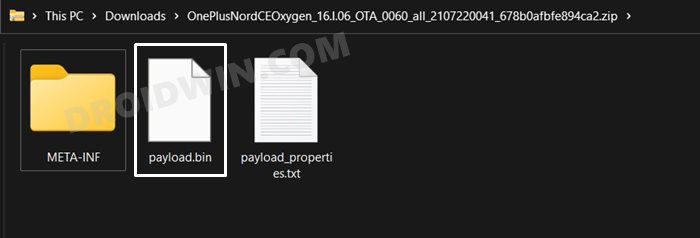
Once you have extracted the firmware, you will get three files, out of which we will be using the paylaod.bin file. For the unware, OnePlus packs all its partition IMG files under this payload.bin file.
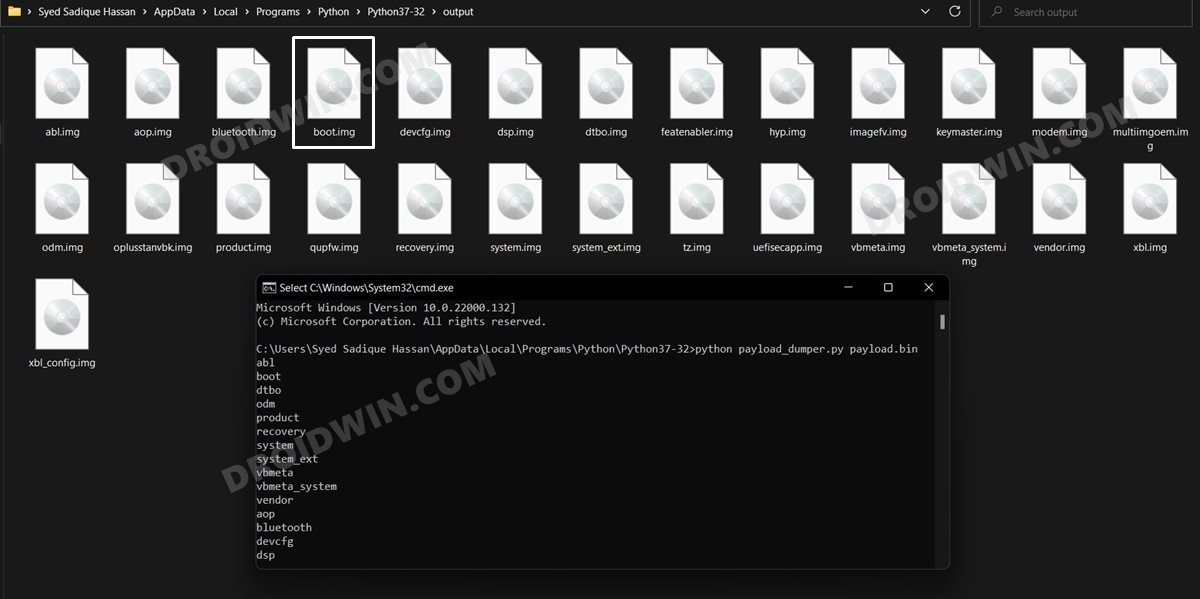
So you will have to extract it in order to get the boot.img, which will then be patched via Magisk and then flashed onto your OnePlus Nord CE to obtain root. For the extraction process, please refer to our detailed guide: How to Extract payload.bin and get stock boot image file.
STEP 6: Patch OnePlus Nord CE 5G Boot.img via Magisk
- To begin with, transfer the extracted stock boot.img file to your device.
- Then install the Magisk app onto your device.
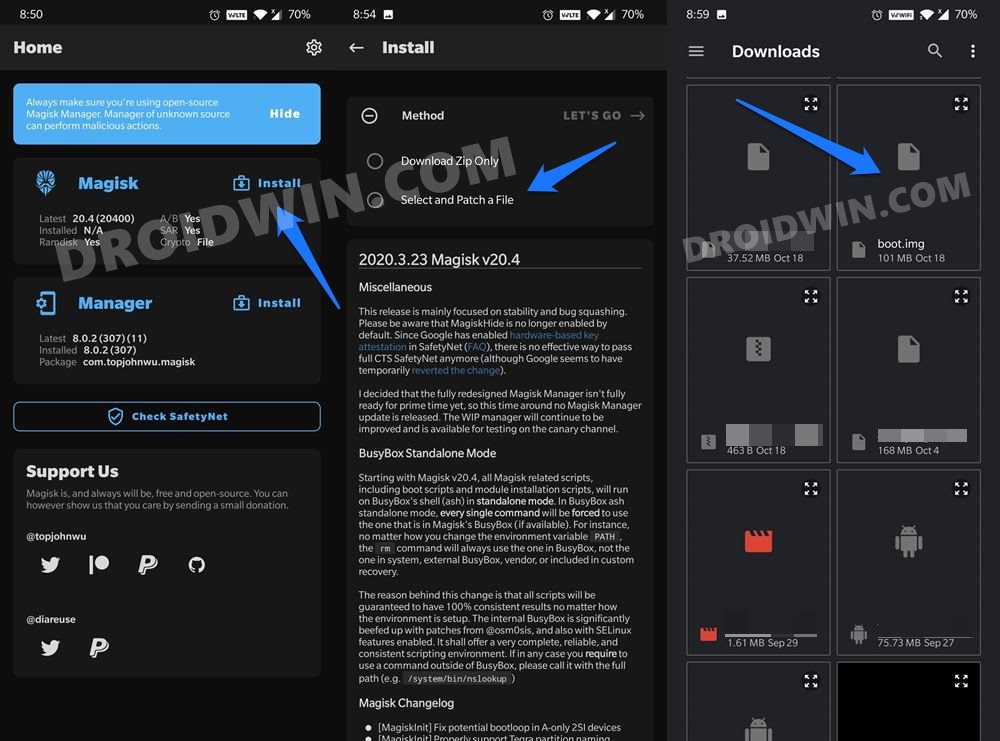
- Launch it and tap on Install next to Magisk.

- Choose Select and Patch a file option,
- Navigate to the extracted boot.img file and select it.
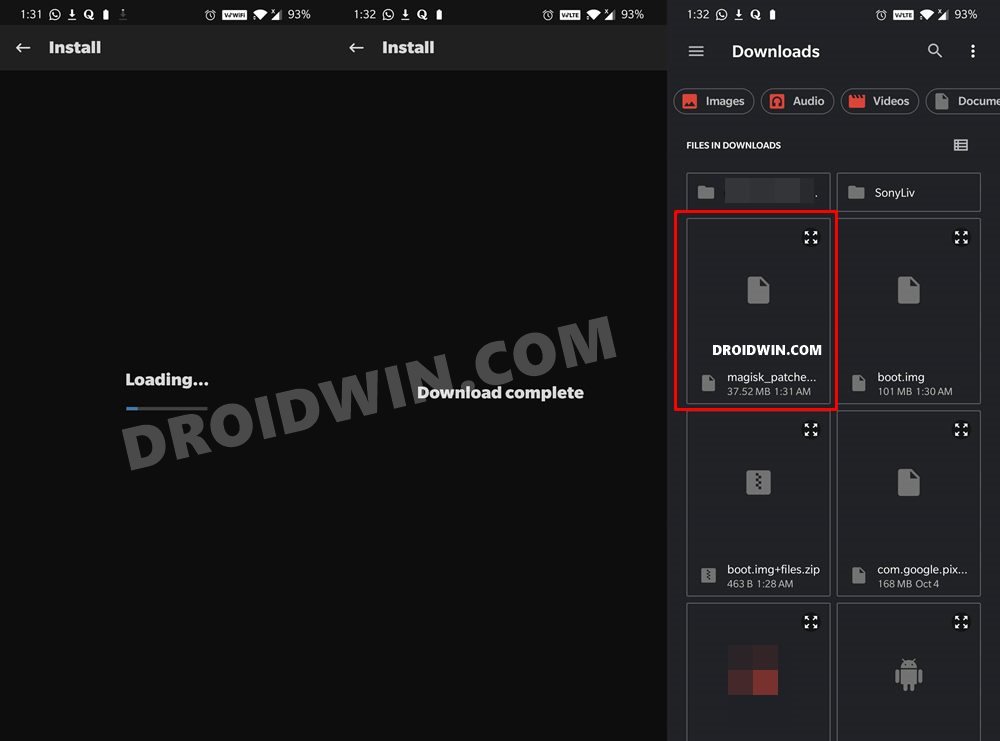
- Magisk will now begin patching this file.

- Once done, you shall get the magisk_patched.img file under the Downloads folder of your device. We will now use this file to root OnePlus Nord CE via Magisk.
STEP 7: Boot OnePlus Nord CE 5G to Fastboot Mode
- Connect your device to the PC via USB cable. Make sure USB Debugging is enabled.
- Then head over to the platform-tools folder, type in CMD in the address bar, and hit Enter. This will launch the Command Prompt.

- Type in the following command in the CMD window to boot your device to Fastboot Mode
adb reboot bootloader
- To verify the Fastboot connection, type in the below command and you should get back the device ID.
fastboot devices

STEP 8: Flash Nord CE 5G Magisk Patched Boot.img via Fastboot
- First off, transfer the patched boot.img file to the platform-tools folder on your PC. Also, make sure that the name of the file is magisk_patched.img, if not, then rename it right away.

- Now with your device booted to Fastboot and connected to PC, type in the below command in the CMD window to flash the patched file:
fastboot flash boot magisk_patched.img
- Once the file has been flashed, you may reboot the device to the OS via the following command:
fastboot reboot
That’s it. These were the steps to root OnePlus Nord CE 5G via Magisk patched boot.img. If you have any queries concerning the aforementioned steps, do let us know in the comments. We will get back to you with a solution at the earliest.
