In this guide, we will show you the steps to root OnePlus 9, OnePlus 9 Pro, and OnePlus 9R devices via Magisk without using TWRP Recovery. The company has recently added three new devices to its feature-rich arsenal. It is no hidden secret that they are sure to follow the tradition of being among the most active players in custom development. In this regard, there are a plethora of mods and customizations that you could welcome onto your devices. All that is needed is an unlocked bootloader.
Once you do so, you will be in a position to flash custom ROMs, install a custom recovery like TWRP or try out mods including the likes of Xposed Framework, Magisk Modules, and Substratum Themes. However, to try out the latter half, you need to gain administrative-level privileges and access to the system partition. In other words, it requires rooting the device via Magisk, which could be carried out via two different methods.
The first one is directly flashing the Magisk ZIP via TWRP (Magisk ZIP is now part of the Magisk App, beginning with v22). However, custom recovery isn’t yet available for this set of devices. So until then, we will proceed with the second method, which involves patching the stock boot.img via Magisk and flashing it via Fastboot Commands. Keeping all these points in mind, let’s start off with the guide to root OnePlus 9, OnePlus 9 Pro, and OnePlus 9R devices via Magisk running Android 12 ColorOS 12.
Table of Contents
Benefits and Risks of Rooting
Once you root your device, you will be in a position to flash a plethora of mods. These include the likes of Magisk Modules, Xposed Framework, Substratum Themes, and Viper4Android among others. Along the same lines, you could also flash a custom kernel and implement your desired CPU profile. However, such tweaks do come with a few risks as well.
To begin with, it will wipe off all the data and could nullify the device’s warranty as well. Along the same lines, it will degrade the Widevine L1 certification to L3, thereby preventing you from streaming content in HD [FIXED]. The SafetyNet will be triggered [FIXED], thereby preventing you from using banking apps [FIXED]. So if that’s well and good then let’s get started with the steps.
Root OnePlus 9/Pro/9R Running OxygenOS 12 via Magisk
The below instructions are listed under separate sections for ease of understanding. Make sure to follow the same sequence as mentioned. Droidwin and its members wouldn’t be held responsible in case of a thermonuclear war, your alarm doesn’t wake you up, or if anything happens to your device and data by performing the below steps.
STEP 1: Install Android SDK

First and foremost, you will have to install the Android SDK Platform Tools on your PC. This is the official ADB and Fastboot binary provided by Google and is the only recommended one. So download it and then extract it to any convenient location on your PC. Doing so will give you the platform-tools folder, which will be used throughout this guide.
STEP 2: Enable USB Debugging and OEM Unlocking
Next up, you will also have to enable USB Debugging and OEM Unlocking on your device. The former will make your device recognizable by the PC in ADB mode. This will then allow you to boot your device to Fastboot Mode. On the other hand, OEM Unlocking is required to carry out the bootloader unlocking.
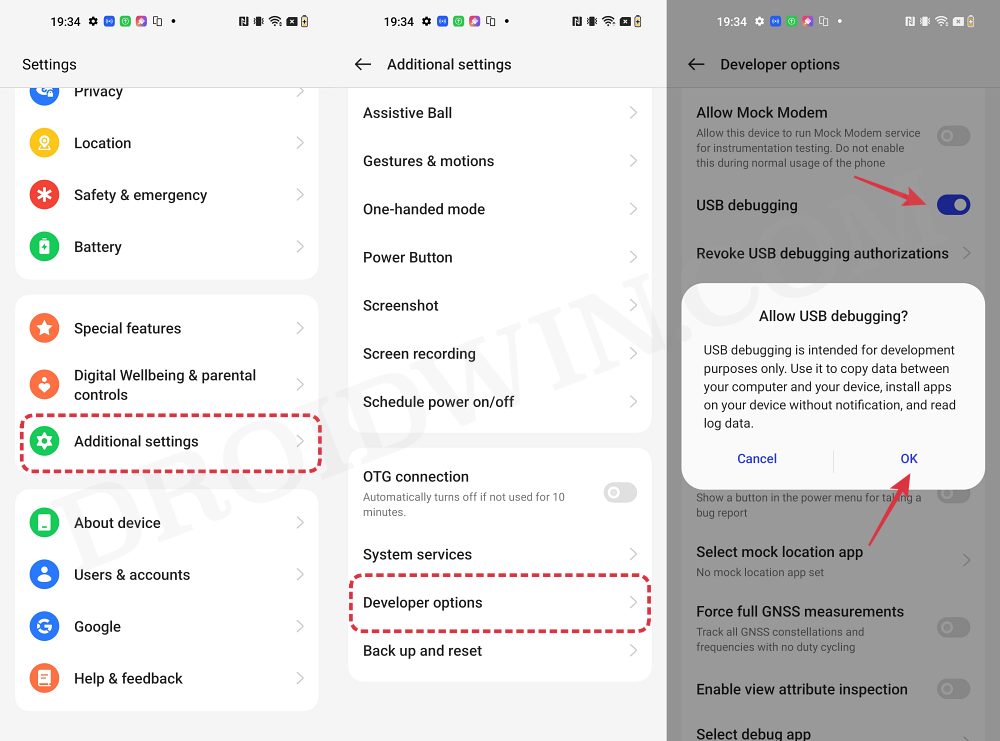
So head over to Settings > About Phone > Tap on Build Number 7 times > Go back to Settings > System > Advanced > Developer Options > Enable USB Debugging and OEM Unlocking.
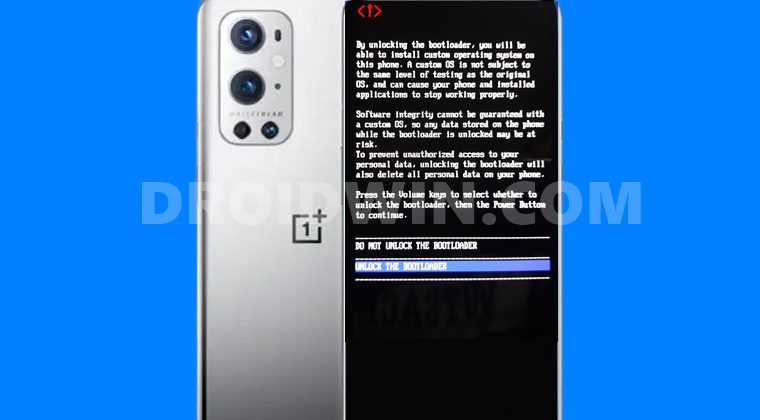
STEP 3: Unlock Bootloader on OnePlus 9/Pro/9R
Next up, you will also have to unlock the device’s bootloader. Do keep in mind that doing so will wipe off all the data from your device and could nullify its warranty as well. So if that’s all well and good, then please refer to our detailed guide on How to Unlock Bootloader on OnePlus.
STEP 4: Download OnePlus 9/Pro/9R Firmware
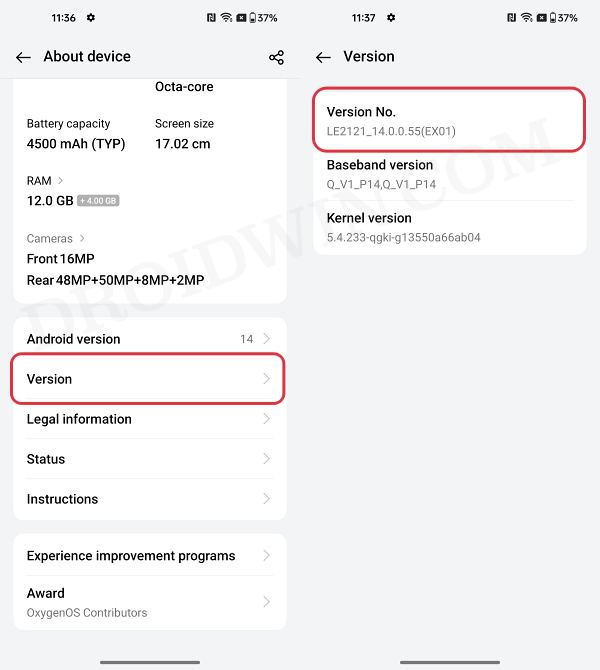
Next up, download the stock firmware for your device from the OnePlus official website or via the Oxygen Updater App. Make sure to download the same version which is currently installed on your device. You can verify the same from Settings > About Device > Version > Build Number.
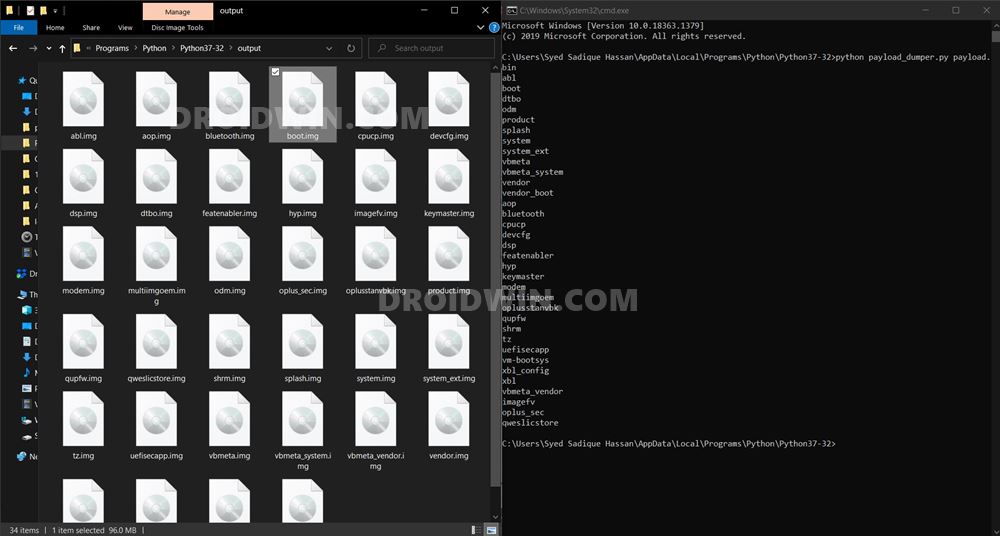
STEP 5: Extract OnePlus Boot.img from Payload.bin
Once you have downloaded the firmware, extract it to any convenient location on your PC. Doing so shall give you a couple of files, including the payload.bin.
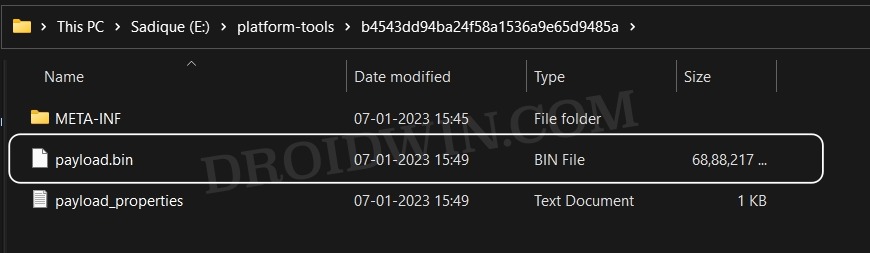
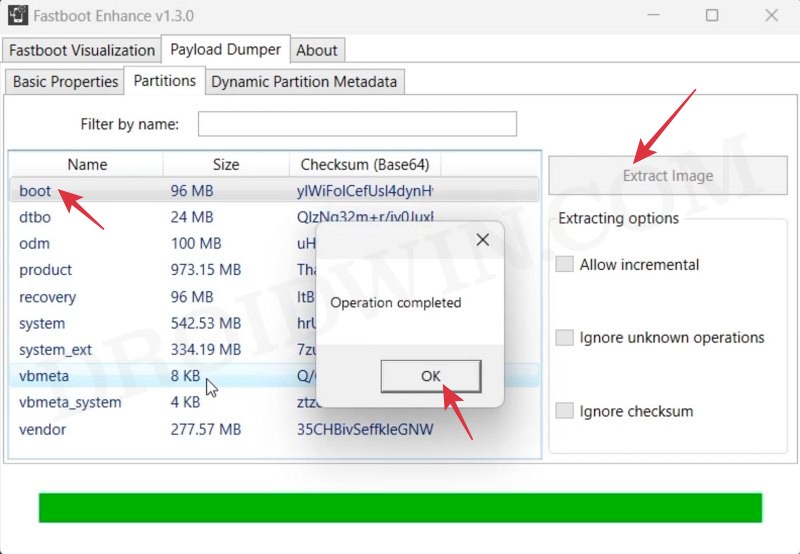
For the unaware, OnePlus packs all its partition IMG files inside this payload.bin file, so you will have to extract it first. For that, you may refer to our guide on How to Extract payload.bin and get the stock boot image file.
STEP 6: Patch OnePlus 9/Pro/9R Boot.img via Magisk
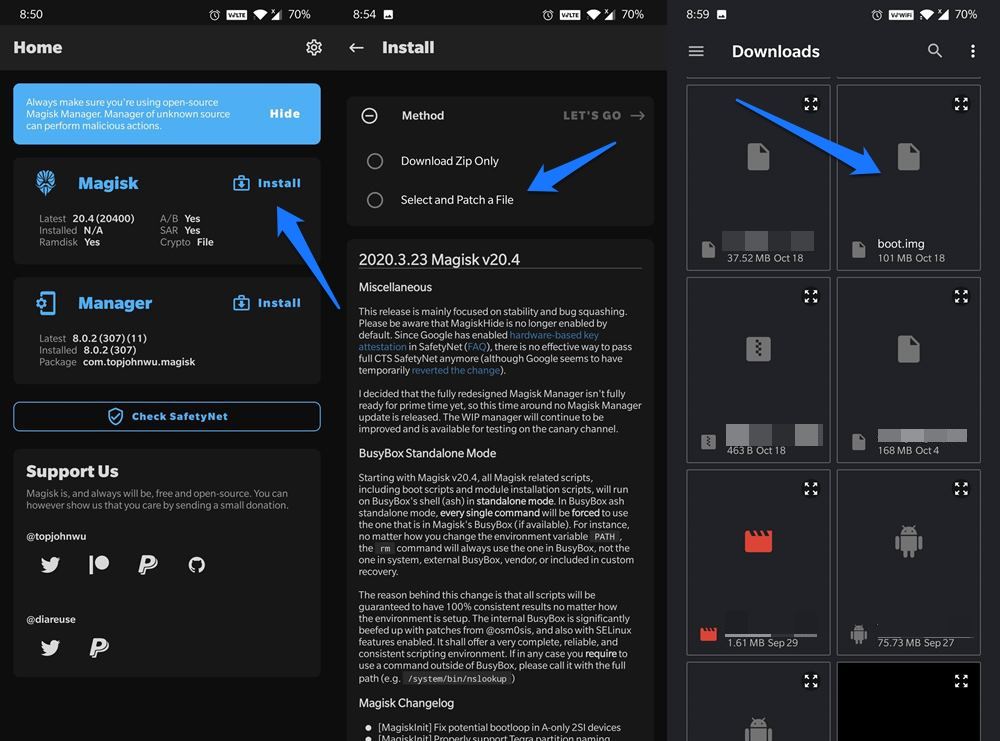
- Download and install the Magisk App on your device.
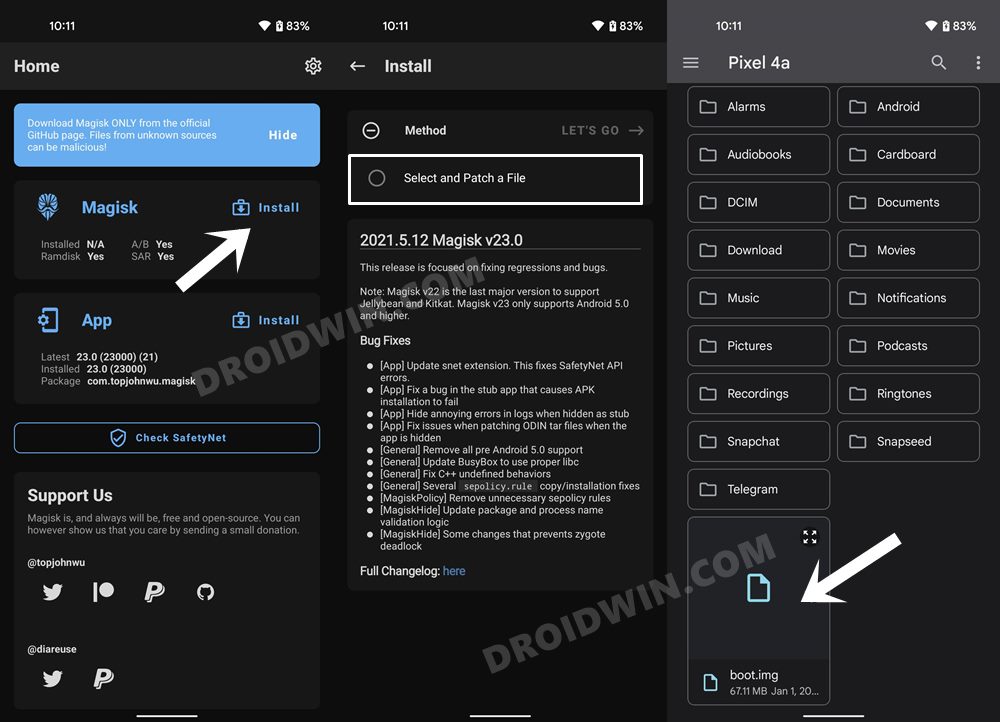
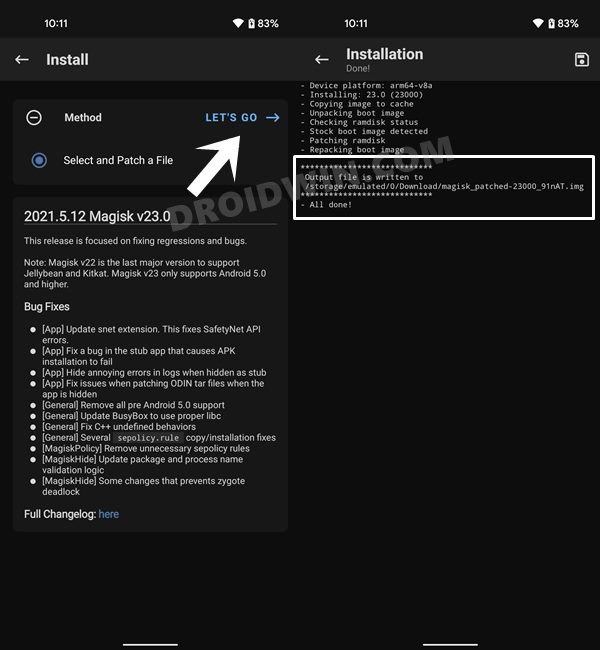
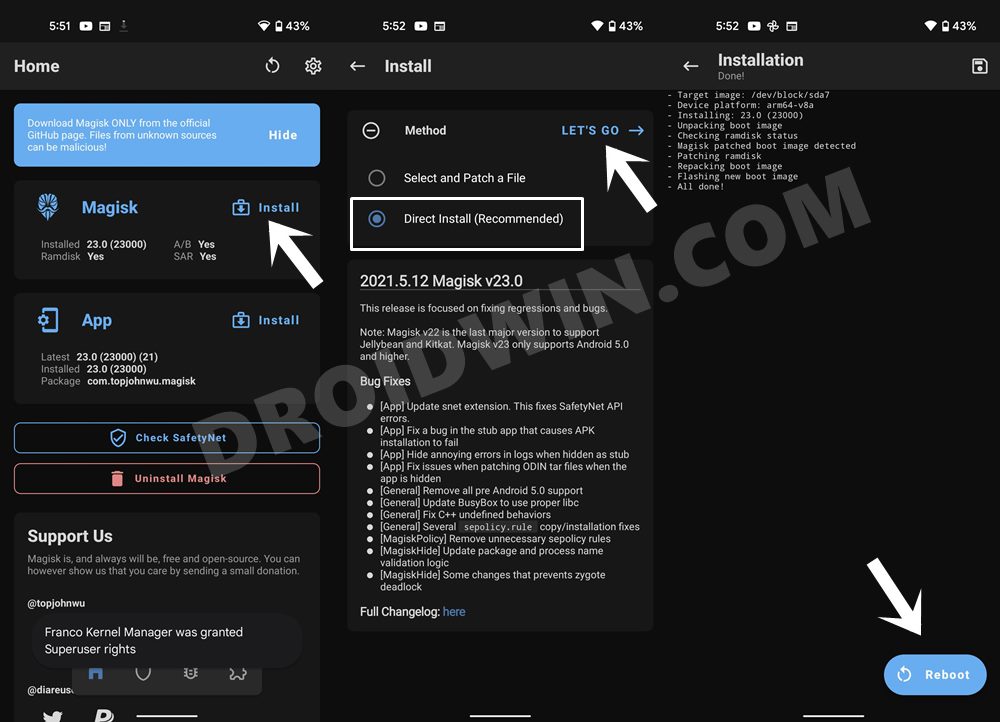
- Then launch it and tap on the Install button next to Magisk.
- After that, choose ‘Select and Patch a File’, and navigate to the stock boot.img file, and select it.

- Then tap on the Let’s Go button situated at the top right.
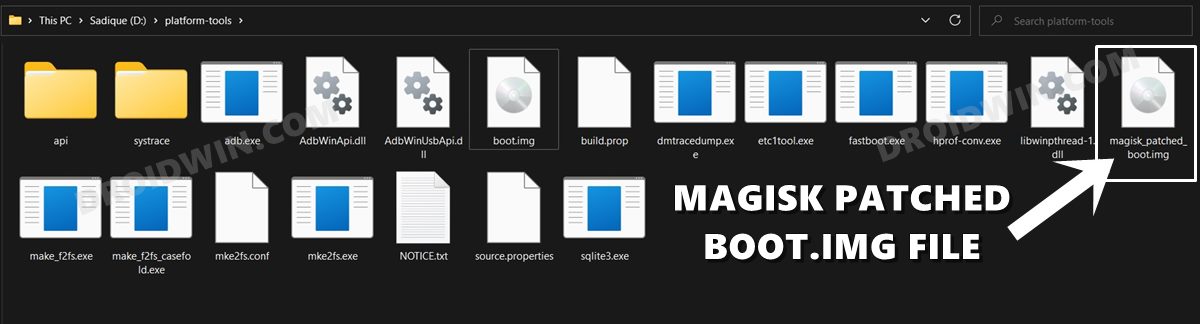
- The boot.img file will now be patched and placed under the Downloads folder on your device. You should transfer this file to the platform-tools folder on your PC. We will now be using this file to root your OnePlus 9/Pro/9R.
STEP 6: Boot OnePlus 9/Pro/9R Fastboot Mode
- Now connect your device to the PC via USB cable. Make sure USB Debugging is enabled.
- Then head over to the platform-tools folder, type in CMD in the address bar, and hit Enter. This will launch the Command Prompt.
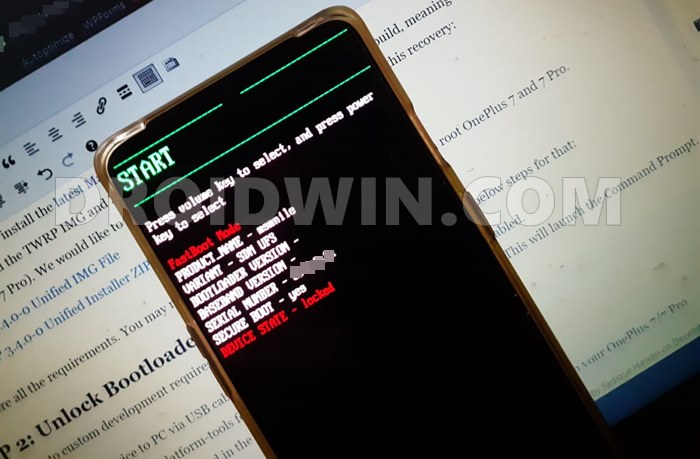
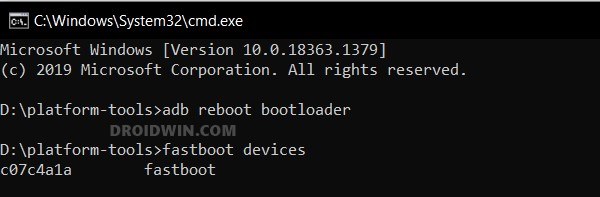
- Type in the following command in the CMD window to boot your device to Fastboot Mode
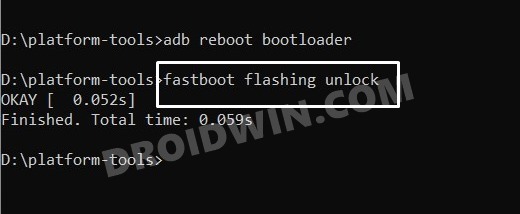
adb reboot bootloader
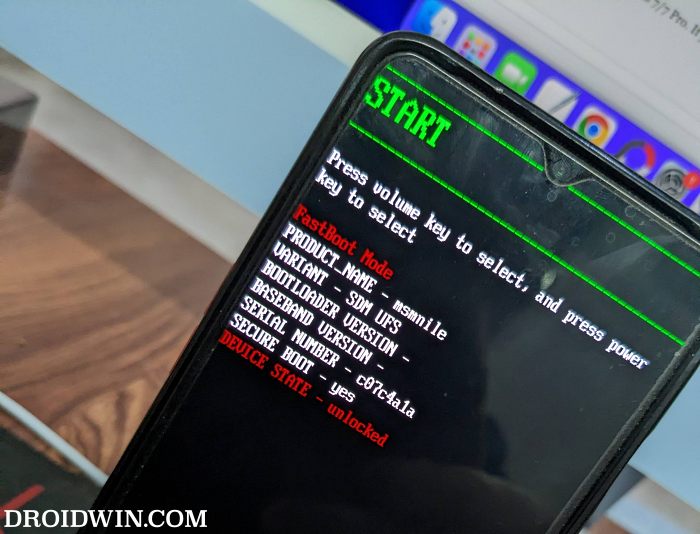
Reference Image - To verify the Fastboot connection, type in the below command and you should get back the device ID.
fastboot devices
- If you are not getting any serial ID, then please install Fastbot Drivers on your PC.

STEP 7: Boot OnePlus 9/Pro/9R using Magisk patched Boot.img
Now, there exist two different methods to proceed ahead. You could either directly flash the patched boot.img file [see FAQ] or temporary boot it. The second approach is highly recommended because you could easily test if everything is working well or not. If it is, then you could proceed ahead with the permanent installation. On the other hand, if things don’t go as planned and your device ends up in a bootloop/ softbrick, then just a normal reboot will fix the issue.
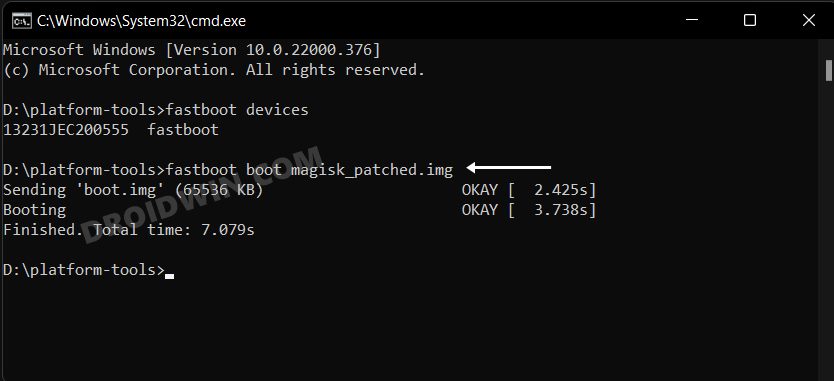
So on that note, let’s get started with the second approach. For that, execute the below command in the CMD window and your device will be booted to a temporarily rooted OS.
fastboot boot magisk_patched.img
STEP 8: Permanent Root OnePlus 9/Pro/9R via Direct Install
After executing the above command, your device will be booted to the OS with a temporary root. Here’s how to make it permanent:
- To begin with, launch the Magisk Manager App.
- Then tap on Install > Direct Install and tap Let’s Go situated at the top-right.
- Once done, hit the Reboot button situated at the bottom right.
- That’s it, your device will now boot to the rooted OS.
So with this, we round off the guide on how you could root your OnePlus 9/Pro/9R via Magisk patched boot.img. If you have any queries concerning the aforementioned steps, do let us know in the comments section below. We will get back to you with a solution at the earliest.
FAQ: Root OnePlus 9/Pro/9R by Flashing Boot.img
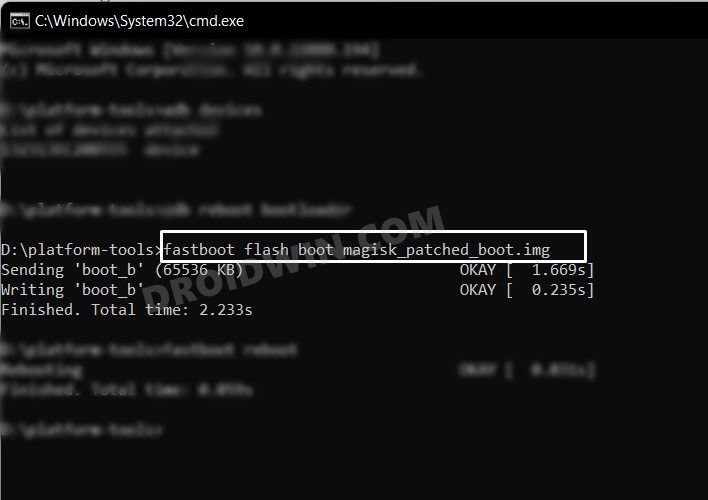
As mentioned in STEP 7. we used the approach of temporary booting to the rooted OS and then used Magisk’s Direct Install method to permanently root your device. However, if you wish to root your device by directly flashing the patched boot.img, then use the below command:
fastboot flash boot magisk_patched_boot.img
How to Root OnePlus 9, Pro, 9R Running ColorOS 12 Android 12 via Magisk
The below instructions are listed under separate sections for ease of understanding. Make sure to follow in the exact same sequence as mentioned. Droidwin and its members wouldn’t be held responsible in case of a thermonuclear war, your alarm doesn’t wake you up, or if anything happens to your device and data by performing the below steps.
Install Android SDK
First and foremost, you will have to install the Android SDK Platform Tools on your PC. This is the official ADB and Fastboot binary provided by Google and is the only recommended one. So download it and then extract it to any convenient location on your PC. Doing so will give you the platform-tools folder, which will be used throughout this guide.
Enable USB Debugging and OEM Unlocking
Next up, you will have to enable USB Debugging and OEM Unlocking on your device. The former will make your device recognizable by the PC in ADB mode. This will then allow you to boot your device to Fastboot Mode. On the other hand, OEM Unlocking is required to carry out the bootloader unlocking process.
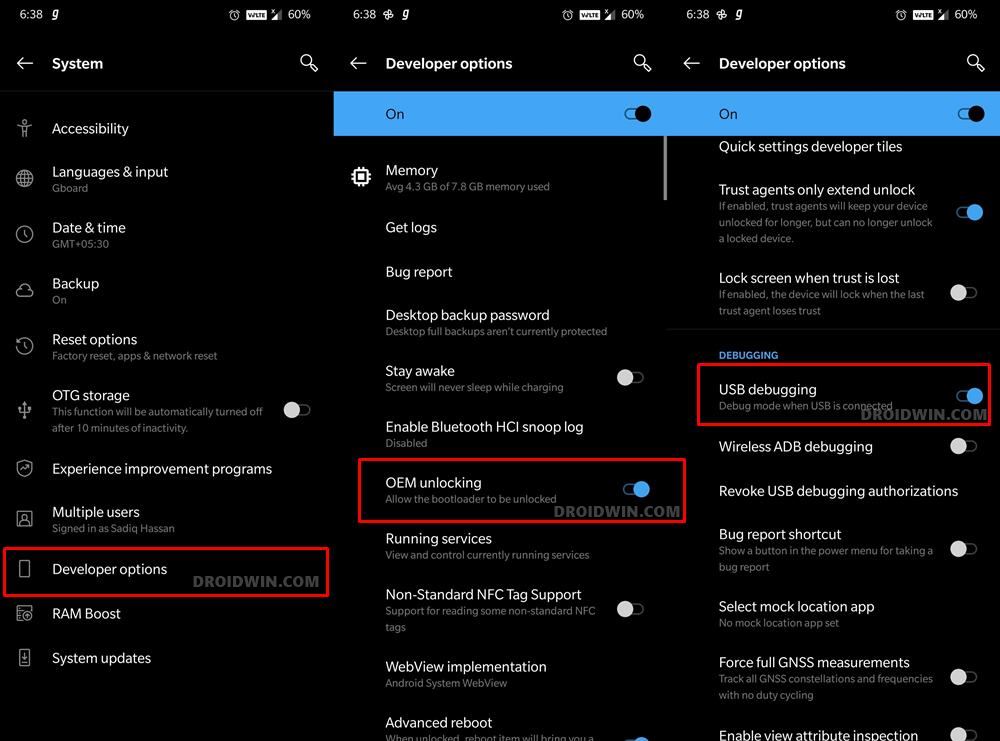
So head over to Settings > About Phone > Tap on Build Number 7 times > Go back to Settings > System > Advanced > Developer Options > Enable USB Debugging and OEM Unlocking.
Unlock Bootloader on OnePlus 9, OnePlus 9 Pro, and OnePlus 9R
After this, you will have to unlock the bootloader on your OnePlus device. Do keep in mind that this process will wipe off all the data and might nullify the device’s warranty as well. So if that’s all well and good, then refer to our comprehensive guide to Unlock Bootloader on OnePlus 9, 9 Pro, and 9R. Once done, move over to the next step to root OnePlus 9, OnePlus 9 Pro, and OnePlus 9R devices via Magisk without using TWRP.
Note: The next two steps require you to download the firmware and extract the boot.img from the resultant payload.bin file. My current firmware is OnePlus 9 (India) 11.2.1.1.LE25DA and I have already extracted the boot.img file. So if you are also on the same version, then you may skip the below two steps and directly grab the stock boot.img file from here. After this, head over to the Patching via Magisk section.
Download OnePlus 9 Stock Firmware
Now you will have to get hold of the stock firmware file for your device, from where we would be extracting the stock boot.img file. At the time of writing, the device has received its first OTA for various regions. For my OnePlus 9 (India), the software version is 11.2.1.1.LE25DA, so I would be using its stock boot.img. You should always keep in mind to download the same software version that is currently installed onto your device (which you could check from the About Phone tab).
Now coming to the download part, OnePlus hosts all the firmware over to their official site. You could also download it from the Oxygen Updater app. so you may download the one that corresponds to your device. If you are downloading from any other source, make sure to get the Full OTA and not the Incremental OTA. Once you have downloaded the firmware, proceed with the below instructions to extract the boot.img and root OnePlus 9/9 Pro/9R.
Extract OnePlus 9/9 Pro/9R Boot.img File from Firmware
While OnePlus packs its firmware files under the ZIP package, but all its partition files are part of the payload.bin. Hence our aim is to extract this payload.bin file and get the resultant boot.img file. For that, you may refer to our comprehensive guide to How to Extract Stock Boot.img from OnePlus OxygenOS Stock ROM. Once extracted, transfer this boot.img file to your device.
Extract Vbmeta and Vendor_Boot
Beginning with Android 12 ColorOS, you will also need to get hold of the vbmeta.img and vendor_boot.img files, apart from the usual boot.img file that we use. So copy both those files from the extracted firmware and then transfer the vendor_boot to your device and the vbmeta.img to the platform-tools folder on your PC.
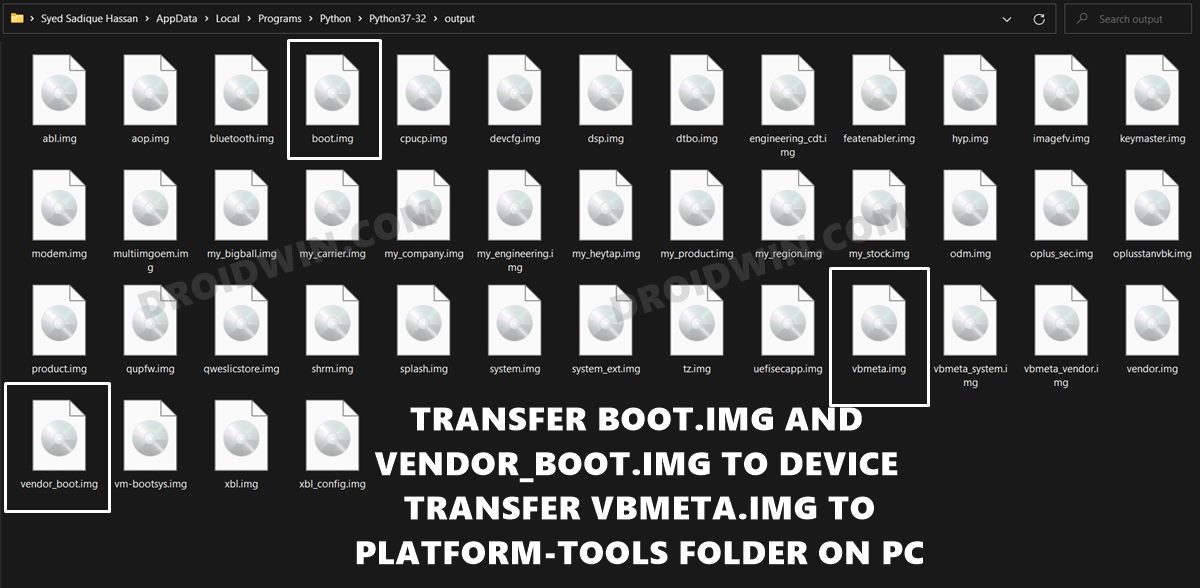
Hence as of now, the boot.img and vendor_boot.img should be placed in your device’s internal storage and the vbmeta. img inside the platform-tools folder on your PC. If that’s well and good, then let’s proceed ahead with the steps to root OnePlus 9/Pro/9R running Android 12 ColorOS 12 via Magisk.
Patch OnePlus 9/Pro/9R Stock Boot.img via Magisk
- First off, install the Magisk App onto your device.
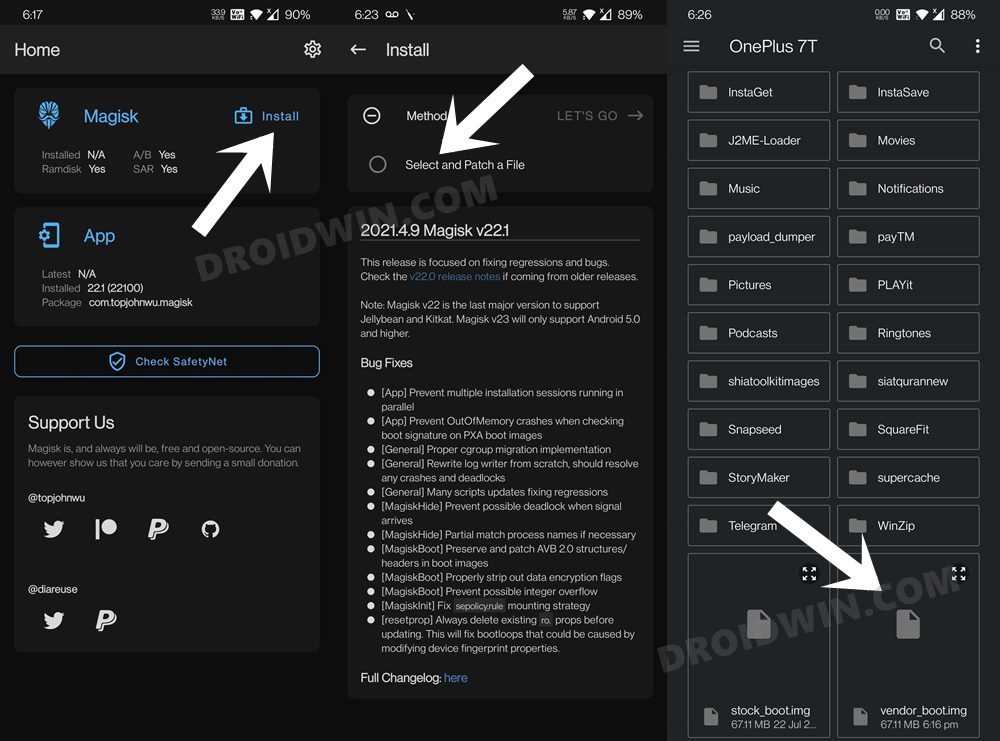
- Then launch it and tap on the Install button situated next to Magisk.
- From the Method section, choose Select and Patch a file.
- Browse to the extracted boot.img file and select it.
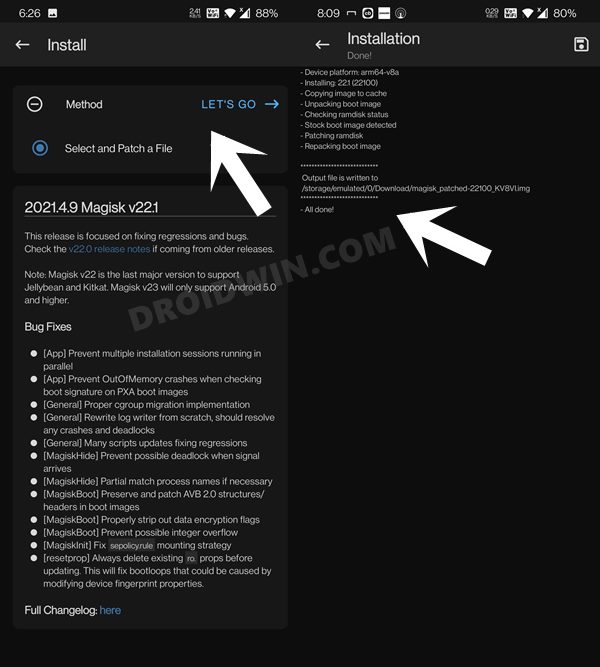
- Then tap on the Let’s Go option situated at the top right.
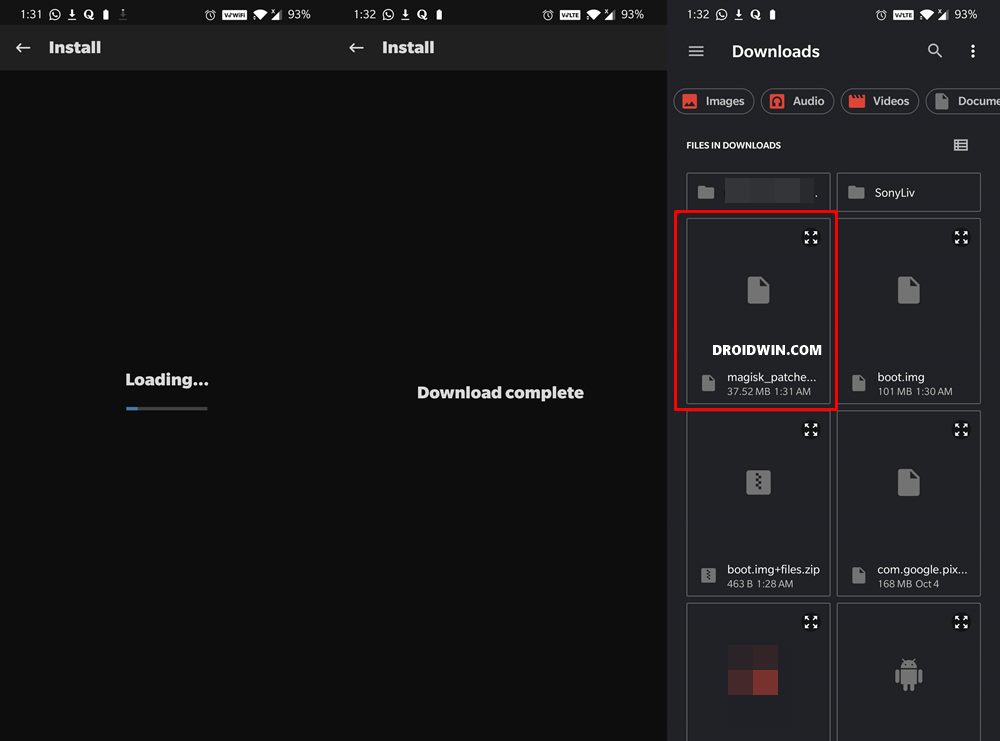
- Magisk will now load the boot.img file and will patch it accordingly. Once that is done, you would get the Download Complete message. [Having issues while patching? Refer to this guide: Fix Magisk patched boot.img issue while Rooting Android 11].
- The patched boot image file will be saved in Internal Storage > Downloads. The name of the file will be magisk_patched.img. Transfer this file to the platform-tools folder on your PC and rename it to magisk_boot.img.
Patch Vendor_Boot via Magisk
- Laucnh the Magisk app and tap on the Install button next to Magisk.
- Then choose Select and Patch a File.
- Now select the vendor_boot.img file and tap on the Let’s Go button situated at the top right.
- Wait for the patching to complete. Once done, open File Explorer and go to the Downloads folder.
- Then copy the patched boot.img and transfer them to the platform-tools folder on your PC. Then rename it to magisk_vendor.img
Boot OnePlus 9/OnePlus 9 Pro/OnePlus 9R to Fastboot Mode
- Connect your device to the PC via USB cable. Make sure USB Debugging is enabled.
- Then head over to the platform-tools folder, type in CMD in the address bar, and hit Enter. This will launch the Command Prompt.
- Type in the following command in the CMD window to boot your device to Fastboot Mode
adb reboot bootloader
- Now type in the below command to verify the Fastboot Connection
fastboot devices
- If you get a device ID followed by the fastboot keyword, then the connection stands successful.
Flash Magisk Patched Boot, Vendor_Boot and Root OnePlus 9/Pro/9R
Let’s now start with the steps to flash the patched files and hence root OnePlus 9, OnePlus 9 Pro, and OnePlus 9R devices running Android 12 ColorOS 12 via Magisk.
- To begin with, make sure that the patched boot (magisk_boot.img.), patched vendor_boot (magisk_vendor.img) and vbmeta.img files are present inside the platform-tools folder.
- Now open the CMD window inside this platform-tools folder and type in the below command to flash the patched boot.img file:
fastboot flash boot magisk_boot.img
- After that, flash the Magisk patched Vendor_Boot file via the below command:
fastboot flash vendor_boot magisk_vendor.img
- Next up, use the below command to flash vbmeta and hence disable the verification:
fastboot --disable-verity --disable-verification flash vbmeta vbmeta.img
- Once that is done, you may now reboot your device to the OS via the below command:
fastboot reboot
That’s it. These were the steps to root the OnePlus 9, OnePlus 9 Pro, and OnePlus 9R via Magisk running Android 12 ColorOS 12. If you have any queries concerning the aforementioned steps, do let us know in the comments. We will get back to you with a solution at the earliest.
- OnePlus 9/Pro Android 12 Stable or Open Beta 3: It’s all messed up!
- How to Install OTA Updates in Rooted Android Device
- How to Pass SafetyNet on Rooted Android 12
- Remove Navigation Bar Gesture Pill on Android 12 Without Root
FAQ: Temporary Boot Magisk to Obtain Root on OnePlus 9 Series
- Instead of directly flash the magisk_patched boot.img file via the below command:
fastboot flash boot magisk_patched.img
- You could also temporarily booted your device to the patched boot.img using the following command:
fastboot boot magisk_patched.img
- This will give you a one-time root i.e temporary root [Read: How to Temporarily Root an Android Device via Magisk]. More importantly, it gave them the option to check if everything is working well or not.
- Once you have confirmed that everything is well and good, they then went ahead with the permanent root. For that, they launched the Magisk App > Install > Direct Install > Reboot.
Well, this has always been an option and it should work for the latest OnePlus devices as well (though I have not personally tested it). Anyways, on that note, we round off this guide on how you could root OnePlus 9, OnePlus 9 Pro, and OnePlus 9R via Magisk without using TWRP Recovery. Do let us know which method you ultimately settled for.


Stanley
Hello!
Good tutorial, but the links to the FW are dead. I need Europe (11.2.1.1.LE15BA) for the 9Pro, or another Europe FW with Android 11. Any ideas?
Thanks!
Neo
The command
–disable-verity –disable-verification
is not recognized (fastboot).
Any idea? Thanks
SR
I’m rooty-toot-tooting my rooted root and bootloading my Windows For WorkGroups 3.11 HAL hardware abstraction layer and POST CMOS BIOS while thunking for a Google access. Can I C++ my autonomous routing or do I simply need to loop via IPv6 on a Palm Pilot? For clarification, I’m a florist with a moonlighting factory job putting handles on paint cans so obviously I’m a technical gienniuss (genus(?), jeannieus(?), G’nyus(?), geehnyes(?)) who knows what he’s doing.
Lyle
Can I have boot.img for LE2127, I don’t know what to do with whatever you giving us plus it is very hard to do with my disabilities, please?
Herman
Hi,
Bootlooping 🙁
Is there any other file that must be patched or something?
OOS12.C47
Herman
<>
Hello,
I am about to root a brand new Oneplus 9. I have no data, it is still unboxed and sealed, but I wonder if there are any data or applications (maybe operator customization or something) that are going to be lost in the process.
Please advise and thank you very much for the articles.
Sadique Hassan
Hi Herman, rooting requires unlocking the bootloader, which will wipe off user data. Since there is no data, next comes the issue with rooting. When you root, it will trip the Safetynet, which will result in the inability to use banking apps and games like Pokemon Go. Although you could fix this SafetyNet issue, but it requires quite a few efforts: How to Pass Magisk SafetyNet on Rooted Android
Jorda
Is there a way to reverse root after using this method?
Sadique Hassan
Hi Jorda, do you mean unroot by reverse root?
Jordan
Exactly. I’ve removed magisk and removed all of the files and reflashed the stock image using the ADB flash command. Is this enough to allow me to relock the bootloader and go back to a factory standard version of the device? If so, can we get a guide that shows this in detail?
Sadique Hassan
Yes, once you have removed all the mods and are back to stock firmware, you may easily relock the bootloader. Just take a backup beforehand and use the fastboot flashing lock command. In the meantime, I will try to cover an article on the same as soon as I get time.
KMA
Hi.
Just a question : With this method, can we install future OTA updates as is without losing root ? Or do we need to do the boot.img patch at each updates ?
I ask because currently on my OP7, I’m forced each time to download full rom (not the OTA), reboot to TWRP, flash it and then flash Magisk the same way.
Otherwise, If I install OTA, I lose TWRP and root.
Thanx.
Konrad
I followed these instructions, everything worked fine until I flashed the magisk patched boot.img. Now my OP9Pro boots straight to fastboot every time, the system won’t boot anymore.
I tried flashing the original boot.img, but even then the system doesn’t boot anymore. Do you have any idea what else I could try?
Sadique Hassan
Hi Konrad, could you just verify if you patched and flashed the correct boot.img. That is, the boot.img that you extracted from stock firmware should be the same as the one that is currently installed on your device. Let me know if that is the case or not.
Slexer
How can i verify that?
Jonathan
Hi, I got a OnePlus 9 Pro from china (With colorOS) and when I run the command “fastboot flash boot OnePlus_9_IN_11.2.1.1.LE25DA_droidwin.com_boot.img” Trying to get OxygenOS. I got a new brick! Any advice?
Sadique Hassan
Hi Jonathan, sorry for that. The file that I have provided is the stock boot.img. You will have to patch it via Magisk and then flash it. Furthermore, make sure that the stock boot.img file that you used matches the stock boot.img file. If that is not the case, then do let me know the firmware currently installed onto your device. I will extract the same and upload it here.
James
Hello,
I bought the OnePlus 9 Pro North American version and I just realize it is a single SIM, so I swapped it out with my OnePlus 8 Pro sim-tray, but I still can’t see both my SIM cards.
I was told by a friend that I can install the European ROM or the Global ROM and I should be able to see both SIMS. Where would I find those and what steps would I use to install it?
Sorry, I am a newbie and not sure how.
Sadique Hassan
Hi James, I don’t have much idea regarding this, so can’t really comment. However, as far as I know, an OTA is on the cards for the support for 4G/5G and 4G/4G Dual SIM support, so if you are planning for the same, then it’s better to stick with the OTA rather than this tweak. But as said before, that’s the most I could help as of now.