In this comprehensive guide, we will show you how to restore OnePlus 8T to Stock OxygenOS via Fastboot Commands. The entire tutorial will go as follows. We will start by downloading the stock OxygenOS ROM for your device. This ROM will then be extracted to get the payload.bin file. After this, we will extract this payload.bin file to get all the partition IMG files (boot.img, vendor.img, system.img).
Finally, all these IMG files will be flashed to their respective partitions. Your device will then boot to stock OxygenOS in its original state. It wouldn’t have custom recovery, mod installed nor will it be rooted. Along the same lines, you could use this guide to fix a boot-looped or soft-bricked OnePlus device.
If there is one OEM that has made full use of Android’s ecosystem, it’s got to be OnePlus. It has always been among the most active layers in the custom development picture. Right from flashing tons of custom ROMs to replacing the device’s stock recovery with TWRP, the options are endless. Likewise, you could also root your device with TWRP or without TWRP.
The former is simply done by flashing the Magisk Installer ZIP via TWRP. The latter method requires patching and flashing the boot.img file. Once rooted, you could then flash Magisk Modules, Xposed Frameworks, Substratum Themes, and other mods. But there are two sides two each coin, and the same is the case here as well. If you end up flashing an incorrect binary or miss any step during the flashing process, it might be a cause of concern.
More often than not, your device will go to a continuous bootloop or get soft-bricked. if that ever happens, then this guide is here to help you out. Today, we will show you how to restore OnePlus 8/8T/8 Pro to Stock OxygenOS via Fastboot Commands. Follow along for the detailed instruction set.
- How to Install OxygenOS OTA on Rooted OnePlus devices
- Download Stable Android 11 OxygenOS 11 for OnePlus 8/ 8 Pro
- How to Extract Stock Boot.img from OnePlus OxygenOS Stock ROM
Table of Contents
Restore OnePlus 8T to Stock via Fastboot Commands
Before we list out the instructions, there are a few requirements that you need to qualify. Make sure to go through them and only then proceed with the unbrick steps. Droidwin and its members wouldn’t be held responsible in case of a thermonuclear war, your alarm doesn’t wake you up, or if anything happens to your device and data by performing the below steps.
STEP 1: Check DDR4 or DDR 5
First and foremost, you’ll have to check if your device has an LPDDR4X or LPDDR5X memory chip. This will help us in determining whether you need to flash xbl_config.img or xbl_lp5.img. So refer to our guide and. get this job done: How to Check DDR RAM Type on OnePlus [3 Methods]. [If you’re unsure and are unable to perform any checks, then you could opt for LPDDR4X as it is the more popular of the two].
STEP 2: Install Android SDK
First and foremost, you will have to install the Android SDK Platform Tools on your PC. This is the official ADB and Fastboot binary provided by Google and is the only recommended one. So download it and then extract it to any convenient location on your PC. Doing so will give you the platform-tools folder, which will be used throughout this guide.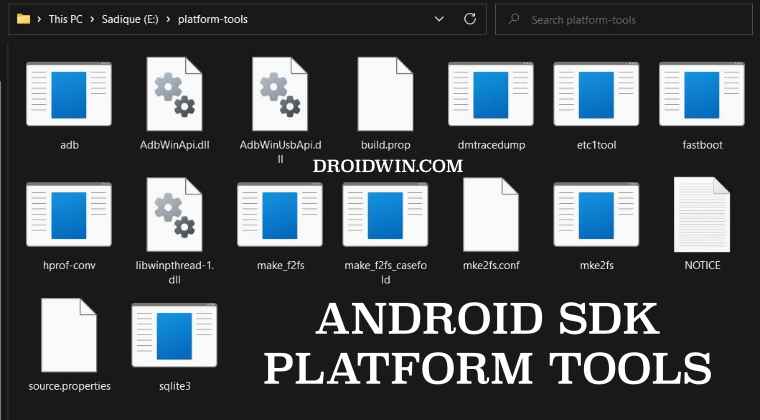
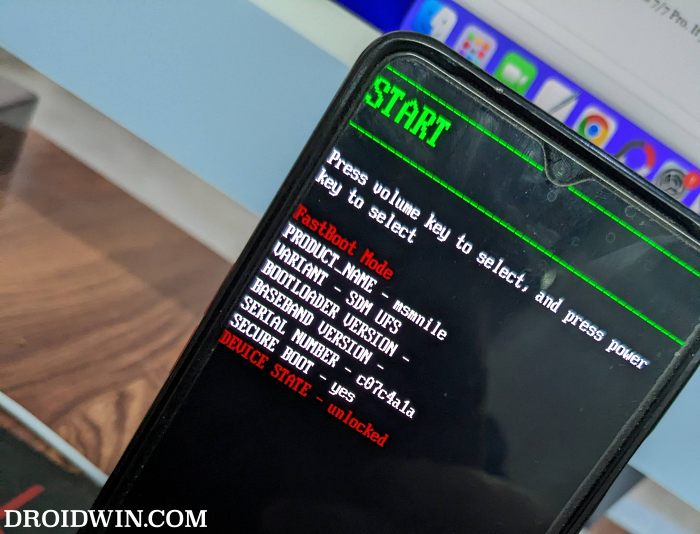
STEP 3: Boot OnePlus 8T to Fastboot Methods
You will have to boot your OnePlus 8 series device to Fastboot Mode. This could be done via 3 different methods, depending on the scenario you are facing as of now:
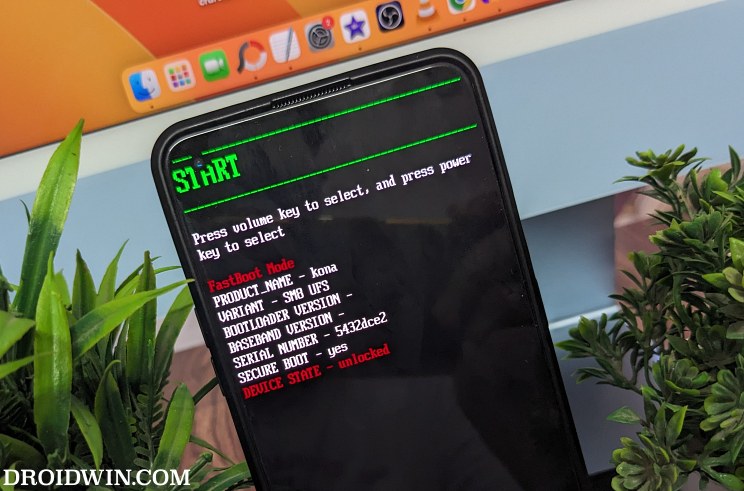
- If your device is soft-bricked, well then it might already be booted to Fastboot.
- If it is in a continuous boot loop, then wait for the battery to dry out so that it powers off. Then plug in the charger and at the same time press and hold the Volume Up, Volume Down, and Power buttons together. The timing is extremely important in this, if done at the right time, then you should have no issues in booting to Fastboot or Bootloader Mode.
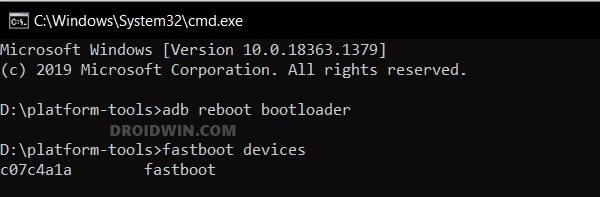
- On the other hand, if your device is perfectly working then use the Advanced Reboot menu under Developer Options and access the Fastboot Mode option.
- You could also enable USB Debugging from the Developer Options and then use the adb reboot bootloader command.
STEP 4: Download OnePlus 8T Stock OxygenOS ROM
- You may now grab hold of the Fastboot ROM for the OnePlus 8T from below:
DOWNLOAD LINK [Credits: XDA Senior Member HELLBOY017]
- Once downloaded, extract it to any location on your PC.

STEP 5: Extract OnePlus 8T Payload.Bin File [Not Needed]
UPDATE: Since we already have the Fastboot ROM in hand, this extraction is no longer required. So skip this step and move over to the next one.
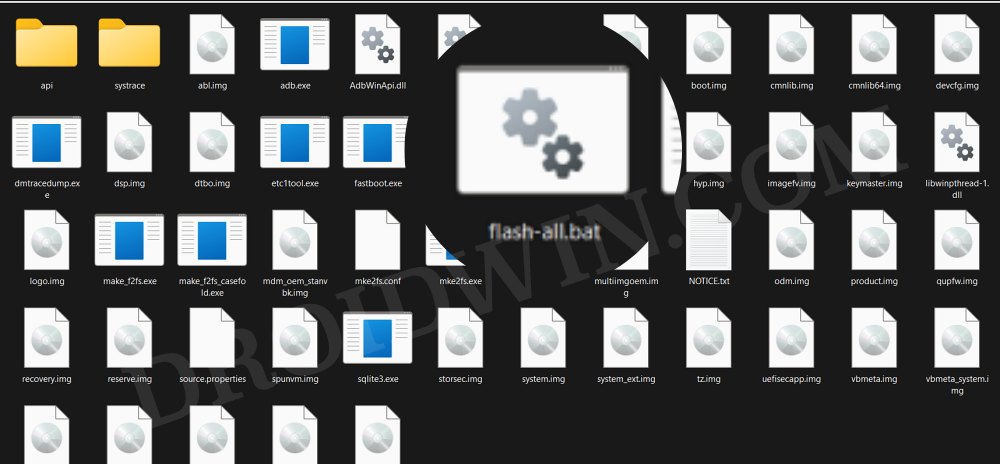
After extraction, you will notice that there aren’t any partition files. Rather you would see a payload.bin file. It is this file that is holding all the partition IMG files. So you will need to extract this patload.bin file to get hold of all the other files. In this regard, this guide should help you out: How to Extract Stock Boot. img from OnePlus OxygenOS Stock ROM.
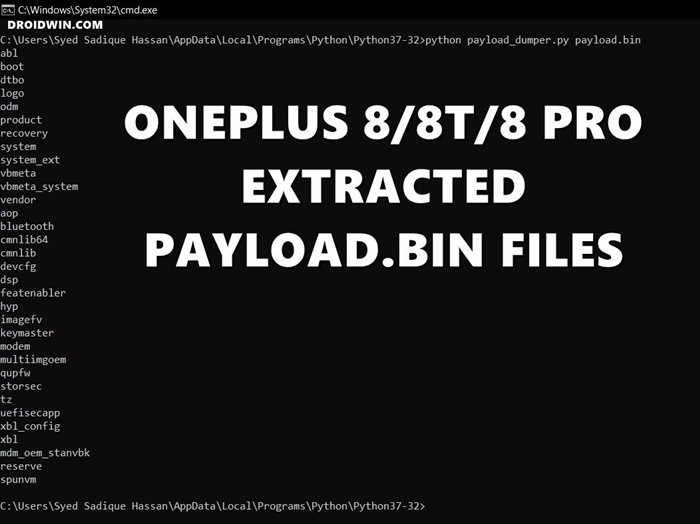
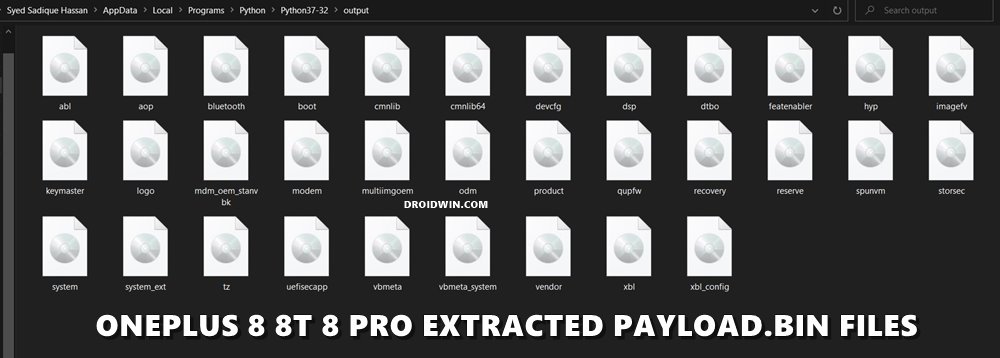
Follow the steps given in this linked guide and you should all the files inside the Python output folder (again refer to the linked guide). For example, the above image shows all the files that I got after extracting the OnePlus 8 payload.bin file. Let’s now proceed to the next step to restore your OnePlus 8T to stock OxygenOS by flashing the Stock ROM via Fastboot Commands.
STEP 6A: Automatic Method
This is the shorter and easier of the two and hence is the recommended method. Just head over to the extracted Fastboot ROM folder and double-click to open the flash-all.bat file. The flashing will now start and in between, you’ll be asked whether your device is LPDDR4X or LPDDR5X. Reply according to the answer you got in STEP 1 and then let the rest of the flashing go on. Once done, your device will automatically boot to the OS.
That’s it. These were the steps to restore the OnePlus 8T to Stock OxygenOS via Fastboot Commands via the automatic method. Let’s now show you how this could be done via the manual method.
STEP 6B: Manual Method
This is the lengthier and more complicated of the two methods but gives you more granular control over the entire process. TIP: Execute the fastboot getvar all command to get hold of all the partitions present on your device. This might come in handy in this method].
fastboot flash recovery recovery.img
fastboot flash boot boot.img
fastboot flash dtbo dtbo.img
fastboot reboot fastboot
fastboot flash --slot=all recovery recovery.img
fastboot flash --slot=all boot boot.img
fastboot flash --slot=all dtbo dtbo.img
fastboot flash --slot=all abl abl.img
fastboot flash --slot=all aop aop.img
fastboot flash --slot=all bluetooth bluetooth.img
fastboot flash --slot=all cmnlib64 cmnlib64.img
fastboot flash --slot=all cmnlib cmnlib.img
fastboot flash --slot=all devcfg devcfg.img
fastboot flash --slot=all dsp dsp.img
fastboot flash --slot=all featenabler featenabler.img
fastboot flash --slot=all hyp hyp.img
fastboot flash --slot=all imagefv imagefv.img
fastboot flash --slot=all keymaster keymaster.img
fastboot flash --slot=all logo logo.img
fastboot flash --slot=all mdm_oem_stanvbk mdm_oem_stanvbk.img
fastboot flash --slot=all modem modem.img
fastboot flash --slot=all multiimgoem multiimgoem.img
fastboot flash --slot=all qupfw qupfw.img
fastboot flash --slot=all spunvm spunvm.img
fastboot flash --slot=all storsec storsec.img
fastboot flash --slot=all tz tz.img
fastboot flash --slot=all uefisecapp uefisecapp.img

If your phone has the LPDDR4X memory chip, then flash the below images:
fastboot flash --slot=all xbl_config xbl_config.img
fastboot flash --slot=all xbl xbl.img

If your phone has the LPDDR5X memory chip, then flash the below images:
fastboot flash --slot=all xbl_config xbl_config_lp5.img
fastboot flash --slot=all xbl xbl_lp5.img

To be on the safer side, it is also recommended to delete and create the super partition.
For that, carry out the steps given in NOTE 1 below and then come back to these commands.

fastboot flash odm odm.img
fastboot flash system system.img
fastboot flash system_ext system_ext.img
fastboot flash product product.img
fastboot flash vendor vendor.img
fastboot flash --slot=all vbmeta vbmeta.img
fastboot flash --slot=all vbmeta_system vbmeta_system.img
fastboot reboot recovery

Now do a Factory Reset via Recovery.
Finally, reboot the device to the OS.
So on that note, we conclude this guide on how to restore or unbrick your OnePlus 8/8T/8 Pro to stock OxygenOS by flashing the Stock ROM via Fastboot Commands. If you have any queries concerning the aforementioned steps, do let us know in the comments. We will get back to you with a solution at the earliest.
NOTE 1: Delete and Create Logical Partitions
- First off, let’s delete the logical partitions. So execute the below-listed commands for the same:
fastboot delete-logical-partition odm

fastboot delete-logical-partition system

fastboot delete-logical-partition system_ext

fastboot delete-logical-partition product

fastboot delete-logical-partition vendor

fastboot delete-logical-partition odm_a

fastboot delete-logical-partition odm_b

fastboot delete-logical-partition system_a

fastboot delete-logical-partition system_b

fastboot delete-logical-partition system_ext_a

fastboot delete-logical-partition system_ext_b

fastboot delete-logical-partition product_a

fastboot delete-logical-partition product_b

fastboot delete-logical-partition vendor_a

fastboot delete-logical-partition vendor_b
- Now delete all the -cow partitions as well. It will look something as shown below
fastboot delete-logical-partition system_a-cow
- If you get an error deleting the -cow partitions, then change slots from the bootloader (fastboot –set-active=a or b), then return to fastbootd and try the delete command again:
- Finally, re-create the deleted partitions, using the below commands:
fastboot create-logical-partition odm_a 100000

fastboot create-logical-partition odm_b 100000

fastboot create-logical-partition system_a 100000

fastboot create-logical-partition system_b 100000

fastboot create-logical-partition system_ext_a 100000

fastboot create-logical-partition system_ext_b 100000

fastboot create-logical-partition product_a 100000

fastboot create-logical-partition product_b 100000

fastboot create-logical-partition vendor_a 100000

fastboot create-logical-partition vendor_b 100000
- Once that is done, you may now flash the rest of the partition files from the aforementioned section [starting with fastboot flash odm odm.img].
Unbrick OnePlus 8/8T/8 Pro via Fastboot Enhance
This is a tool created by XDA Senior Member xzr467706992 and beholds a slew of intriguing features, including the ability to directly flash the payload.bin file, without the need to even manually extract it first. Do note that even though this tool was created for OnePlus 8T but it should work across other OnePlus devices too. [Well, I have personally tested it on the OnePlus 7T and OnePlus 10 Pro, it works well and good even on those devices].
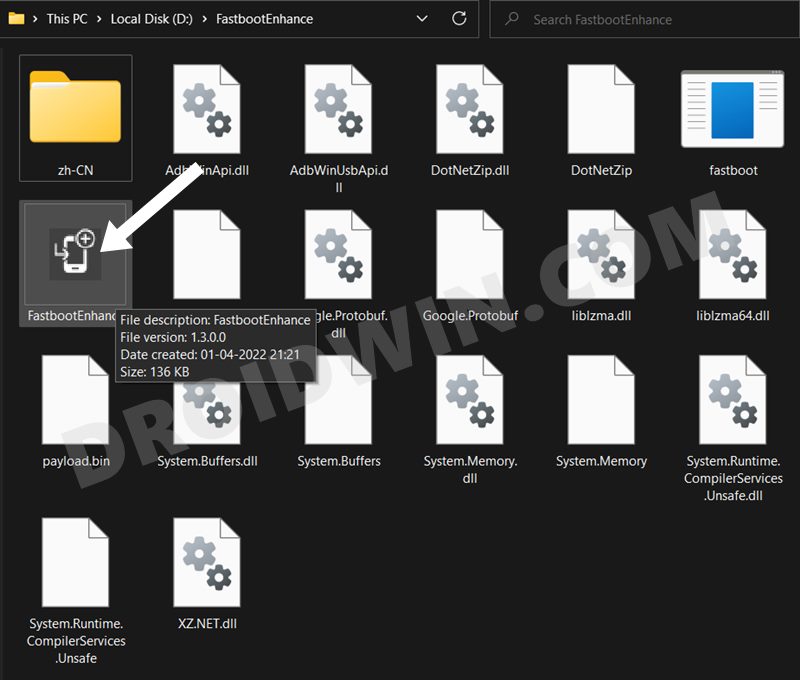
STEP 1: Download Fastboot Enhance Tool
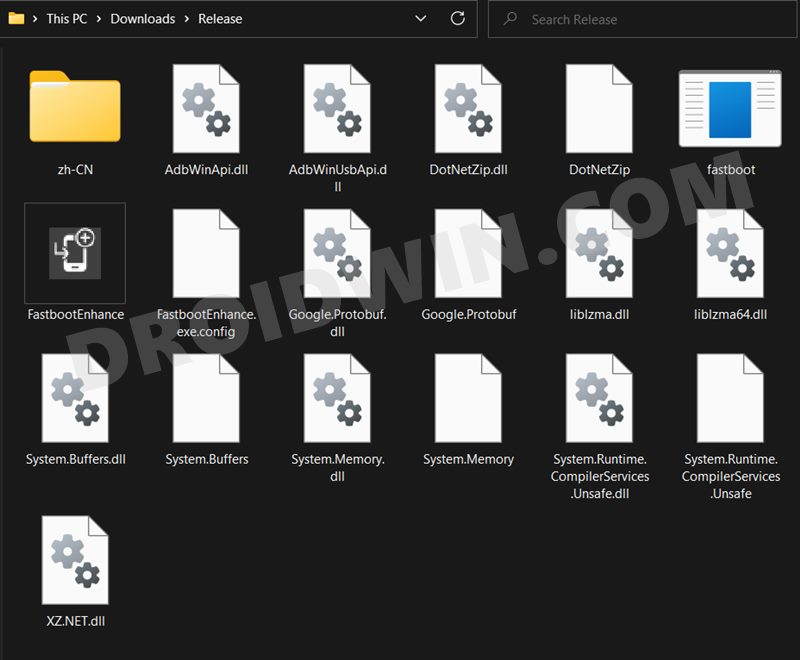
Download the Fastboot Enhance Tool from GitHub [direct link]. Once downloaded, extract it to any convenient location on your PC. The biggest advantage of this tool is that you could directory flash the payload.bin file, there is no need to extract it and get the resultant IMG files!
STEP 2: Download OnePlus OnePlus 8/8T/8 Pro ROM
- Next up, get hold of the firmware for your device from below:
OnePlus 8/8T/8 Pro Stock Firmware
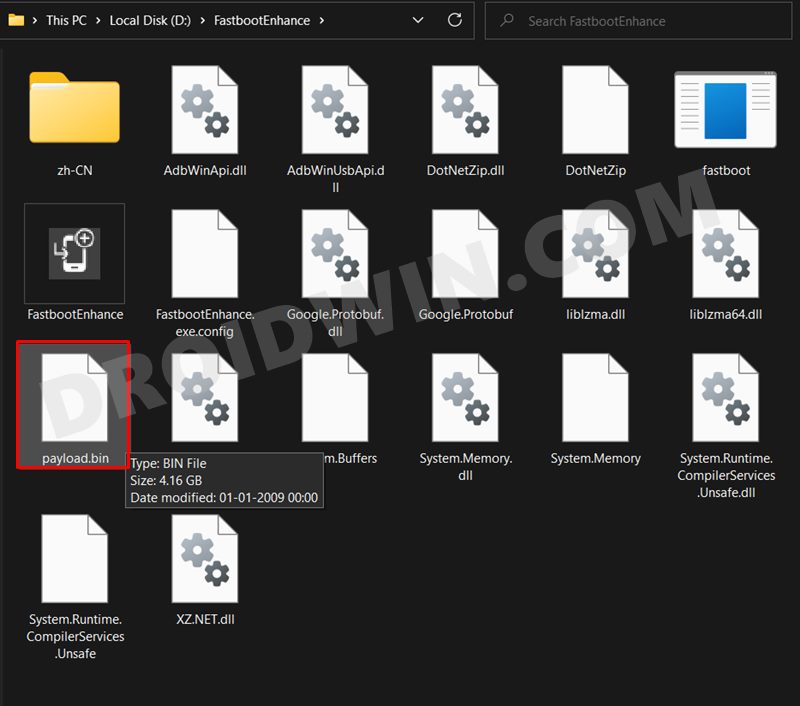
- Once downloaded, extract it and transfer the resultant payload.bin file to the Fastboot Enhance Tool folder.
STEP 3: Install Android SDK
Next up, install the Android SDK Platform Tools on your PC. This is the official ADB and Fastboot binary provided by Google and is the only recommended one. So download it and then extract it to any convenient location on your PC. Doing so will give you the platform tools folder, which will be used throughout this guide.

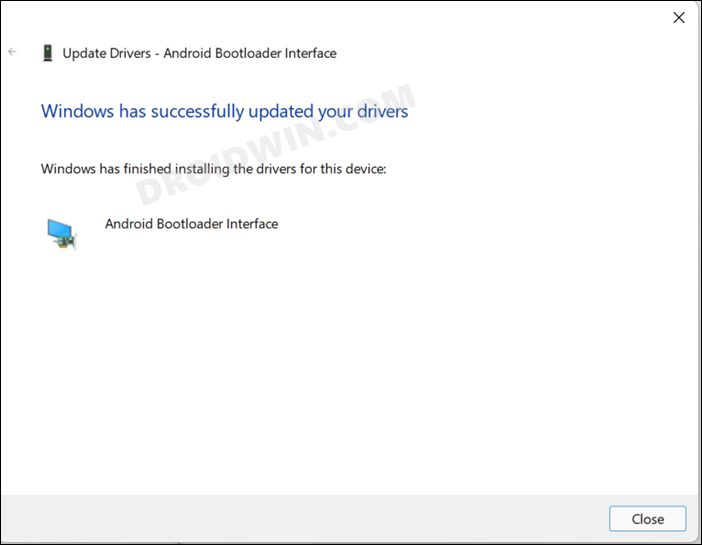
STEP 4: Install Fastboot Drivers
The tool doesn’t come with the Fastboot Drivers, so you will manually have to install it on your PC. For that, please refer to our guide on How to Install Fastboot Drivers in Windows 11. Likewise, make sure to install the OnePlus USB Drivers as well [they are usually automatically installed as soon as you connect your device to the Windows PC for the first time].
STEP 5: Boot to Fastboot Mode
- Since your device is currently in a brick state, you wouldn’t be able to use the adb reboot bootloader command to boot your device to Fastboot Mode. Rather, you will have to take the help of the Hardware key combinations to get this job done.
- Once booted, type in the below command and you should get back the device ID. This signifies that the Fastboot connection stands successful.
fastboot devices
STEP 6: Flash Downgrade Firmware on OnePlus 8/8T/8 Pro via Fastboot
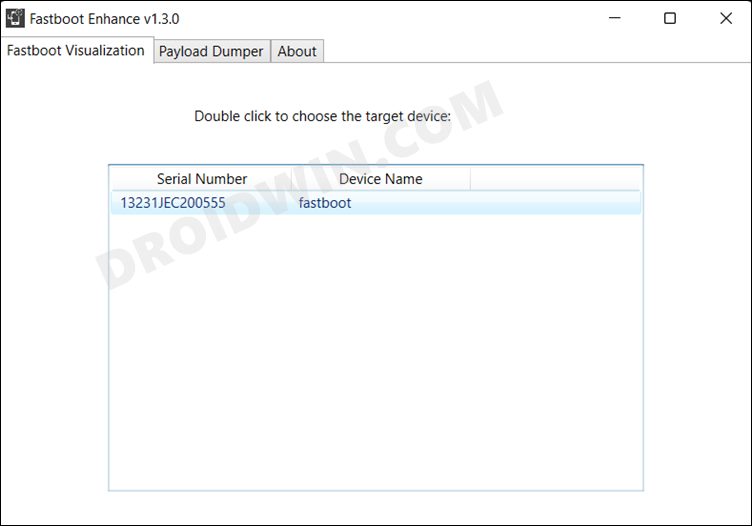
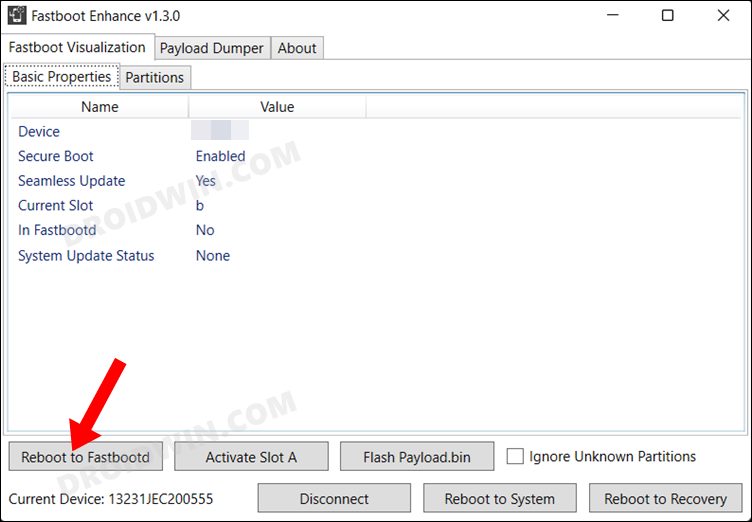
- To begin with, launch the Fastboot Enhance Tool via its EXE file.
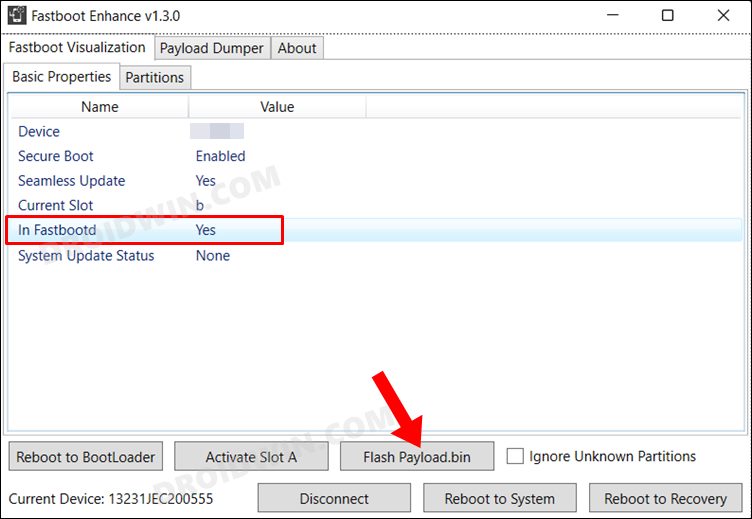
- Your device should be listed under the Fastboot Virtualization tab, select it.
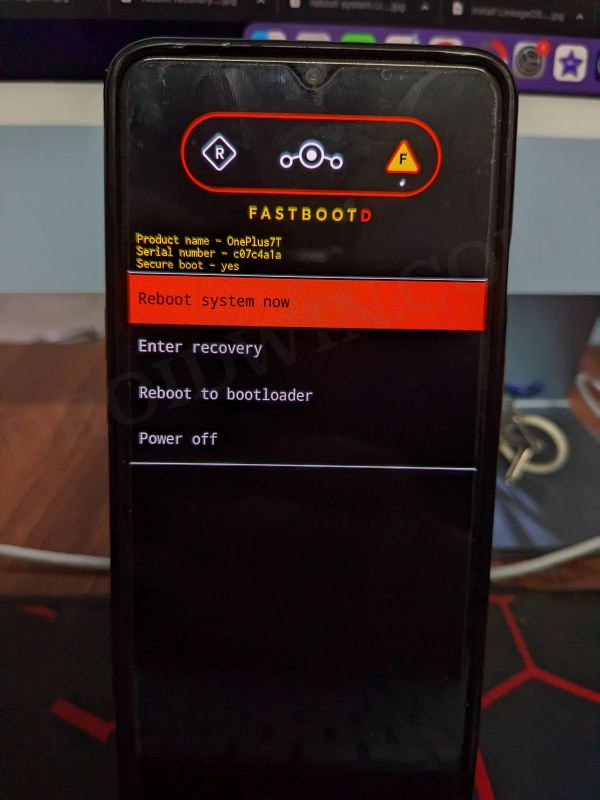
- After that, click on the Reboot to FastbootD button.
- Your device will boot to FastbootD Mode.
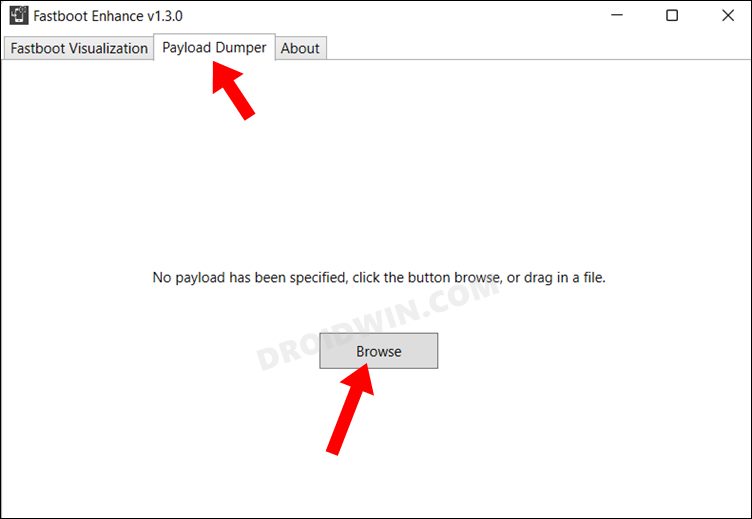
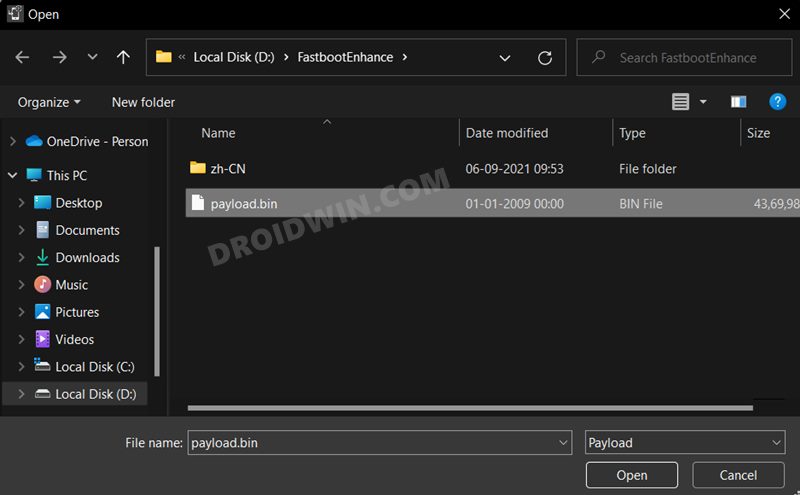
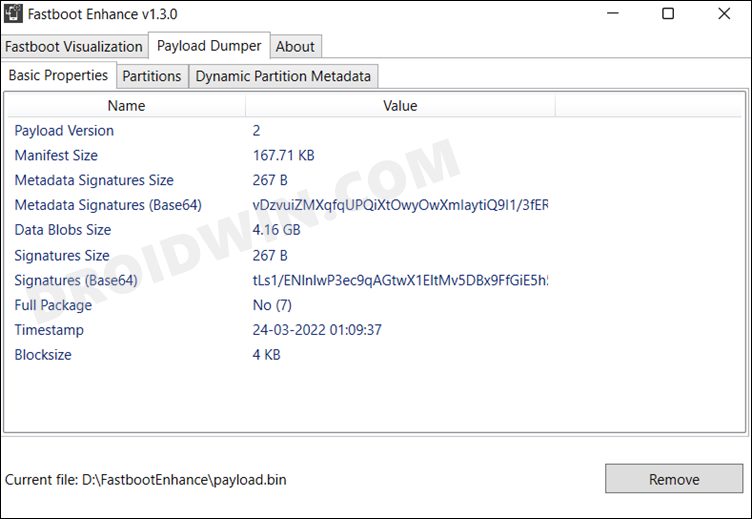
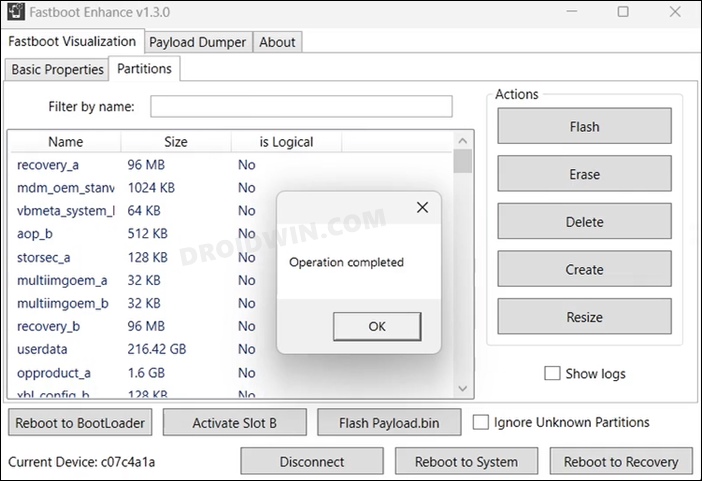
- Now go to the Payload Dumper tab and click on Browse.
- Navigate to the payload.bin file, select it and click Open.
- The file will now be loaded in the tool, displaying the resultant information.
- Now go to the Fastboot Virtualization tab and click on Flash payload.bin. If the flashing starts, well and good.
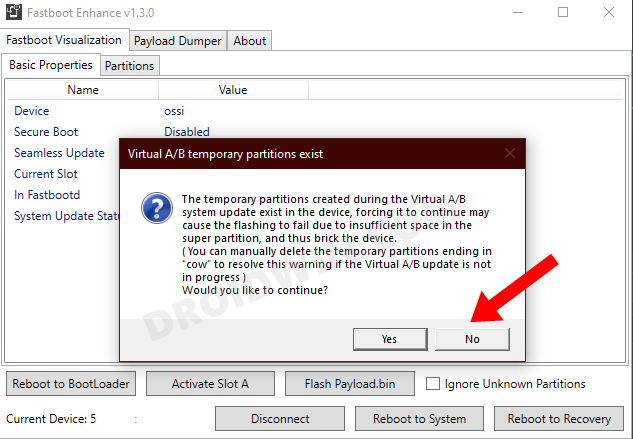
- However, if you get the ‘Virtual A/B temporary partitions exist’ popup, then click on No.
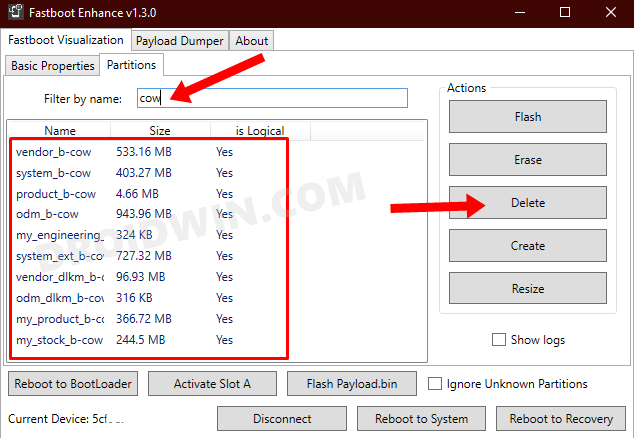
- After that, go to the Partitions tab and type in cow in the Filter by name box.
- Select all the partitions from the results that have cow in their name and hit the Delete button.
- Once done, click on Flash payload.bin. This time the flashing will start without any issues.
- Once complete, you will be notified of the same. You may now boot to the OS by clicking on Reboot to System.


Shafik
Hello,
I have the 8Pro and it got in the Orange State.
I followed your instructions via fastboot enhance & SDK.
All went according plan, deleting cow, loading payload.bin – only thing difrent from your video was that he asked whether to ignore unknown operations (if I remember right) and I said yes.
After fastboot enhance was ready the phone startet as in your video with all white text and one orange line to boot but goes than in the qualcomm crash dump mode. After switching of and on it repeats this.
Stoping the boot with the power butoon, the screen is black and the phone shows as Qualcomm HS-USB QDLoader 9008 (COM3) in the device manager.
What now? Can you help?
Steff
Thank you so, so, so much! I’ve tried everything until I came across this article and fixed my bricked OnePlus 8 Pro!! Do you have PayPal, I want to send you a tip!
Uzair
Fastboot Ehance works on Tmobile Oneplus8?
I have convered into Global, Does Fastboot enhance work on it?
Dimitris
All run correctly, but after last reboot….. Nothing. Not even getting detected by pc. No charging screen nothing…. Totally bricked
Dimitris
Which btw probably is due to this: https://droidwin.com/oxygenos-12-resulting-in-hard-bricked-oneplus-devices/
Again your article…. Please put something into your article next to the
fastboot flash –slot=all xbl_config xbl_config.img
fastboot flash –slot=all xbl xbl.img
Commands about the rams, else everyone that needs it will end up with a very expensive brick
David Champion
I’ve been following the procedures to return my kb2007 to stock but I’m stuck at fastboot flash –slot=all dsp dsp.img
every other command was working, got the payload bin from the official oneplus site.
“Sending ‘dsp_a’ (65536 KB) FAILED (Write to device failed in SendBuffer() (no link))
fastboot: error: Command failed”
any idea what might be wrong with that one? I’m doing it from fastbootD and up until that point, everything was operating smoothly. Original cable that came with phone, tested with other cables and ports. Intel processor windows 10
ahmed saied
My device got stuck on the list of fastboots .. 3 days ago and I tried and tried all the methods that I found and did not find a solution. Did I lose my device permanently? Your method I feel it should work but I don’t know what’s wrong I did it right step by step as you explained but every time it comes the last commands and they all fail all these commands fail I give up
These commands all fail
fastboot flash odm odm.img
fastboot flash system system.img
fastboot flash system_ext system_ext.img
fastboot flash product product.img
fastboot flash vendor.img
fastboot flash –slot=all vbmeta vbmeta.img
fastboot flash –slot=all vbmeta_system vbmeta_system.img
fastboot reboot
Sadique Hassan
Hi Ahmed, have you tried flashing these files in FastbootD Mode as well [apart from Fastboot]?
Ahmed
I’ve tried everything and every way I don’t know what to do wrong I really gave up
can i contact you Telegram or anything or you can see it through team vewer for example and help me!
Mohamed
“flashing is not allowed for critical partitions” is showing after the fastboot flashing aop aop.img
How to allow it??
Osama OS
Hey, this method worked well but there’s error shows is ( flashing not allowed for critical partiton ?
flashing unlock commadhasbeen used already but same proplem !
Waleed Qureshi
Hi I have oneplus 8t 5g I think I have flashed my Stock recovery and also rom and now I I am bootloader mode. I have oneplus 8t 5g KB23007.
I have tried MSM tool but it always give error Param load error
on system I can seey that Qualcomm drivers are installed.
Please guide the right way so I can do that.
saif
my device is oneplus 7t pro, can this method also be used for the same with the method? ofcource by using the appropriate rom file?
Suleyman
Can this method be used to directly convert OP 8 Tmobile version to Global firmware?
Currently I have A11.0.6 (latest with Dec sec patch) on the OP 8 Tmo. Can I download latest OP global Rom and follow the steps in this article and convert Tmo to Global?
Jamil
Sir my phone rooted with Magisk ,TWRP installed and bootloader unlocked can I follow the above method,…and sir when I extracted my stock rom with payload dumper with payload file it doesn’t give all imj files what sould I do next…
BRIAN David MOORE
none of the payload,bin files i have found have opproduct.img?
ghaleb
WARNING: You are using pip version 21.1.3; however, version 21.2.3 is available.
You should consider upgrading via the ‘C:\Users\username\AppData\Local\Programs\Python\Python39\python.exe -m pip install –upgrade pip’ command.
Sadique Hassan
Well, you could consider updating it via the given command. But it should work without any issues in the current version as well.
Addy
What do i do
C:\platform-tools>fastboot flash aop aop.img
Sending ‘aop’ (200 KB) OKAY [ 0.011s]
Writing ‘aop’ FAILED (remote: ‘Flashing is not allowed for Critical Partitions
‘)
fastboot: error: Command failed
C:\platform-tools>fastboot flashing unlock_critical
FAILED (remote: ‘ Device already : unlocked!’)
fastboot: error: Command failed
Glenn
same problem here. IN2020. Trying to restore stock 11 from Pixel Experience.
Maya
same here
Sadique Hassan
Hi Kyaw, yes it needs an unlocked bootloader.
Evan
Been getting a ‘Flashing is not allowed for Critical Partitions’ error, not sure how to proceed. Looking online I found ‘fastboot flashing unlock_critical’ but it seems to not register as a command so I’m stuck :/
Sadique Hassan
Well, Evan the fix you have mentioned is exactly what is required (fastboot flashing unlock_critical). Could you please let me know what error message is that command giving?
Auzaie
Hi i also got that error
the error is
C:\Users\Admin\Desktop\Root\platform-tools>fastboot flash storsec storsec.img
Sending ‘storsec’ (20 KB) OKAY [ 0.047s]
Writing ‘storsec’ FAILED (remote: ‘Flashing is not allowed for Critical Partitions
‘)
fastboot: error: Command failed
and this also applies to other imgs that are trying to flash into phone
Sadique Hassan
Hi Auzaie, is your device’s critical partition unlocked? If not, you could do so via fastboot flashing unlock_critical command (it will wipe all your data)