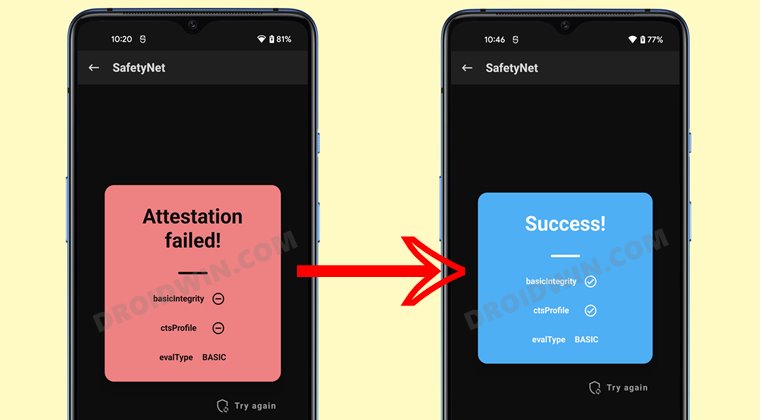
In this guide, we will show you the steps to pass SafetyNet on your OnePlus 8 without Magisk or root. It’s no hidden secret that rooting your device will end up triggering the safety flag. Also known as SafetyNet, this is an API that is embedded into your device by Google and is used to perform a check on whether your device has been modified or not. If it has been, then the SafetyNet result will come out as Failed and you will be unable to use banking/payment apps and WideVine certification will be degraded to L3 from L1.
However, using a nifty workaround, you could easily pass this test. All that you need to do is flash the MagiskHide Props Config, force basic attestation, and enable Magisk Hide for the app of your choice [as well as for the compulsory Google apps]. However, some users have reported that they haven’t even rooted their device in the first place and are still failing the safetynet test.
This is mostly happening with devices that are running a custom ROM [even the signed ones are giving out this error]. To rectify this issue, users could root their devices and then perform the aforementioned tweak, but that might prove to be quite a lengthy process. So is there an alternate way out? Well, if you own a OnePlus 8, then you could easily pass the SafetyNet test without Magisk or Root. Let’s check out how.
Table of Contents
How to Pass SafetyNet without Magisk/Root on OnePlus 8
The below instructions will only work on Custom ROMs like LineageOS that come with the Root Debugging feature [you may verify the same from Settings > Developer Options]. However, as of now, you should be on stock OxygenOS 11 [STEP 1,2]. Once you get hold of the device’s fingerprint using the instructions given below, you could then flash the Custom ROM and subsequently pass the safetynet [STEP 3].
Moreover, it is recommended to take a complete device backup before proceeding with the below steps. Droidwin and its members wouldn’t be held responsible in case of a thermonuclear war, your alarm doesn’t wake you up, or if anything happens to your device and data by performing the below steps.
STEP 1: Install Android SDK
 First and foremost, you will have to install the Android SDK Platform Tools on your PC. This is the official ADB and Fastboot binary provided by Google and is the only recommended one. So download it and then extract it to any convenient location on your PC. Doing so will give you the platform-tools folder, which will be used throughout this guide.
STEP 2: Enable USB Debugging and OEM Unlocking
Next up, you will have to enable USB Debugging and OEM Unlocking on your device. The former will make your device recognizable by the PC in ADB mode. This will then allow you to boot your device to Fastboot Mode. On the other hand, OEM Unlocking is required to carry out the bootloader unlocking process.
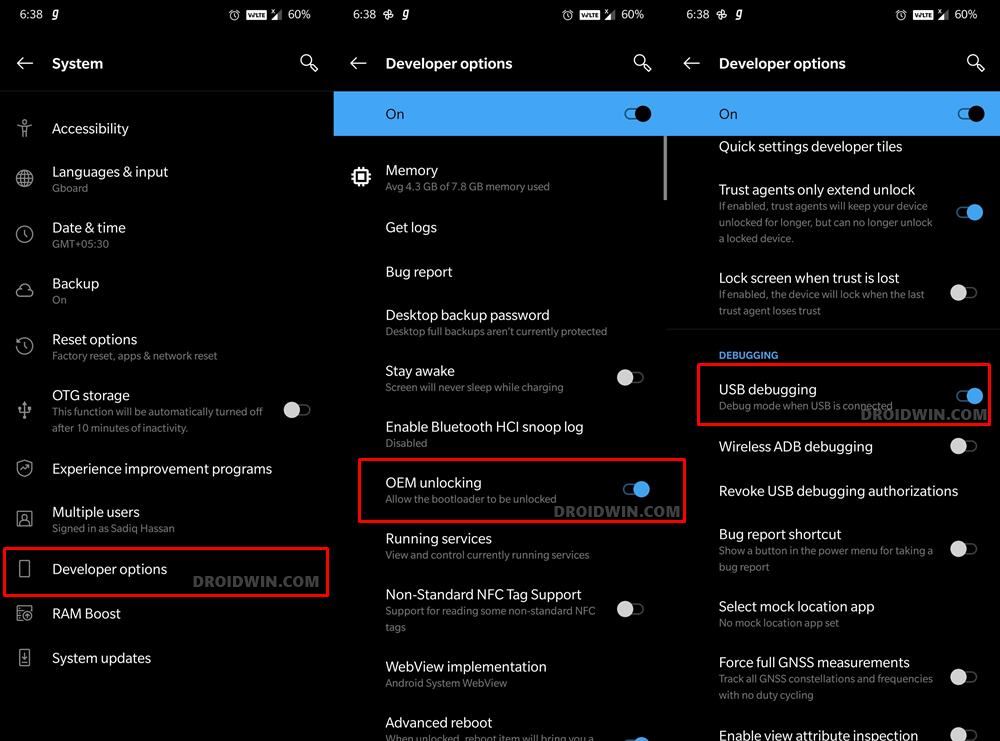
So head over to Settings > About Phone > Tap on Build Number 7 times > Go back to Settings > System > Advanced > Developer Options > Enable USB Debugging and OEM Unlocking.
STEP 3: Unlock Bootloader on OnePlus 8
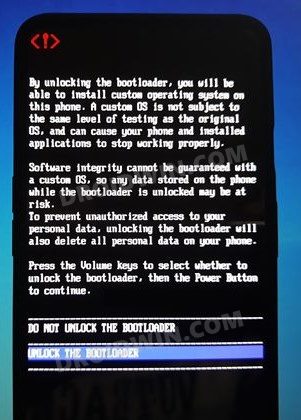
After this, you will have to unlock the bootloader on your OnePlus 8. Do keep in mind that this process will wipe off all the data and might nullify the device’s warranty as well. So if that’s all well and good, then refer to our comprehensive guide on How To Unlock the Bootloader on OnePlus 8, 8 Pro, and 8T.
STEP 5: Find Device’s Build Fingerprint
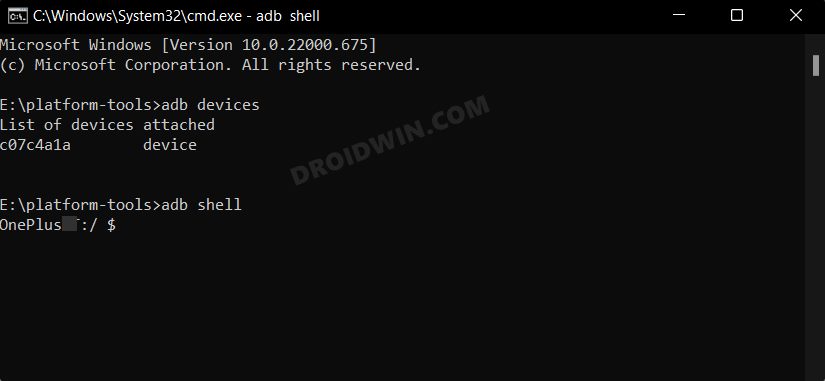
- Connect your device to the PC via USB cable. Make sure USB Debugging is enabled.
- Then head over to the platform-tools folder, type in CMD in the address bar, and hit Enter. This will launch the Command Prompt.

- Type in the following command in the CMD window to open the shell environment
adb shell
- Now type in the below command to get the device’s fingerprint build
getprop ro.build.fingerprint
- Copy the output and paste it into Notepad. It should be something along the lines of:
OnePlus/OnePlus8_EEA/OnePlus8:11/RP1A.201005.001/2012102310:user/release-keys
- Now get hold of your device’s model number from below and note it down in the Notepad
IN2010 China
IN2011 India
IN2013 Europe/Asia
IN2015 NA/USA
IN2017 T-Mobile
IN2019 Verizon

 Now type in the below command to get the device’s fingerprint build
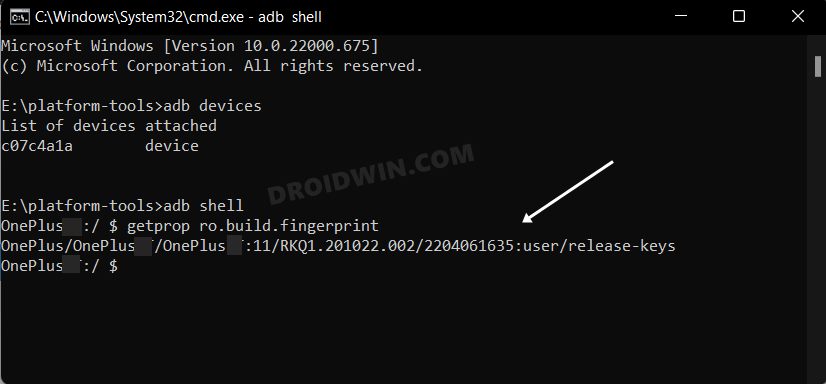 Copy the output and paste it into Notepad. It should be something along the lines of:
STEP 6: Edit Configuration Files
- Download and extract the OP8 configuration package on your PC [Credits: XDA Senior Member thattechguy_69].
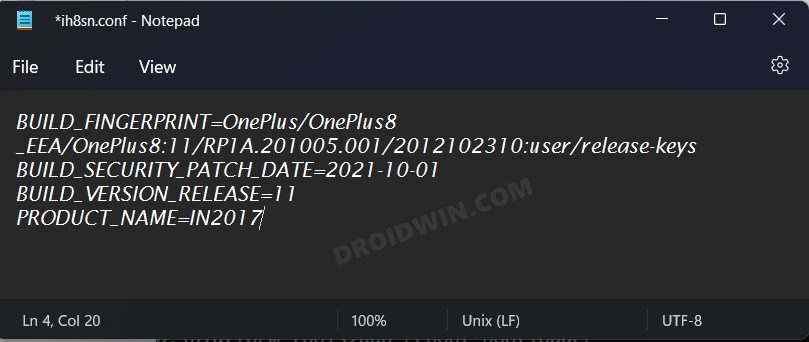
- Then go to its etc folder and open the ih8sn.conf file via Notepad.
- Now replace the Build_Fingerprint value with the one that you had got in STEP 5.
- Similarly, replace the PRODUCT_NAME with the Model Number that you had got in STEP 5.
- Finally, hit Ctrl+S to save the changes to this file.
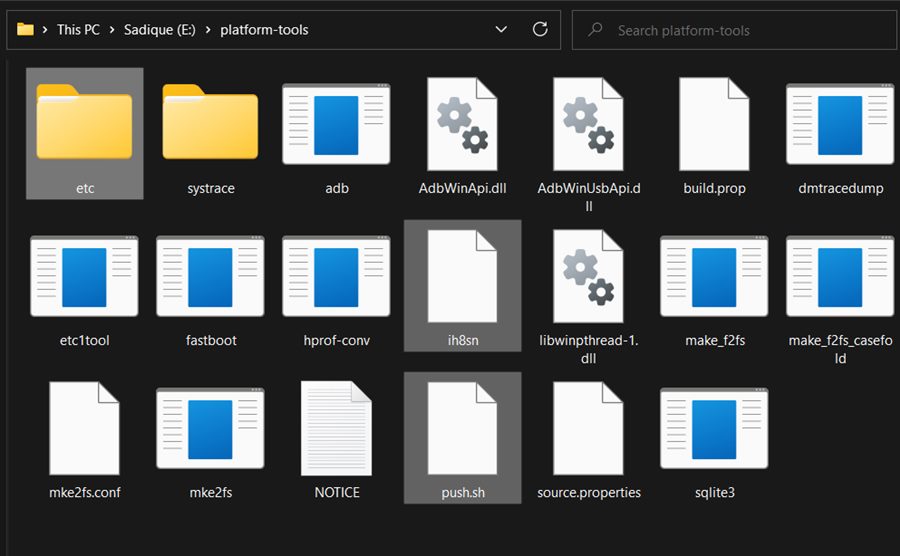
- Then transfer all the files inside the OP8 folder to the platform-tools folder.

STEP 7: Pass Safetynet on Custom ROM without Magisk/Root
- To begin with, flash LineageOS ROM [or any other custom ROM that has the Root Debugging feature].
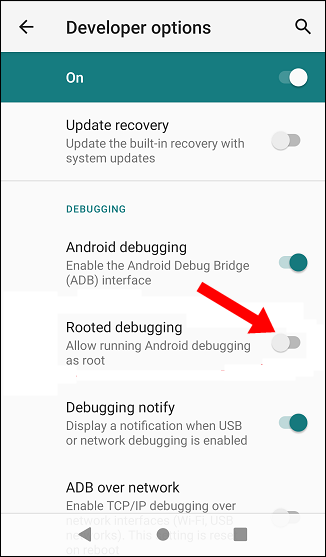
- Then go to Settings and enable Developer Options. After that, enable USB Debugging and Rooted Debugging from Developer Options.
- Now open CMD inside the platform-tools folder [make sure that you have transferred the contents of the OP8 folder with the modified ih8sn.conf file inside this folder].
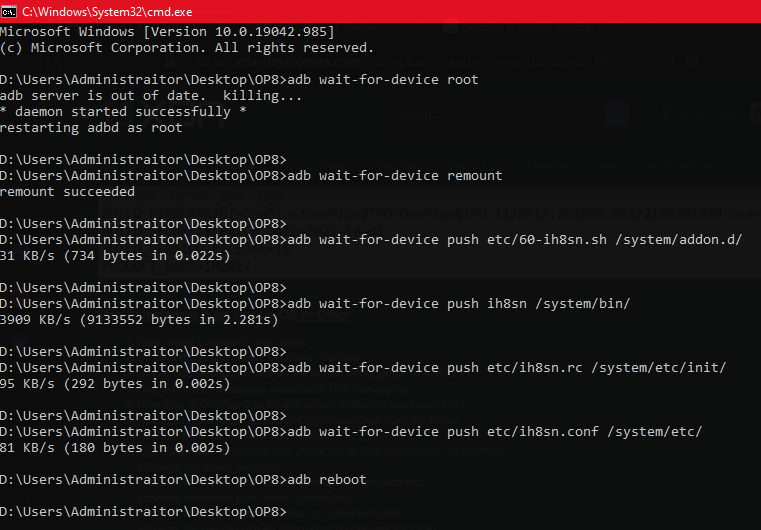
- Then execute all the below-given commands, one at a time. Moreover, you will have to reboot the device after executing every command
adb wait-for-device root
adb wait-for-device remount
adb wait-for-device push etc/60-ih8sn.sh /system/addon.d/
adb wait-for-device push ih8sn /system/bin/
adb wait-for-device push etc/ih8sn.rc /system/etc/init/
adb wait-for-device push etc/ih8sn.conf /system/etc/
Credits: XDA Senior Member thattechguy_69 - Finally, reboot the device using the below command
adb reboot
That’s it. These were the steps to pass SafetyNet on your OnePlus 8 without Magisk or root. If you have any queries concerning the aforementioned steps, do let us know in the comments. We will get back to you with a solution at the earliest.


