In this guide, we will show you two different methods to pass SafetyNet on your rooted OnePlus 11. The latest addition to the OnePlus has already created quite a buzz in the tech community. As of now, most of the discussions are surrounding two major developments- the revival of the alert slider and the omission of wireless charging, the latter of which is surely going to raise a few eyebrows.
If we turn our attention towards custom development, then there are a plethora of tweaks to welcome abode. Among them, it’s the ability to gain administrative access by rooting the device via Magisk that has always been at the top of the priority queue for many. However, it comes with its fair share of downsides as well, the primary among which is the failing of SafetyNet.
As a result of which, you wouldn’t be able to use banking and payment apps or try put games like Pokemon Go. Likewise, WideVine L1 Certification will fall to L3 thereby resulting in our inability to stream DRM content [such as Netflix] in Full HD. Fortunately, you could easily rectify most of these “issues” by passing the SafetyNet on your rooted OnePlus 11. And in this guide, we will show you how to do just that. Follow along.
Table of Contents
How to Pass SafetyNet on Rooted OnePlus 11
Given below are two different methods to get this job done. The first method is the newer and shorter approach whereas the second method is the older and lengthier one. Go through both of them and try out the one that is in sync with your requirement. Droidwin and its members wouldn’t be held responsible in case of a thermonuclear war, your alarm doesn’t wake you up, or if anything happens to your device and data by performing the below steps.
METHOD 1: Pass SafetyNet without Magisk Hide Props Config [NEW]
The shorter of the two methods, this doesn’t require you to spoof the device’s fingerprint or flash the Magisk Hide Props Config, all thanks to tweaks made by the developer of the Universal SafetyNet Fix Module. So on that note, let’s get started with the steps to pass Safetynet on your rooted OnePlus 11.
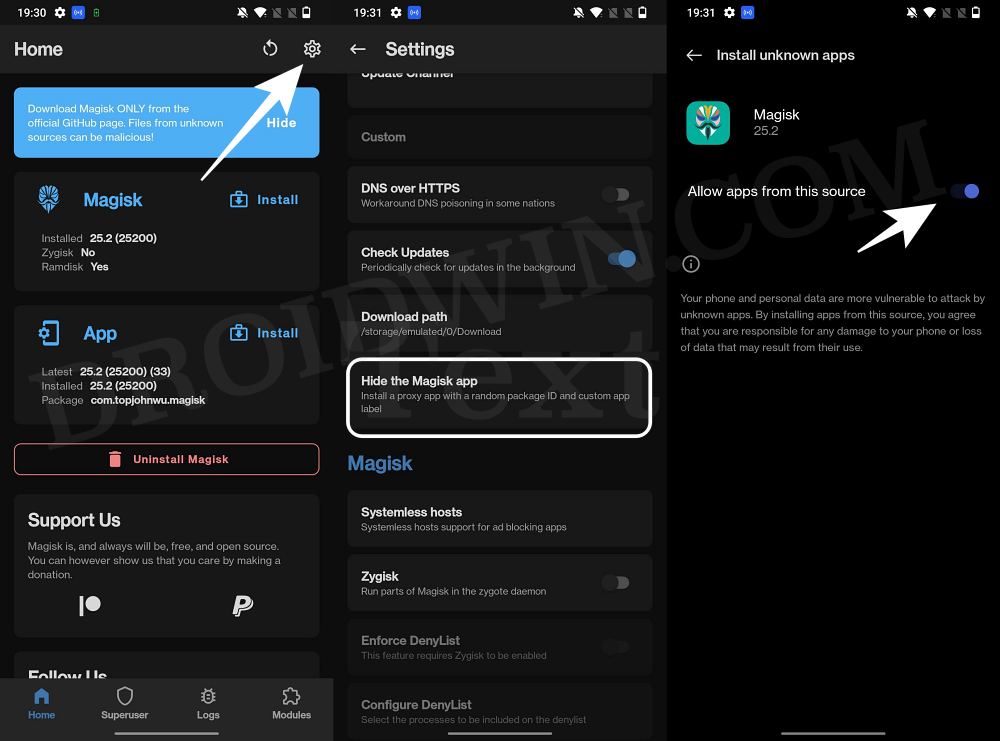
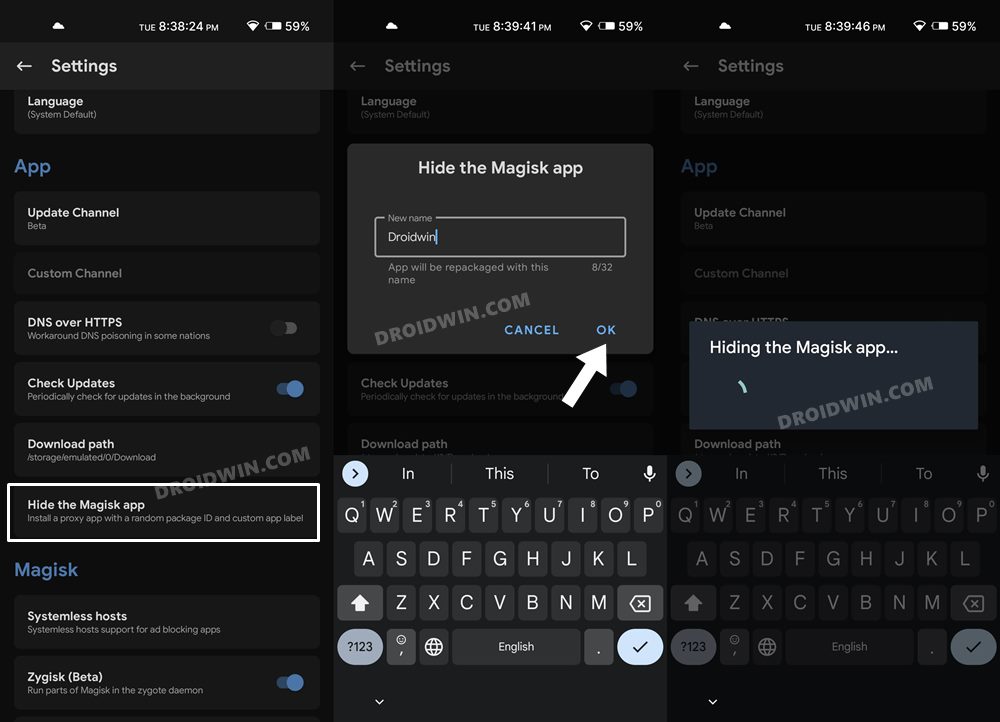
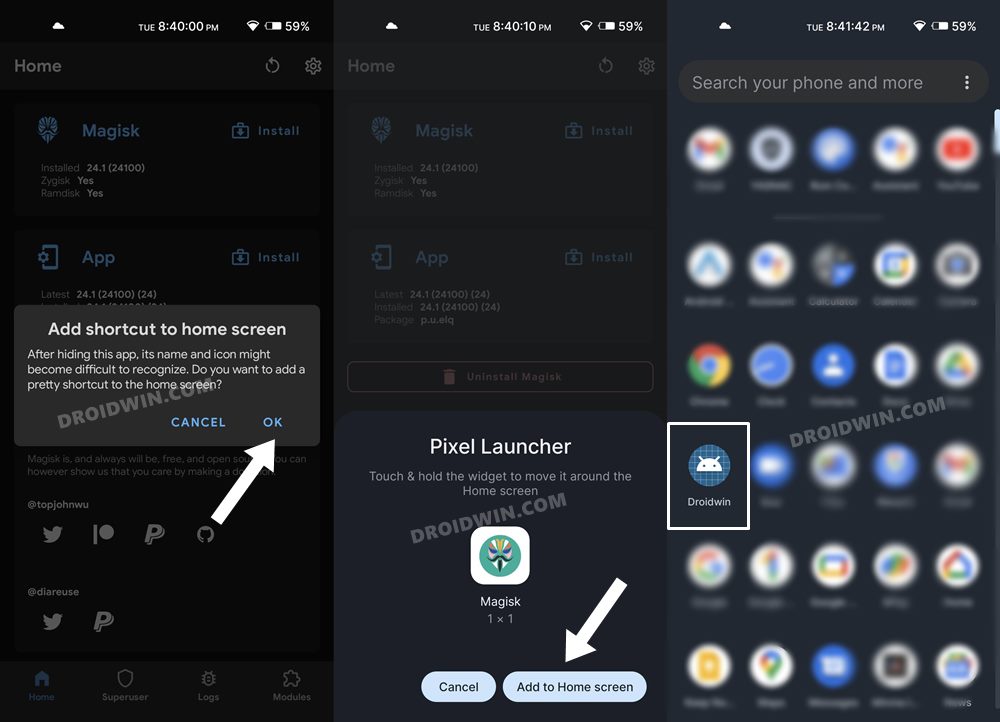
STEP 1: Hide Magisk App
- Launch the Magisk App and tap on the settings icon situated at the top right.
- Then tap on Hide the Magisk App > Enable the toggle next to Allow apps from this source.

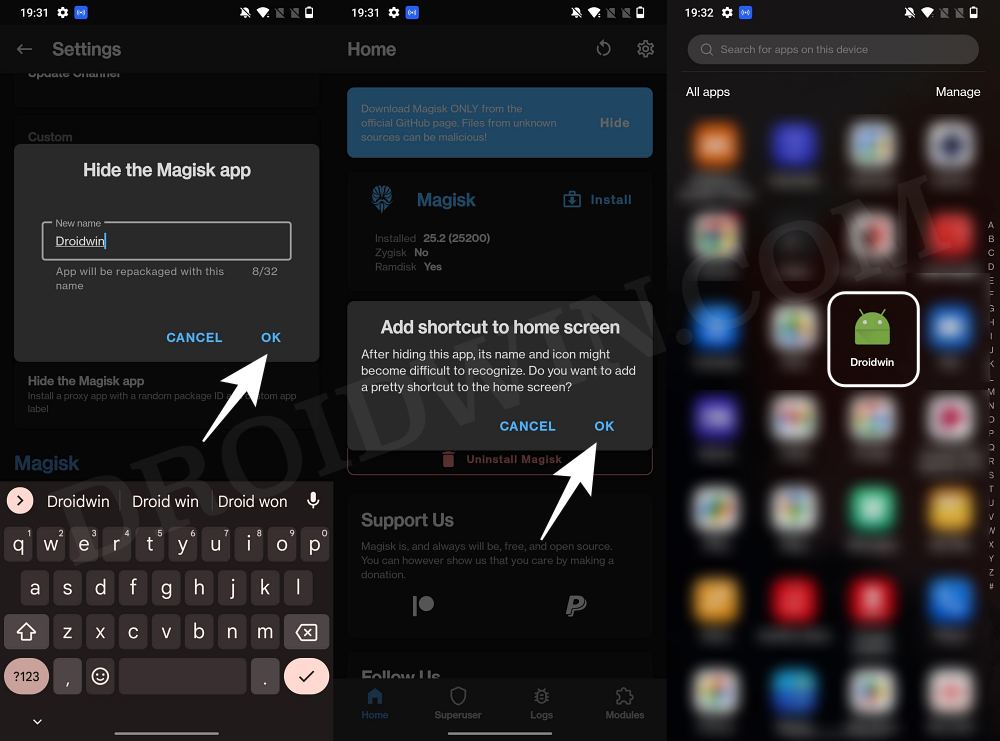
- Assign a new random name to this Magisk app and hit OK.
- It will now ask for a home-screen shortcut, tap OK [recommended].
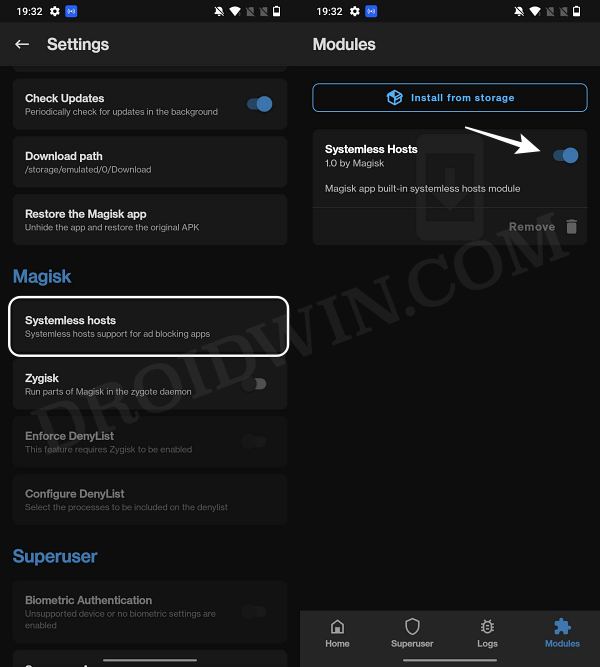
STEP 2: Enable Systemless Hosts
- Launch the Magisk App and tap on the settings icon situated at the top right.
- Then tap on Systemless hosts.
- Now go to the Modules section and verify that it has been added.
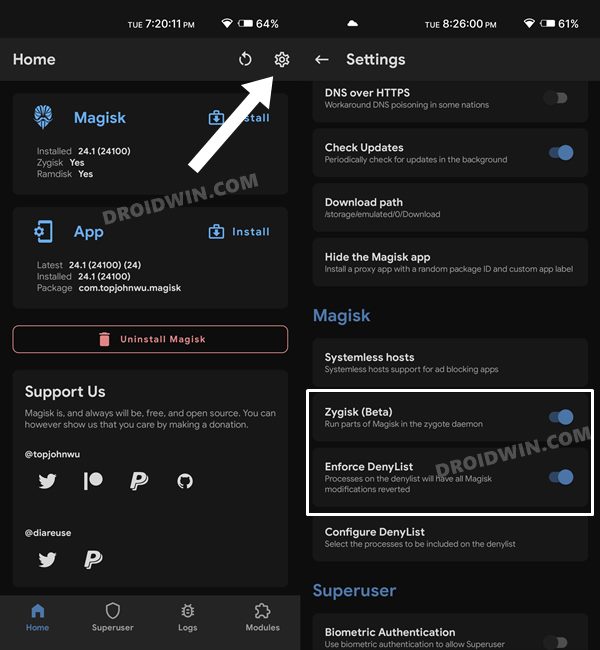
STEP 3: Enable Zygisk
- Launch the Magisk App and tap on the settings icon situated at the top right.
- Then enable the toggle next to Zygisk and restart your phone.
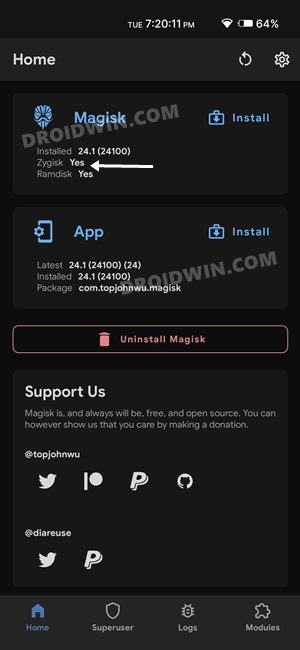
- Now launch Magisk and make sure that it says YES next to Zygisk.
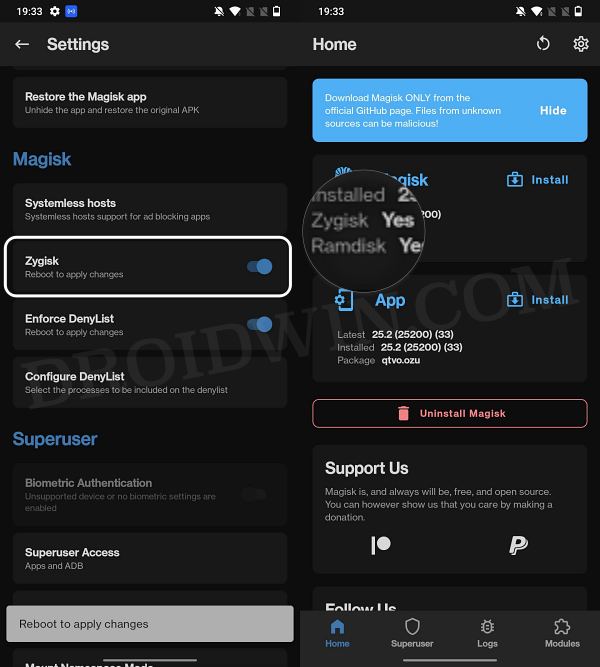
STEP 4: Configure Denylist
Denylist is the new name for the traditional Magisk hide. You could use this functionality to hide root from the desired apps, apart from the three compulsory apps listed below.
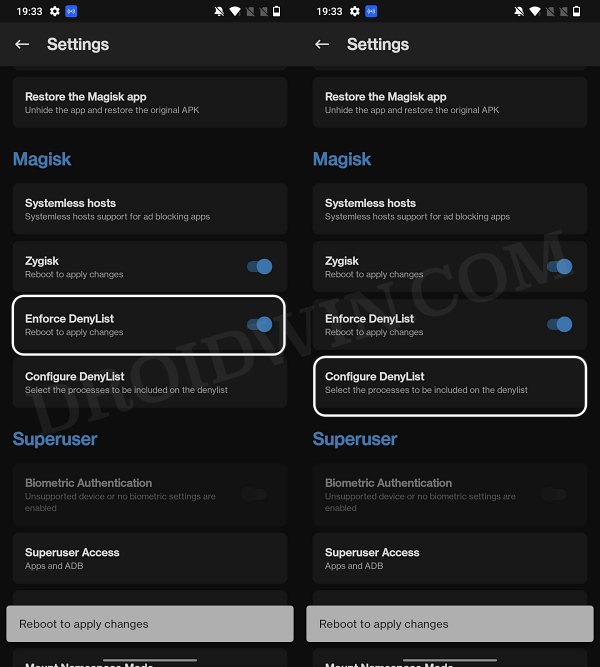
- Launch the Magisk App and tap on the settings icon situated at the top right.
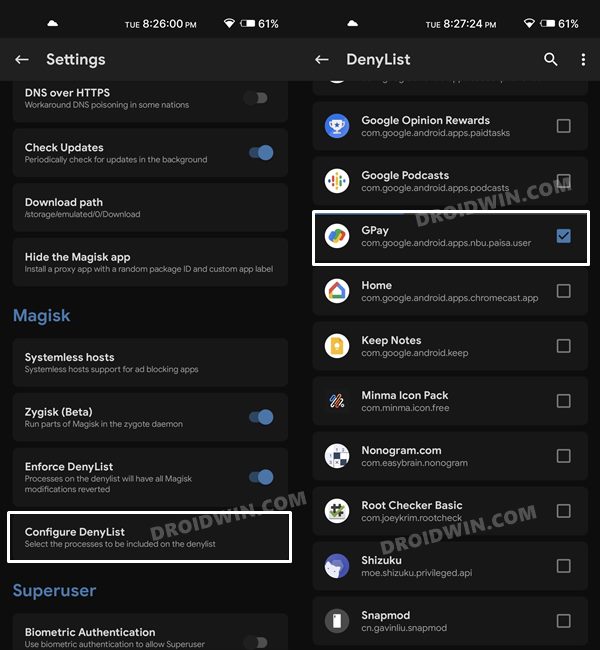
- Then enable the toggle next to Enforce Denylist. Now tap on Configure Denylist.
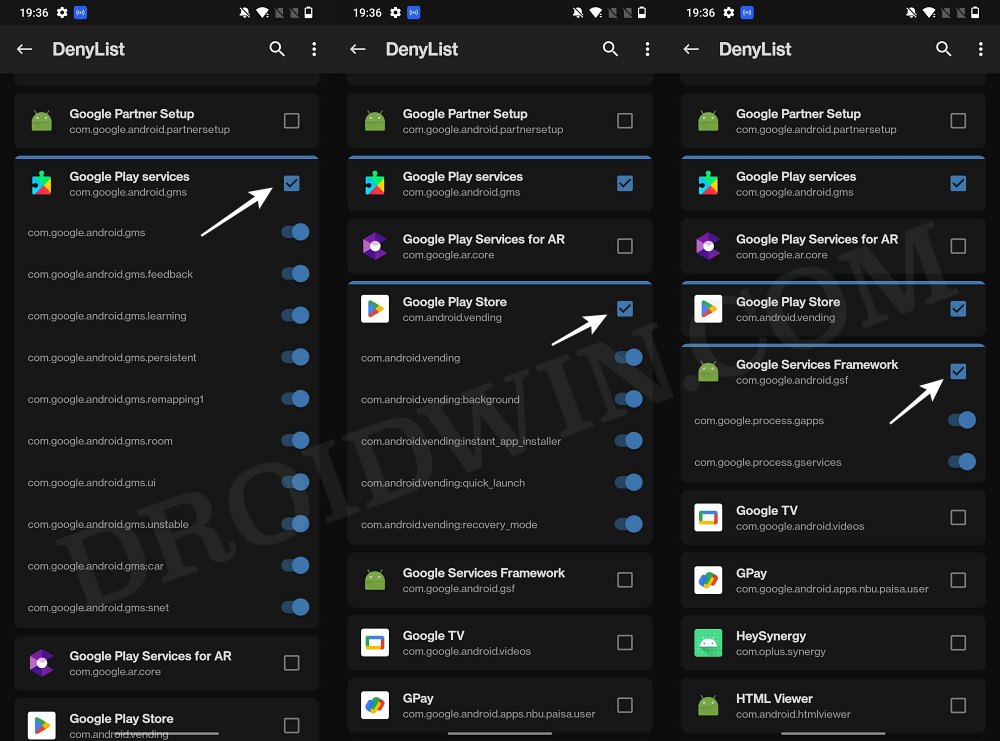
- Then expand the following apps and checkmark all its services
Google Play Service
Google Play Store
Google Service Framework
Google Play Protect Service [if present]
- After that, do the same for the banking/payment app of your choice.
- NOTE: Upon restart, the Google Service Framework might get unchecked and Google Play Services might be missing from the DenyList. This is just a UI bug and nothing to worry about [as they are still active in the backend].
STEP 5: Flash Universal SafetyNet Fix Module
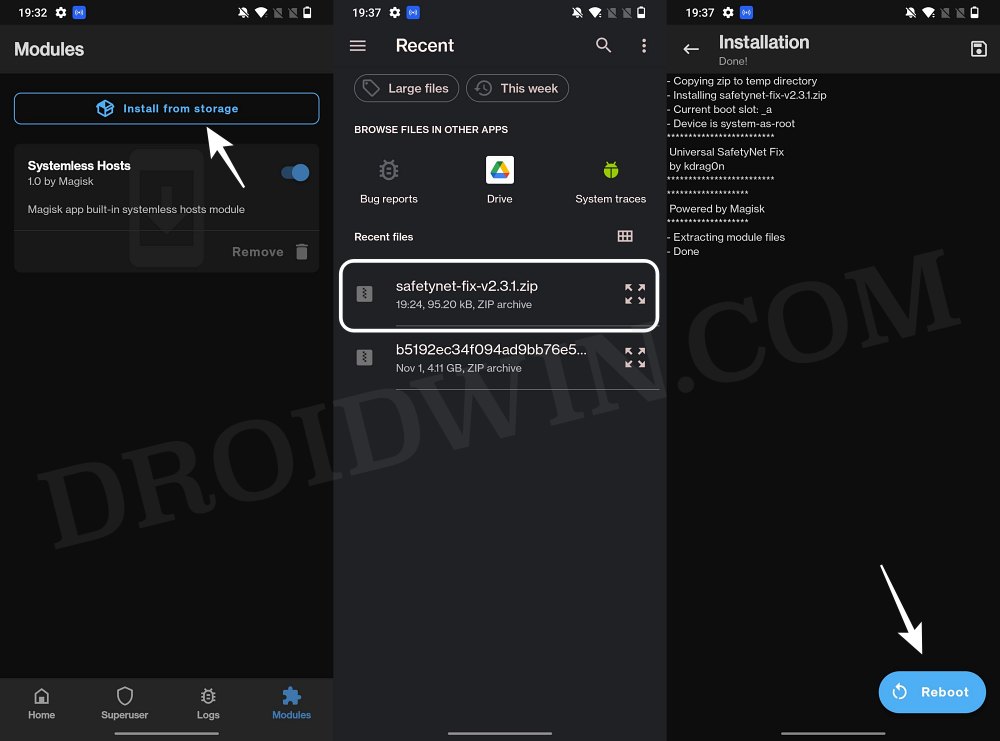
- Download the new Universal SafetyNet Fix module from below:
safetynet-fix-v2.3.1.zip [Source: GitHub]
- Then launch Magisk, go to the Modules section and tap on Install from Storage.
- Navigate to the downloaded safetynet module and select it.
- It will now be flashed. Once done, hit Reboot.
STEP 6: Delete Data
You will now have to delete the app data of all the apps from which you have hidden root. These include the compulsory Google apps and the desired apps of your choice.
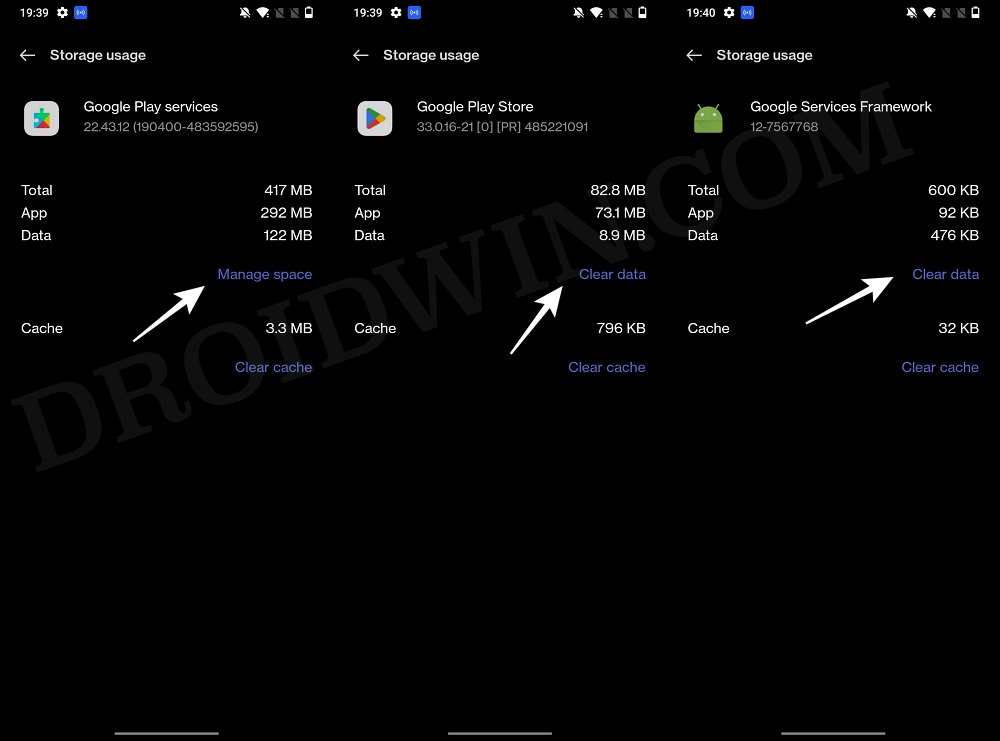
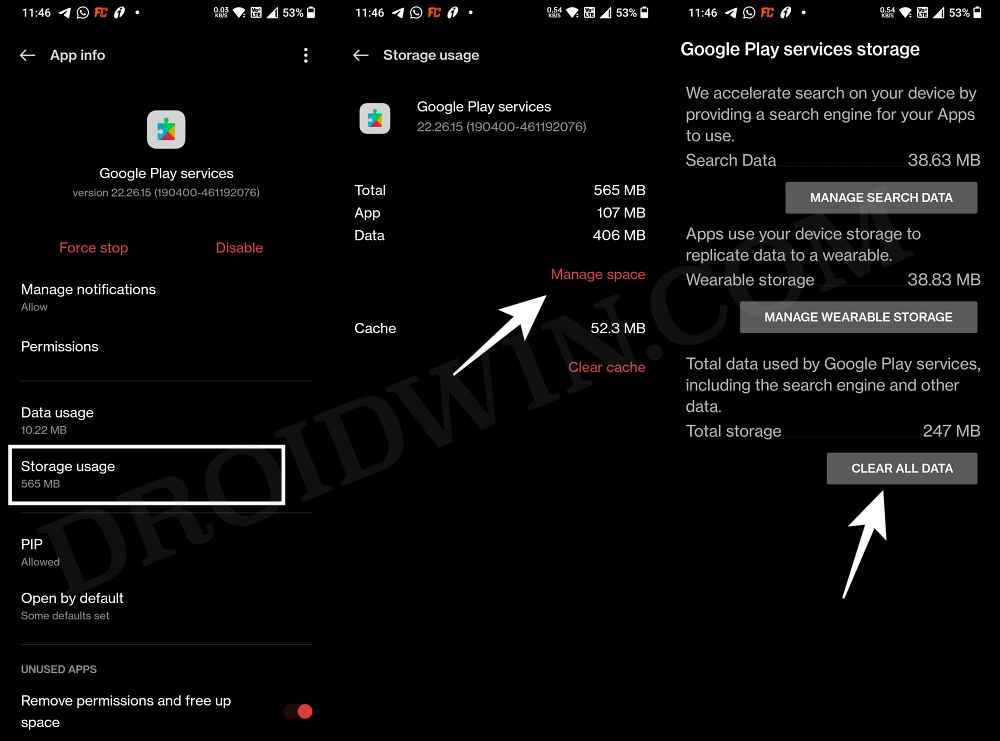
- Head over to Settings > Apps and select Google Play Service.
- Then go to its Storage section and tap on Manage Space > Clear all data.
- After that, delete the data of Google Play Store and Google Play Protect Service [if present].
- Then tap on the overflow icon situated at the top right and select Show System.
- This will bring up the system apps. Select Google Service Framework and delete its data.
- Finally, delete the data of the banking/payment apps from which you have hidden root. Once done, restart your device [compulsory].
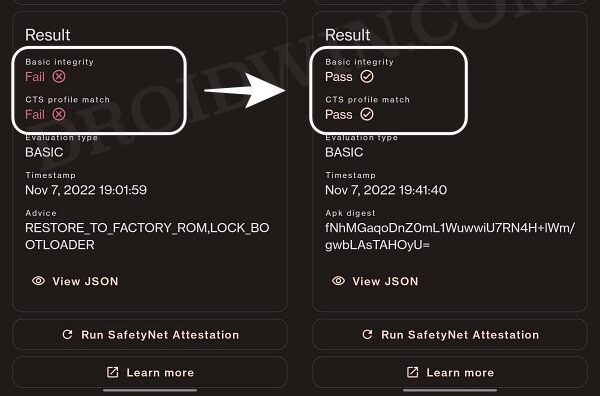
STEP 7: Check SafetyNet Test Results
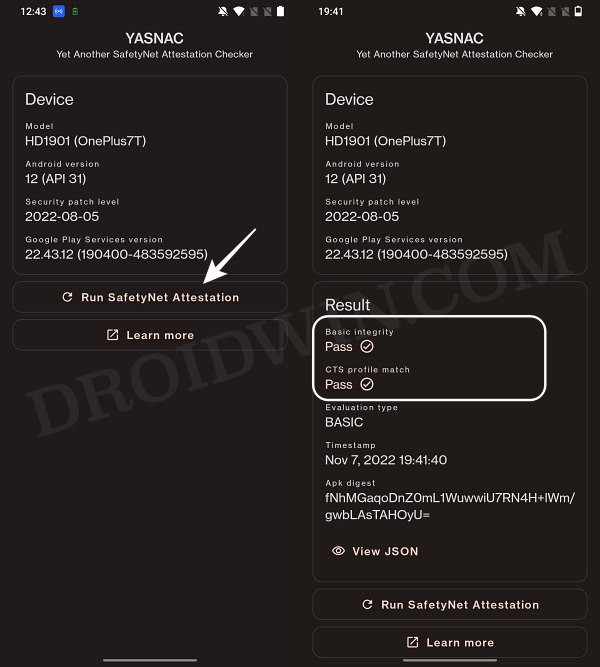
- Download and install the YASNAC app from Play Store.
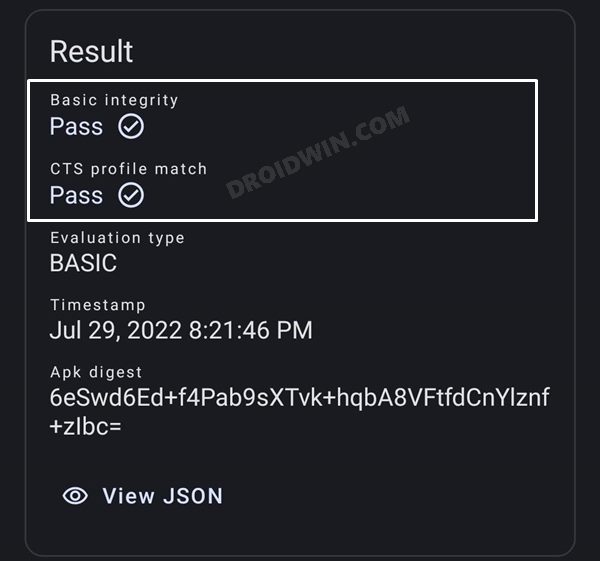
- Then launch it and tap on Run SafetyNet Attestation.
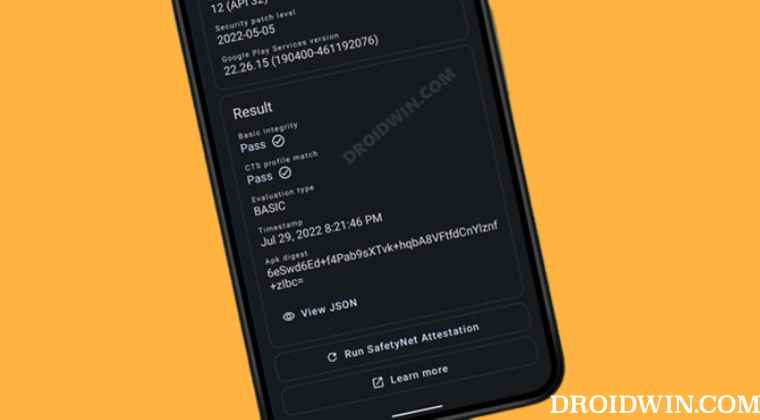
- You should now get Pass under both Basic Integrity and CTS Profile Match.
That’s it. these were the steps to pass SafetyNet on your rooted OnePlus 11. If you have any queries concerning the aforementioned steps, do let us know in the comments. We will get back to you with a solution at the earliest.
- How to Pass SafetyNet test after installing Xposed or EdXposed
- Fix Magisk Safetynet API Error: Detailed Guide
- How to Fix ctsProfile Mismatch Error on Rooted Android
- Bootloop after installing/updating Magisk: How to Fix
METHOD 2: Pass SafetyNet using Magisk Hide Props Config [OLD]
This is the lengthier of the two methods and involves spoofing the device’s fingerprint to one of the older devices that followed Basic Attestation and were easier to bypass.
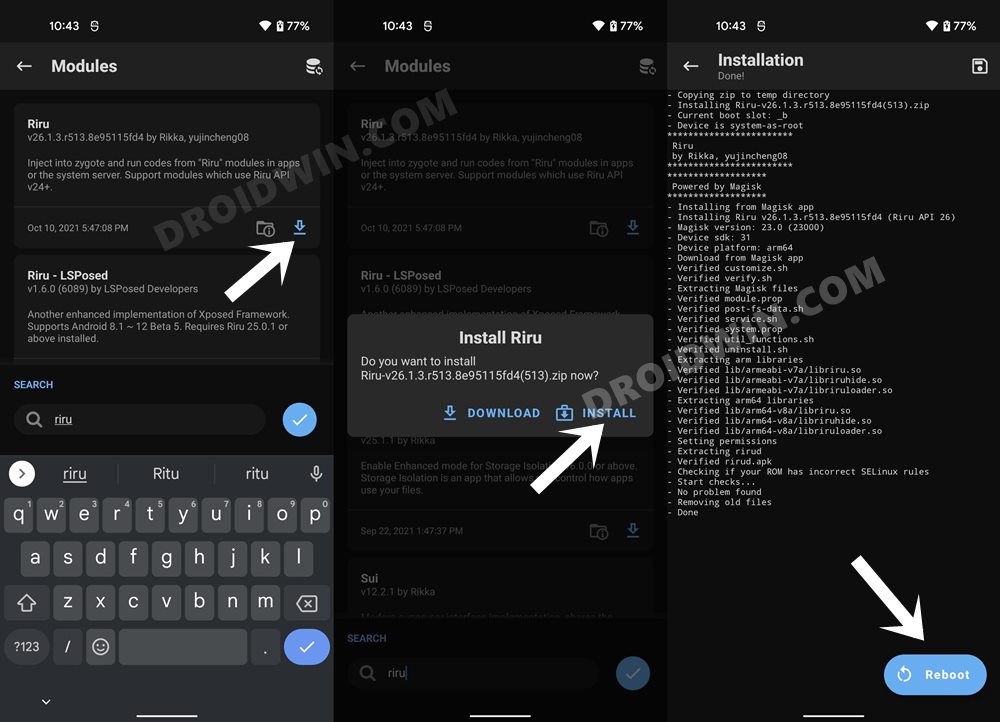
STEP 1: Install Riru Module on OnePlus 11
First off, you will have to install the Riru Module, which is a prerequisite for the SafetyNet Fix Module.
- Download the Riru Module from GitHub and transfer it to your device.
- Then launch the Magisk App and go to the Modules section.
- After that, tap on Install from Storage, select the module, and hit Install.
- Once done, tap on the Reboot button that appears at the bottom right.
STEP 2: Flash Universal SafetyNet Fix on OnePlus 11
Next up, you will have to flash the latest version of the USNF (Universal SafetyNet Fix) module via Magisk. So refer to the below steps to try it out:
- To begin with, download the USNF module and transfer it to your device: safetynet-fix-v2.2.0. [Check for Latest Version]
- Then install the Magisk App onto your device. As of now, it is recommended to install the Canary build.
- Now launch the Magisk App and go to the Modules section.
- Then tap on Install from storage, navigate to the safetynet fix module and select it.
- The flashing shall now begin and would take a few seconds. Once done, reboot your device for the module to be active.

STEP 3: Enforce Deny List and Enable Zygisk on OnePlus 11
Deny List is the new name for Magisk Hide. For the unaware, it is the feature through which you could hide root from various installed apps onto your device. So let’s first enable this Deny List and then configure it according to the requirement.
- Launch the Magisk App onto your device
- Then tap on the Settings icon situated at the top right.
- Now enable the toggle next to Zygisk and Enforce Deny List.
- Now restart your device for the changes to take place. Then launch Magisk and make sure it says YES next to Zygisk.
STEP 4: Configure Deny List on OnePlus 11
Deny List is the new name for Magisk Hide. For the unaware, it is the feature through which you could hide root from various installed apps onto your device. So let’s first enable this Deny List and then configure it according to the requirement.
- Under the Magisk Settings menu, tap on Configure DenyList.
- Now, select the desired user apps in order to hide root from them [optional].
- After that, tap on the overflow icon situated at the top right and select Show System App.
- Now checkmark Google Play Protect Services, Google Play Services, Google Play Store, and Google Service Framework.

STEP 5: Hide the Magisk App on OnePlus 11
Some apps not only check for the SafetyNet flag but also verify if the Magisk app is installed onto your device or not. Therefore, let’s disguise this app so that it re-installs itself with a different package name. Follow along.
- To begin with, launch the Magisk App on your device.
- Then tap on the gear icon situated at the top right to access its Settings menu.
- Then go to Hide the Magisk App option and let the feature do its job.
- Once done, it will ask whether you wish to have the app shortcut on the home screen.
- For ease of convenience, you may select Yes and then tap on the Add to Home Screen button.
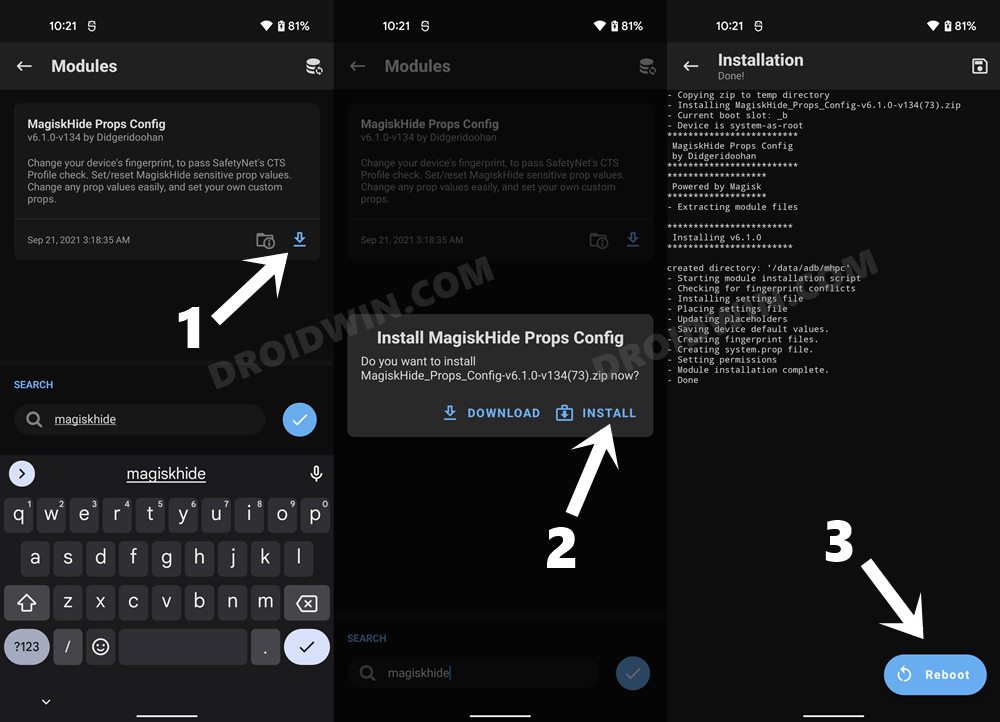
STEP 6: Install MagiskHide Props Config on OnePlus 11
- Download MagiskHide Props Config from GitHub/XDA and transfer it to your device.
- Then launch the Magisk App onto your device.
- After that, tap on Install from Storage, select the Module, and hit Install.
- Once the installation is complete, hit the Reboot button situated at the bottom right.
STEP 7: Force Basic Attestation on OnePlus 11
We will now be starting with the implementation of the BASIC attestation on top of the hardware-based so that it becomes easier to bypass. Here’s how it could be done:
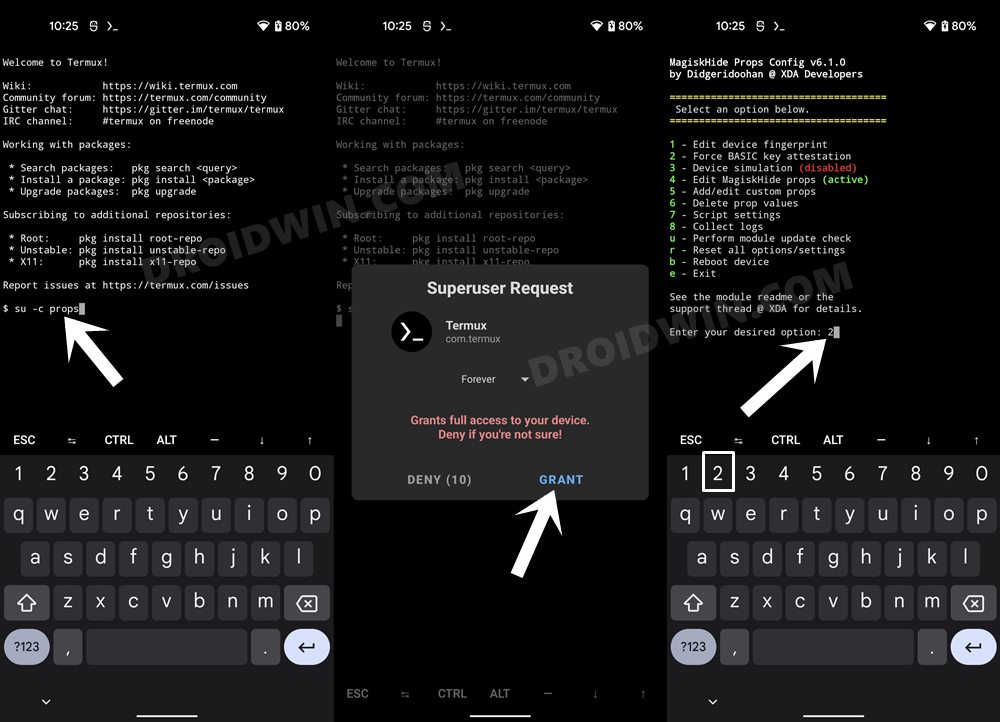
- First off, install any terminal emulator app on your device (such as the Termux app).
- Now launch it and type in the below command:
su -c props
- You will now get a Superuser Request, tap Grant.
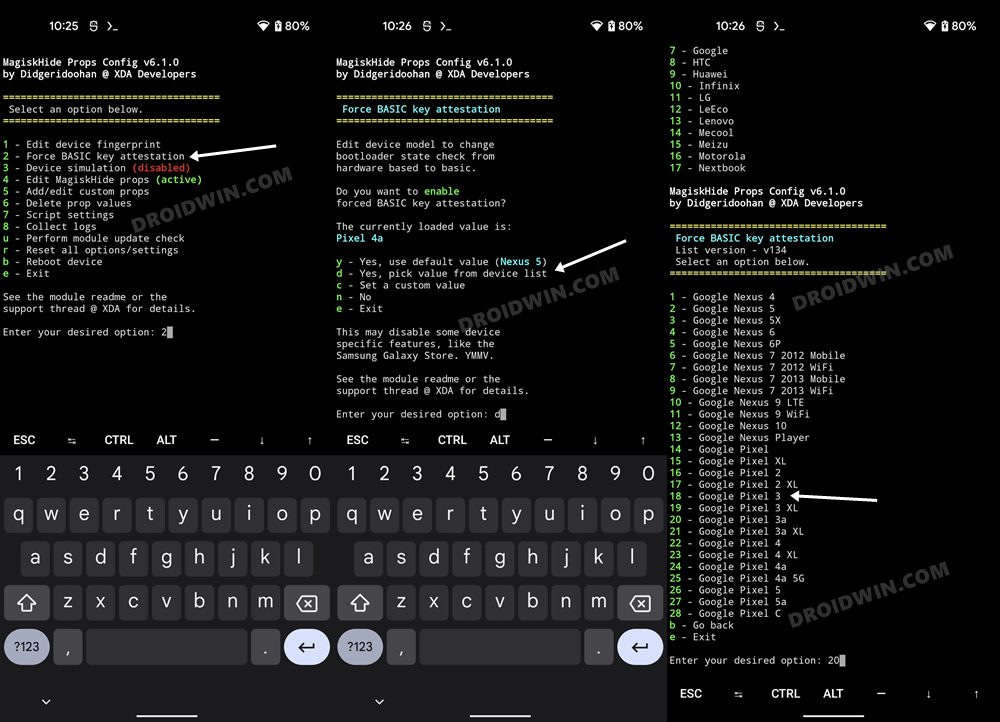
- It shall now launch the MagiskHide Props Config within the terminal itself. Type in 2 [Force BASIC Key Attestation] and hit Enter.
- This shall take you to the Force BASIC Key Attestation page. In my testing, Pixel 3 with Android 10 spelled out success. So let’s select that one only.
- So type in d [Yes, pick value from device list] and hit Enter. Then type in 7 [Google] and press Enter. After that, type 18 [Google Pixel 3] and hit Enter.
- It will now ask you to confirm the selected value, type y [YES], and hit Enter. Then type in 2 to select Android version 10.
- Finally, you will have to reboot the device. So type y [YES] and press Enter.

STEP 8: Delete Play Service and Play Store Data
- Head over to Settings > Apps > See All Apps and go to the Google Play Service app.
- Go to its Storage usage section and tap on Manage Space.
- Then tap on Clear All Data followed by OK in the confirmation dialog box.
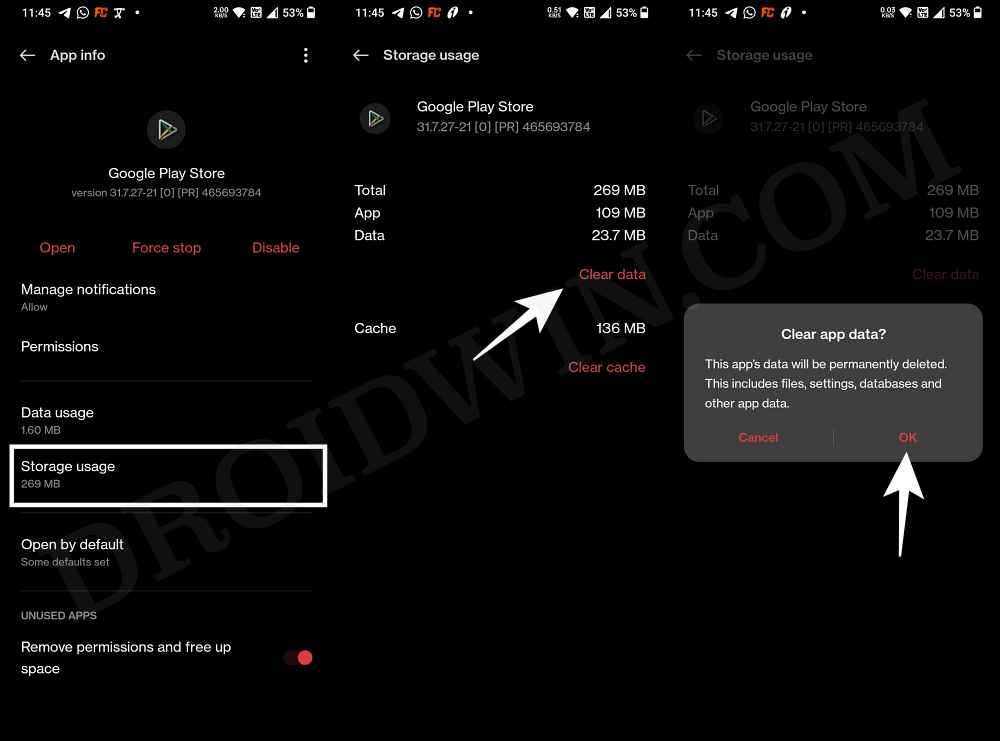
- Once that is done, go to the Google Play Store app’s Storage usage section.
- After that, tap on Clear Data followed by OK in the confirmation dialog box.
STEP 9: Check SafetyNet Result on Rooted OnePlus 11
- Download YASNAC from the Play Store and install it onto your device.
- Then launch the app and tap on Run SafetyNet Attestation.
- You should now get the Pass result under both the basicIntegrity and ctsProfile sections.
So with this, you have successfully passed the SafetyNet on your rooted OnePlus 11. If you have any queries concerning the aforementioned steps, do let us know in the comments. We will get back to you with a solution at the earliest.


