In this guide, we will show you the steps to fix MSM Tool unable to recognize the OnePlus 9 device and in turn, gives out the Sahara Connection Failed error. The OEM has always been among the front runners when it comes to custom development. Be it for flashing custom ROMs or installing a custom recovery like TWRP, there’s a lot to try out. Along the same lines, you could also gain administrative privileges by rooting the device via Magisk.
On the flip side though, these tweaks do come with a few risks as well. If you don’t perform it correctly or flash an incorrect binary, then your device might end up in a bootloop or softbrick. To fix that, you could easily flash the stock firmware via Fastboot Commands. But what if the device gets hard-bricked? Well, since these devices come with the underlying Qualcomm chipset, you could easily it’s Emergency Download Mode You may then flash the unbrick OPS firmware using the MSM Download Tool.
But that is easier said than done as you might occasionally get bugged with quite a few issues. Among them, the most concerning one is when the MSM Download tool is unable to identify the connected OnePlus device. If you are also currently getting bugged with this problem, then fret not. In this guide, we will show you the steps to fix the issue of MSM Tool unable to recognize OnePlus 9 and in turn, giving out the Sahara Connection Failed error.
Table of Contents
[FIX] MSM Tool unable to recognize OnePlus 9: Sahara Connection error
To fix this issue, you will have to use the Indian Version of the MSM Download Tool that has been made for the OnePlus 9 Pro. Yes, it is not a typo! You will have to flash the OnePlus 9 Pro firmware onto your OnePlus 9 device and that too of the Indian region. Once your device gets unbricked, it would be booted to the OnePlus 9 firmware only.
You could then flash your device’s region firmware via the Local Upgrade method and everything will be back as before. With this, you would have got a decent idea as to what we are about to do. So without any further ado, let’s get started with the steps to fix MSM Download Tool unable to recognize OnePlus 9 / Sahara Connection Failed error.
- Fix Sahara communication failed error in MSM Download Tool
- How to Fix Sahara Fail/QSaharaServer Fail/Process Fail Error in QFIL Tool
- Fix adb is not recognized as an internal or external command
- How to Fix Stuck in Param Preload error MSM Download Tool
STEP 1: Install Qualcomm HS-USB QDLoader 9008 Drivers
First and foremost, you would have to install the Qualcomm HS-USB QDLoader 9008 Drivers so that your PC is able to recognize the connected device in EDL Mode. As a result, your device will then be recognized as Qualcomm HS-USB QDLoader 9008 by the Device Manager.
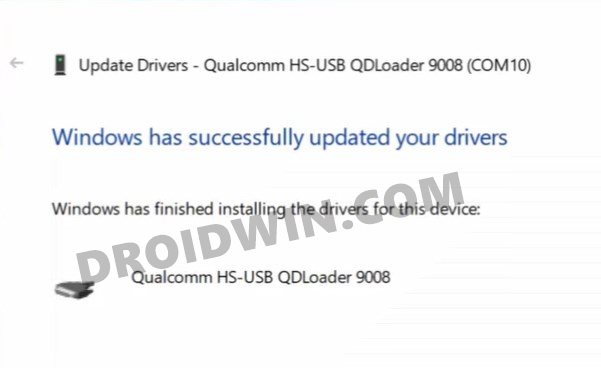
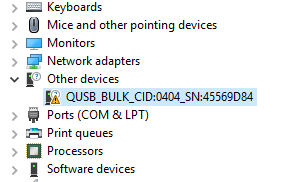
However, if you don’t install these drivers, then your PC wouldn’t be able to identify the connected device and the Device Manager would list pout the device as QHUSB_BULK. So refer to our guide to Download and Install Qualcomm HS-USB QDLoader 9008 Drivers.
STEP 2: Download MSM Download Tool
Next up, you will have to get hold of the MSM Download Tool for OnePlus 9 Pro Indian build. So download it from below [Credits: XDA Senior Member @mlgmxyysd]:
- Device/Region: LE2121 – India
- Download Link: Version 11.2.4.4
- Reference: XDA Source thread
STEP 3: Set Up the MSM Download Tool
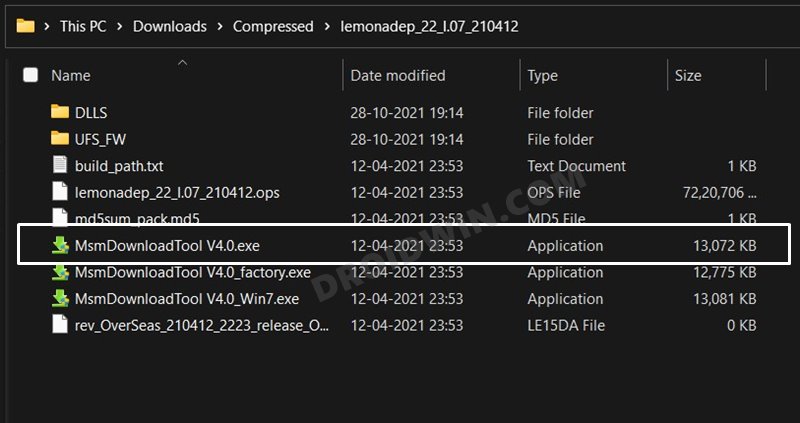
- To begin with, extract the downloaded MSM Download Took package.
- Then double-click on the MSMDownloadTool V4.0.exe file to launch the tool.

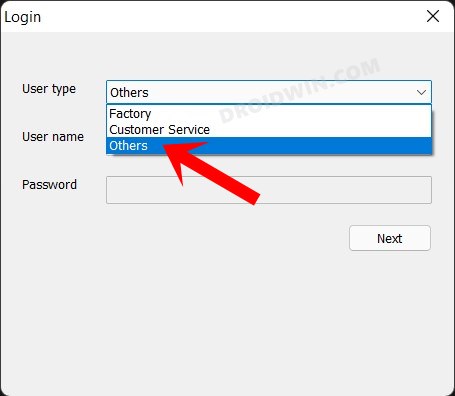
- In the first screen that appears, select User Type as Other and click Next.
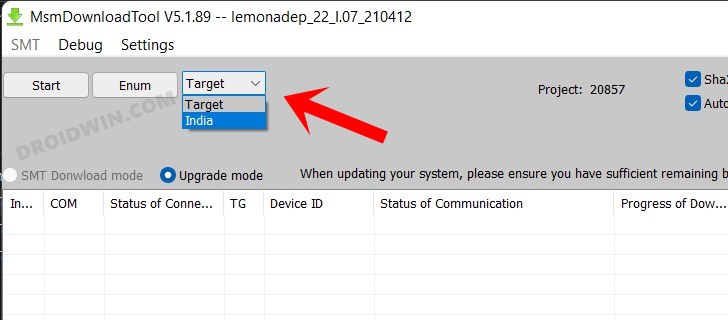
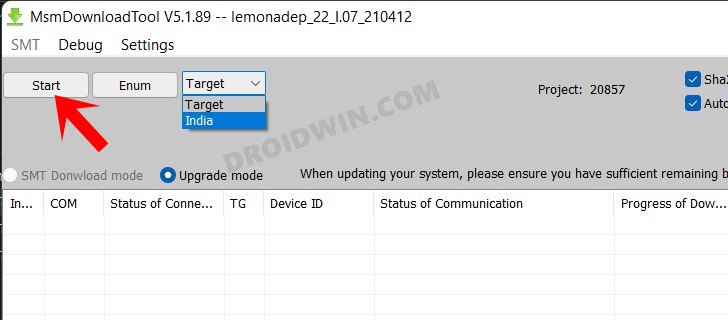
- Now click on the Target button and select Indian:
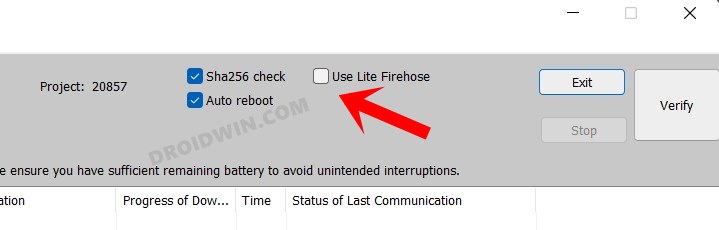
- After that, enable the Use Lite Firehose option as well [IMPORTANT].
STEP 4: Boot OnePlus 9 to EDL Mode
In most instances, OnePlus automatically boots to the EDL Mode as soon as it gets bricked. So let’s verify if that is the case with your device or not.
- Connect your device to the PC via the official USB Cable
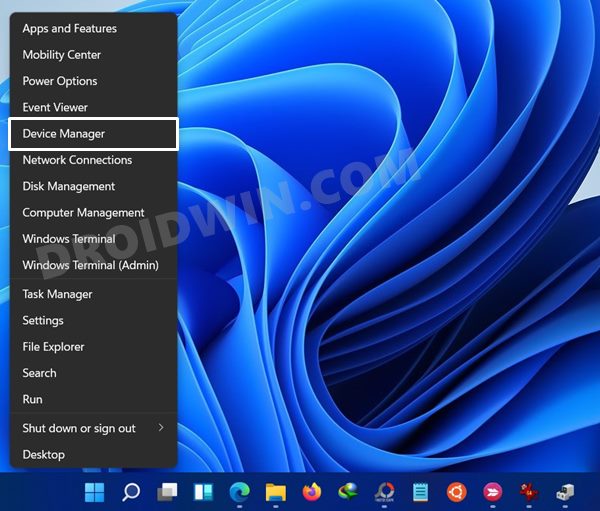
- Then right-click on the Start Menu and open Device Manager from the menu that appears.
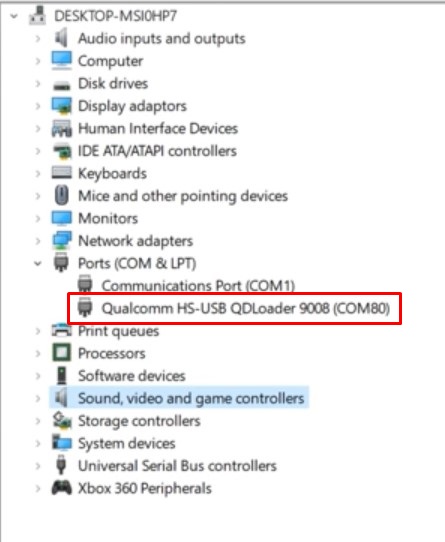
- Now expand either the Other Devices or Ports section and check out the name of your device.
- If it spells out Qualcomm HS-USB QDLoader 9008, then your device is already booted to EDL Mode.
- On the other hand, if it is listed as QHUSB_BULK then you will have to boot it to EDL Mode, as follows:
- To begin with, unplug the device from the PC and power it off.
- Then press the Volume Up and Down keys together and your device shall boot to EDL.
- Keeping both the volume keys pressed, connect the device to the PC via USB cable.
- Then release the Volume Keys and your device
STEP 5: Flash OnePlus 9 ‘Pro’ Unbrick Firmware via MSM Tool
- Make sure that the MSM Download Tool is ready, your device is booted to EDL Mode and connected to PC.
- If that’s well and good, then head over to the MSM Download Tool and hit the Start button.
- The flashing process will now start and could take up to 10 minutes.
- Once done, you shall be notified of the same and your device shall boot to the OS.
So these were the steps to fix the issue of MSM Tool unable to recognize OnePlus 9 and in turn, giving out the Sahara Connection Failed error. If you have any queries concerning the aforementioned steps, do let us know in the comments. We will get back to you with a solution at the earliest.
FAQ: Switch From OnePlus 9 Pro to OnePlus 9 Firmware
As of now, your OnePlus 9 device will have the Pro variant’s firmware installed. So let’s rectify it and flash your device’s firmware onto it. In this regard, there are two different approaches that you could take: Local Upgrade and TWRP. Both of them are listed below, refer to the one that you find easier to execute.
Via Local Upgrade
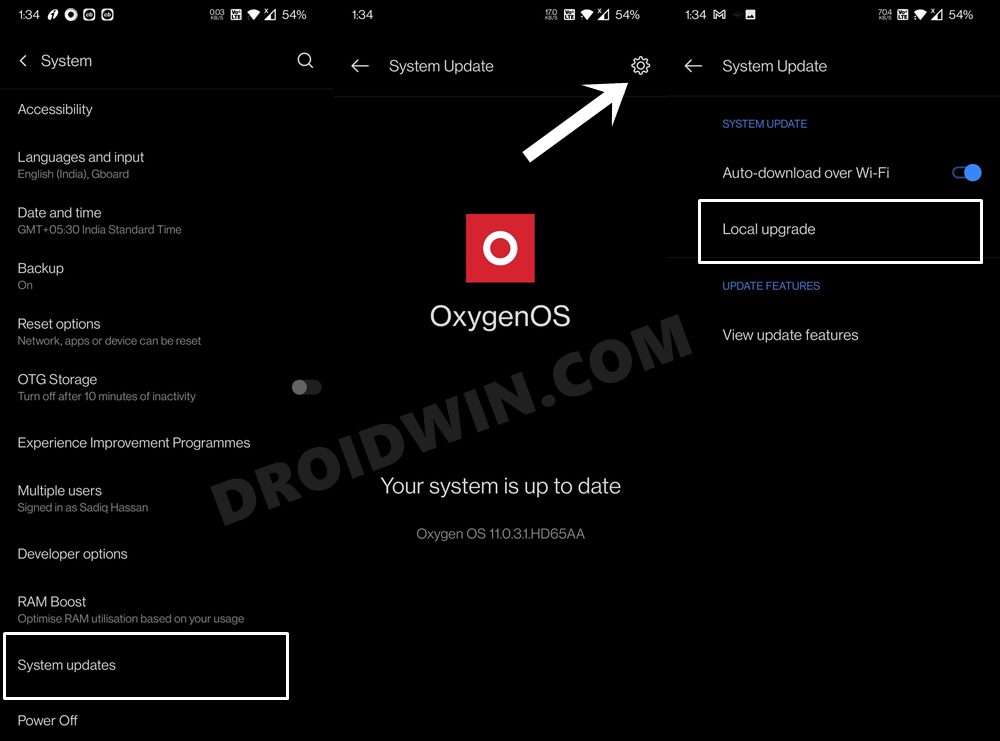
Since you could now access the OS, the easiest approach will be to download the latest stock firmware from the OnePlus site and then install it via the Local Upgrade option. (Settings > System > System Updates > Settings Icon > Local Upgrade).
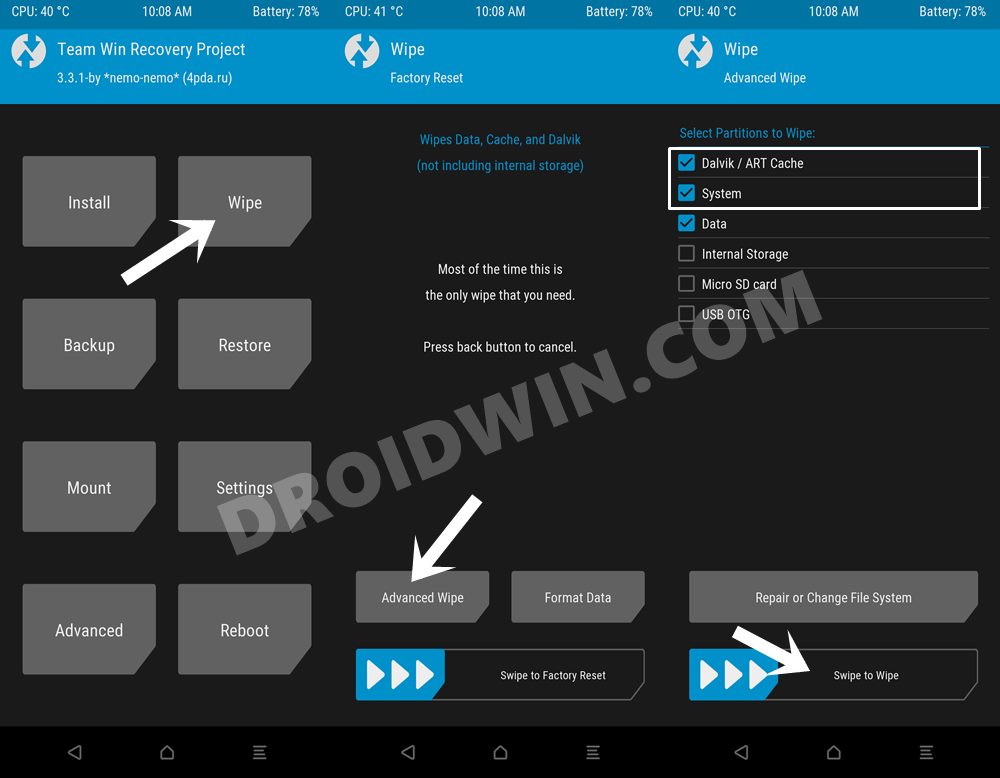
Via TWRP Recovery
- To begin with, download the firmware ZIP from the OnePlus site.
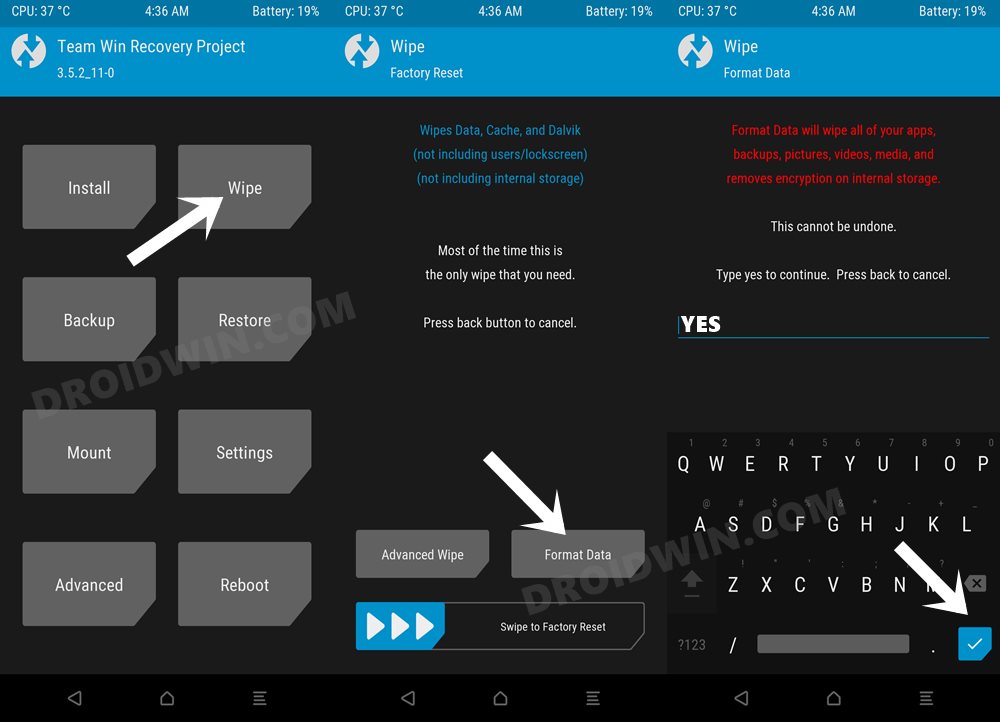
- Then boot your device to TWRP Recovery.
- Now go to Wipe and format the Data.
- After that, wipe the System and Dalvik partitions.
- Now transfer the firmware ZIP to your device.
- Go to Install and flash the ROM ZIP file.
As of now, we have wiped the system partition and flashed the ROM on your active partition, the inactive slot would still be having the OnePlus 9 Pro firmware installed. So let’s now deal with this.
- Once the ROM has been flashed, boot your device to the OS.
- You will now get an update for your device corresponding to your region. So download and install it.
- It will now be installed to the inactive partition (which earlier had the Indian ROM installed).
- So reboot your device to switch slots.
- Your device will now boot to that slot in which you had installed the latest firmware for your region.
With this, we round off the guide on how you could fix the issue of MSM Tool unable to recognize the OnePlus 9 as well as the Sahara Connection Failed error. All your quires are welcomed in the comments below.


graindart
After India Pro is working on your phone, if you need to go back to Tmobile stock for the OP 9, see the following link:
https://forum.xda-developers.com/t/help-returning-oneplus-9-tmobile-back-to-stock.4408109/