In this guide, we will show you the steps to downgrade your Motorola Moto G Pure from Android 12 to Android 11. A few Motorola devices have just been blessed with the twelfth iteration of the OS. As a result of which, they are about to welcome a slew of noteworthy features, among them, it’s the new material You theming engine that is likely to take away all the limelight. However, it seems quite a few bugs have managed to creep in as well.
Numerous Moto G Pure users who have installed the latest Android 12 update have reported a plethora of issues related to mobile network connectivity. SIM card not being recognized, no 5G network, and no audio during calls are just some of the crucial functionalities that aren’t working along the expected lines. If you are also getting bugged with these issues, then as of now, your best bet is to downgrade your Motorola Moto G Pure from Android 12 to Android 11. And in this guide, we will show you how to do just that. Follow along.
Table of Contents
Motorola Moto G Pure: Downgrade from Android 12 to Android 11

The process will wipe off all the data from your device, so take a complete device backup beforehand. Droidwin and its members wouldn’t be held responsible in case of a thermonuclear war, your alarm doesn’t wake you up, or if anything happens to your device and data by performing the below steps.
STEP 1: Install Android SDK
First and foremost, you will have to install the Android SDK Platform Tools on your PC. This is the official ADB and Fastboot binary provided by Google and is the only recommended one. So download it and then extract it to any convenient location on your PC. Doing so will give you the platform-tools folder, which will be used throughout this guide.

STEP 2: Download Motorola Moto G Pure Stock Firmware
Next up, get hold of your device’s stock firmware corresponding to your region from the Lolinet Servers. Once downloaded, extract it inside the platform-tools folder.

STEP 3: Enable USB Debugging and OEM Unlocking
Next up, you will have to enable USB Debugging and OEM Unlocking on your device. The former will make your device recognizable by the PC in ADB mode. This will then allow you to boot your device to Fastboot Mode. On the other hand, OEM Unlocking is required to carry out the bootloader unlocking process.

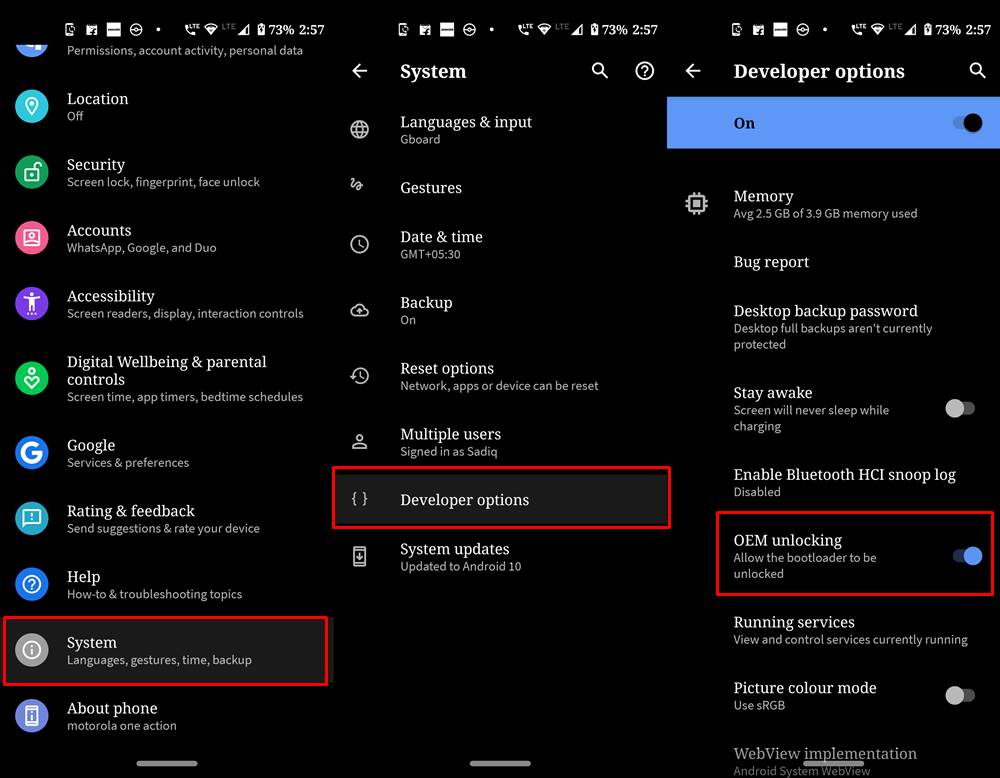
So head over to Settings > About Phone > Tap on Build Number 7 times > Go back to Settings > System > Advanced > Developer Options > Enable USB Debugging and OEM Unlocking.
STEP 4: Unlock Bootloader on Moto G Pure
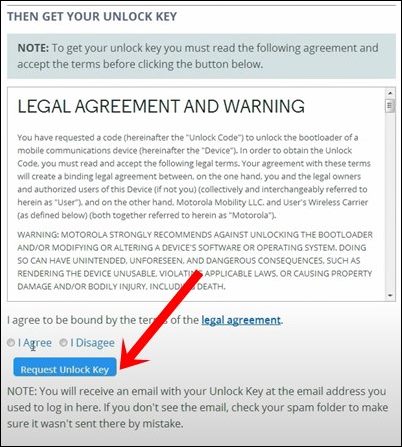
Next up, you will also have to unlock the device’s bootloader in order to downgrade your Motorola Moto G Pure from Android 12 to Android 11. Do keep in mind that doing so will wipe off all the data from your device and could nullify its warranty as well. So if that’s all well and good, then please refer to our detailed guide on How to Unlock the Bootloader on any Motorola Device.

STEP 5: Boot to Fastboot Mode
- Connect your device to the PC via a USB cable. Make sure USB Debugging is enabled.
- Then head over to the platform-tools folder, type in CMD in the address bar, and hit Enter. This will launch the Command Prompt.

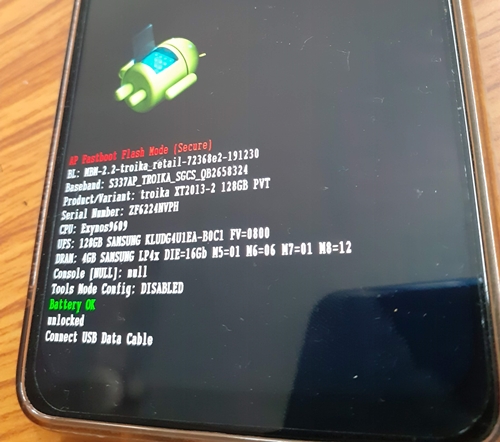
- After that, type in the following command in the CMD window to boot your device to Fastboot Mode
adb reboot bootloader

- To verify the Fastboot connection, type in the below command and you should get back the device ID.
fastboot devices
STEP 6: Downgrade Motorola Moto G Pure to Android 11 via Fastboot Commands
Now execute each of the below commands in the CMD window that is opened in the platform-tools folder. Make sure to execute one command at a time. Moroever, if you get an error, then don’t leave the process midway, rather execute the rest of the commands till the end. And as soon as you execute the last command, your Motorola Moto G Pure will automatically boot to the downgraded Android 11 OS.
fastboot oem fb_mode_set
fastboot flash gpt PGPT
fastboot flash preloader preloader.img
fastboot flash lk_a lk.img
fastboot flash tee_a tee.img
fastboot flash sspm_a sspm_a.img
fastboot flash dtbo_a dtbo.img
fastboot flash logo_a logo.bin
fastboot flash spmfw_a spmfw.img
fastboot flash scp_a scp.img
fastboot flash vbmeta_a vbmeta.img
fastboot flash vbmeta_system_a vbmeta_system.img
fastboot flash md1img_a md1img.img
fastboot flash gz_a gz.img
fastboot flash boot_a boot.img
fastboot flash vendor_boot vendor_boot.img
fastboot flash super super.img_sparsechunk.0
fastboot flash super super.img_sparsechunk.1
fastboot flash super super.img_sparsechunk.2
fastboot flash super super.img_sparsechunk.3
fastboot flash super super.img_sparsechunk.4
fastboot flash super super.img_sparsechunk.5
fastboot flash super super.img_sparsechunk.6
fastboot flash super super.img_sparsechunk.7
fastboot flash super super.img_sparsechunk.8
fastboot flash super super.img_sparsechunk.9
fastboot flash super super.img_sparsechunk.10
fastboot flash super super.img_sparsechunk.11
fastboot flash super super.img_sparsechunk.12
fastboot flash super super.img_sparsechunk.13
fastboot flash super super.img_sparsechunk.14
fastboot flash super super.img_sparsechunk.15
fastboot flash super super.img_sparsechunk.16
fastboot flash super super.img_sparsechunk.17
fastboot flash super super.img_sparsechunk.18
fastboot flash super super.img_sparsechunk.19
fastboot flash super super.img_sparsechunk.20
fastboot flash super super.img_sparsechunk.21
fastboot flash super super.img_sparsechunk.22
fastboot flash super super.img_sparsechunk.23
fastboot flash super super.img_sparsechunk.24
fastboot flash super super.img_sparsechunk.25
fastboot flash super super.img_sparsechunk.26
fastboot flash super super.img_sparsechunk.27
fastboot flash super super.img_sparsechunk.28
fastboot flash super super.img_sparsechunk.29
fastboot flash super super.img_sparsechunk.30
fastboot flash super super.img_sparsechunk.31
fastboot flash super super.img_sparsechunk.32
fastboot flash super super.img_sparsechunk.33
fastboot flash super super.img_sparsechunk.34
fastboot erase nvdata
fastboot erase userdata
fastboot erase metadata
fastboot oem fb_mode_clear
fastboot reboot
That’s it. These were the steps to downgrade Motorola Moto G Pure from Android 12 to Android 11 via Fastboot commands. It’s really a sad state of affairs that we might have to end up voiding the device’s warranty and factory resetting the device to rectify an issue that has been caused by an officially released update. Anyways, this is how things stand at this moment, and we don’t have much say in that. So on that note, we round off this guide. If you have any queries, then do let us know in the comments section below.


Beard
Hey there. I’m on this website “https://mirrors.lolinet.com/firmware/motorola/cofud/official/” trying to find out which firmware to download to rollback to Android 11. I know I need XT2173-3 but can’t figure out what which Q3-26-8X-X to get. I don’t see anything like that string on my bootloader screen.
Kim Wilson
In STEP 2: Download Motorola Moto G Pure Stock Firmware
When I look at my phone’s model number it has: XT2163-4
Is that what should be in the name of the zip file when I download it?
I saw the image you have in that section is the same as mine except TMO is in the name, which makes me wonder if that firmware is for T-Mobile users.
I started to download another under ATT since our phones are on the AT&T network. But it’s name is this:
XT2163-6_ELLIS_ATT_11_RRHS31.Q3-46-110-17_subsidy-ATT_RSU_regulatory-DEFAULT_CFC.xml.zip
Which is probably a higher model version that mine.
I’m not sure which file I should download. Can you help me with this? Thank you!