In this guide, we will show you the steps to install TWRP Recovery and then root your Redmi Note 8 Pro device via Magisk. Redmi series have always known to be an active participant in custom development. Be it the flashing of binaries or trying out a plethora of mods, the possibilities stand endless. Right after you have unlocked the device’s bootloader, you are in a position to replace the device’s stock recovery with a custom one.
In other words, you could easily install the TWRP Recovery onto your Xiaomi device. Likewise, you could even gain access to the system partition. To do so, there are two different approaches. The first one is a shorter approach and just involves flashing the Magisk ZIP via TWRP. The second method on the other hand requires you to patch the stock boot.img via Magisk and then flash it via Fastboot. No matter which method you end up choosing, the end result is that you will attain administrative privileges.
This then translates to your ability to try out Magisk Modules, Substratum Themes, Xposed Frameworks, among others. So if you are looking for all these features to make a permanent abode onto your device, then you have come to the right place. In this guide, we will show you the steps to install TWRP Recovery and then root your Redmi Note 8 Pro device via Magisk. Without further ado, let’s get started.
- How to Run ADB Fastboot Commands directly on Android without Root
- How to Flash Custom ROMs in Android using Web Browser
- Flash Custom ROM After Wiping Internal Storage Without SD Card or OTG
- How to Flash a Custom ROM without TWRP Recovery
Table of Contents
How to Install TWRP Recovery and Root Redmi Note 8 Pro
While you are pretty much aware of the perks of this method, there are a few risks that you need to keep in mind as well. First and foremost, as soon as you unlock the bootloader, the device’s warranty will become null and void. Likewise, it will also erase all the data from your device. Upon rooting, banking apps like Google Pay might not function [though it could be fixed by hiding root: How to Pass Magisk SafetyNet on Rooted Android].
Furthermore, WideVine L1 will be degraded to L3, hence apps like Netflix and Hulu wouldn’t be able to play videos in HD. If that’s all well and good, then let’s get on with the steps to install TWRP Recovery and root Redmi Note 8 Pro via Magisk. Droidwin and its members wouldn’t be held responsible in case of a thermonuclear war, your alarm doesn’t wake you up, or if anything happens to your device and data by performing the below steps.
- How to Bypass Xiaomi Account Verification via Mi Unlock Tool
- Unbrick Redmi Note 7 | Note 8 | Note 9 Series: The Fix?
- Fix Mi Account Authorization | Unbrick Xiaomi | EDL Mode?
- Download Patched Firehose File (prog_emmc_firehose.mbn) for 600+ Android Devices
STEP 1: Enable USB Debugging and OEM Unlock
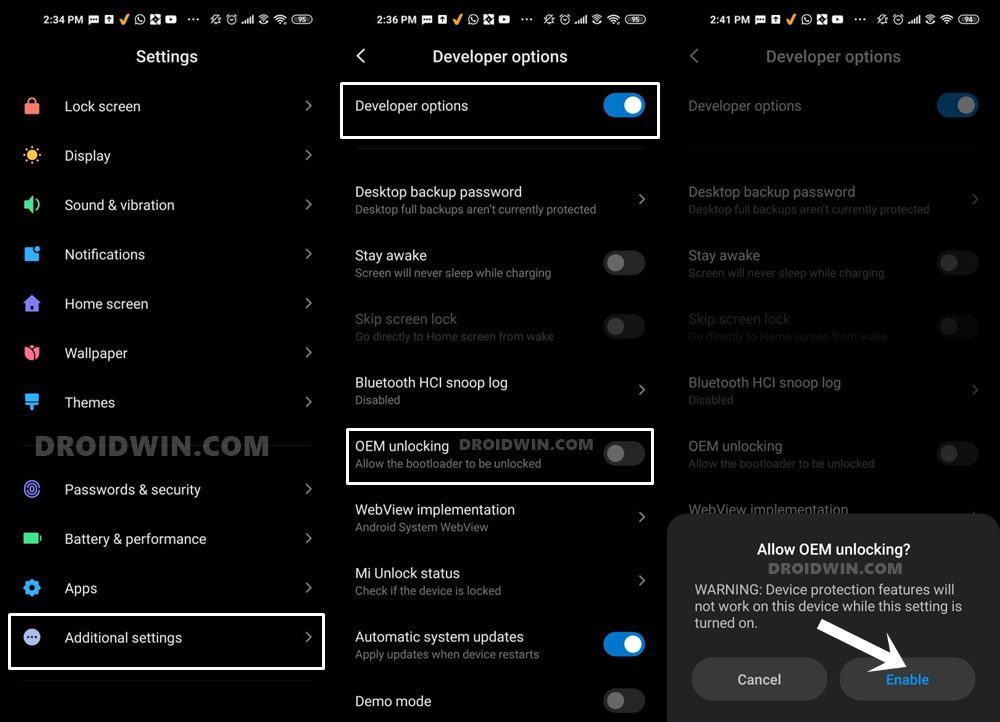
You will have to enable USB Debugging so that your device gets recognized by your PC in ADB Mode. But why do you need ADB? Well, it’s because we will be using this ADB mode to boot your device to Fastboot. On the other hand, OEM Unlock is needed to be enabled so that you are able to unlock the device’s bootloader. So head over to Settings > About Phone > Tap on Build Number 7 times > Go back to Settings > System > Advanced > Developer Options > Enable USB Debugging and OEM Unlock.
STEP 2: Unlock Bootloader on Redmi Note 8 Pro
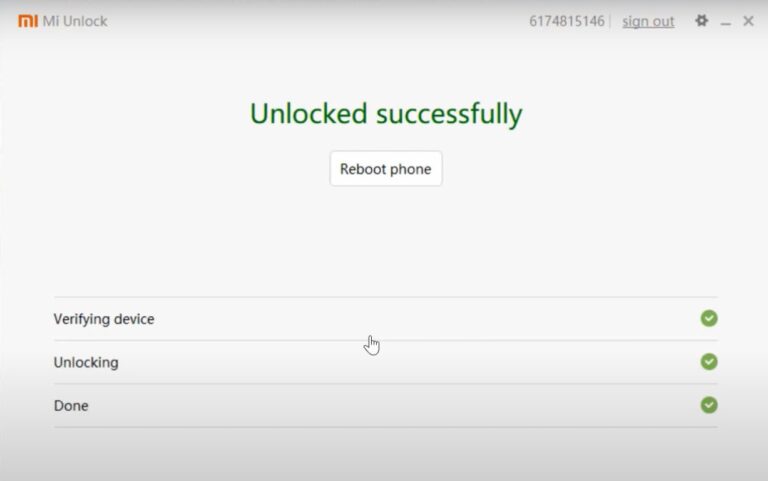
To begin with, you will have to unlock the bootloader on your device. For that, you will have to enable OEM Unlocking and then boot your device to Fastboot. Then connect it to PC via USB cable, launch Mi Unlock Tool, and click Unlock. Here are the detailed instructions for the same: How to Unlock Bootloader on any Xiaomi Device.
STEP 3: Boot Redmi Note 8 Pro to Fastboot Mode
You will now have to boot your device to Fastboot Mode. It is in this mode that you will be able to install TWRP and root your Redmi Note 8 Pro device via Magisk.

- To begin with, install Android SDK Platform Tools on your PC. This is the official ADB and Fastboot binary provided by Google. So download it and then extract it to any convenient location on your PC.
- Now connect your device to the PC via USB cable. Make sure USB Debugging is enabled.
- Then head over to the platform-tools folder, type in CMD in the address bar, and hit Enter. This will launch the Command Prompt.
- Type in the following command in the CMD window:
adb reboot bootloader
- You should now see the Mi bunny logo with the Fastboot text underneath. This indicates that the device has been successfully booted to the Fastboot Mode.
STEP 4: Install TWRP Recovery and Root Redmi Note 8 Pro
There are two different builds of TWRP. The first one is the official version whereas the second one is the unofficial build. Both have different flashing instructions. Please go through both these methods beforehand and then only decide which one you need to settle with. I have explained both these methods in detail below.
Furthermore, this device uses the Android Verified Boot Image, hence we will have to disable it before flashing the TWRP. This needs to be done for both methods- whether you are going ahead with the official or unofficial build. The instructions for the same are given below in their respective sections. Follow along.
STEP 4A: Root Redmi Note 8 Pro via Official TWRP
The below instructions are listed under separate sections for ease of understanding. Make sure to follow in the exact same sequence as mentioned below.
Disabling VBMeta
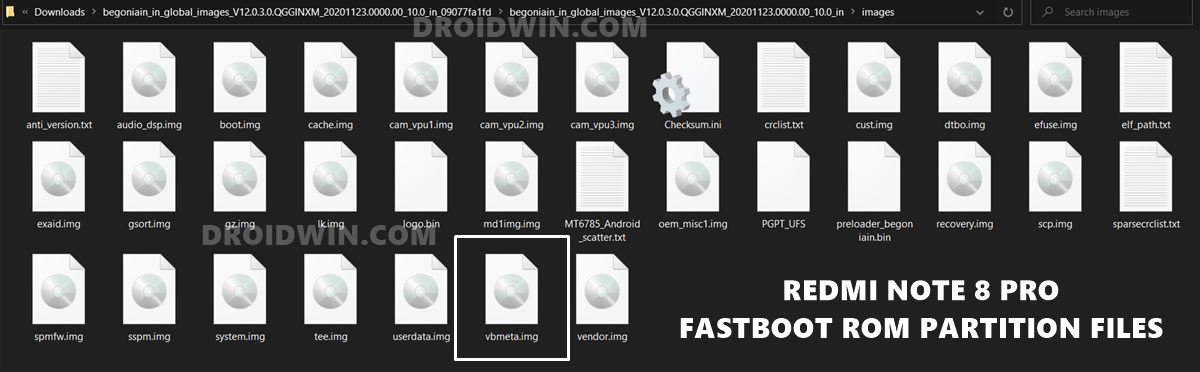
To begin with, download the stock firmware [Fastboot ROM] corresponding to the build number that is currently installed onto your device. This is needed so that we could get the stock vbmeta.img file which we will be using to disable vbmeta.
- So download the ROM that corresponds to your build number and extract it to any convenient location on your PC.
- Then go to the ROM’s Images folder and copy the vbmeta.img file.

- Now transfer this vbmeta.img to the platform-tools folder.
- Inside that same folder address bar, type in CMD and hit Enter. This will launch the CMD window.
- With your device booted to Fastboot, connect it to the PC via USB cable.
- Now type in the below command in the CMD window to disable VBMeta:
fastboot --disable-verity --disable-verification flash vbmeta vbmeta.img

That’s it. AVB is now disabled on your device. You may now install the TWRP Recovery and root your Redmi Note 8 Pro device.
Installing official TWRP Recovery on Redmi Note 8
- Talking about TWRP Installation, download the official build of TWRP for your device: twrp-3.5.0_9-0-begonia.img
- Now transfer this recovery file to the platform-tools folder and rename it to twrp. Hence the complete name will be twrp.img
- Finally, execute the below command to flash TWRP onto the recovery partition of your device:
fastboot flash recovery twrp.img
- Now press the Power + Vol. Up button together. As soon as your device boots up, leave the Power button but keep pressing the Vol. Up key until you are booted to TWRP.
With this, the TWRP Recovery has been permanently installed onto your device, you may now proceed ahead to root it via Magisk. But first, let’s decrypt the data partition [this will wipe off all the data].
Decrypt Data Partition via TWRP
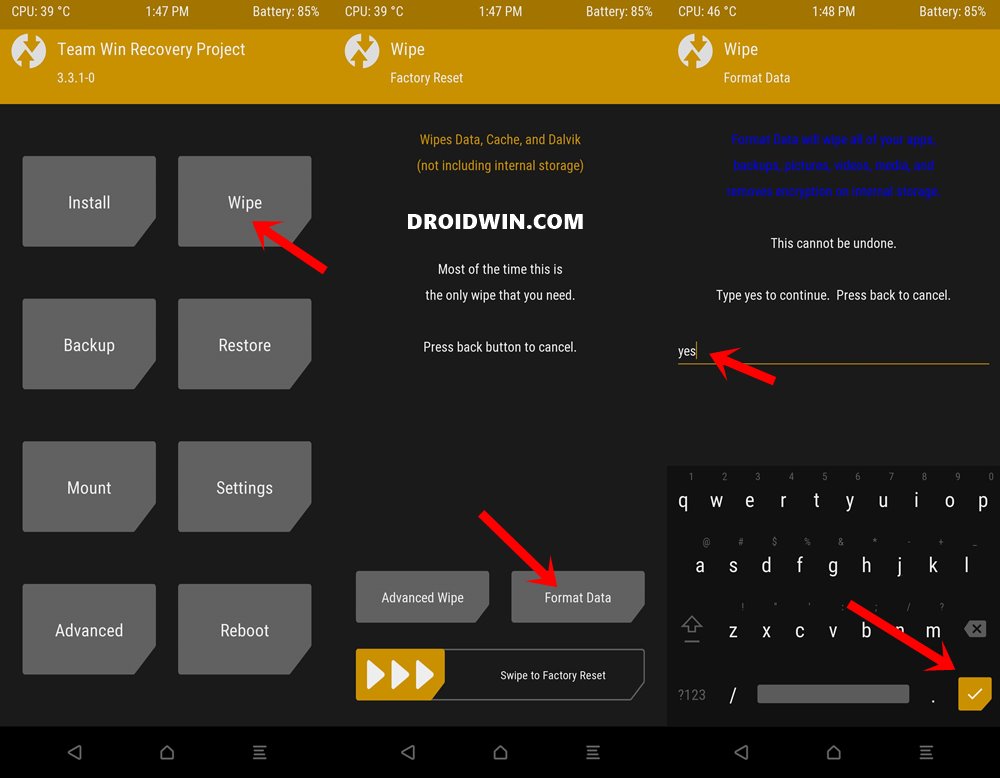
- So go to Wipe and select Format Data. Type in YES in the space provided and tap on the checkmark situated at the bottom right.
- When that is done, download the Magisk Installer ZIP file and the Disable_DM-Verity ZIP.
- Now transfer both these files to your device. You may refer to our guide on how to do so: How To Transfer or Install Files via TWRP Recovery [3 Methods].
Root via Official TWRP and Magisk
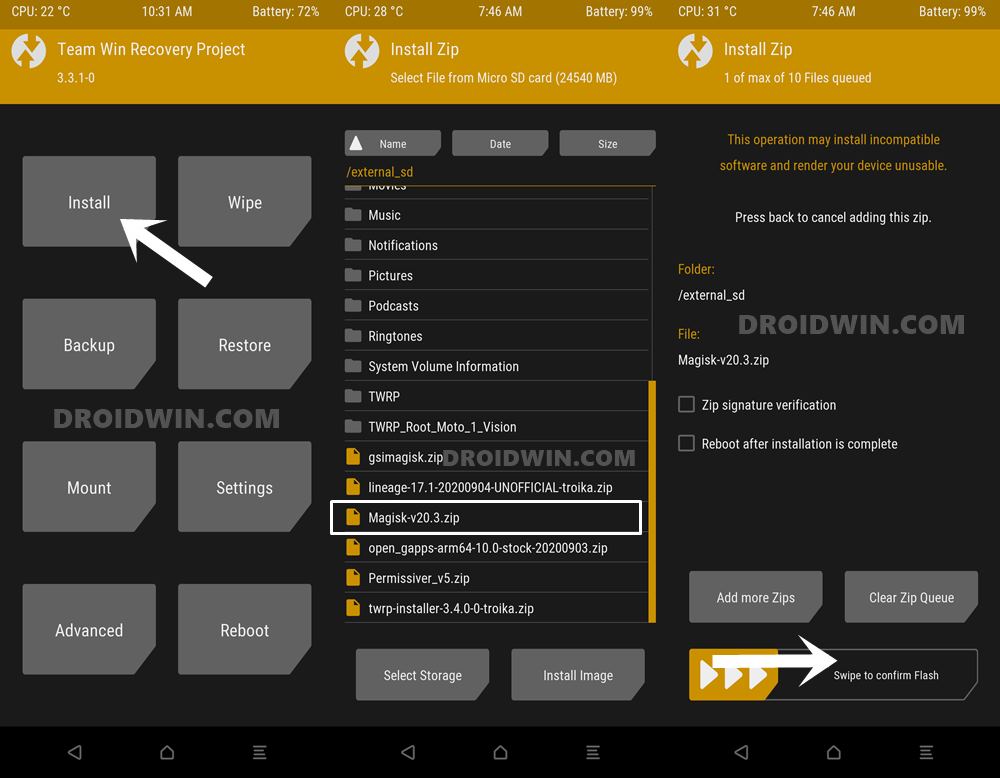
- Once done, go to Install, select the Magisk ZIP file and perform a right swipe to flash it.
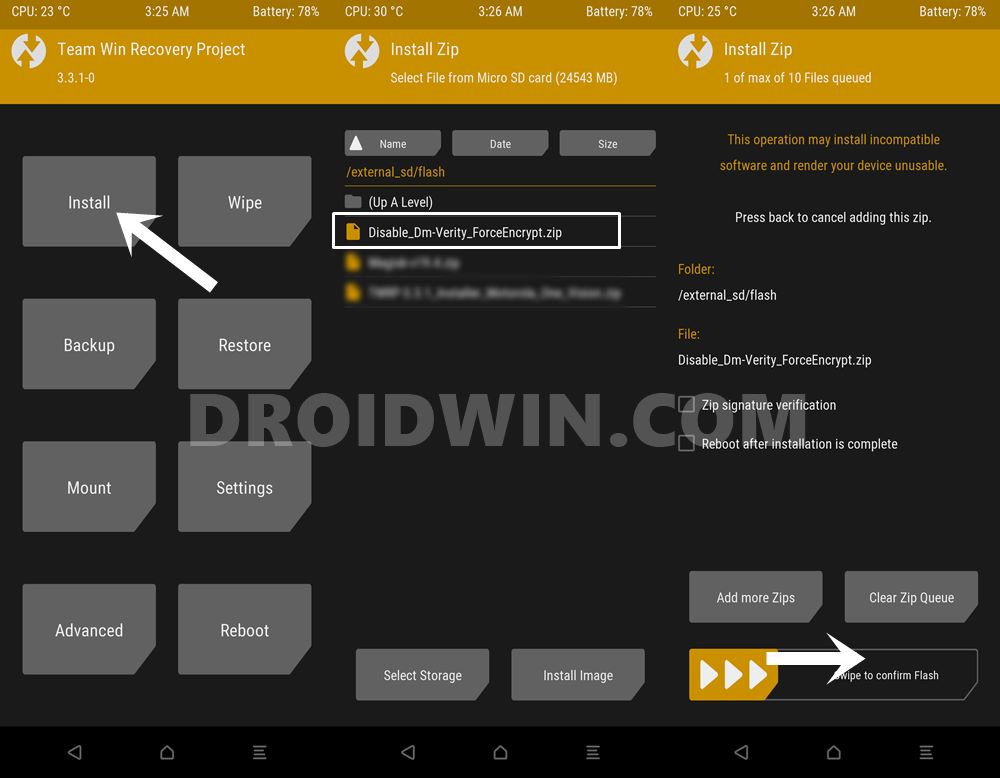
- Next up, go to Install, select the Disable_DM-Verity ZIP file and perform a right swipe to flash it as well.
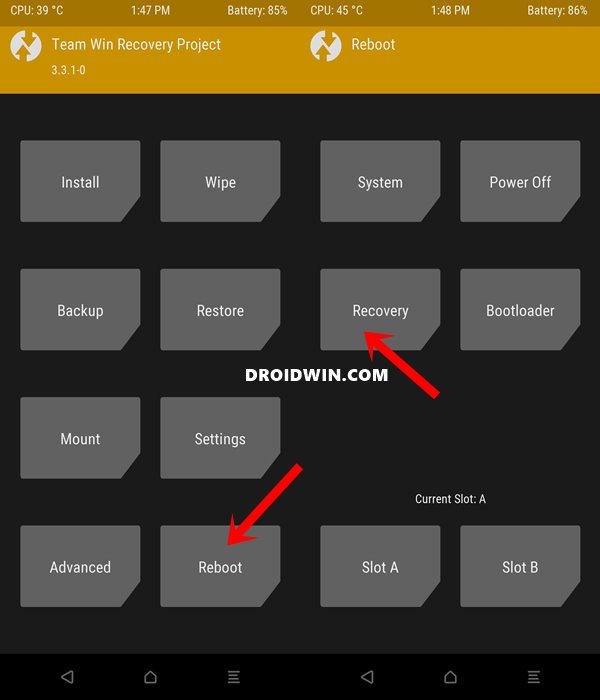
- When that is done, reboot to TWRP via Reboot > Recovery.
- Once it reboots to TWRP, you may now reboot to the OS via Reboot > System.
With this, we conclude the guide on how to root Redmi Note 8 Pro via official TWRP Recovery. Let’s now check out the steps to do so via unofficial TWRP.
STEP 4B: Root Redmi Note 8 Pro via Unofficial TWRP
As before, the below instructions are listed under separate sections for ease of understanding. Follow in the exact same sequence as mentioned.
Install Unofficial TWRP
- Download the unofficial TWRP Recovery for your device: twrp.img. [Credits: XDA Senior Member pritish1998].
- Transfer it to the platform-tools folder on your PC.
- Now connect your device to PC via USB cable (make sure it is booted to Fastboot)
- Inside the platform-tools folder, type in CMD in its address bar and hit Enter. This will launch the Command Prompt.
- Type in the below command in this CMD window to flash the recovery to the recovery partition
fastboot flash recovery twrp.img
- Now press the Power + Vol. Up button together. As soon as your device boots up, leave the Power button but keep pressing the Vol. Up key until you are booted to TWRP.
With this, the TWRP Recovery has been installed onto your Redmi Note 8 Pro. But before you proceed with rooting, you will have to disable VBMeta, which could be done as follows:
Disable VBMeta via TWRP
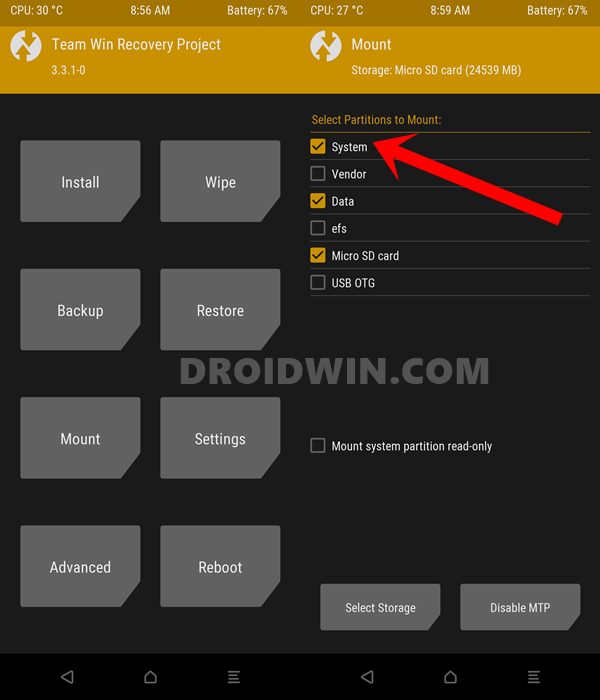
- From the TWRP home screen, go to Mount and enable System.
- Now go to Advanced and select File Manager. Then go to the system_root folder > system and delete “recovery-from-boot.p” from there.
- Once that is done, again go to Advanced, and this time Select “Close AVB2.0” and perform a right swipe to confirm it.

Root using Unofficial TWRP and Magisk
- When that is done, go back and tap on Install Root. It will install Magisk v19.4 automatically.
- You may update it to a newer build later on via this guide: How to Update Magisk ZIP and Magisk Manager.
- Anyways, once Magisk is flashed, go to Reboot and select Recovery. Your device will boot to TWRP.
- You may now reboot to the OS via Reboot > System. That’s it. Your device stands rooted via unofficial TWRP.
So this was all from this guide on how to install TWRP Recovery and root Redmi Note 8 Pro via Magisk. We have shared the instructions via both the official as well as the unofficial TWRP. Do let us know in the comments which one you ultimately settled for.
Fixing Bootloop or Bricked Issues in Redmi Note 8 Pro
This device has been among the riskiest ones to deal with if we talk from the enthusiast’s point of view. While you could still fix bootloop or soft brick by flashing stock firmware via Fastboot: How to Unbrick Redmi Note 8 Pro via Fastboot Commands. But this rule didn’t apply to hard brick. For that, you needed to boot your device to Download Mode and then flash the firmware via SP Flash Tool “after having an authorized account”.
So I wasn’t covering this guide until there was a way to bypass this restriction. And now, that exploit is finally live! You may now flash the firmware onto your hard-bricked Note 8 Pro without requiring any authorizations. Refer to our comprehensive guide to know more: Bypass MediaTek SP Flash Tool SLA DAA Authentication. Apart from that, if you have any other queries relating to installing TWRP or rooting Redmi Note 8 Pro, do let us know in the comments section below.


Agustin C
I need help. I’ve tried this a lot of times, but the result still the same. I have a RN8Pro (Begonia), I’ve followed this guide step by step, but when I try to boot to TWRP the phone just keep rebooting as long as I keep the VolUp key pressed. The moment I release VolUp, it reboots again and boots directly to Android. I’ve flashed the vmeta.img from the original Begonia Global 12.5.3 ROM then flashed TWRP 3.5.1_9 (Begonia) then pressed Pwr+VolUp, and still got this same result. I’ve bootloader unlocked, developer opts On, adb drivers and all that’s required.
Things I’ve tried:
– Used vmeta.img of CorvusOS 14 (Begonia) to try disable AVB unsucessfully
– Changed USB port from USB 3.0 to 2.0
– Used original and generic USB cable
– Tried to flash twrp.img to boot using “fastboot flash boot twrp.img” but this makes the phone to enter a bootloop, so then I flashed boot.img from original Begonia ROM
– Used Odin3, but doesn’t recognize my phone
– Reinstalled ADB drivers, re-downloaded “platform-tools” from original source
Basically I’m stuck trying to rewrite stock recovery with TWRP, and it seems that when I try to flash a new recovery it keeps getting back to stock miui recovery, even if I reboot from bootloader directly using Pwr+VolUp. Any help will be welcome.