In this tutorial, we will show you how to install the TWRP Recovery and root your Motorola One Action. Apart from Nokia, Motorola seems to be the only one in line actively producing the Android One devices (after the retirement of Xiaomi’s Mi A series). In this regard, the Motorola One Action is among the most feature enriched budget device that you could get your hands on. The 6.3-inch screen has a 1080 x 2520 pixel resolution and a slightly awkward 21:9 aspect ratio.
Under the hood, you get an octa-core Exynos 9606 chipset (yes, Samsung isn’t the only one with Exynos) and Mali-G72 MP3 GPU. It comes in a single variant- 128GB 4GB RAM with expandable storage support. The triple rear camera (12+16+5MP) and a single 12MP camera could be called decent at its best. To support all these features, you get a 3500 mAh battery.
The only issue one could recall with this device is its unresponsive touch issues (FIXED!), especially while it is charging. Anyways, while the device offers value for money, but the specs sheet is just one aspect. You could also get your hands on a plethora of custom developments, and in this guide, we will be sharing just that. So without further ado, here are all the required steps to install TWRP Recovery and root the Motorola One Action.
A/B Partition Guides
- [GUIDE] Flash ROMs/Magisk/TWRP/Kernels on A/B Partition Devices
- How to Flash Various Files in A/B Partition Devices
- Install Custom ROMs on any Android Device- Includes A/B Partition
- How to Fix FAILED (remote: unknown command) Error
Table of Contents
How to Install TWRP Recovery and Root Motorola One Action
Most of our readers might already be aware of the perks of installing the TWRP Recovery and gaining administrative privileges via root. So we wouldn’t be discussing more on that. However, what all the readers might really be interested in are the steps to install this recovery and hence obtain root. So here is the ting. While the official TWRP is already available for One Action, but there are a lot of issues with that build.
Well, even the instructions given on that page aren’t giving out the desired results. But developers over at XDA have compiled a working TWRP recovery for Motorola One Action that does its job pretty well. There are no issues as such with the build and I have personally tried it on my One Action. So without further ado, let’s get on with the guide. Keep in mind that the steps are somewhat different than what you might have done until now. Proceed with the steps very carefully and at your own risk.
STEP 1: Prerequisites
- Create a complete device backup. This is because we will have to format the data partition later on in this guide.
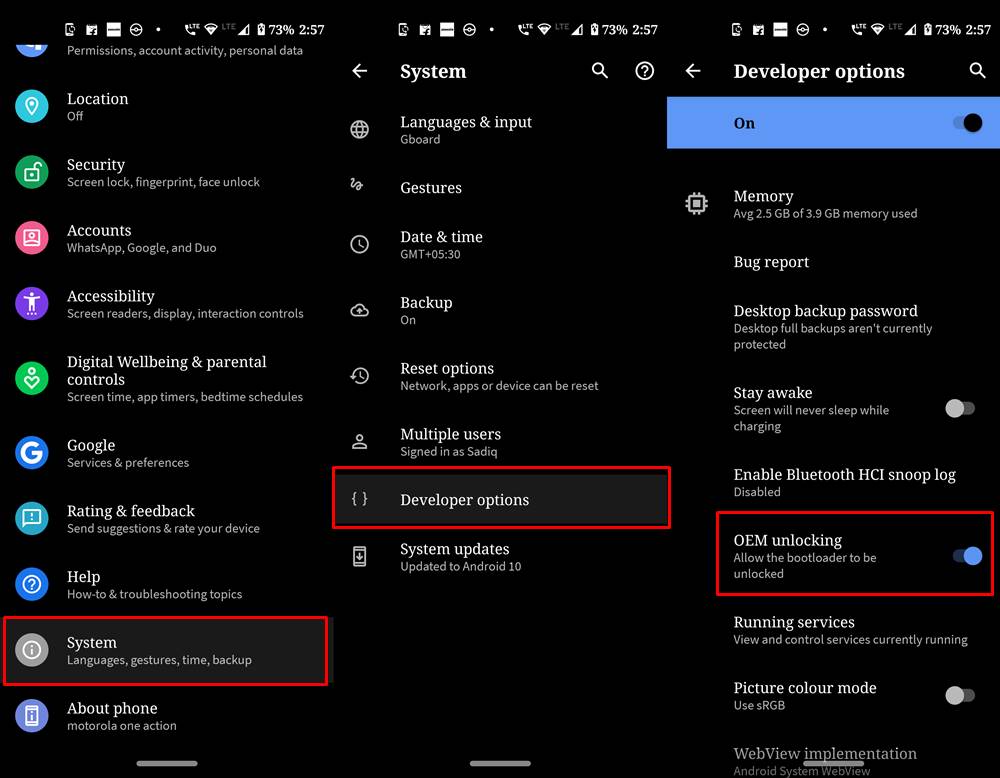
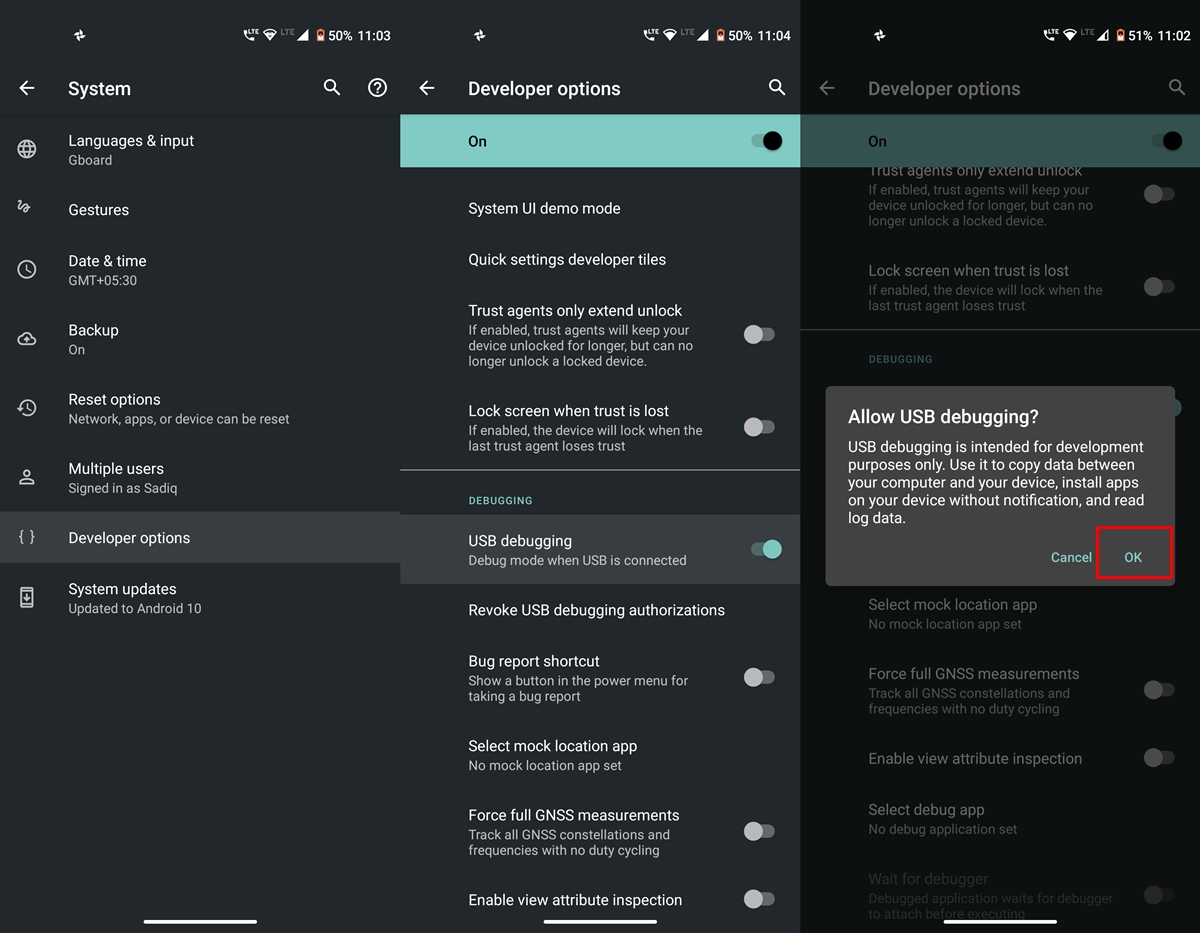
- Also, enable USB Debugging as well as OEM Unlocking. The former will be needed to execute ADB Commands while the latter will allow for the bootloader unlocking process.

- To enable both these options, head over to Settings > About Phone > Tap on Build Number 7 times > Go back to Settings > System > Advanced > Developer Options > Enable both the USB Debugging as well as OEM Unlocking toggle.
STEP 2: Download the Required Files
- To begin with, download and install the Android SDK Platform Tools. This will supply us with the necessary ADB and Fastboot binaries.
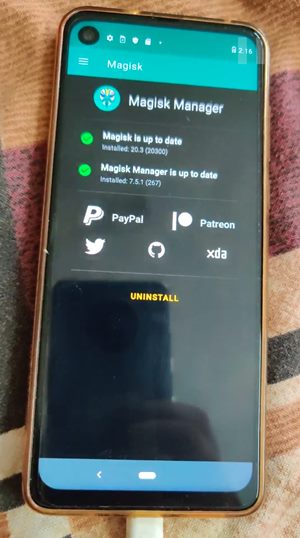
- Then, download the Magisk Installer ZIP file.
- Next up, download the TWRP Recovery for your Motorola One Action. We would like to thank XDA Recognized Developers @Stricted and @deadman96385 for this TWRP build.
- Also, download the patched vbmeta file as well as the Disable_Dm-Verity_ForceEncrypt.zip file. Credits to XDA senior member tys0n for these files as well as laying out the instructions for the same over at the XDA forum.
- We would recommend you take a copy of all these files and place them onto the Memory Card. We aren’t recommending to place it to your Internal storage as they will have to wiped twice or thrice during the entire process.
TWRP GUIDES
- How to Install OTA Updates in Rooted Android Device
- How to Permanently Install TWRP without TWRP ZIP File (only using TWRP.img file)
- Root Android Devices Without TWRP Recovery
- How to Fix TWRP Error 7 (While Flashing Custom ROM via TWRP)
STEP 3: Unlock Bootloader
To begin with, unlocking the bootloader is the first gateway that you need to pass. So refer to our detailed guide on How to Unlock the Bootloader on any Motorola Device.
Once your device boots up after the unlocking process, you will have to set it up via your Google account. But we would advise you not to do it now as later on, we would again have to format the data partition. So skip through the entire login, lock screen, and other such processes. Just enable Developer Options and USB Debugging from the Settings menu.
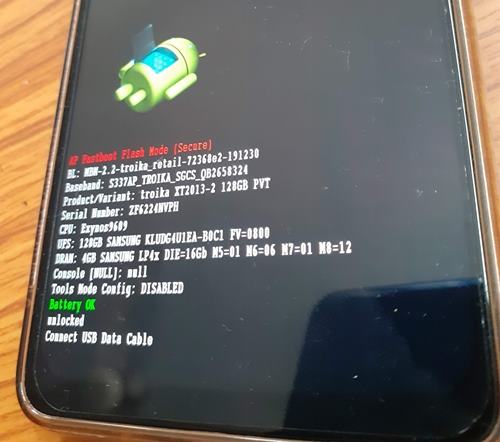
STEP 4: Boot Device to Fastboot
- Now that the bootloader is unlocked, you will have to boot your Motorola One Action to Fastboot Mode. Follow the below steps for that:
- Connect your device to PC via USB Cable. Make sure USB Debugging is enabled.
- Head over to the platform-tools folder, type in CMD in the address bar, and hit Enter. This will launch the Command Prompt.
- Type in the below command in that CMD window to boot your device to Fastboot mode:
adb reboot bootloader
- Once that is done, you may then proceed with installing TWRP Recovery on your Motorola One Action.
Magisk Guides
- [GUIDE] Flash ROMs/Magisk/TWRP/Kernels on A/B Partition Devices
- Everything About Magisk- Manager, Modules and More
- Best Magisk Modules of 2020 [PART-1]
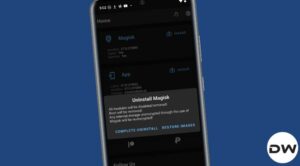
- [3 METHODS] Unroot any Android Device-Uninstall Magisk
STEP 5: Install TWRP Recovery on Motorola One Action
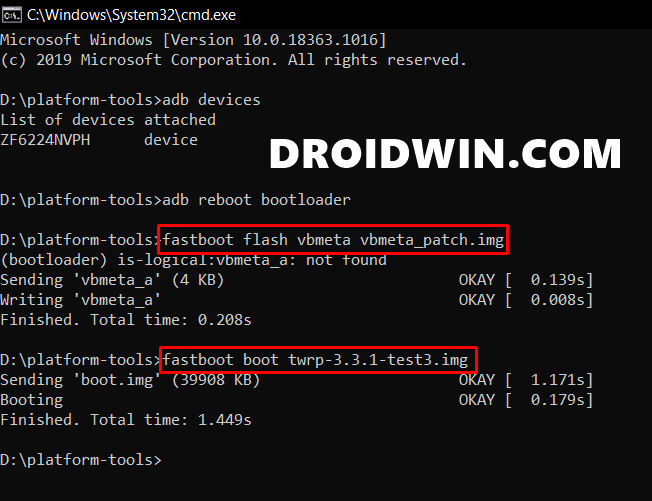
- Before you head over to install the TWRP Recovery, you will also have to flash the patched vbmeta file. So please transfer the vbmeta patch file as well as the TWRP image file to the platform-tools folder.
- Then inside the same folder, type in CMD in the address bar and hit Enter. Make sure your device has been booted to the fastboot mode and connected to PC.
fastboot flash vbmeta vbmeta_patch.img
- It would only take a few seconds for the file to be flashed. Once then you may then boot your Motorola One Action to the TWRP Recovery. For that make use of the below command:
fastboot boot twrp-3.3.1-test3.img
- As a side note, the general syntax for the above command is fastboot boot recovery-name.img. In this case, the name of TWRP is twrp-3.3.1-test3, hence the above command.
- Your device will now boot to TWRP and you will have to allow it to carry on modifications. For that, perform a right swipe on the Swipe to allow the modifications button at the bottom.
- Next up, you will have to format the data partition (this will wipe all the data on your device). For that, head over to Wipe and tap on Format Data. Then type in YES and tap on the blue tick mark situated at the bottom right.


Before beginning with the next step, make sure that the TWRP image file (twrp-3.3.1-test3.img), Disable_Dm-Verity_ForceEncrypt.zip file and the Magisk ZIP file is present on your device.
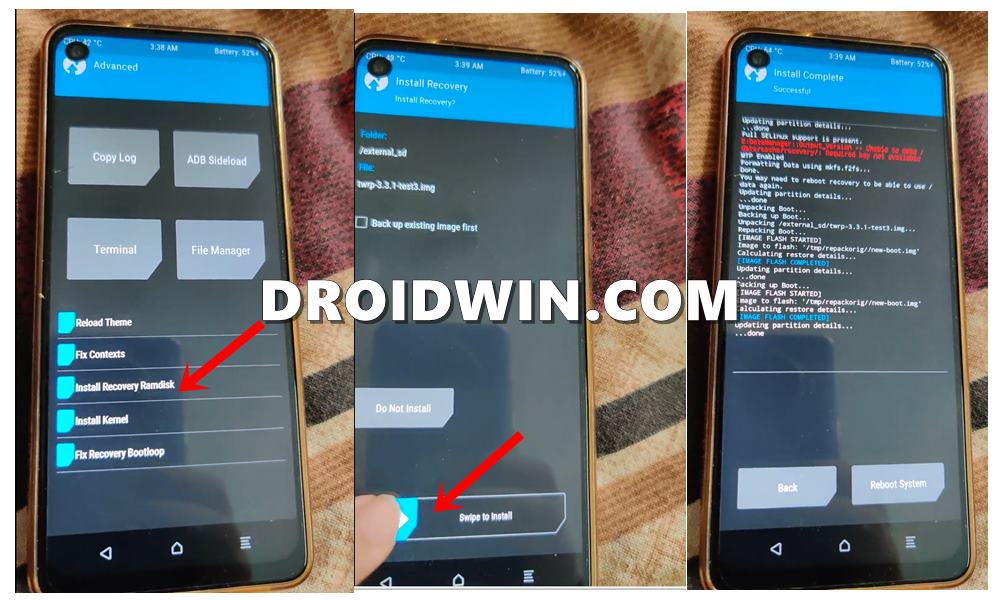
STEP 6: Permanent Installation of TWRP
- Till now, we have only booted our device to TWRP, i.e. a temporary installation. To permanently install it, follow the below steps:
- From the TWRP main menu, go to Advanced and tap on the Install Recovery Ramdisk option.
- File Manager will now open, navigate to the twrp-3.3.1-test3.img file and select it. Then perform a right swipe to install it. By doing so, we have successfully extracted the TWRP ramdisk and installed it to the boot.img file.
- Now, again head over to the Advanced options on your TWRP Recovery. This time, tap on fix recovery bootloop and do a right swipe to confirm it.
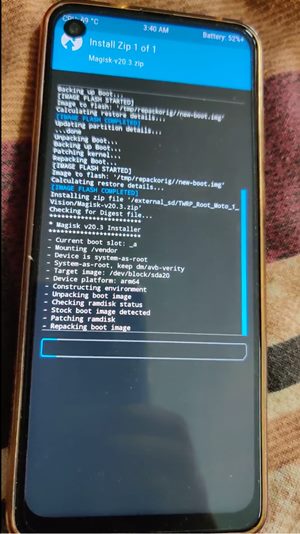
STEP 7: Root Motorola One Action
- Its now time to root your Motorola One Action. For that, we would be making use of the Magisk Installer ZIP file.
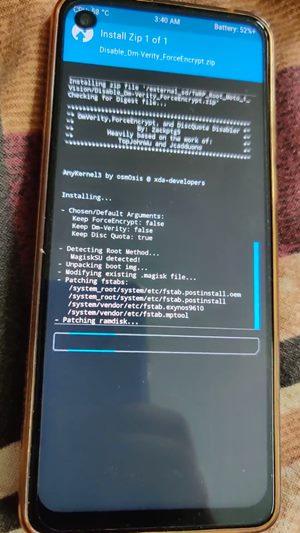
- So from the TWRP, head over to Install and select the Magisk ZIP file. Then perform a right-swipe to flash it.
- When Magisk has been flashed, go back to Install and this time install the Disable_Dm-Verity_ForceEncrypt.zip file.
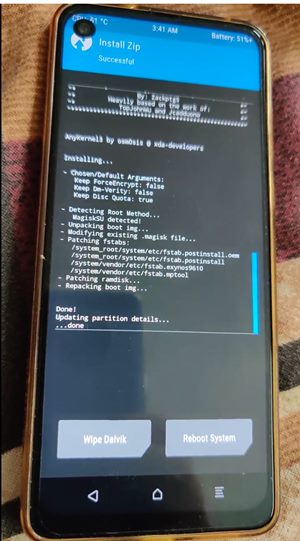
- Once that has been flashed, you may reboot your device to the system. You should see a button at the bottom right named Reboot System, tap on it. If you get a prompt to install the TWRP app, simply tap on Do Not Install.
- Your device will now reboot and in between will reboot again. This is completely normal and nothing to worry about. The second time your device should successfully boot to the Android OS.
Android Tips and Tricks
- How to Disable Screenshot Captured Notification and Sound without Root
- How to Watch Netflix in HD on Rooted Devices ( Get Widevine L1 Support )
- Enable USB Debugging on a Broken Android Device’s Screen? Here’s a Workaround
- How to Go Back to Stock ROM from GSI ROM (All Android Devices)
Concluding Remarks
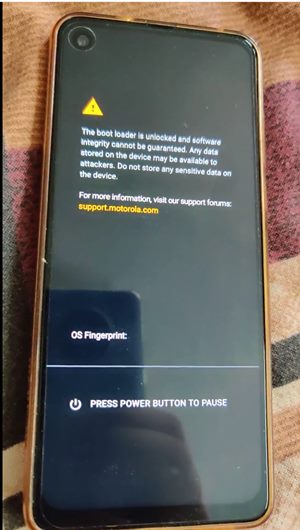
With this, we conclude the guide on how to install TWRP Recovery and root Motorola One Action. Once your device boots, you will have to sign in with your Google Account and set it up. Furthermore, every time your device reboots, you will see a Bootloader Unlock Warning message. I am looking for ways to overcome this. Though it isn’t on top of my priority list as there is no issue with that message. With that said, if you have any queries with respect to any of the aforementioned steps, do let us know in the comments section below. We will get back to you with the solution as soon as possible.


Iskren Minkov
Hello. I’ve followed the your method before and it worked fine I managed to root my device. Recently tho my phone decided to stop working working and it refuses to boot to android. I am able to access bootloader, twrp but I can’t boot. I’ve reinstalled magisk, tried locking and unlocking the bootloader.
Krutik kapadia
hey, i want to unroot moto one action.
Please, tell me the whole process. by mistake, I deleted the whole OS and then I have to reinstall it.
tell me the correct way to do it.
I have taken backup of current OS in pendrive from TWRP
Iskren Minkov
Hello. I have followed all the steps until I got to the rooting part I installed all of the zips but my device doesn’t wanna boot and it’s stuck in a boot loop. I can’t even get into recovery mode pls help.
geeky hero
We recently rooted our phone and now internal storage has stopped working playstore cannot dwonlaod apps on internal.when we open internal storage it says Nothing to show here.please help
Brett
Couldn’t stand the thought of not having my own creation of a Android OS on my phone. If this wasn’t possible I’d do without. Something about not being able to control my device in every fathomable way down to the root 😉 terrifies me as a programmer. 🤘Glad others are on the same page. Just arrived here to look things over before sending this method to novice. Everything checks out with me. Thank you for posting this and saving me hours on the phone giving a walkthrough. 👍
Sadique Hassan
Thanks a lot for these encouraging words, Brett. Glad that I could help you out.
Tom McNIchol
Hi, Thanks for all the work you have done but I’m fairly new to this.
I’ve downloaded all the files and put them on my external card. I’m lost after that.
With my phone in data transfer mode I opened a command prompt from C:\platform-tools_r30.0.4-windows
And entered
adb reboot bootloader
” Make sure your device has been booted to the fastboot mode and connected to PC.”
I’m not sure if I’m in fastboot mode and don’t know where to look. I feel like I’m getting real close. Any help is greatly appreciated…Tom
[email protected]
Sadique Hassan
Hi Tom, apologies for the late reply. Fastboot Mode on Moto One Action (or any device for that matter) could be reached by executing the adb reboot bootloader command inside the CMD window that you have opened in the Platform-Tools folder. Now to verify the same, you could execute the fastboot devices command. In doing so, you should get an alphanumeric string of random characters and the fastboot text next to it. This signifies that the device has been successfully booted to Fastboot. For Moto One Action, I have also attached the Image when it is booted to Fastboot [See the Image in STEP 4 after the adb reboot bootloader command]. Let me know in case of further queries:)