In this tutorial, we will show you the steps to install OxygenOS OTA updates on a rooted OnePlus device. Getting access to system partition or having administrative rights translates to carrying out a plethora of tweaks. All that is needed is an unlocked bootloader and then you could root your device via TWRP or without TWRP (both involves Magisk). This then allows you to install Magisk Modules, Substratum Themes, Xposed Frameworks, and various other mods. However, they come with some associated risks as well.
In most cases, your device might end up in a soft brick or bootloop, while extreme cases might also lead to hard brick. Fortunately, you could easily ‘fix’ most of these issues by using MSM Tool and booting your device to EDL Mode. Then there was another issue to deal with. For long, a rooted device straightaway blocked the ability to install OTA updates. However, when Google introduced A/B partition, it changed the entire Android ecosystem.
While the removal of the recovery partition and hence using the boot partition to flash recoveries was one major takeaway, there is another one that doesn’t get the recognition it deserves. And that is installing OTA updates on a rooted Android device. Since OnePlus devices take this A/B approach as well, we could also apply the same rule here as well. So with that said, here is the required information on how to install OxygenOS OTA updates on a rooted OnePlus device.
- How to Root any Android Device without PC
- How to Permanently Install TWRP without TWRP ZIP File (only using TWRP.img file)
- Root Android Devices Without TWRP Recovery
- How to Fix TWRP Error 7 (While Flashing Custom ROM via TWRP)
Table of Contents
What we will be doing in this tutorial: The Blueprint
First off, we will be disabling the Automatic Updates on your device. After this, we will restore back the stock boot.img file from the Magisk Manager. Don’t worry, you wouldn’t require to download the stock boot.img file for your device. When you had patched the stock boot.img file via Magisk, it took a backup of your stock boot.img file and we will be using just that backed up file. This restoration of the stock boot.img file will be done to the inactive slot.
Once that is done, you would have to download and install the OTA update (via automatic or Local upgrade). This OTA update will also be installed to the inactive slot, where we had just restored the stock boot.img file. So as of now, your inactive slot is unrooted and has the latest OTA installed. Our final step will be to root this inactive slot. For that, we will be using the Install to Inactive Slot option of Magisk Manager. Once that is done, you would have successfully rooted the inactive slot with the newly OTA installed.
You just have to reboot the OnePlus device to make the Inactive Slot the Current Active Slot and the active slot as the inactive one. As soon as your device reboots, it would be running on the slot on which we had installed the OTA as well as Magisk. For some users, all this information might be a little hard to digest at first. That is completely understandable and nothing to worry about. Below we have listed all the instructions in a detailed step by step manner along with along the necessary screenshots. This should definitely clear all your doubts. So on that note, let’s begin with the steps to install OxygenOS OTA updates on a rooted OnePlus device.
- Install Custom ROMs on any Android Device- Includes A/B Partition
- Flash Custom ROM After Wiping Internal Storage Without SD Card or OTG
- How to Go Back to Stock ROM from GSI ROM (All Android Devices)
- Fix Magisk Module Bootloop without TWRP Recovery
How to Install OxygenOS OTA on Rooted OnePlus devices
We would be breaking down the instructions into separate sections for the ease of understanding. Follow in the exact same sequence as given below.
STEP 1: Disable Automatic Updates
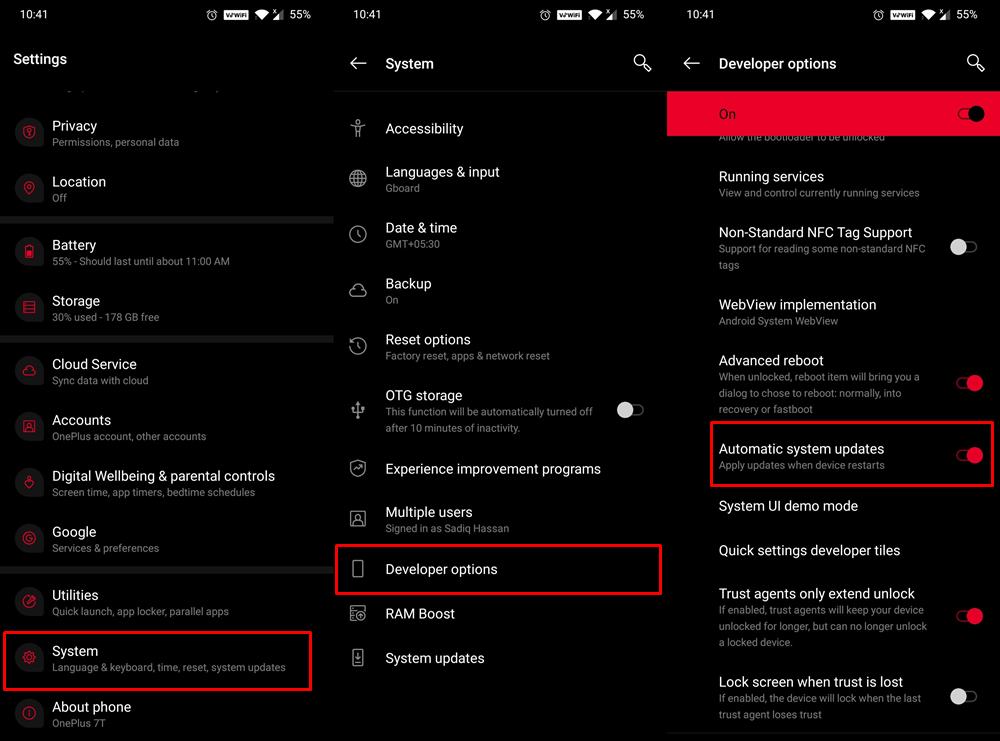
First and foremost, you will have to disable automatic system updates on your OnePlus device. For that, you will have to enable USB Debugging. So head over to Settings > About Phone > Tap on Build Number 7 times and it would be enabled. Now go to Settings > System > Developer Options and disable the Automatic system updates toggle.
STEP 2: Restore Stock Boot Image
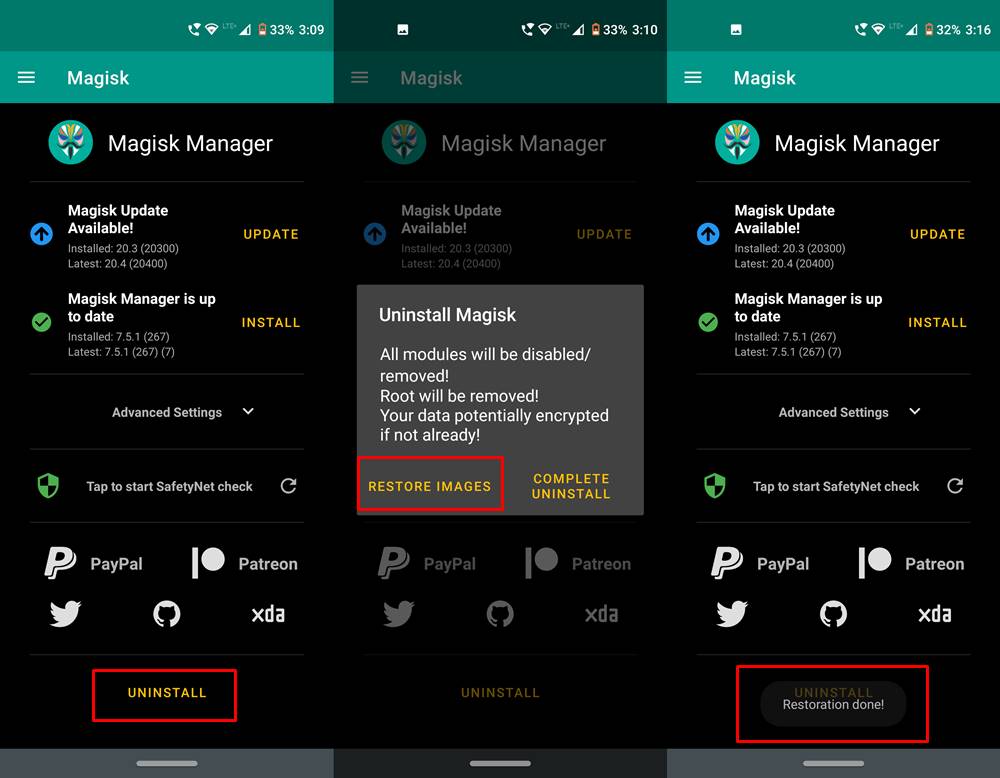
You will now have to restore the stock boot.img file and install it to the inactive slot. So launch the Magisk Manager app on your device, tap on Uninstall and then tap on Restore Images.
STEP 3: Install OxygenOS OTA
Let’s now come to the third step of the guide on how to install OxygenOS OTA updates on a rooted OnePlus device. We will now be installing the OTA update file to the inactive slot. For that, go to Settings > System > System updates and tap on the Download and Install Now button. If there is no OTA update, then you could manually download the update from the OnePlus website and then install it via the Local Upgrade method.
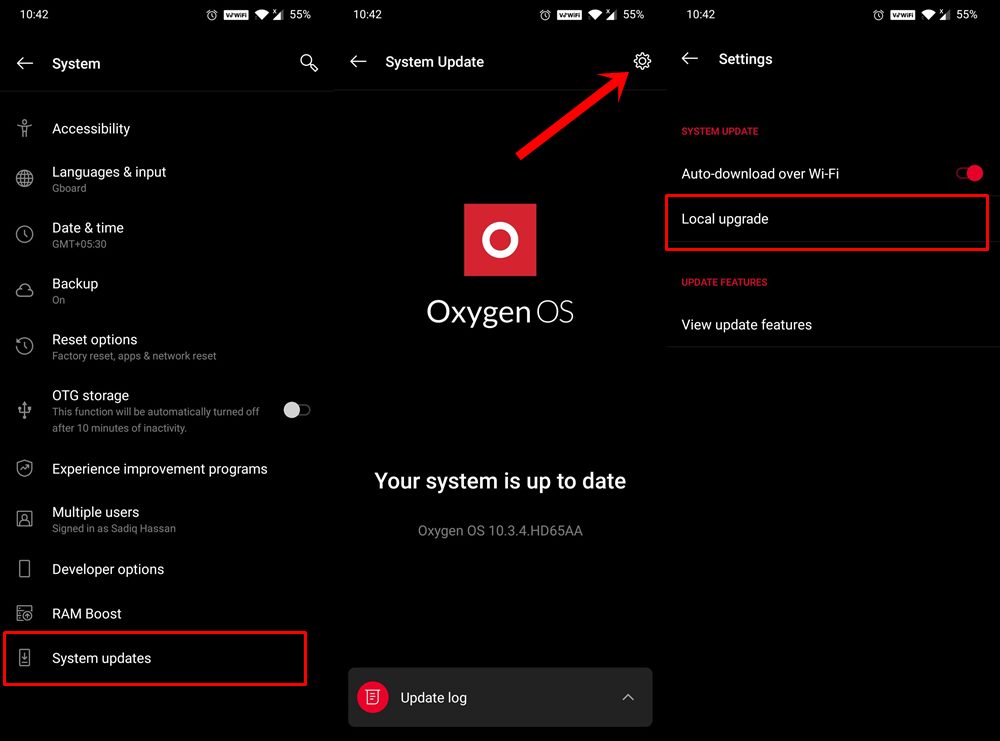
To do so, transfer the package to your device and then go to Settings > System > System Updates > Tap on the Settings icon situated at the top-right > tap on Local Upgrade > Select the Update file and tap on the Upgrade Now button.
Once the installation is complete, do not reboot your device. The reason? This is because the OTA is currently installed in the inactive slot that also has the non-rooted stock boot.img file that we had restored in STEP 2. So as of now, the inactive slot is unrooted so if you boot to this slot, you will lose root. So once you have installed the OTA update, do not reboot the device and move ahead with the next step.
STEP 4: Install Magisk to the Inactive Slot
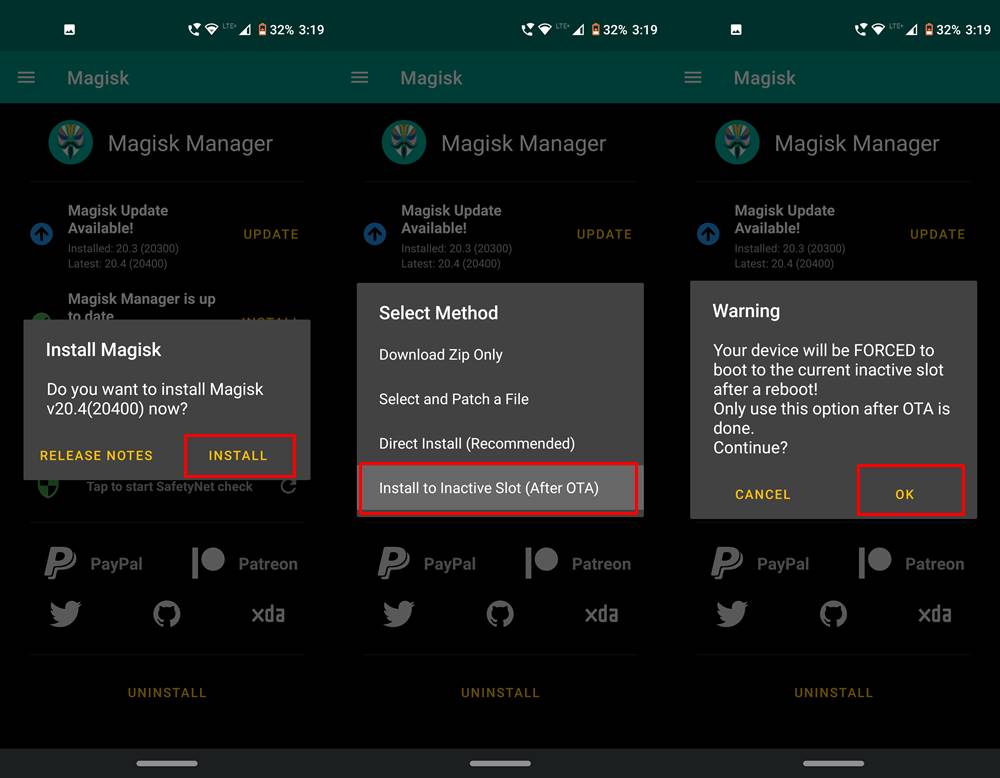
It’s now time to root your inactive slot, and we would be doing that using Magisk itself. So launch the Magisk Manager app and tap on Install next to Magisk Status. Then in the Install Magisk dialog box, tap on Install and finally under Select method, select the “Install to Inactive slot (after OTA)”. Then tap on OK in the Warning box that appears. The flashing process will now begin and should take a few seconds.
STEP 5: Switching to the Rooted & OTA Installed Inactive Slot
Once the flashing process is complete, you should see the Reboot button situated at the bottom right. Tap on it and your device will now boot to the inactive slot in which we have installed the OTA (step 3) and then rooted it as well (step 4). Furhtermore, as soon as your device boots to this slot, it will niw be your active slot.
That’s it. With this, we conclude the guide on how to install OxygenOS OTA updates on a rooted OnePlus device. If you still have any queries related to the aforementioned steps, do let us know in the comments section.