In this guide, we will show you how to install GSI onto your Android device using DSU Loader, without using any ADB or Fastboot commands or even TWRP! [Click to Skip the Theory and Directly go to the Instructions Part]. With the emergence of Project Treble devices, there was a major change in the Android architecture- Google separated the framework and the vendor implementation.
Hence the vendor no longer needed to be updated with each new OS upgrade and the OEM only had to look for the framework part. This greatly escalated the entire OS rollout process as earlier OEMs had to wait for the chipset manufacturers to make the required changes to the vendor before they could actually roll out the update. But now, this wait time was gone.
Hence the OEMs could now directly check if the Project Treble has been properly implemented by just booting a signed Generic System Image file. And this is what gave rise to the GSI ROMs that we know today! However, it is no longer limited to developers for testing purposes, rather an entire tech community is now getting benefited from these GSI ROMs as they are able to get hold of the latest OS on the first day itself.
Well, this time we got hold of the Android 12 Beta GSI even before Google announced the first beta update in the I/O! With that said, there is still some element of doubt regarding the installation of these ROMs. Not anymore. Today we will show you the steps to install GSI onto your Android device using DSU Loader, without using any ADB or Fastboot commands or a custom recovery like TWRP. Follow along. [ALSO READ: How to Go Back to Stock ROM from GSI ROM].
Table of Contents
What is Dynamic System Updates (DSU) in Android

Before we list out the instructions, I would highly recommend that you understand the entire concept behind all this. With Android 10, Google first introduced DSU. This allowed the developers to temporarily install the GSI ROM without using Fastboot Commands, test their apps, and then go back to the stock OS.
While booting the GSI ROM via GSU, it created a new and temporary system and data partitions on your device that are stored inside the /data/gsi partition. As a result, the DSU then booted these partitions rather than the original ones and your device would then be booted to the installed GSI. But how come our device had storage space for the creation of these additional partitions?
Well, Google made it mandatory for every device launched with Android 10 to have logical partitions that could dynamically resize itself during boot. So if your device comes with Android 10 out of the box, you would be able to install GSI onto your Android device using this DSU Loader. Let’s now check out how this could be achieved.
How to Install GSI on Android via DSU Loader
The best part about SU loader is that you don’t need to manually search for and download the GSI file. The DSU would automatically list out all the GSIs that are compatible with your device and CPU architecture. This way you could be cent percent sure of its compatibility. On that note, let’s now check out the instructions to install the GSI onto your Android device using DSU Loader.
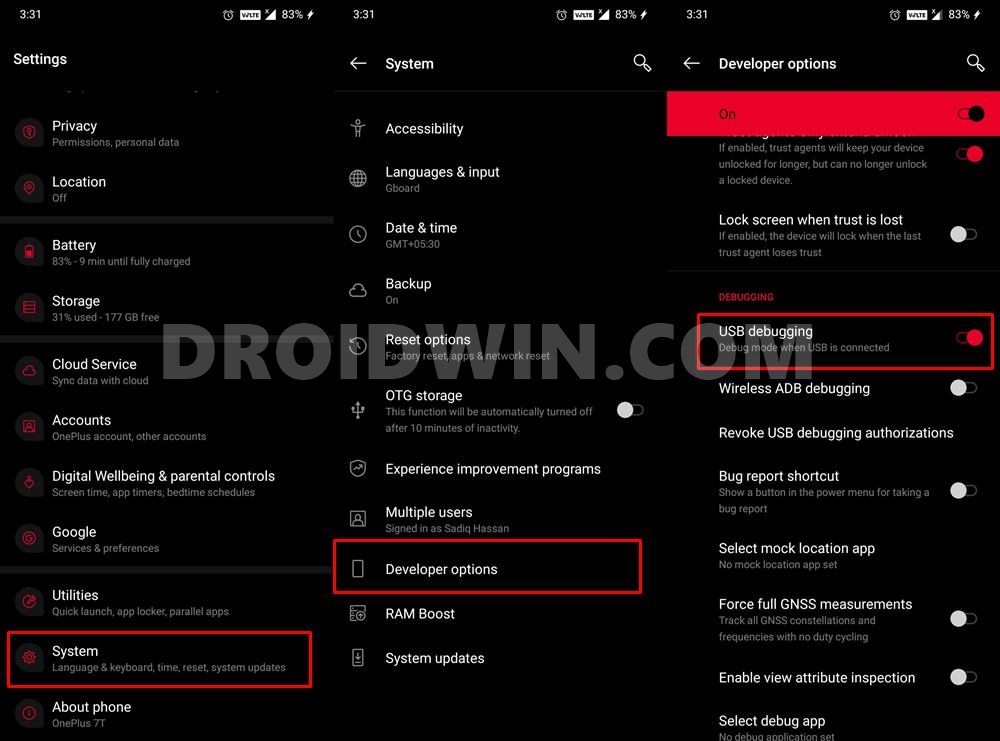
STEP 1: Enable USB Debugging
To begin with, you will have to enable Developer Options on your device. So head over to Settings > About Phone > Tap on Build Number 7 times > Go back to Settings > System > Advanced > Developer Options > Enable USB Debugging.
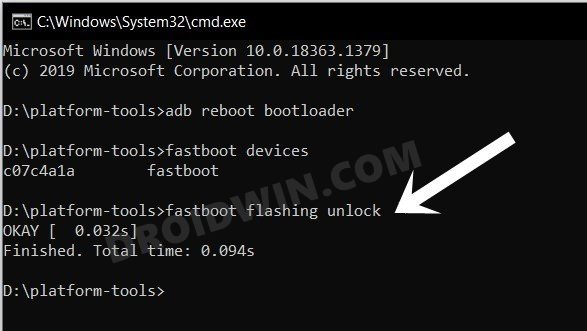
STEP 2: Unlocked Bootloader
There has been an element of confusion regarding this process, but to put things into perspective- as of now, you will have to unlock the bootloader on your device. In the future, Google is planning to remove this requirement as well. But for now, this requirement is still in place and you will need an unlocked bootloader. So refer to our guide on How to Unlock the Bootloader of any Android Device.
STEP 3: Install GSI via DSU Loader
Let’s now get started with the steps to install the GSI ROM onto your device via DSU Loader. Follow along.
- To begin with, connect your device to the internet.
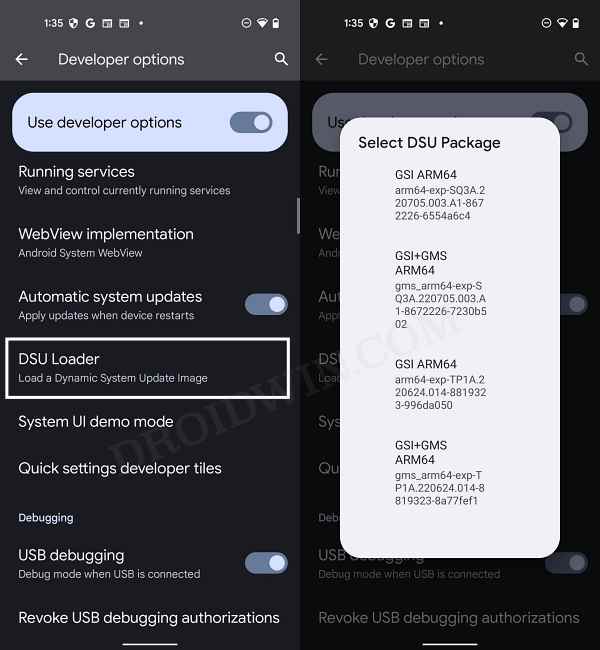
- Then go to Settings > System > Developert Options > DSU Loader.

- Google will now search and bring in all the supported GSI ROMs for your device. Select any one of your choices [see Note below].
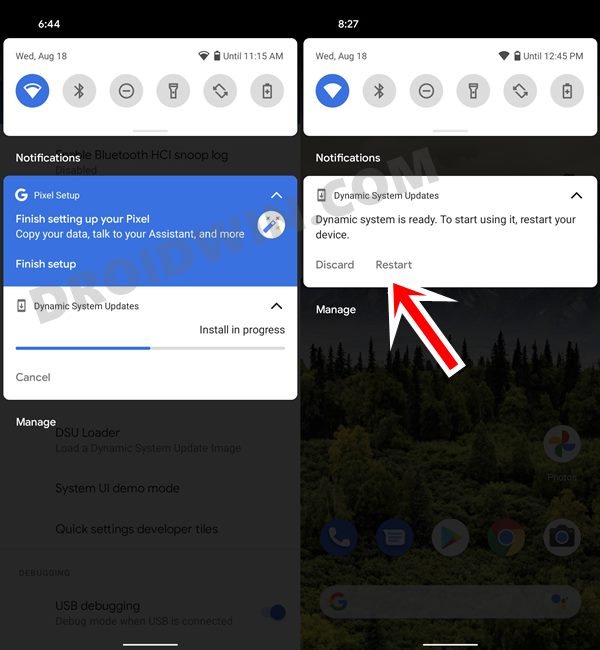
- The selected GSI file will now be downloaded onto your device. Once done, go to the Notification Panel and tap Restart. Your device will now boot to the newly installed GSI.
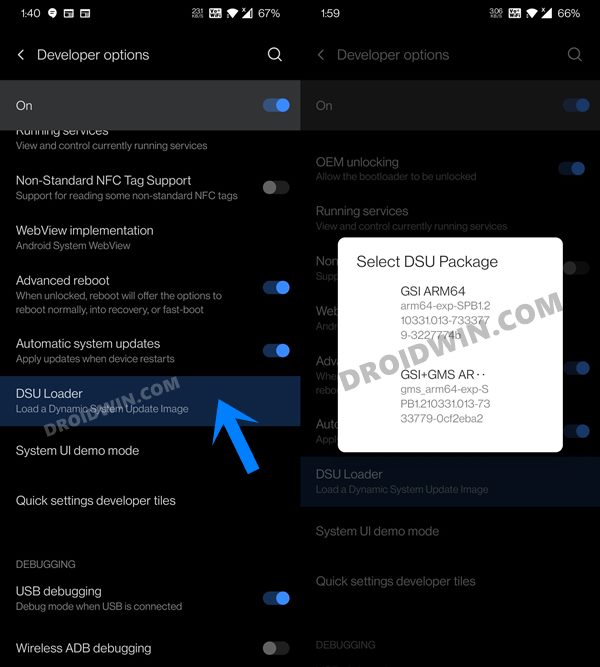
NOTE: You might see two different packages for a ROM, one would be named GSI whereas the other would be GSI+GSM, so what’s the difference between them? Well, GSI doesn’t come with any Google Apps, Services, and Framework whereas GSI+GSM has all the Google apps pre-installed, so you may choose the one that meets your requirements.
Conclusion
This was all from this guide on how to install GSI onto your Android device using DSU Loader, without using any ADB or Fastboot commands or TWRP Recovery. This has definitely made it quite easy to flash Generic System Images onto our devices. This is because the Fastboot Method calls for quite a lot of effort and have complication involved as well.
These include flashing an empty vbmeta file, erasing the system partition (which more often than not leads to more issues), and then flashing the required GSI. However, with DSU, flashing is now just a click (or rather a tap) away. And with the future development that we wouldn’t even need to unlock the bootloader to flash GSI via DSU, this might soon be the go-to choice for the masses. What are your views on the same? Do let us know in the comments section below.


Chris Estep
There are two DSUs (complete with Gapps) for Android 12 OTHER than Google’s own – you can pick them via the DSU Loader in Android 12’s settings option – I suspect that at least one is Corvus (the only Android 12 GSI I know of other than Google’s own). So I’ll be checking both out to see which is which.
Chris Estep
The other DSU is Android 13 – not 12 – which is normally NOT an option for sargo at all – rather cute.