In this guide, we will show you how [and why] to install the Android 13 to both the slots on your Pixel 6A/6/Pro to prevent it from getting bricked. The concept of A/B partition first came into existence in Android 7.1 and has since then been a permanent member of the Android domain. In simple terms, one major benefit of dual partition is that you could continue using your device [on the active partition] while the OTA is being downloaded and installed in the background [in the inactive slot].
![]()
Then once you are done with your work, you may reboot your device to switch slots and be on the new updated OS. However, with the latest iteration of the OS and the Pixel devices, things are getting complicated. For the unaware, Google has implemented an Anti-Rollback Protection with Android 13 on the Pixel 6 series. As a result of which, you’ll no longer be able to perform a downgrade to Android 12 [though you could still do so by being on the Android 13 bootloader and flashing the Android 12 firmware].
![]()
While that’s well and good, where does the need for flashing the firmware on both slots fits in this scenario? Let me explain. As of now, your device has been flashed with the Android 13 firmware in one slot. If you end up flashing a custom binary that prevents the device from booting up [this is quite a usual phenomenon in this domain], then it will try booting using the second slot, which still has Android 12 installed.
![]()
In other words, it will try performing a downgrade, which would straightaway kick in the Anti-Rollback mechanism, and prevent your device from booting up. And here it is- a bricked Pixel device! So to prevent that from happening, it is recommended to install the Android 13 build to both the slots on your Pixel 6A/6/Pro. And in this guide, we will show you how to do just that. Follow along.
Table of Contents
Install Android 13 in Both Slots on Pixel 6A/6/Pro to Prevent Brick
![]()
Before starting, it is recommended that you take a complete device backup. Droidwin and its members wouldn’t be held responsible in case of a thermonuclear war, your alarm doesn’t wake you up, or if anything happens to your device and data by performing the below steps.
STEP 1: Modify Android 13 flash-all.bat File
When we flash the firmware via flash-all file, it tends to automatically restart the device once the flashing is complete. So we will add a command and instruct it not to do so because we will have to change slots and then flash to the other partition as well. Here’s how it could be done
- To begin with, download and extract the Android 13 factory image for your device.
- Then right-click on the flash-all.bat file and select Edit. It will open in Notepad.

- Now add the following line at the end of the file [after fastboot -w update image-xxx-xxx.zip]:
fastboot --skip-reboot - [Optional] If you don’t want to reset your device after flashing is complete, then remove the -w keyword from
fastboot -w update image-raven-tp1a.220624.021.
zip - So the above command will transform to
fastboot update image-raven-tp1a.220624.021.
zip - Once that is done, save the changes via Ctrl+S.
STEP 2: Install Android SDK

Next up, install the Android SDK Platform Tools on your PC. This is the official ADB and Fastboot binary provided by Google and is the only recommended one. So download it and then extract it to any convenient location on your PC. Doing so will give you the platform-tools folder, which will be used throughout this guide.
STEP 3: Enable USB Debugging and OEM Unlocking
You will also have to enable USB Debugging and OEM Unlocking on your Pixel device. The former will make your device recognizable by the PC in ADB mode. This will then allow you to boot your device to Fastboot Mode. On the other hand, OEM Unlocking is required to carry out the bootloader unlocking process.
![]()
So head over to Settings > About Phone > Tap on Build Number 7 times > Go back to Settings > System > Advanced > Developer Options > Enable USB Debugging and OEM Unlocking.
STEP 4: Unlock Bootloader on Pixel 6A/6/Pro
Next up, you will also have to unlock the device’s bootloader. Do keep in mind that doing so will wipe off all the data from your device and could nullify its warranty as well. So if that’s all well and good, then please refer to our detailed guide on How to Unlock Bootloader on Google Pixel Devices.
STEP 5: Boot Pixel 6A/6/Pro Fastboot Mode
- Now connect your device to the PC via USB cable. Make sure USB Debugging is enabled.
- Then head over to the platform-tools folder, type in CMD in the address bar, and hit Enter. This will launch the Command Prompt.
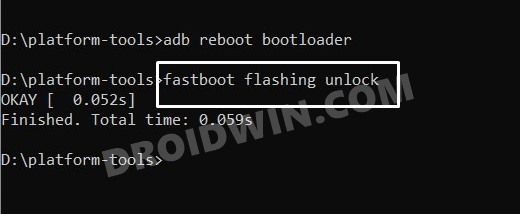
- Type in the following command in the CMD window to boot your device to Fastboot Mode
adb reboot bootloader
- To verify the Fastboot connection, type in the below command and you should get back the device ID.
fastboot devices

STEP 6: Check Current Active Slot
Let’s now check the current active slot to which we would be flashing the firmware.
- To do so, refer to the “Boot Slot” section in the Fastboot screen, it will be either A or B.
- You could also do so by executing the below command and then check out the value next to “(bootloader) current-slot”.
fastboot getvar all
STEP 7: Flash Android 13 Firmware to Both Slots
- To begin with, double-click on the flash-all.bat file to start the flashing process. By default, it will flash on the active partition.
- Once done, your device will stay on the Fastboot Mode [because we had added the fastboot –skip-reboot command].
- It’s now time to change slots. If your device was on Slot A, then use the below command to switch to Slot B.
fastboot --set-active=b
- On the other hand, if it was on Slot B, then use the below command to switch to Slot A.
fastboot --set-active=a
- Now again launch the flash-all.bat file to flash the firmware to this slot as well.
- Once done, you may now reboot the device to the OS via the below command
fastboot reboot
That’s it. These were the steps to install Android 13 to both the slots on your Pixel 6A/6/Pro to prevent it from getting bricked. Now you are in a safe spot- if your device is unable to boot via the current active slot, it will try booting from another slot, which also has Android 13 installed. So there is no rollback involved and it should be able to access the OS [even if it doesn’t, you will at least be able to access the Fastboot mode from where you could manually flash the stock firmware].
The second approach to get this job done
So is there any other way of getting this job done? Well, there is another similar approach. In that, you should flash the Android 13 firmware without adding the fastboot –skip-reboot command in the flash-all file. Once the flashing is done, your device will boot to the OS. Now reboot to the Fastboot Mode and switch to the inactive slot as explained in STEP 7. Then again flash the firmware via flash-all.bat and you would have Android 13 installed across both the slots.
On that note, we conclude these two different methods to install Android 13 to both the slots on your Pixel 6A/6/Pro to prevent it from getting bricked. If you have any queries concerning the aforementioned steps, do let us know in the comments. We will get back to you with a solution at the earliest.


Tulio
Question if I’m already running the Android 13 in Slot A. Should I run this complete tutorial or just jump to the STEP 3?
KR.
Sadique Hassan
Hi Tulio, If you already have Android 13 in slot A, then you may skip step 1. Just boot to Fastboot, switch to slot B via fastboot –set-active=b, and then flash the firmware in that slot via the unmodified flash-all.bat file [which is present in the stock firmware].